Managing Extensions for Zoho BugTracker
Zoho Marketplace is an online store where you can upload the extensions you develop for any of Zoho's products. Additionally, the extensions in our store are available for your business. You will learn how to install, manage, and access the extensions available for Zoho BugTracker here.
- Install extension
- Configure extension
- View or edit extension
- Authorize or revoke a connection
- Enable or disable an extension
- Uninstall extension
- Update extension
- Access extension
Feature availability
Available in all our plans (including the free plan)
Install extension
- Navigate to
 > Marketplace > All
 - Select an extension from the list displayed on the screen. Alternatively, you can search for an extension in the search bar.
- Click Install.
- Choose the profiles and projects where you would like the extension to be shared:
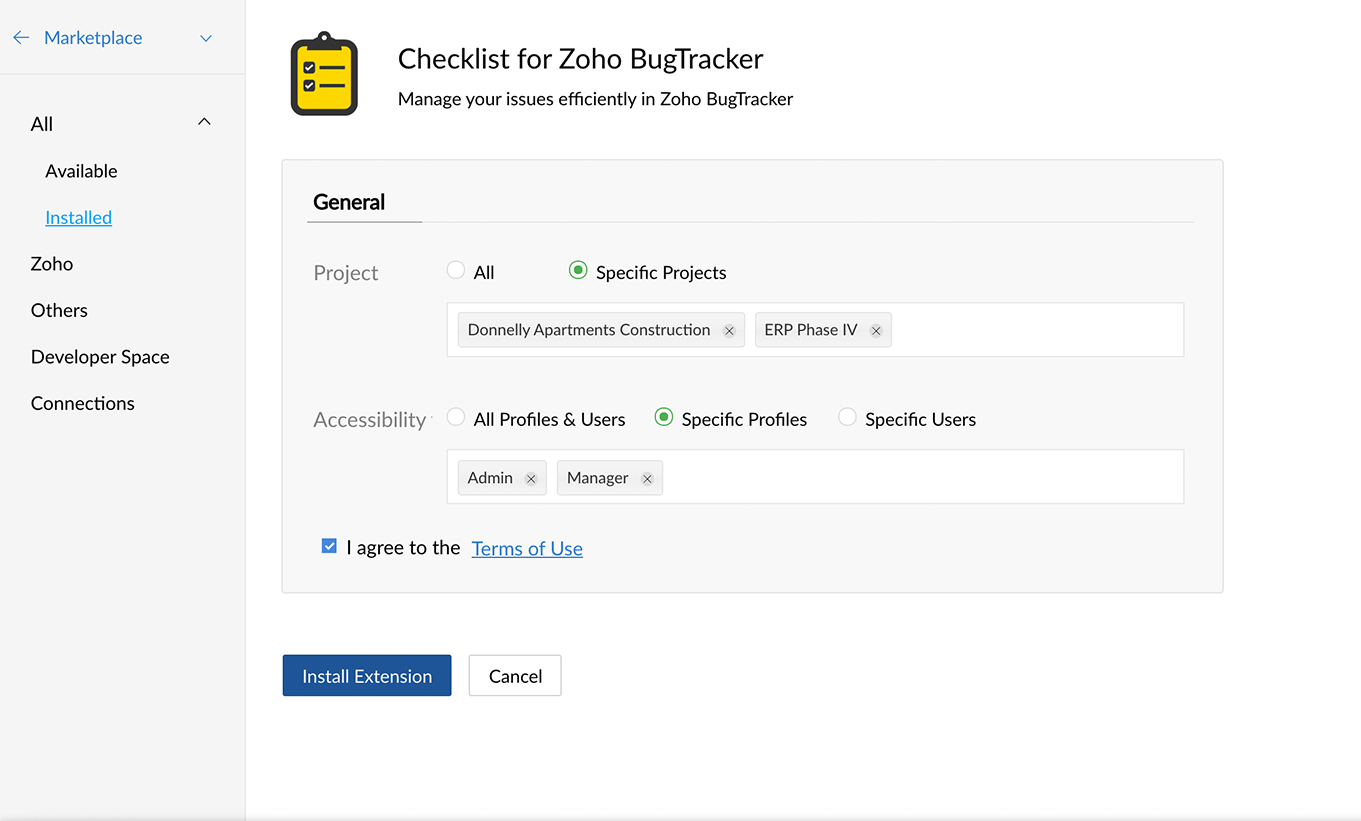
- Choose All if you wish to display the extension to all the profile and project users
- Choose Specific Profiles and Specific Projects to display the extension to a selective set of profiles and project users.
- Select one or more profiles from the Specific Profiles dropdown and select one or more projects from the Specific Projects dropdown respectively.
- Choosing specific projects will not apply or have an effect on your choice for the extensions that show up on the Attachment picker and Top band.
- Click Install Extension.
- Continue to configure the extension (Configuration tab) or manage connections (Connections tab), if required.
- The extensions that require additional input will have the Configuration tab on this page.
- The extensions that require a third-party connection will have a Connections tab on this page
- If your extension doesn't have either of these tabs, you can ignore this step and proceed to install the extension
 > Marketplace > All
- Only a Portal Owner or an Administrator can install an extension.
Configure extension
If the extension's developer requires additional information, a few extensions may have a Configuration section on the Extension Settings page.
Here's how you configure it:
- Execute the first six steps of the section that guides you in installing the extension.
- Navigate to the Configuration tab.
- Enter the information requested by the extension's developer.
- Click Save Configuration
If you skip configuring your extension on this page, you'll be prompted to complete the configuration in the supported widget locations.
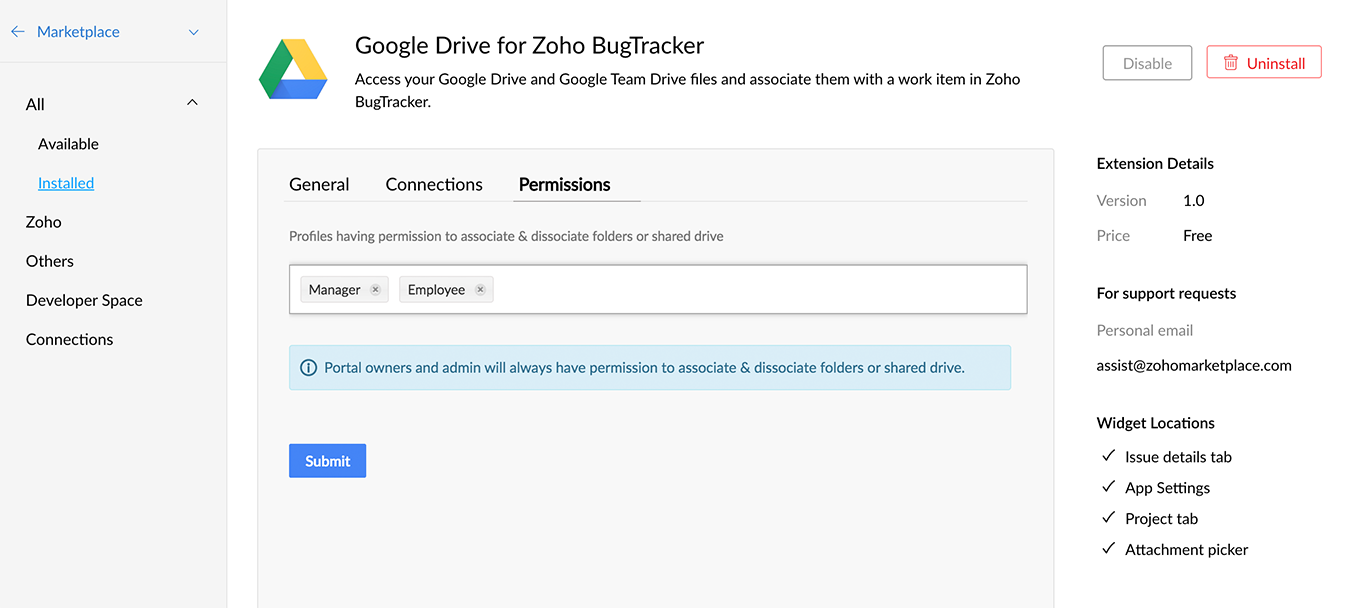
View or edit extension
- Navigate to > Marketplace.
- Click Installed on the left panel. You can view all the installed extensions on this page.
- Click the extension you would like to edit.
- Modify your preferences in the General section.
- Click Save Changes
Authorize or revoke a connection
You can authorize or revoke a connection from an extension's settings page. To do this,
- Navigate to > Marketplace > Installed.
- Navigate to the Connections tab.
- Authorize or revoke the connection, if any, as necessary. These changes will be autosaved.
If you skip managing connections on the above page, you will need to complete authorization from the Connections listing page or the issue details page.
Authorize/revoke a connection from the Connections tab
- Navigate to > Marketplace.
- Click Connections in the left panel.
- Click Authorize to let the third-party service access the extension. Otherwise, click Revoke to withdraw an authorized connection.
- If you are unable to see any records on this page, then you haven't established a connection with a third-party service.
Authorize a connection from the issue details page
To authorize a connection from an issue's details page,
- Navigate to the Issues module of a project.
- Click on an issue.
- Navigate to the extension's widget on the bottom panel.
- Click Authorize Connection.
Enable or disable an extension
- Navigate to > Marketplace > Installed.
- Click Disable to suspend an active extension. Disabling an extension removes its widgets from all the supported widget locations in the product.
- Click Enable to reactivate a disabled extension
Disabling an extension doesn't uninstall it from your portal. You can enable it at any time.
Uninstall extension
- Navigate to > Marketplace > Installed.
- Click the extension you would like to delete.
- Click Uninstall in the upper-right corner of the page. Uninstalling an extension removes it from all the supported widget locations and deletes its properties.
- Confirm your action.
Update extension
- Navigate to > Marketplace > Installed.
- Click the extension you would like to update.
- Click the Update link beside the version number which will be displayed if you are using an older version of the extension.
Access extension from Zoho BugTracker
You will be able to access an extension from the following locations:
- Issue details page
- Extension settings page
- Top navigation bar
- Attachment picker
- Project tab
- Right panel
Issue details page
- Navigate to the Issues module of any project in your portal after installing an extension completely.
- Click on an issue and scroll down to the bottom panel.
- Navigate to the right of the bottom panel. The extension will be loaded as a widget inside the last tab in the bottom panel.
Extensions settings page
- Navigate to -> Integration -> Extensions -> Installed.
- Click your extension
- The extension will be loaded as a widget inside the last tab on this page.
- Only administrators can access this widget.
Top navigation bar
- Navigate to the top navigation bar and click the
 icon.
icon. - Access the extension you want from the listing.
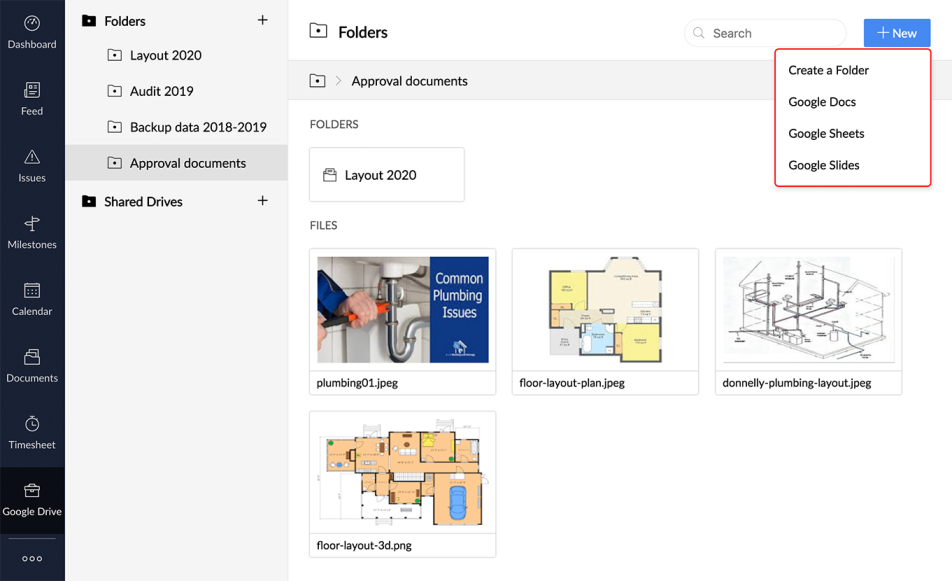
Attachment picker
You can access your Google Drive account directly from an attachment picker like how you access the files from your local computer. i.e. You can access your GDrive account when you submit an issue, attach files in your status, issue, forums, chat, etc.,
Project tab
- Navigate to your project and click the extension from the left-hand panel.
- The extension will be loaded as a module in your project.

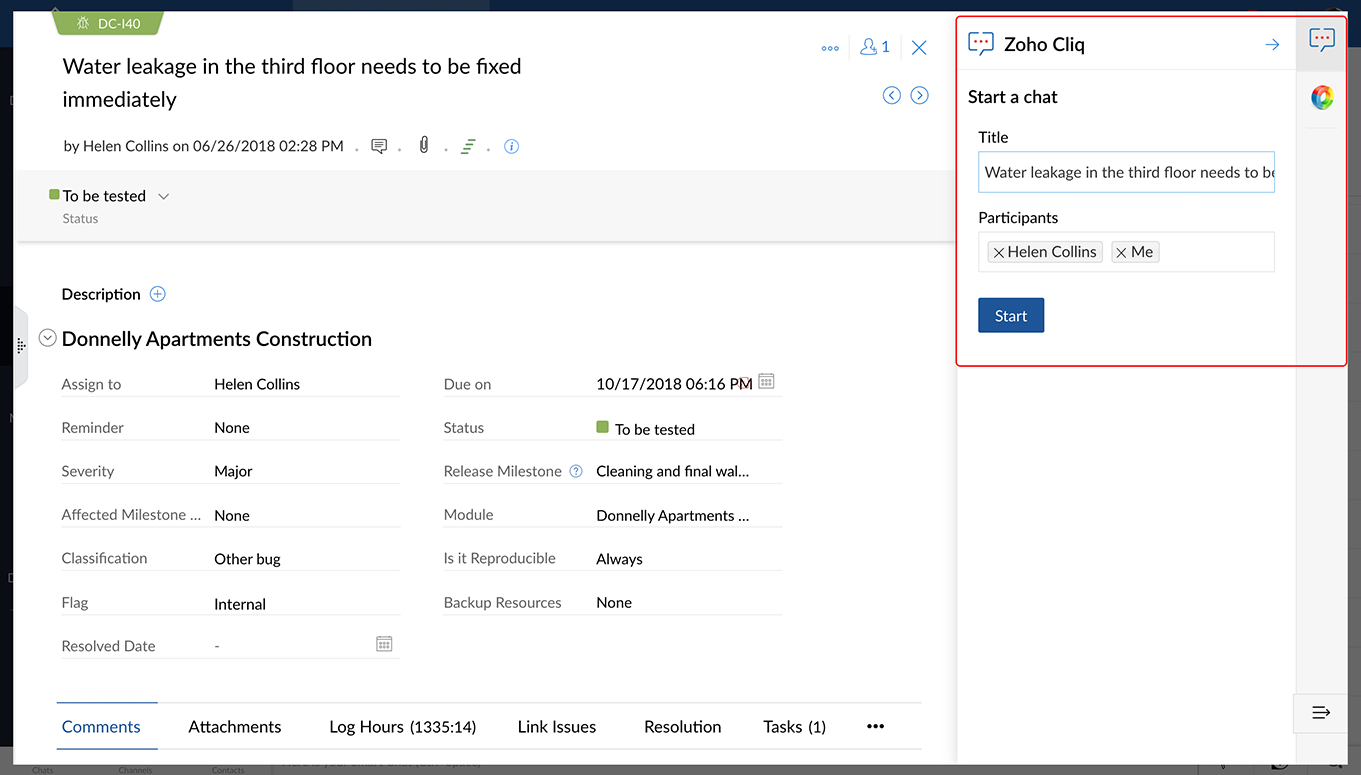
Right panel
- Navigate to the Issues module of your project.
- Click on an issue.
- Access services like Cliq and Zoho Assist to initiate a chat about the issue and initiate a remote session respectively.