
How do I change the account type associated with an account?
Note: You will not be able to change the account type of the default accounts of Zoho Books or mark them as inactive.
To change the account type associated with an account:
- Go to the Accountant module on the left sidebar and click Chart of Accounts.
- Select the account for which you want to change the account type.
- Click Edit at the top of the account’s details page.
- In the Edit Account pop-up, select the new account type from the dropdown next to the Account Type field and click Save.
You will not be able to change the account type associated with an account if you have created transactions using the account. However, you can mark the account as inactive, create a new account, and associate transactions with this account.
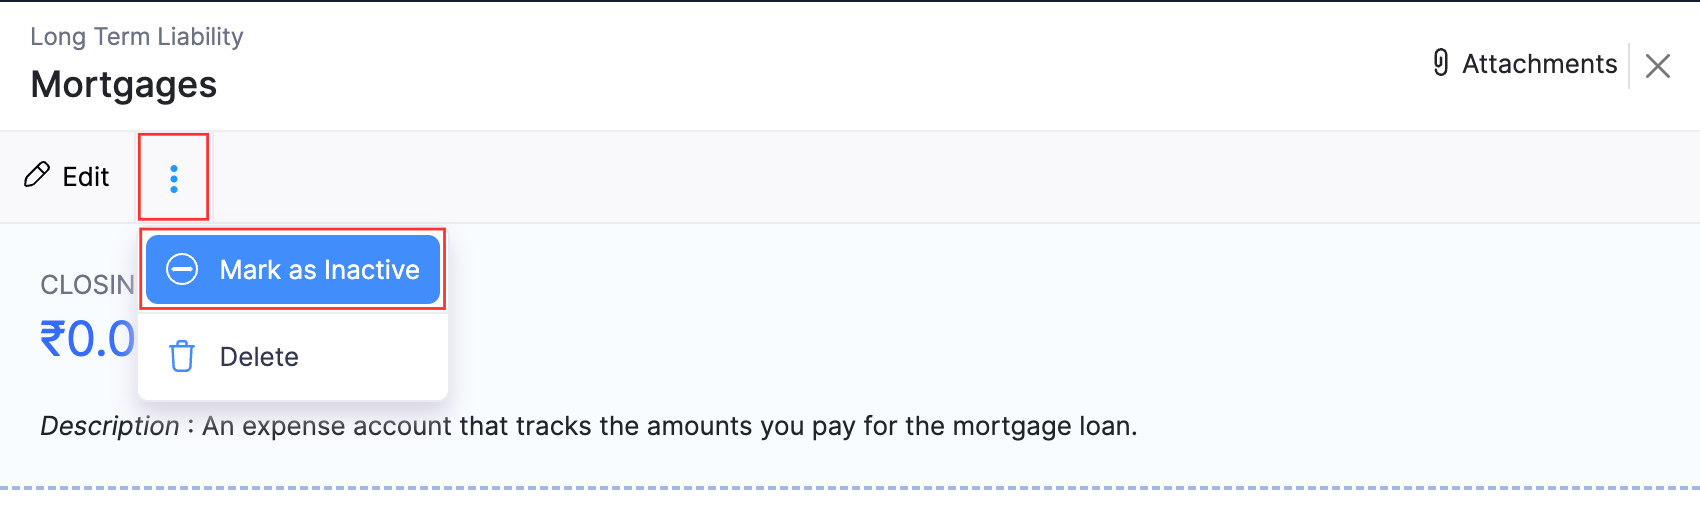
To mark the account as inactive:
- Go to the Accountant module on the left sidebar and select Chart of Accounts.
- Select the account that you want to mark as inactive.
- Click the More account at the top of the account’s details page and select Mark as Inactive from the dropdown.
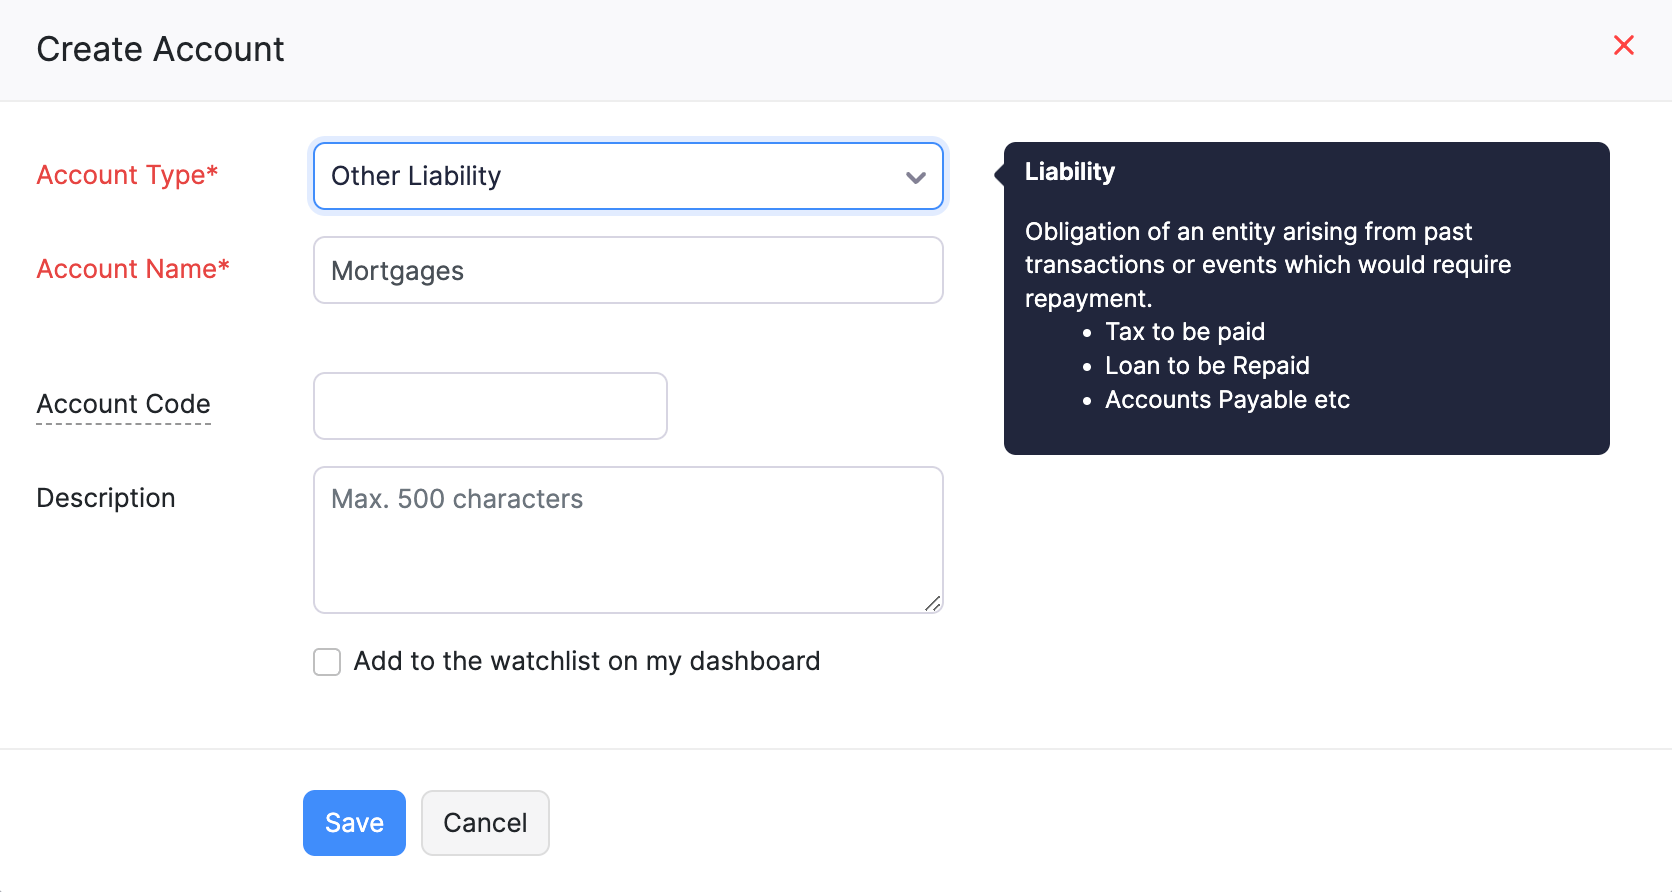
To create a new account:
Go to the Accountant module on the left sidebar and select Chart of Accounts.
Click + New Account on the top right corner of the page.
In the Create Account pop-up:
- Select the required Account Type.
- Enter the Account Name. Ensure that the new account’s name matches with the name of the account that you marked as inactive.
- Enter the Account Code and Description if required.
- Click Save.
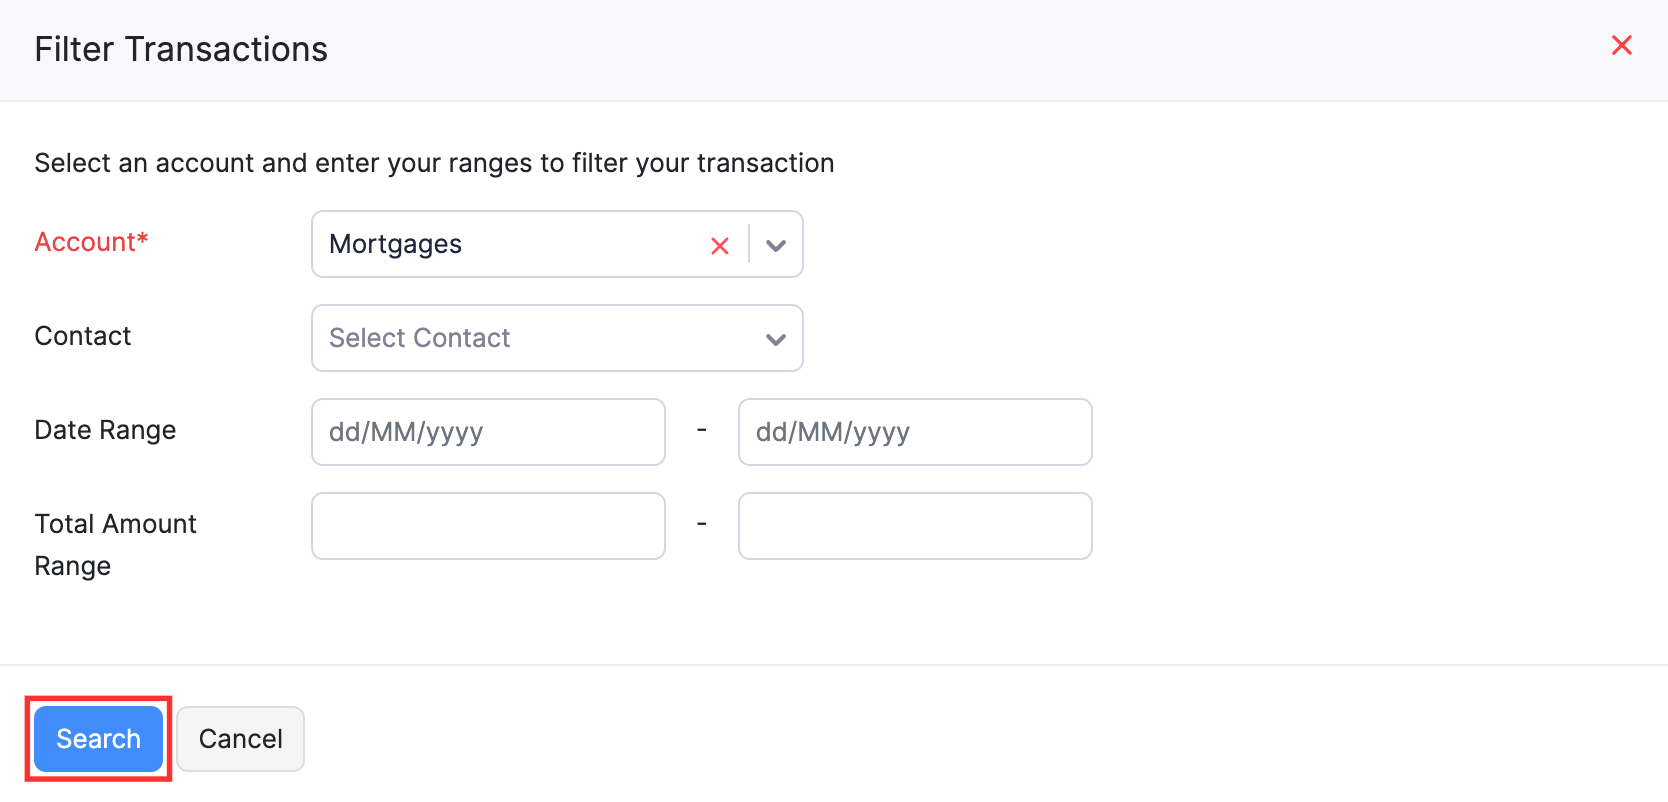
To update the new account in the existing transactions:
- Go to the Accountant module on the left sidebar and select Bulk Update.
- Click Filter and Bulk Update.
- In the Filter Transactions pop-up:
- Select the account that you want to update in the dropdown next to the Account field.
- Enter other criteria, if required.
- Click Search. The transactions that match the criteria you specified will be listed.
The following accounts will not be listed in the dropdown:
- Accounts Receivable
- Accounts Payable
- Unearned Revenue
- Retained Earnings
- Fixed accounts
- Inventory Tracked accounts
- Bank accounts
- Click the checkbox on the left side of a transaction to select it.
- Click Update.

- In the pop-up that appears, click the dropdown next to the New Account field and select the new account you created.
- Click Replace.
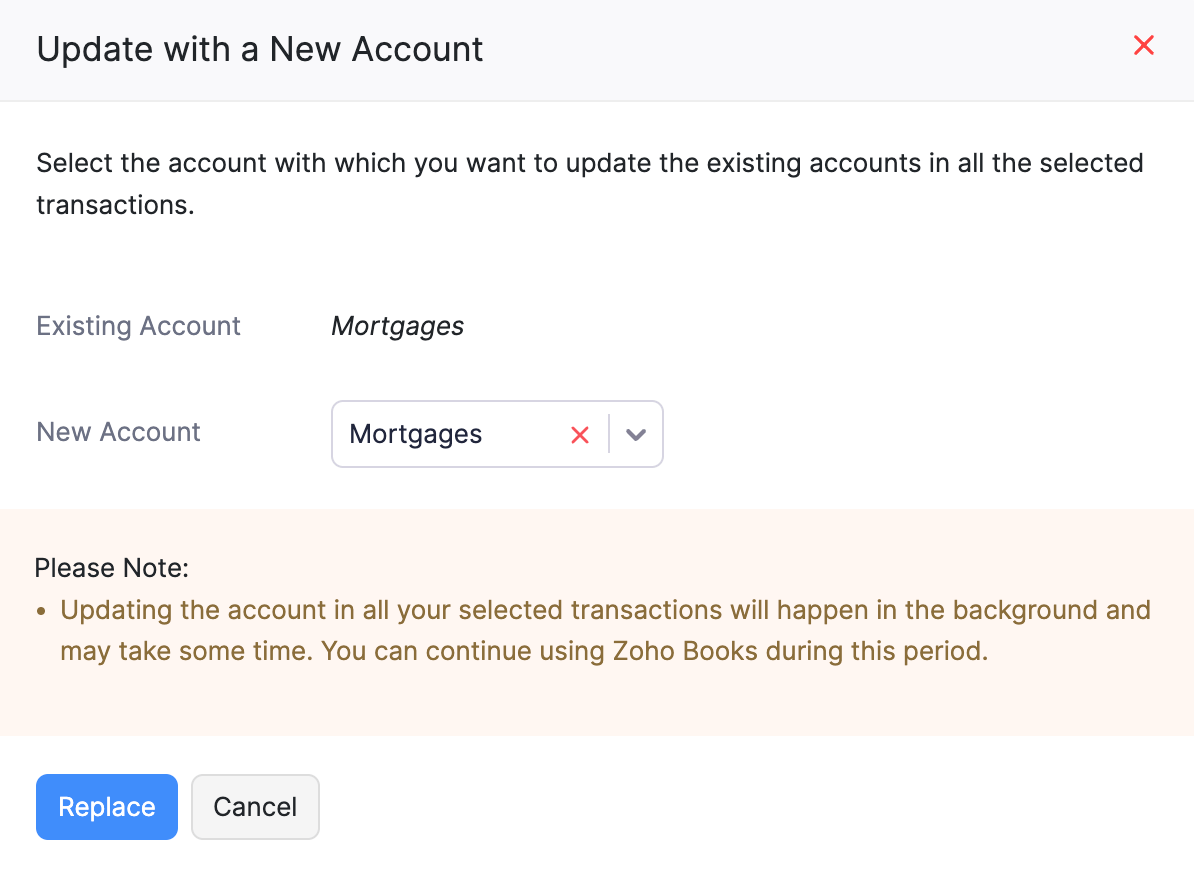
The account associated with the transactions selected will be updated. This will take some time based on the number of transactions you have selected.
Note: You can bulk update the accounts in the Invoices, Credit Notes, Purchase Orders, Expenses, Bills, and Vendor Credits modules.
 Yes
No
Yes
No
Thank you for your feedback!