
Custom Approval
Custom Approval allows organizations to create approval flows tailored to their unique business needs, especially when the default approval flow isn’t suitable.
Scenario: Brandon is a Sales Manager at Zylker. Usually, he approves invoices for Zylker’s customers. However, if an invoice total is more than $10,000, Patricia, the Head of Sales, must approve it. Brandon sets up a custom approval in the Invoices module of Zoho Books by adding a criteria that invoices of $10,000 or more should be sent to Patricia for approval.
Create a Custom Approval
To create a custom approval flow for a module:
- Go to Settings in the top right corner of the page.
- Navigate to the module for which you want to add a custom approval.
- Click the Approvals tab.
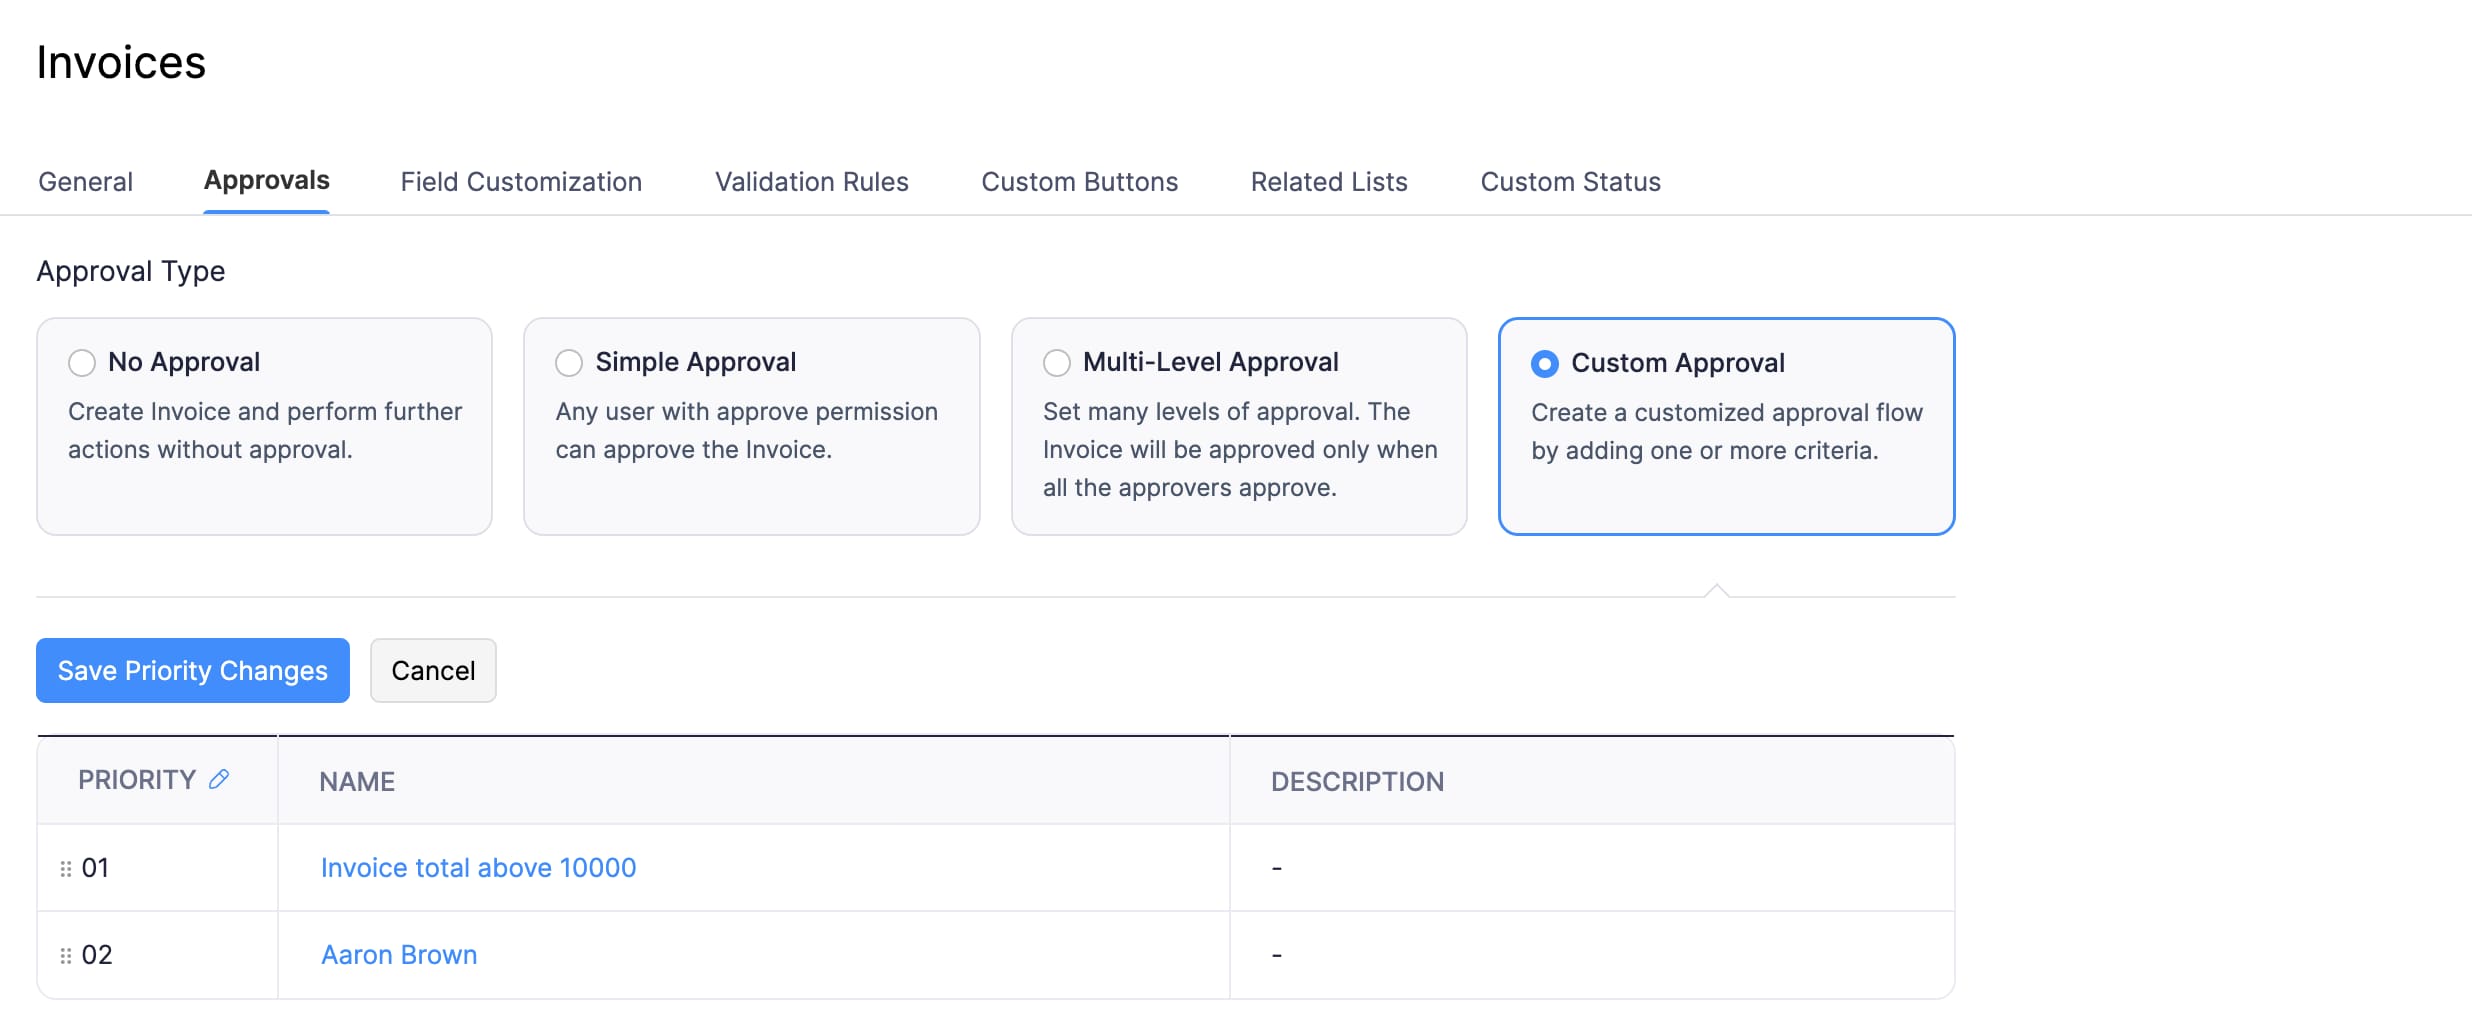
- Click Custom Approval under Approval Type.
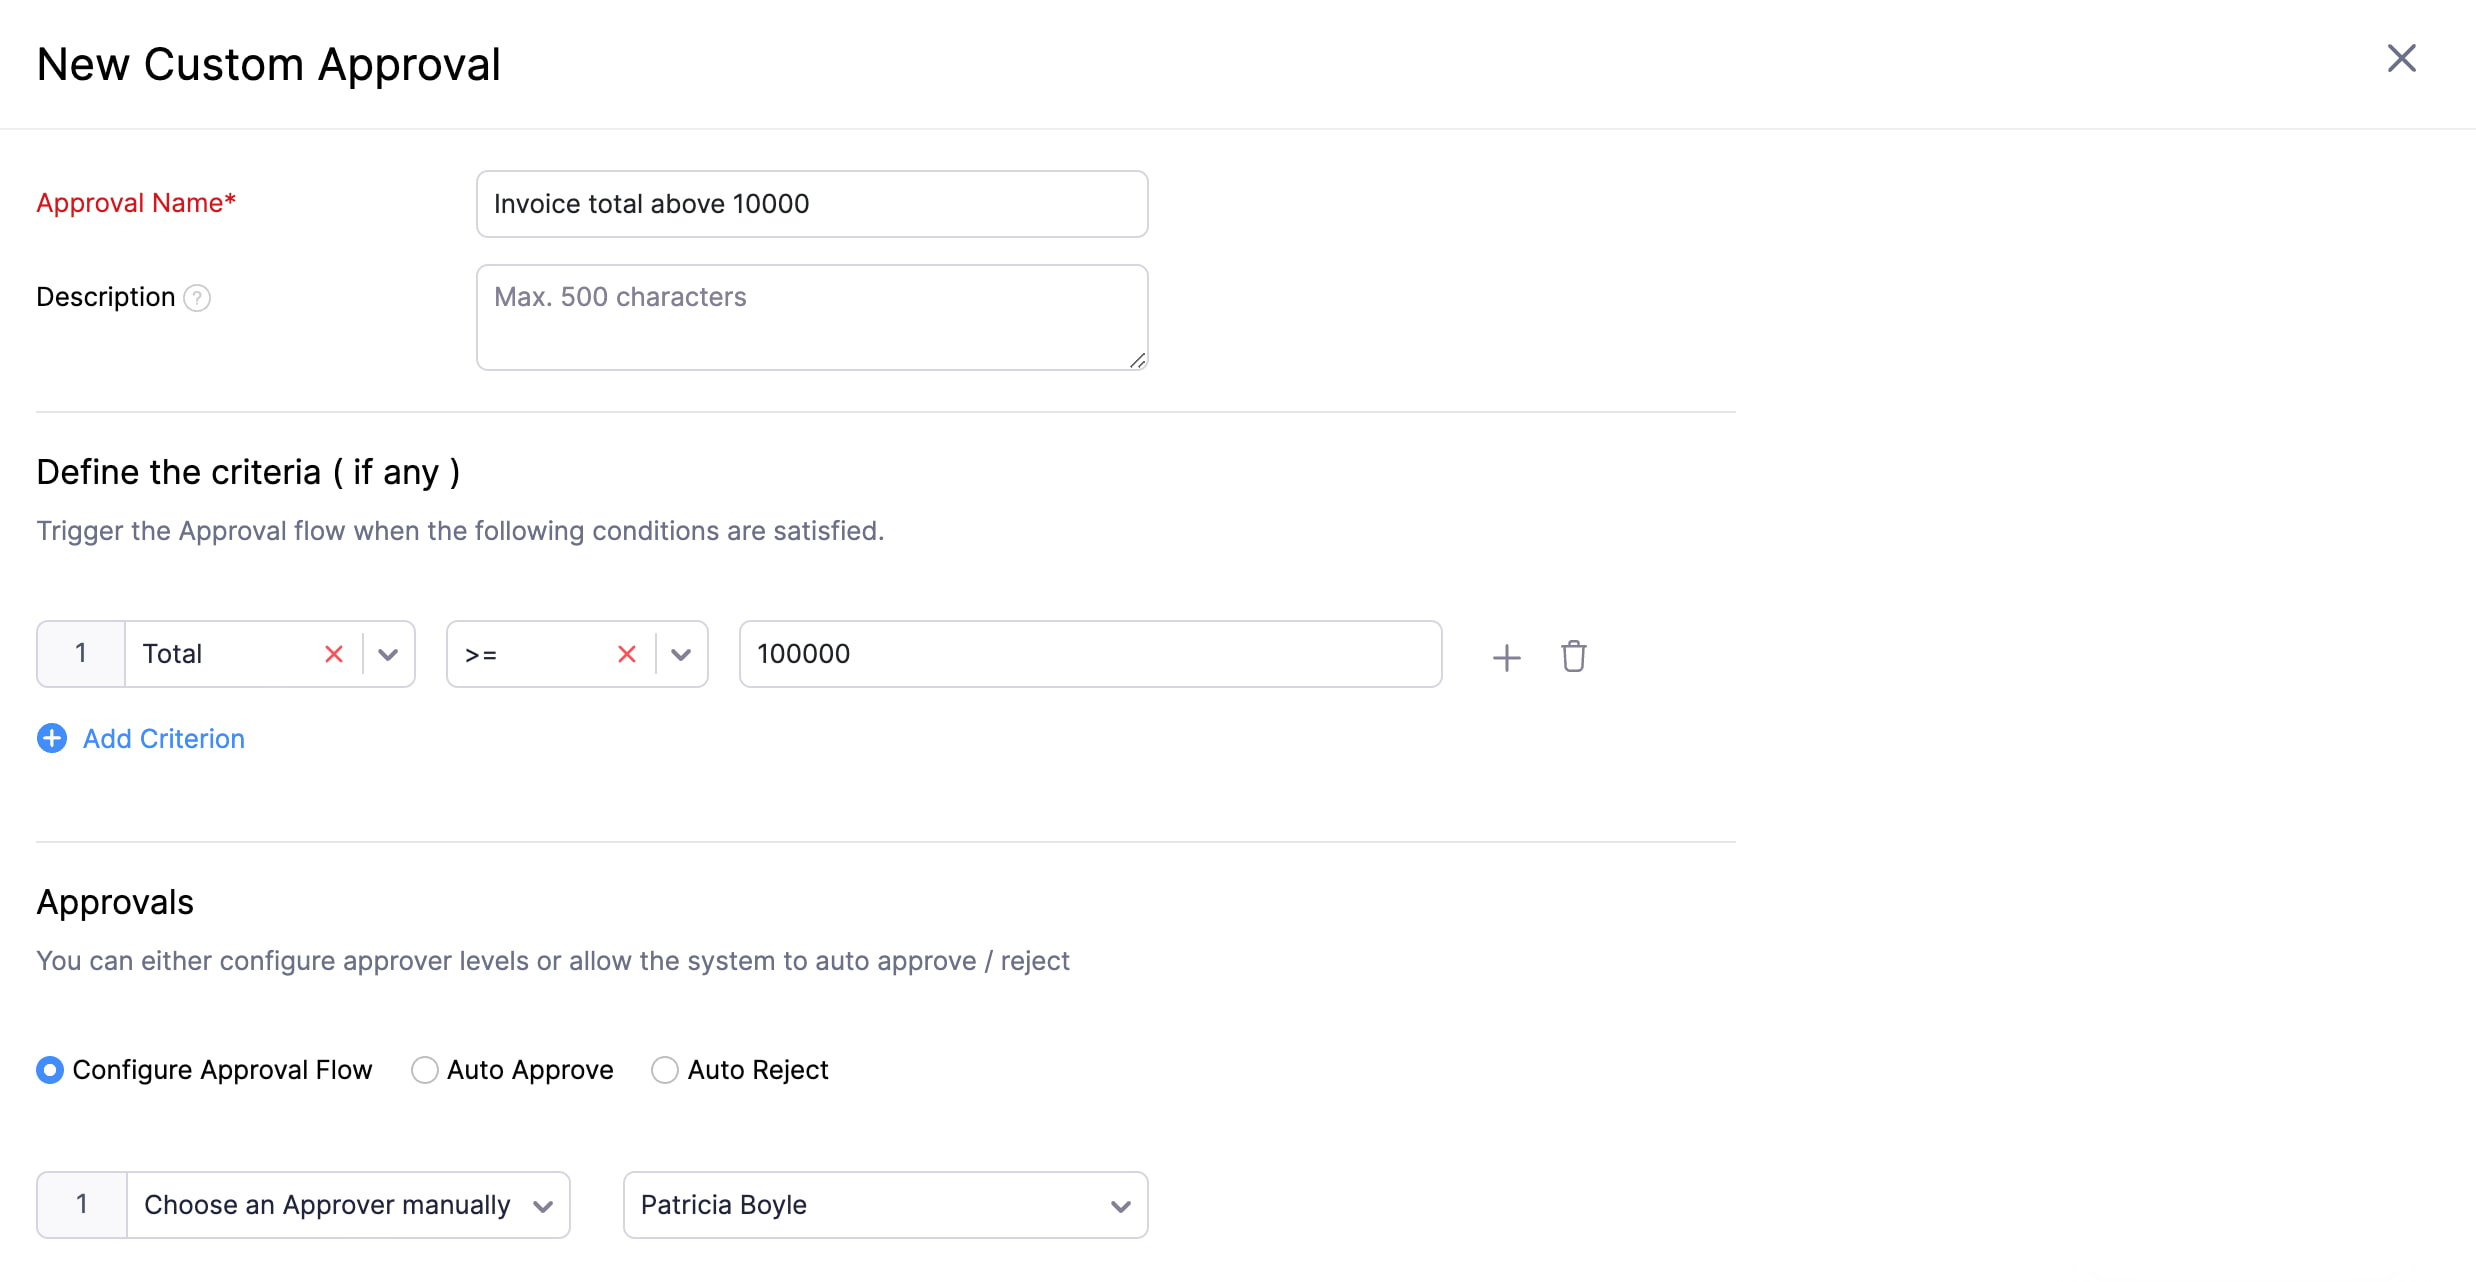
- Click New Custom Approval. You’ll be redirected to the New Custom Approval page.
- Enter the Approval Name and provide a Description if required.
- Add the criteria based on which the custom approval should be triggered. Click + Add Criterion to add more criteria.
- Select the approval flow. You can configure an approval flow, or choose to auto accept or auto reject records.
- Click Save.
Prioritize Approvals
If you’ve created multiple custom approvals for a module, in some cases, transactions can fulfill the criteria of more than one custom approval. In such cases, you can prioritize which custom approval should be triggered first. Here’s how:
- Go to Settings in the top right corner of the page.
- Navigate to the module for which you want to prioritize custom approvals.
- Click the Approvals tab.
- Click Custom Approval under Approval Type.
- Click the Edit icon next to PRIORITY.
- Drag and drop to reorder the custom approvals as per priority. The approval with priority 01 will be prioritized over the other approvals.
- Click Save Priority Changes.
Edit or Delete a Custom Approval
You can edit and delete the custom approvals created. Here’s how:
- Go to Settings in the top right corner of the page.
- Navigate to the module for which you created the custom approval.
- Click the Approvals tab.
- Click Custom Approval under Approval Type.
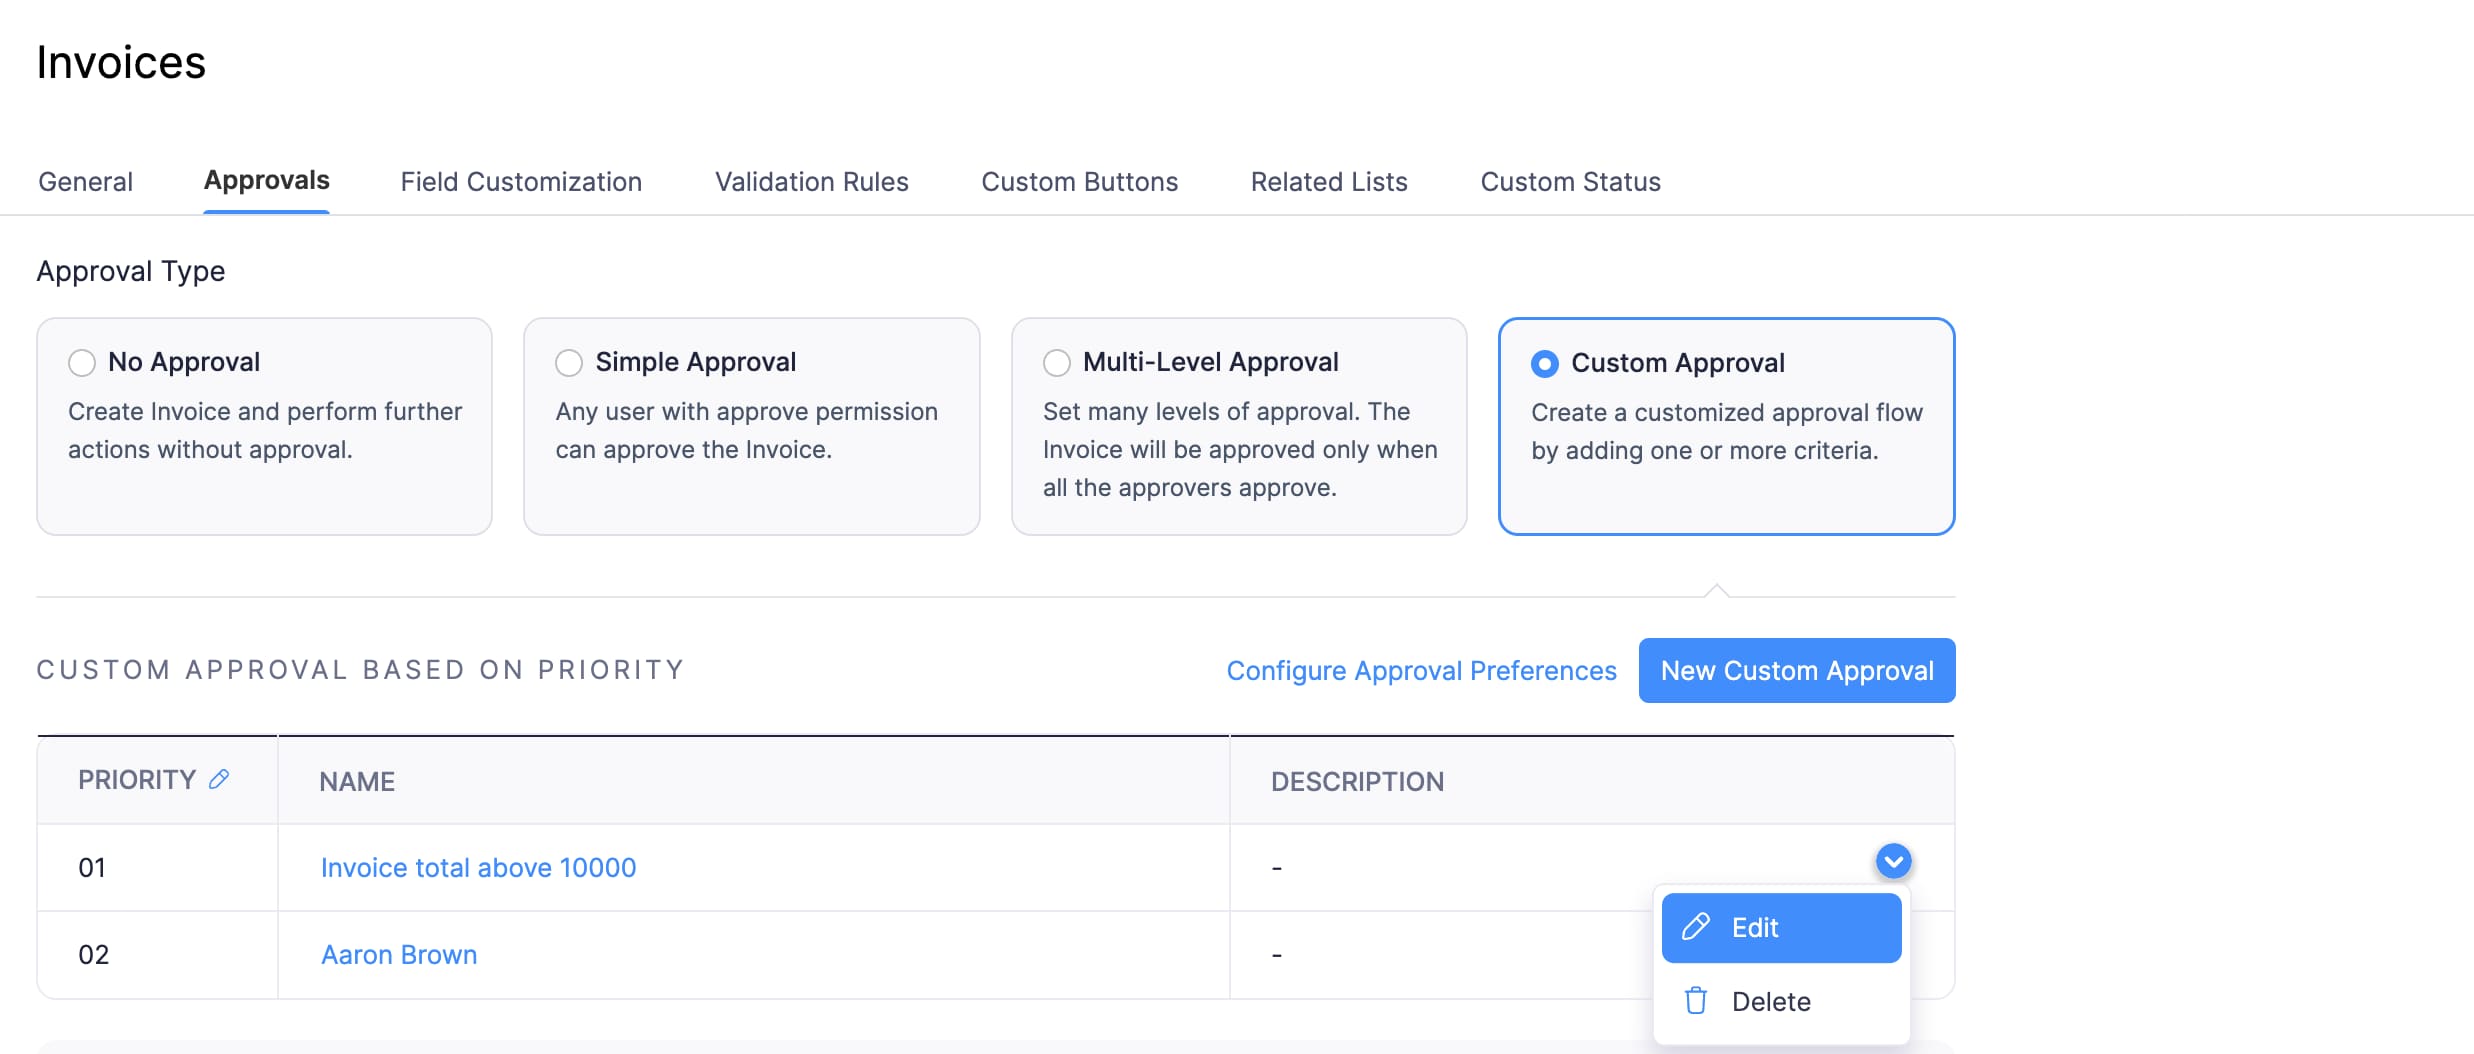
- Hover over the custom approval you want to edit or delete.
- Click the dropdown and select Edit or Delete.
- If you want to edit a custom approval, click Edit. Make the necessary changes and click Save.
- If you want to delete a custom approval, click Delete.
Approval and Notification Preferences
The approval and notification preferences for Custom Approval apply to all the custom approvals you create for the module. To configure them:
- Go to Settings in the top right corner of the page.
- Navigate to the module for which you created the custom approval.
- Click the Approvals tab.
- Click Custom Approval under Approval Type.
- Click Configure Approval Preferences at the top right of the custom approvals list.
Approval Preferences
- Check Allow approvers to approve the transactions they create if you want approvers to be able to approve transactions they have submitted themselves.
Notification Preferences
- Check Send email and in-app notifications when transactions are submitted for approval to notify approvers.
- Check Notify the submitter when a transaction is approved or rejected to notify the submitter of the approval outcome.
Click Save to apply the changes.
 Yes
No
Yes
No
Thank you for your feedback!