
API Configurations for Widgets
API Configurations enable a widget to fetch, process, and update data. They define the endpoints, request parameters, and authentication methods the widget uses to securely access external or backend services.
Once created, each API configuration is assigned an API name, which can be used in widgets to initiate API calls, without exposing or altering the raw URL or request structure.
Note:
- API Configurations is available only for organizations with Widgets enabled. Widgets is available only in the Premium and above plans of Zoho Books. API Configurations can only be used in SDK version 2.0 and above.
- Ensure that your widget includes the SDK version 2.0 script shown below to enable this feature:
<script src="https://js.zohostatic.com/zohofinance/v2.0/zf_sdk.js"></script> Create an API Configuration
To create an API Configuration:
- Log in to Zoho Sigma.
- Select the required workspace.
- In the All Extensions tab, hover over the required extension and click the Edit Extension icon.
- Go to the Build section at the top.
- Click Widgets on the left sidebar.
- Navigate to the API Configurations tab at the top.
- Click + New API Configuration.
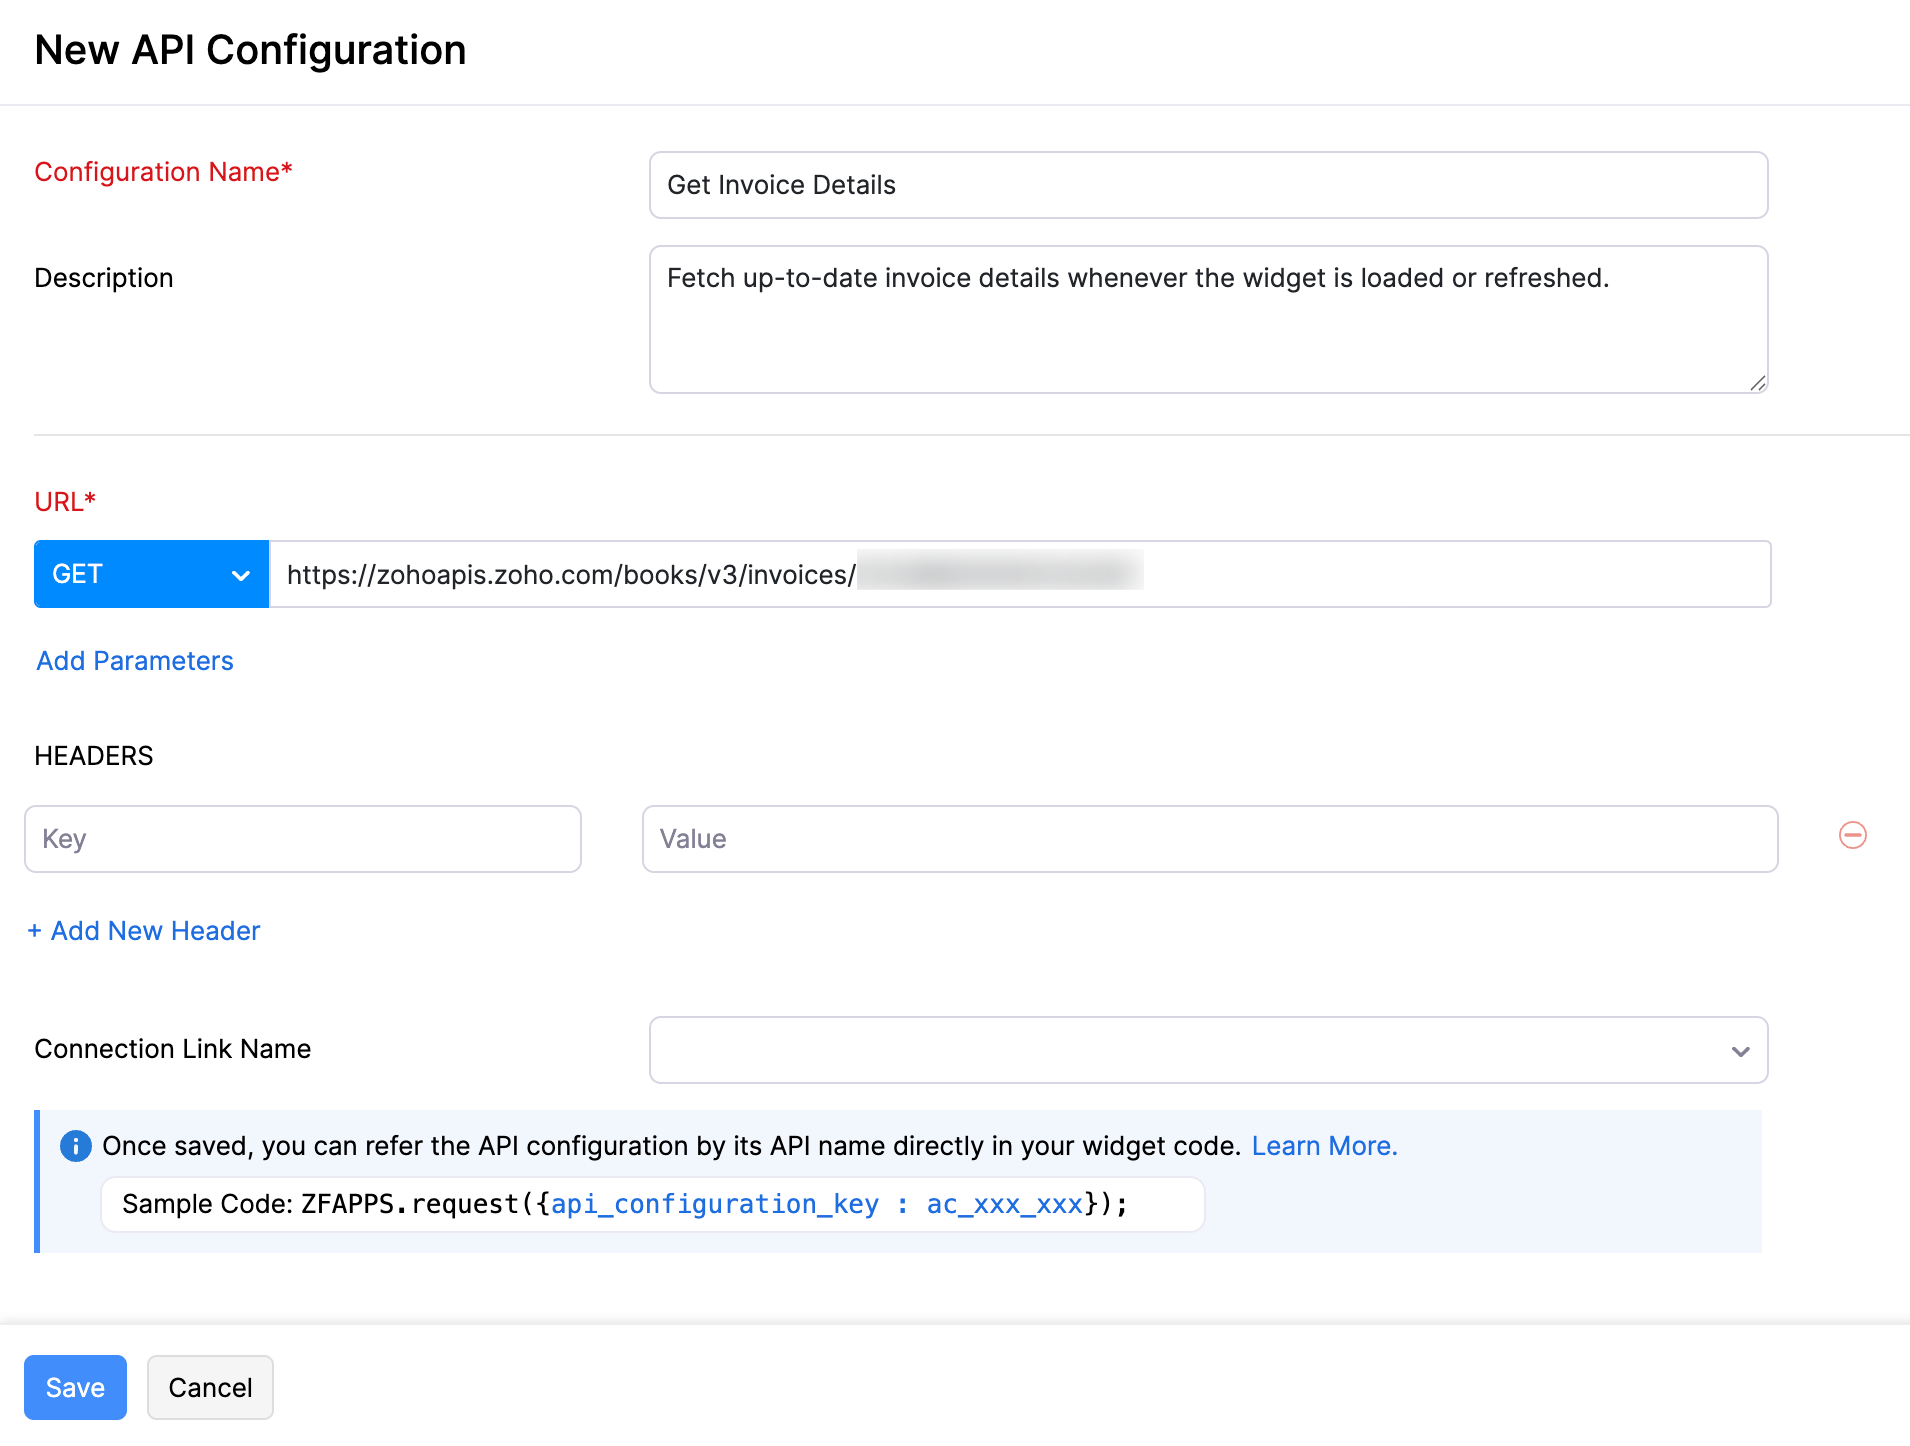
- Fill in the following details on the page that appears:
- Enter the Configuration Name, and provide a Description if required.
- In the URL section, select the HTTP method and enter the URL of the third-party application.The HTTP methods available in Zoho Books are listed below:
- Get: Requests to retrieve data from the server without making any modifications.
- Post: Requests that the data sent must be considered as new
- Put: Requests that the data sent should be considered as a modified version of the one already present
- Delete: Requests that the data must be deleted.
Note: If your extension works across multiple Zoho Finance apps, you can use api_root_endpoint in place of the base URL. It is a dynamic variable available via the organization object. In Zoho Books, api_root_endpoint resolves to https://zohoapis.zoho.com/books/v3. If your extension is built only for Zoho Books, you can use https://zohoapis.zoho.com/books/v3 directly.
- You can also add additional query parameters by clicking Add Parameters and entering the required values in the Key and Value fields.
Note: You can add dynamic query parameters in the widget code.
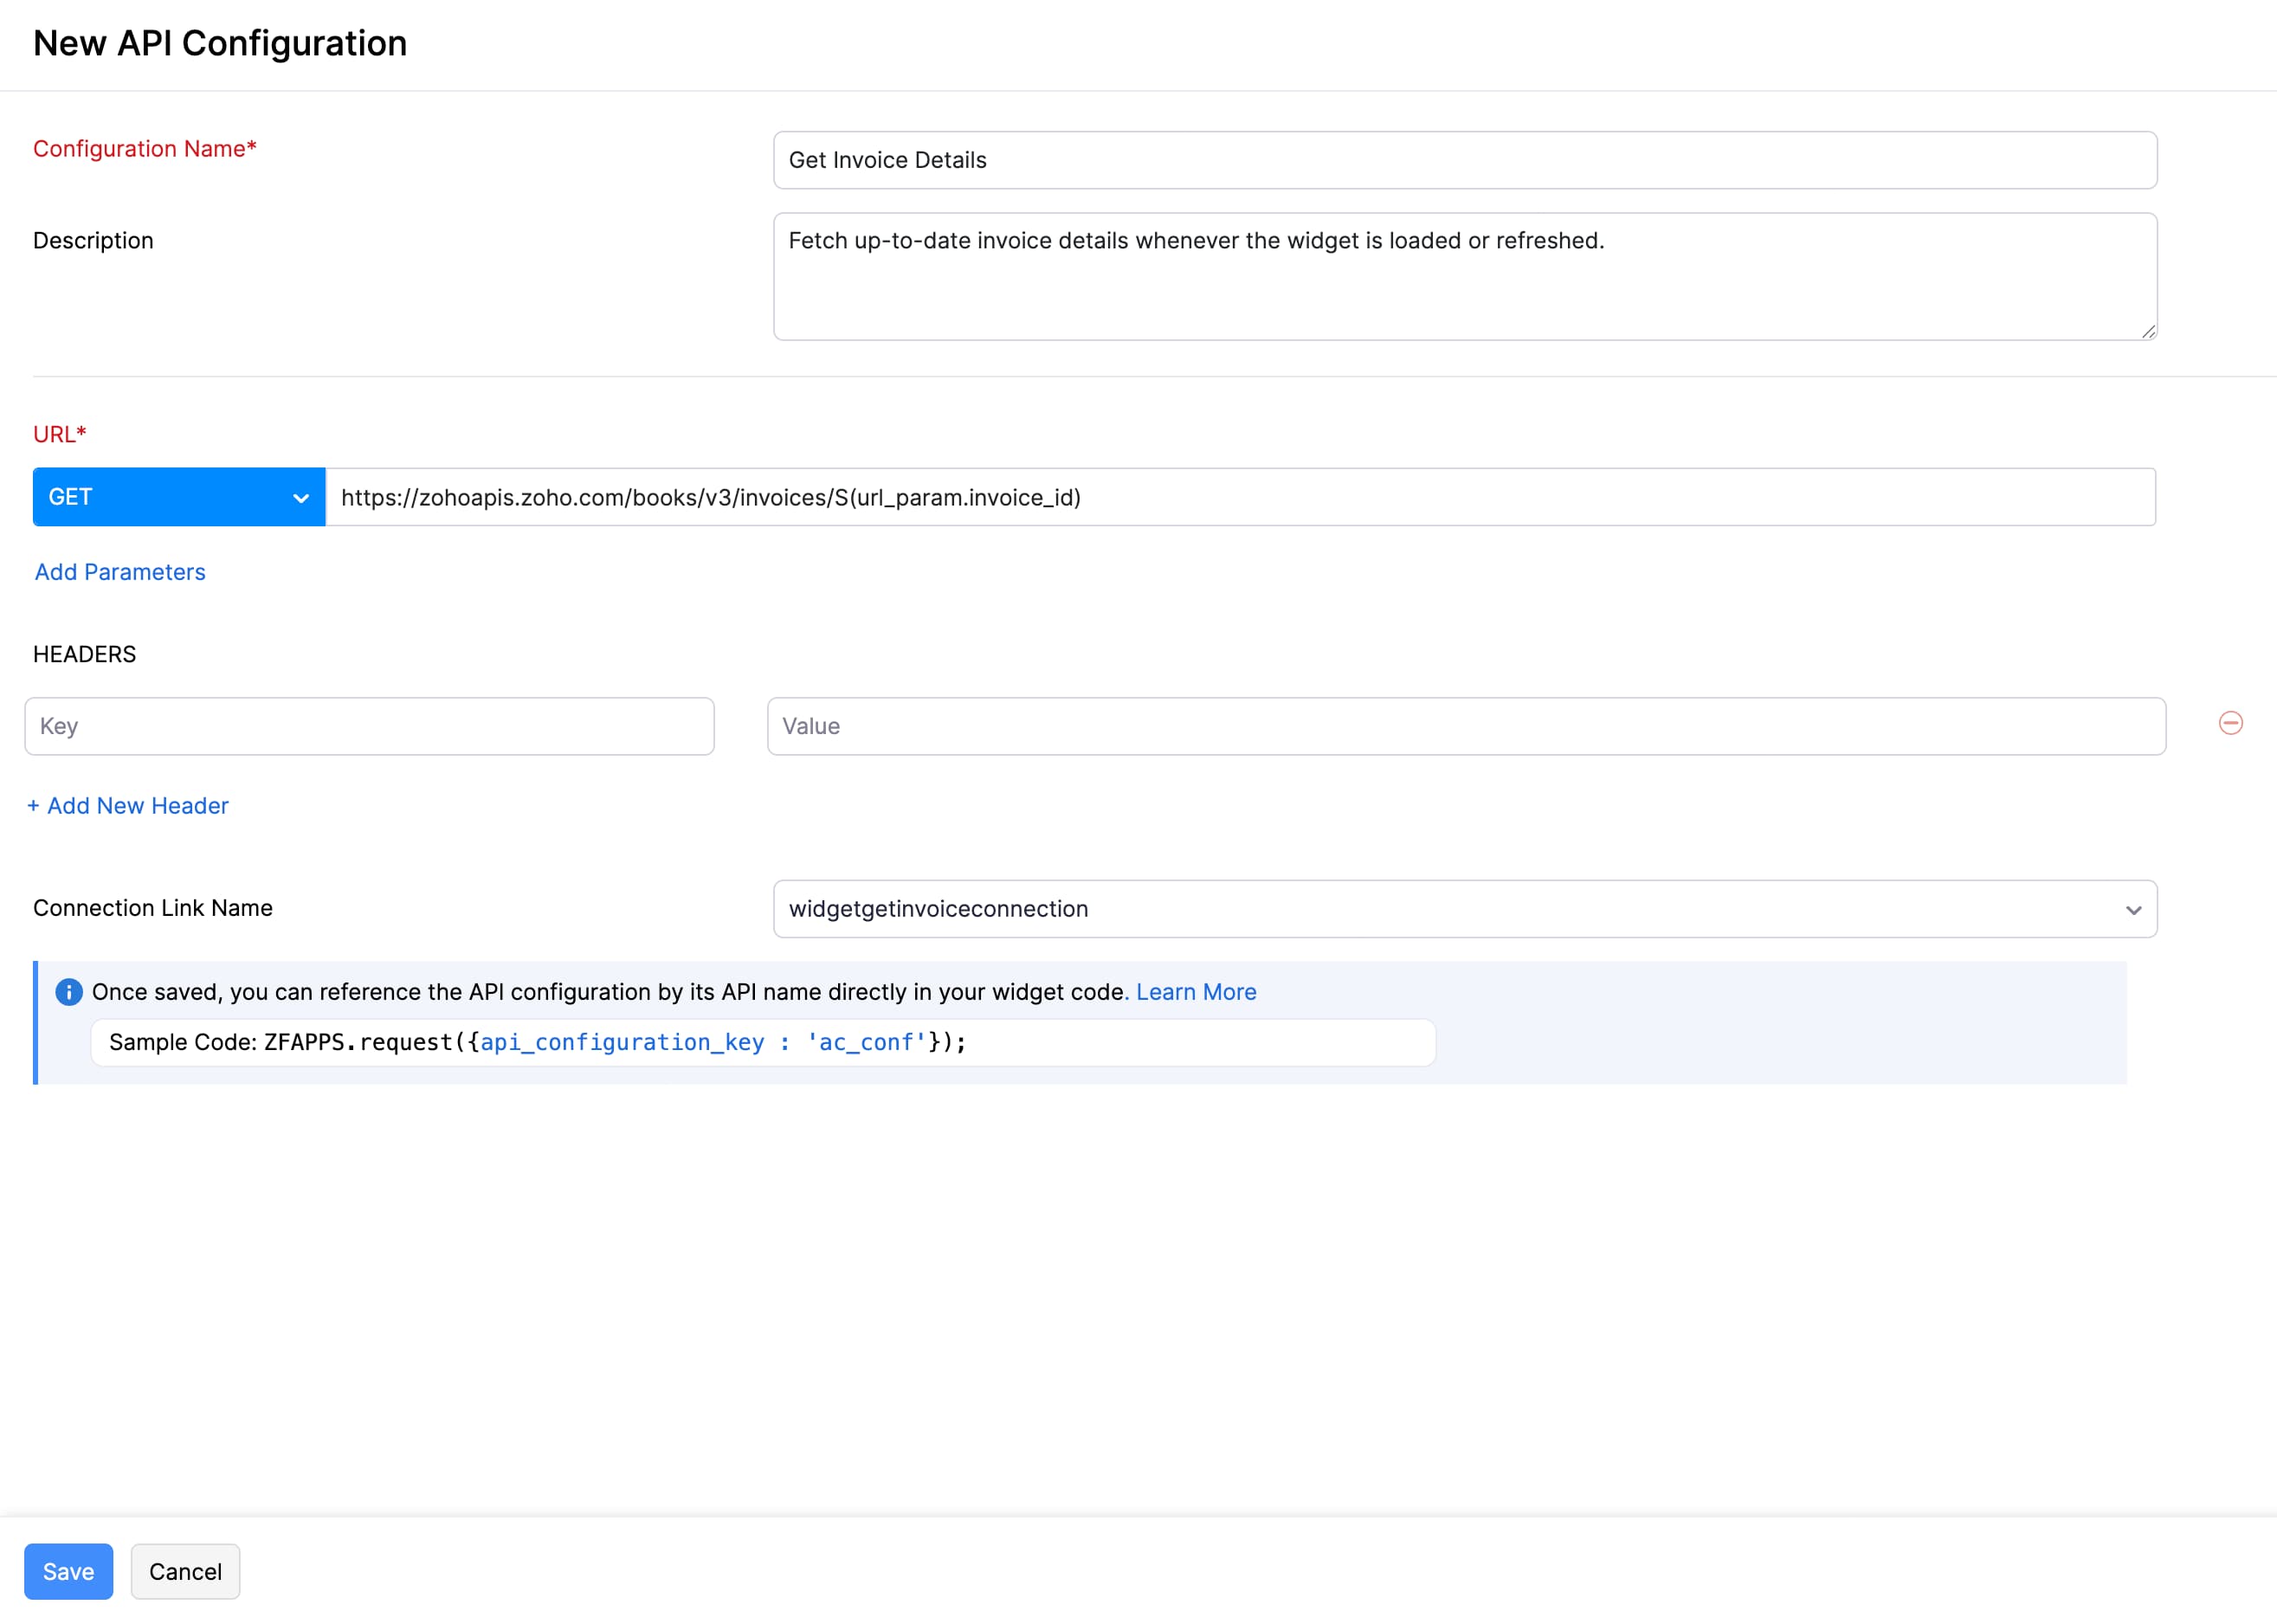
- If your API URL includes parts that should change dynamically (like user IDs or record IDs), use the placeholder ${url_param.paramName} in the URL. Then, provide the actual value in the widget configuration so it gets substituted automatically when the API is called.
- In the Headers section, you can include any additional information that you want to be included in the HTTP request. You can also add custom parameters like Auth Token, Security Token, API Key, and other parameters. Click + Add New Headers if you want to add additional headers.
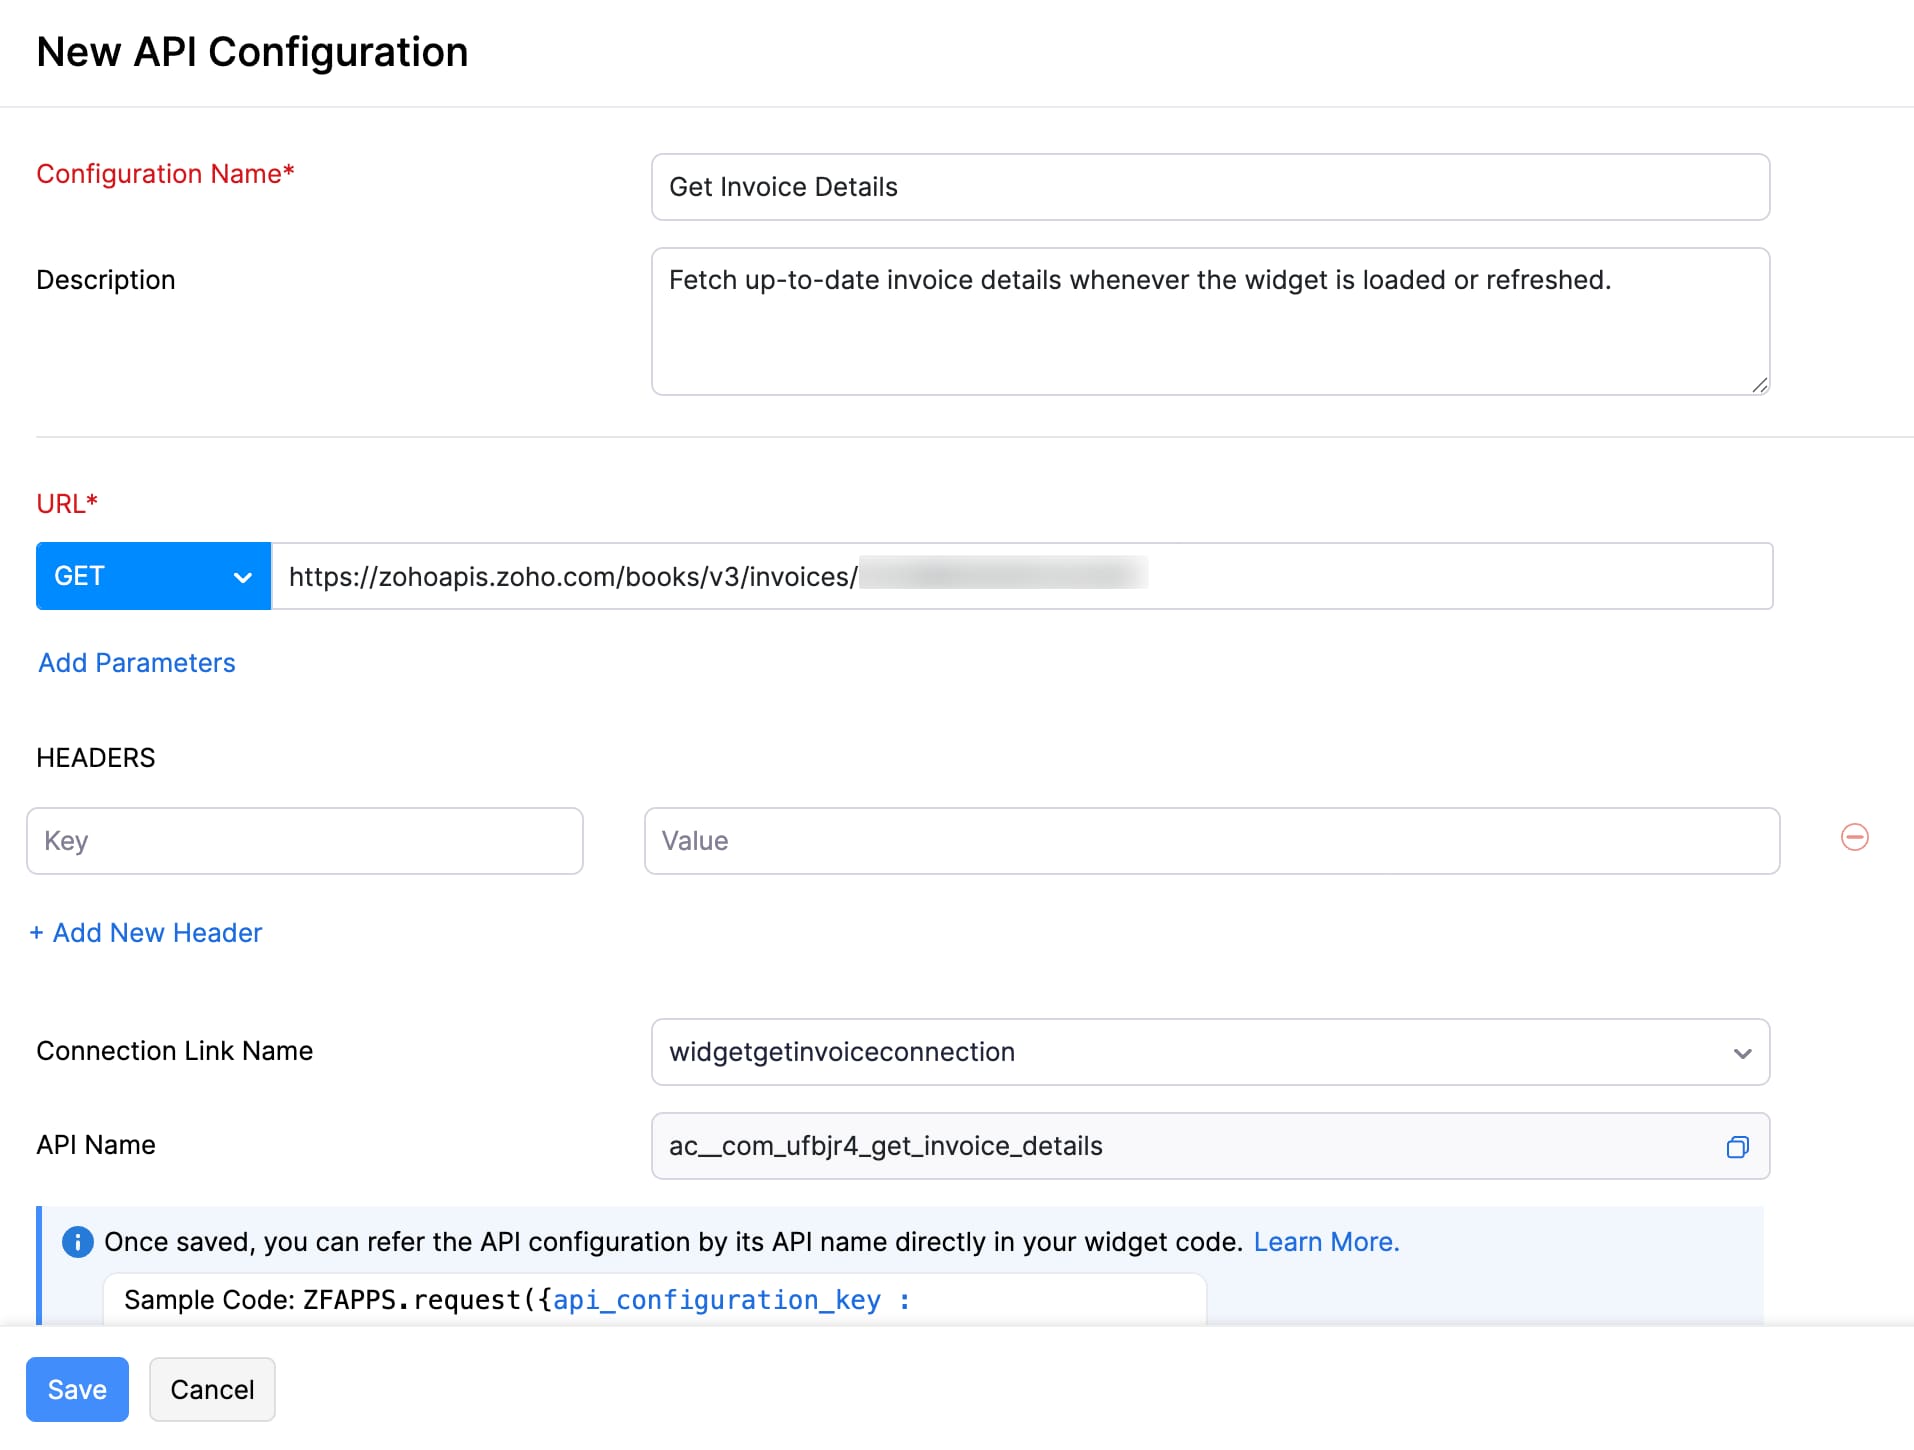
- Select a Connection Link Name if required. Connections enable secure access to third-party applications by managing authentication without exposing sensitive credentials. Click + New Connection to create a new one.
- Click Save.
On the List page, click Copy next to the API configuration you want. Once copied, you can use the name to reference it directly in your widget.

Use API Configurations in Widgets
Once you’ve created an API configuration, here’s how you can use it in your widget.
Sample Code
 const options =
 {
//Replace 'ac_xxx_xxx' with the API Name of the api configuration created.
  api_configuration_key: 'ac_xxx_xxx',
// To add dynamic URL parameters, queries, or headers, define them in the widget code itself as shown below.
// Static parameters can be set directly when creating the API configuration.
  url_param: { 'key': 'value' },
  url_query: { 'key': 'value' },
  header: { 'key': 'value' },
  body: {
	mode: 'urlencoded/formdata/raw',
	urlencoded: {
	 'key': 'value'
	},
	formdata: {
	 'key': 'value'
	},
	raw: 'RAWDATA'
	},
  attachments:[{"document": file}]
 }
ZFAPPS.request(options)
  .then(function (response)
    {
      console.log("API Response", response);
    })
  .catch(function (error)
    {
      console.error("Error fetching data:", error);
    });
Use Static URL Parameters
To use static URL parameters in an API configuration, specify the URL to be used within the widget, and select the appropriate HTTP method. Include static URL parameters directly in the URL, and add any required static query parameters. Use the configured API name in your widget to reference the API configuration.
Sample Code
 const options =
 {
  api_configuration_key: 'ac__com_hizlsp_fetch_invoice'
 };
ZFAPPS.request(options)
  .then(function (response)
    {
      console.log("API Response", response);
    })
  .catch(function (error)
    {
      console.error("Error fetching data:", error);
    });
Response Once the API call is triggered, the widget will return a response similar to the one shown below for static parameters.
 {
   "code": "",
   "message": "Triggered Successfully",
   "data":{
      "body": {} // Response of the third-party service.
   }
}
Use Dynamic URL Parameters
To use dynamic URL parameters in an API configuration, specify the URL to be used within the widget and select the appropriate HTTP method. Add dynamic URL parameters using the format ${url_param.paramName} in the URL, and pass the corresponding dynamic value from the widget. Next, select a Connection Link Name if required.
Example: https://www.zohoapis.com/books/v3/invoices/${url_param.invoice_id}
Sample Code
 const options =
 {
  api_configuration_key: 'ac__com_9ci4ky_get_invoice',
  url_param: {'invoice_id': invoice_id},
 };
ZFAPPS.request(options)
  .then(function (response)
    {
      console.log("API Response", response);
    })
  .catch(function (error)
    {
      console.error("Error fetching data:", error);
    });
Response
Once the API call is triggered, the widget will return a response similar to the one shown below for dynamic parameters.
 {
   "code": "",
   "message": "Triggered Successfully",
   "data":{
      "body": {} // Response of the third-party service.
   }
}
Edit an API Configuration
You can edit an API configuration to make changes to it. Here’s how:
- Go to the Build section at the top of the Developer Portal.
- Click Widgets on the left sidebar.
- Navigate to the API Configurations tab at the top.
- Click the More icon next to the API configuration and click Edit from the dropdown.

- Make the necessary changes.
- Click Save.
Delete an API Configuration
If you no longer need an API configuration, you can delete it. However, the API configuration can no longer be used to securely connect the widget with external applications.
To delete an API configuration:
- Go to the Build section at the top of the Developer Portal.
- Click Widgets on the left sidebar.
- Navigate to the API Configurations tab at the top.
- Click the More icon next to the API configuration and click Delete from the dropdown.
- Click Delete again in the pop-up that appears to confirm your action.
 Yes
No
Yes
No
Thank you for your feedback!