
External Connections
External Connections is a platform that helps third-party applications get or collect Zoho OAuth tokens, which can be used to communicate with Zoho apps. Unlike Internal Connections, these tokens are stored in the third-party application. When a user installs your extension and authorizes connections, they will be redirected to the specified URL to complete authentication.
Note: If your extension uses external connections, users must authorize those connections before installing the extension. Similarly users must revoke the external connections before they can uninstall the extension.
Create External Connections
To create an external connection:
- Log in to Zoho Sigma.
- Select the required workspace.
- In the All Extensions tab, hover over the required extension and click the Edit Extension icon.
- Go to the Build section at the top.
- Click Connections on the left sidebar.
- Navigate to the External Connections tab at the top.
- Click + New External Connection.
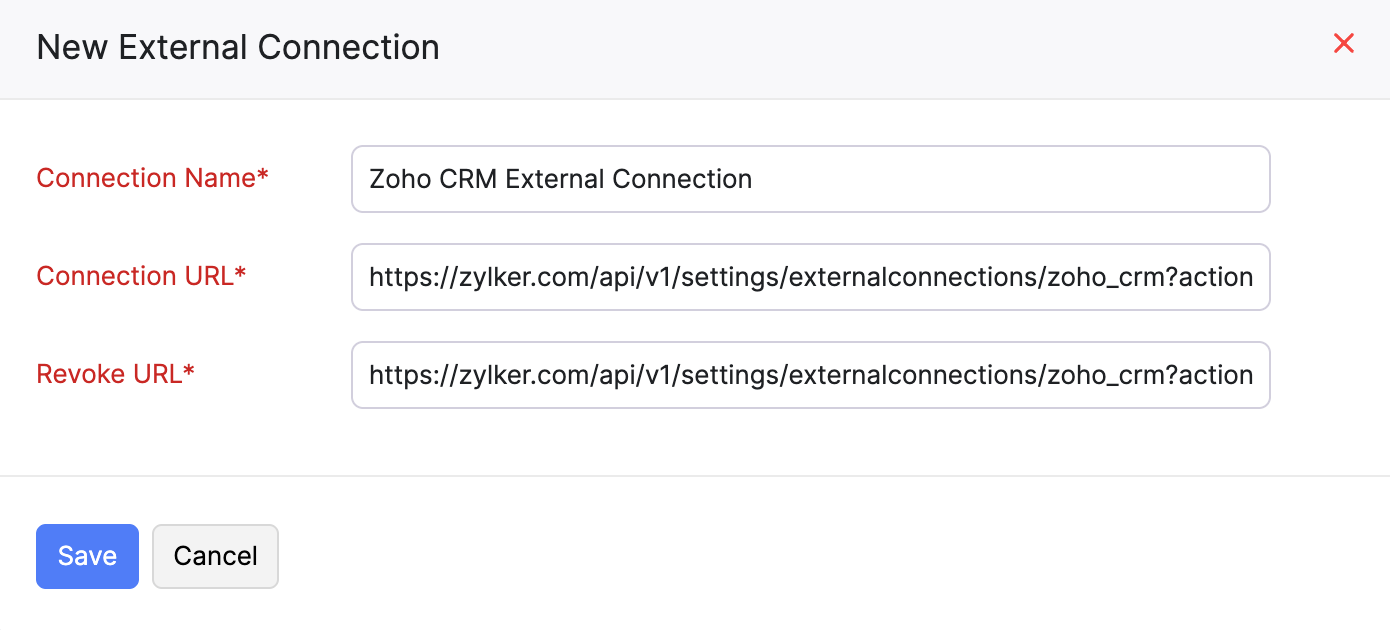
- Fill in the following details in the pop-up:
- Enter the Connection Name.
- Provide the Connection URL and Revoke URL.
Insights:
- The Connection URL is the endpoint provided by the third-party application where users are redirected to authorize access.
- The Revoke URL is the endpoint used to invalidate or disconnect an existing token.
- Click Save.
- Next, create a Secret Key using Extension Settings to handle connection authorization and revoke processes.
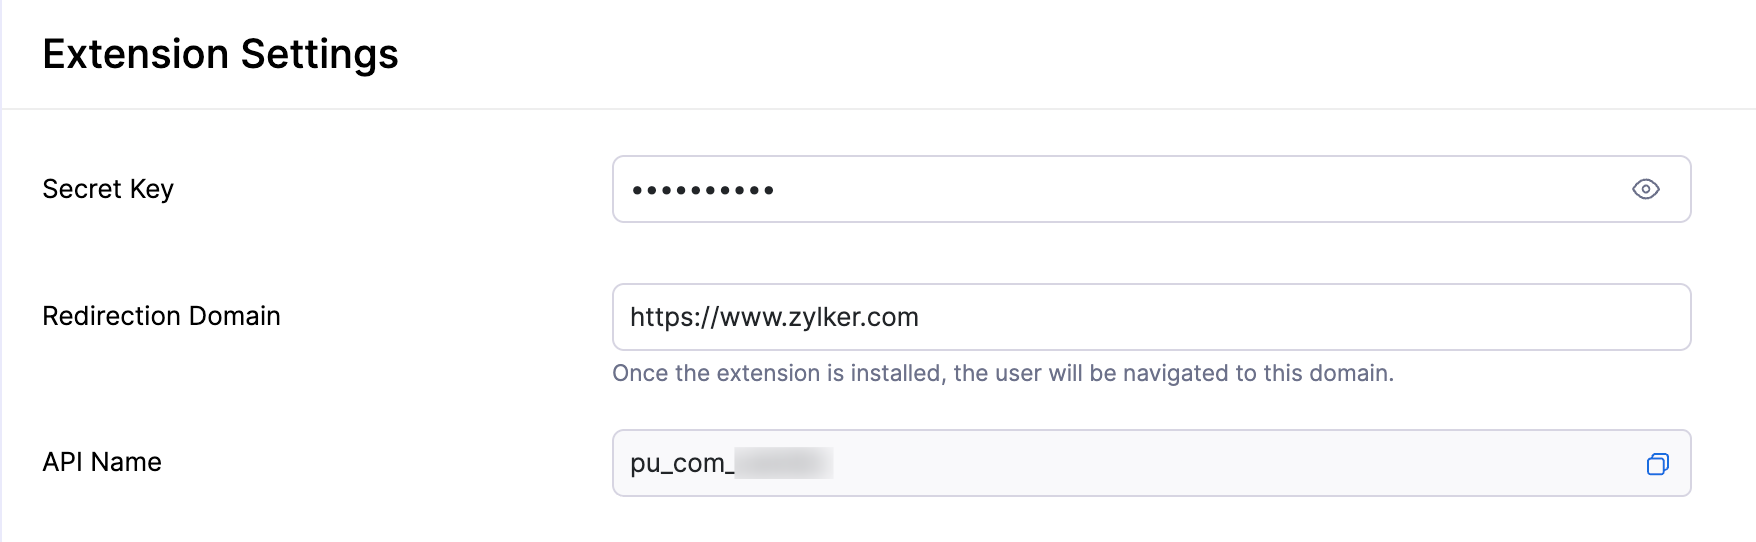
Extension Settings API Name
Each extension has a unique API name for its settings. This API name is automatically generated when the extension is created and is used internally by Zoho APIs and SDKs to identify the extension configuration.
You’ll need this API name when:
- Referring to the extension settings in APIs or SDK methods
- Associating the external connection with the correct extension
To find the API name for your extension settings:
- Log in to Zoho Sigma.
- Select the required workspace.
- In the All Extensions tab, hover over the required extension and click the Edit Extension icon.
- Go to the Build section at the top.
- Click Extension Settings on the left sidebar.
- Click the Copy icon next to API Name. This value must be used as the jti claim in the JWT payload.
How Connection Authorization Works
When a user installs your extension with External Connections, the connection is not active immediately. The user must explicitly authorize it by clicking Connect on the extension’s page. The entire authorization flow is designed to securely identify the user’s organization and allow the third-party application to register itself with Zoho. Here’s how the authorization process works:
- During installation, the user clicks Connect for the external connection from the Zoho product. Zoho redirects the user to the Connection URL configured while creating the extension. This URL loads the third-party application’s page and includes a JWT token as a query parameter.
?jwttoken= - The third-party application decodes and validates the received JWT token to verify the user and organization context.
- After successful validation, the third-party application authenticates the user on its side (for example, by prompting the user to sign in).
- After the user provides consent for the third-party application to access the requested data, the third-party application generates a new JWT token and signs it using the extension’s Secret Key. This token represents the extension’s authorization to interact with Zoho on behalf of the organization.
- Using this generated JWT token, the third-party application makes a PUT request to Zoho’s External Connections API to mark the connection as connected.The JWT must be passed in the required header:
https://books.zoho.com/api/v3/settings/externalconnections/${external_connection_API_Name}?action=mark_as_connected&organization_id=${organization_id}Zoho validates this token to ensure the request originates from a trusted extension.headers: { 'X-Zoho-Signature': JWT } - Once Zoho confirms the request and returns a successful response, the third-party application notifies the client (the browser page where the user initiated the connection) by sending a POST message:At this point, the UI updates to indicate that the external connection has been successfully authorized and is ready for use.
{ "external_connector_api_name": "ec__com_xxx", "connection_status": "connected" }
What is a JWT Token?
The JWT Token is a JSON Web Token (JWT) generated by Zoho. Its purpose is to help your application identify who is authorizing the connection and from which organization.
A JWT always has three parts, separated by a dot (.) as defined in RFC 7519 – JSON Web Token:
header.payload.signatureeyJ0eXAiOiJKV1QiLCJhbGciOiJIUzI1NiJ9.eyJvcmdhbml6YXRpb25faWQiOiIxMjM0NTYiLCJvcmdhbml6YXRpb25fbmFtZSI6IlhYWFhYWFgiLCJ1c2VyX2lkIjoiMTIzNDU2IiwiZXhwIjoxMjM0NTY3ODkxMDExfQ.qp8FJc2V3aH2Qx0kJwGm3S1E9XbY0ZLrDk5pH2s9YxAHeader Describes the token type and the algorithm used to sign it.
{
  "typ": "JWT",
  "alg": "HS256"
}
Payload Contains the information required to identify the installation context.
{
  "user_id": "123456",
  "organization_id": "123456",
  "organization_name": "Zylker",
  "exp": 1234567891011
}
From this payload, your application can clearly identify:
| Term | Description |
|---|---|
| user_id | Unique identifier of the Zoho user who approved the connection. |
| organization_id | Unique identifier of the Zoho organization that authorized the connection. |
| organization_name | Name of the Zoho organization. |
| exp | Expiration time of the JWT (One hour from the current time in milliseconds) |
Signature Ensures the token has not been tampered with. This is verified using Zoho’s signing mechanism.
JWT Token to Be Generated by the Third-Party
After receiving consent to access the user’s data, the third-party application must generate a signed JWT token using the extension’s Secret Key. The payload should include:
const payload = {
user_id: USER_ID,
organization_id: ORG_ID,
organization_name: ORG_NA ME,
jti: 'pu_com_xxxx'
exp: Date.now() + 3600000
};
From this payload, the platform can clearly identify:
| Term | Description |
|---|---|
| user_id | Unique identifier of the user authorizing the connection. |
| organization_id | Unique identifier of the organization. |
| organization_name | Name of the organization. |
| jti | The plugin handle. |
| exp | Expiration time of the JWT (One hour from the current time in milliseconds) |
Here, pu_com_xxxx represents the unique ID of the extension which is obtained from the Extension Settings page.
How Connection Revocation Works
The revocation process indicates that the token has been deleted or invalidated on the third-party application side. An extension cannot be uninstalled without first revoking the external connection.
This process is similar to the connection authorization process. When the user clicks Revoke, they will be redirected to the Revoke URL with the JWT token appended.
To mark the external connection as revoked, the third-party application should make an API call to the following endpoint using the same method and headers as in the connection flow:
https://books.zoho.com/api/v3/settings/externalconnections/${ecId}?action=mark_as_revoked&organization_id=${req.body.orgId}
The X-Zoho-Signature header should contain the JWT token created as described in the previous steps. This token is used to verify and authorize the external connection.
headers: { 'X-Zoho-Signature': JWT }
Once the API response confirms a revocation, the third-party application will send a POST message with the following details to notify the revoke status:
{
"external_connector_api_name": "ec__com_xxx",
"connection_status": "revoked"
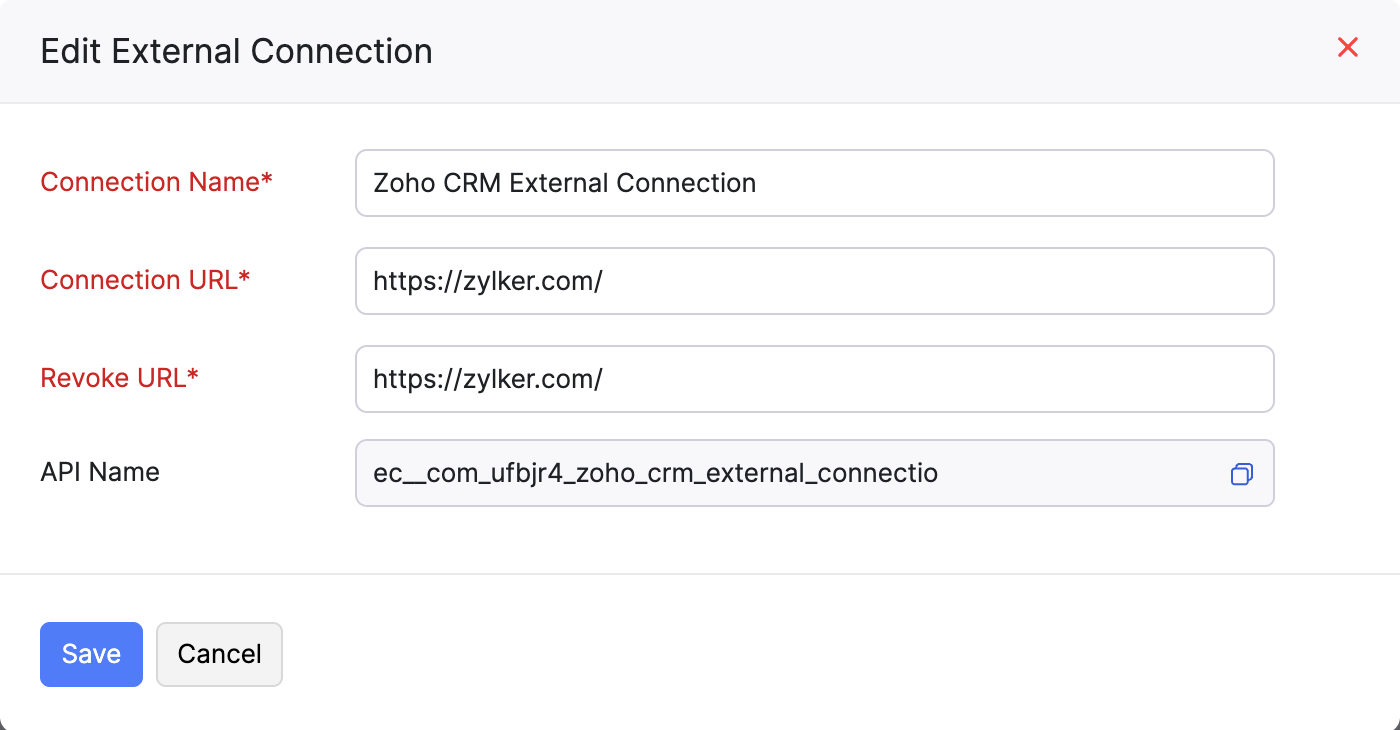
}Edit External Connections
The API name is required to form the endpoint URL for marking the external connection as connected or revoked.
You can view the API name of the connection from the Edit External Connection pop-up. You can also update the connection name, connection and revoke URLs by editing the connection. Here’s how:
- Log in to Zoho Sigma.
- Select the required workspace.
- In the All Extensions tab, hover over the required extension and click the Edit Extension icon.
- Go to the Build section at the top.
- Click Connections on the left sidebar.
- Navigate to the External Connections tab at the top.
- Hover over the required connection, click the Dropdown icon, and select Edit.
- Make the necessary changes in the Edit External Connections pop-up.
- Click Save.
Delete External Connections
To delete an external connection:
- Log in to Zoho Sigma.
- Select the required workspace.
- In the All Extensions tab, hover over the required extension and click the Edit Extension icon.
- Go to the Build section at the top.
- Click Connections on the left sidebar.
- Navigate to the External Connections tab at the top.
- Hover over the required connection, click the Dropdown icon, and select Delete.

- Click Yes in the pop-up to confirm your action.
 Yes
No
Yes
No
Thank you for your feedback!