Other Actions for Customers
Let us have a look at the various actions that can be performed in the Customers/Vendors module in Zoho Billing.
Edit Customers
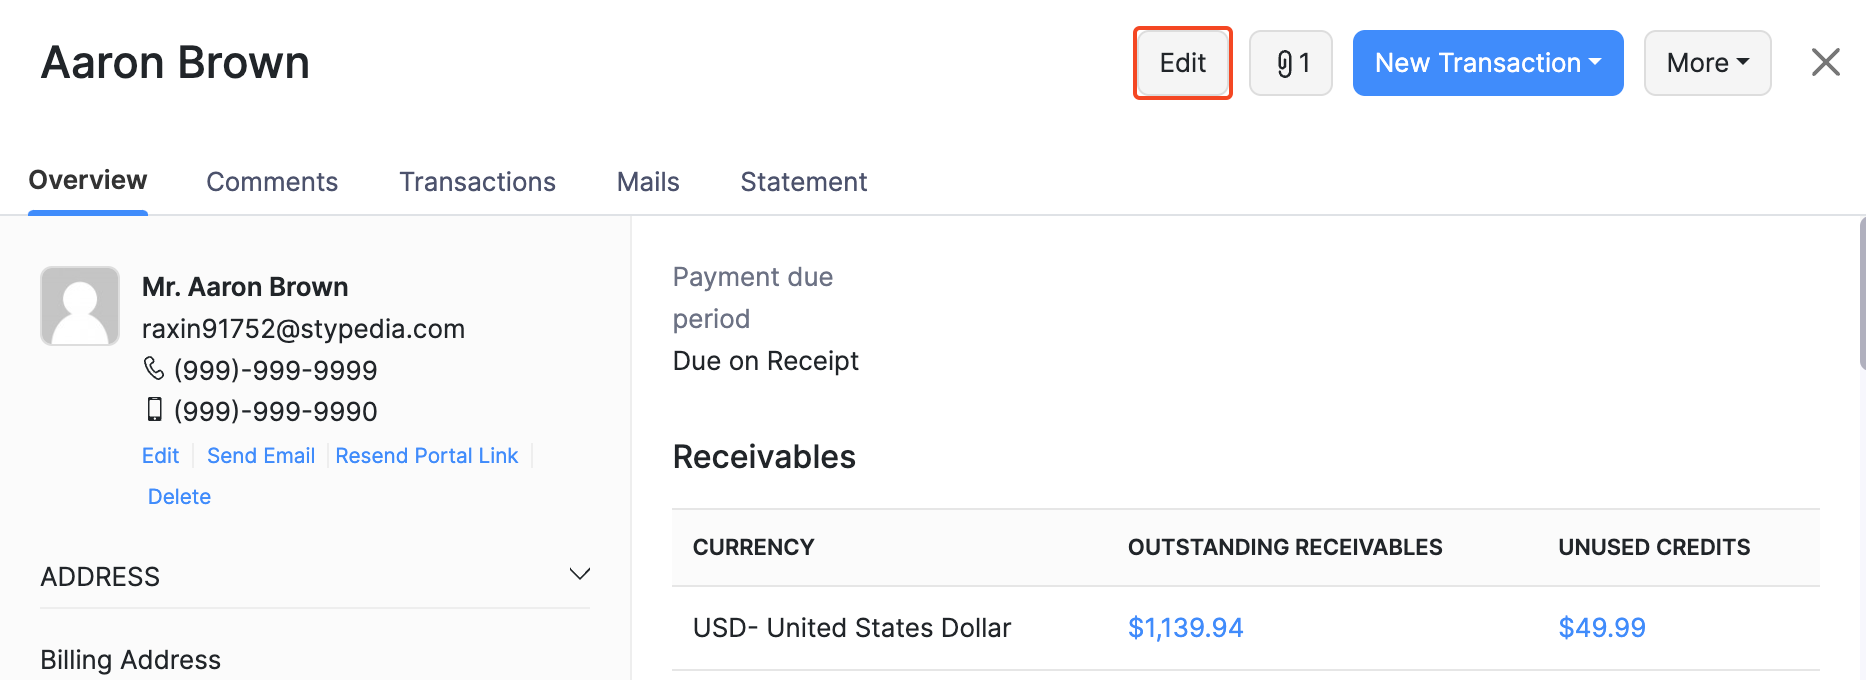
To change the details of any customer that you have created:
Go to Customers and select a customer to edit.
Click the Edit button on the right side of the page.
Make the necessary changes.
Click Save.
Filter Customers
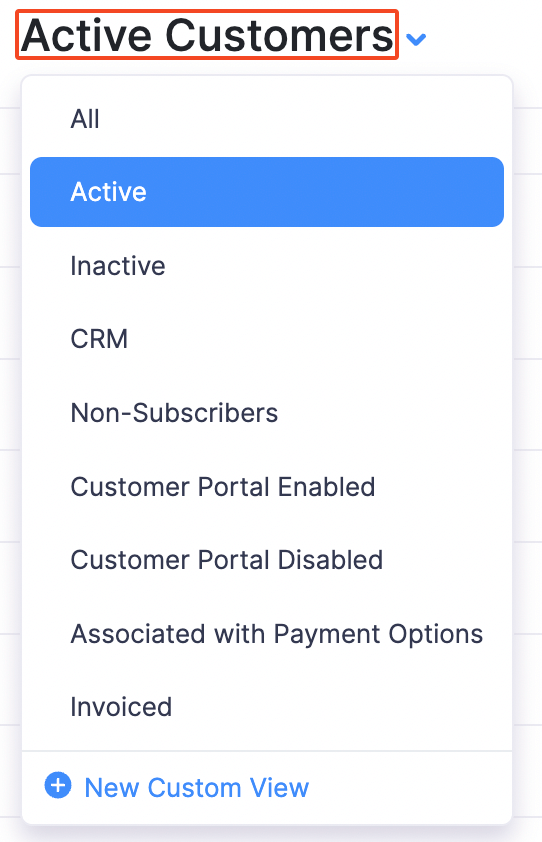
Your customers can be sorted on the basis of their type. To filter your customers:
- Go to Customers.
- Click the All Customers dropdown on top of the page.
- Select the filter.
Custom Filters
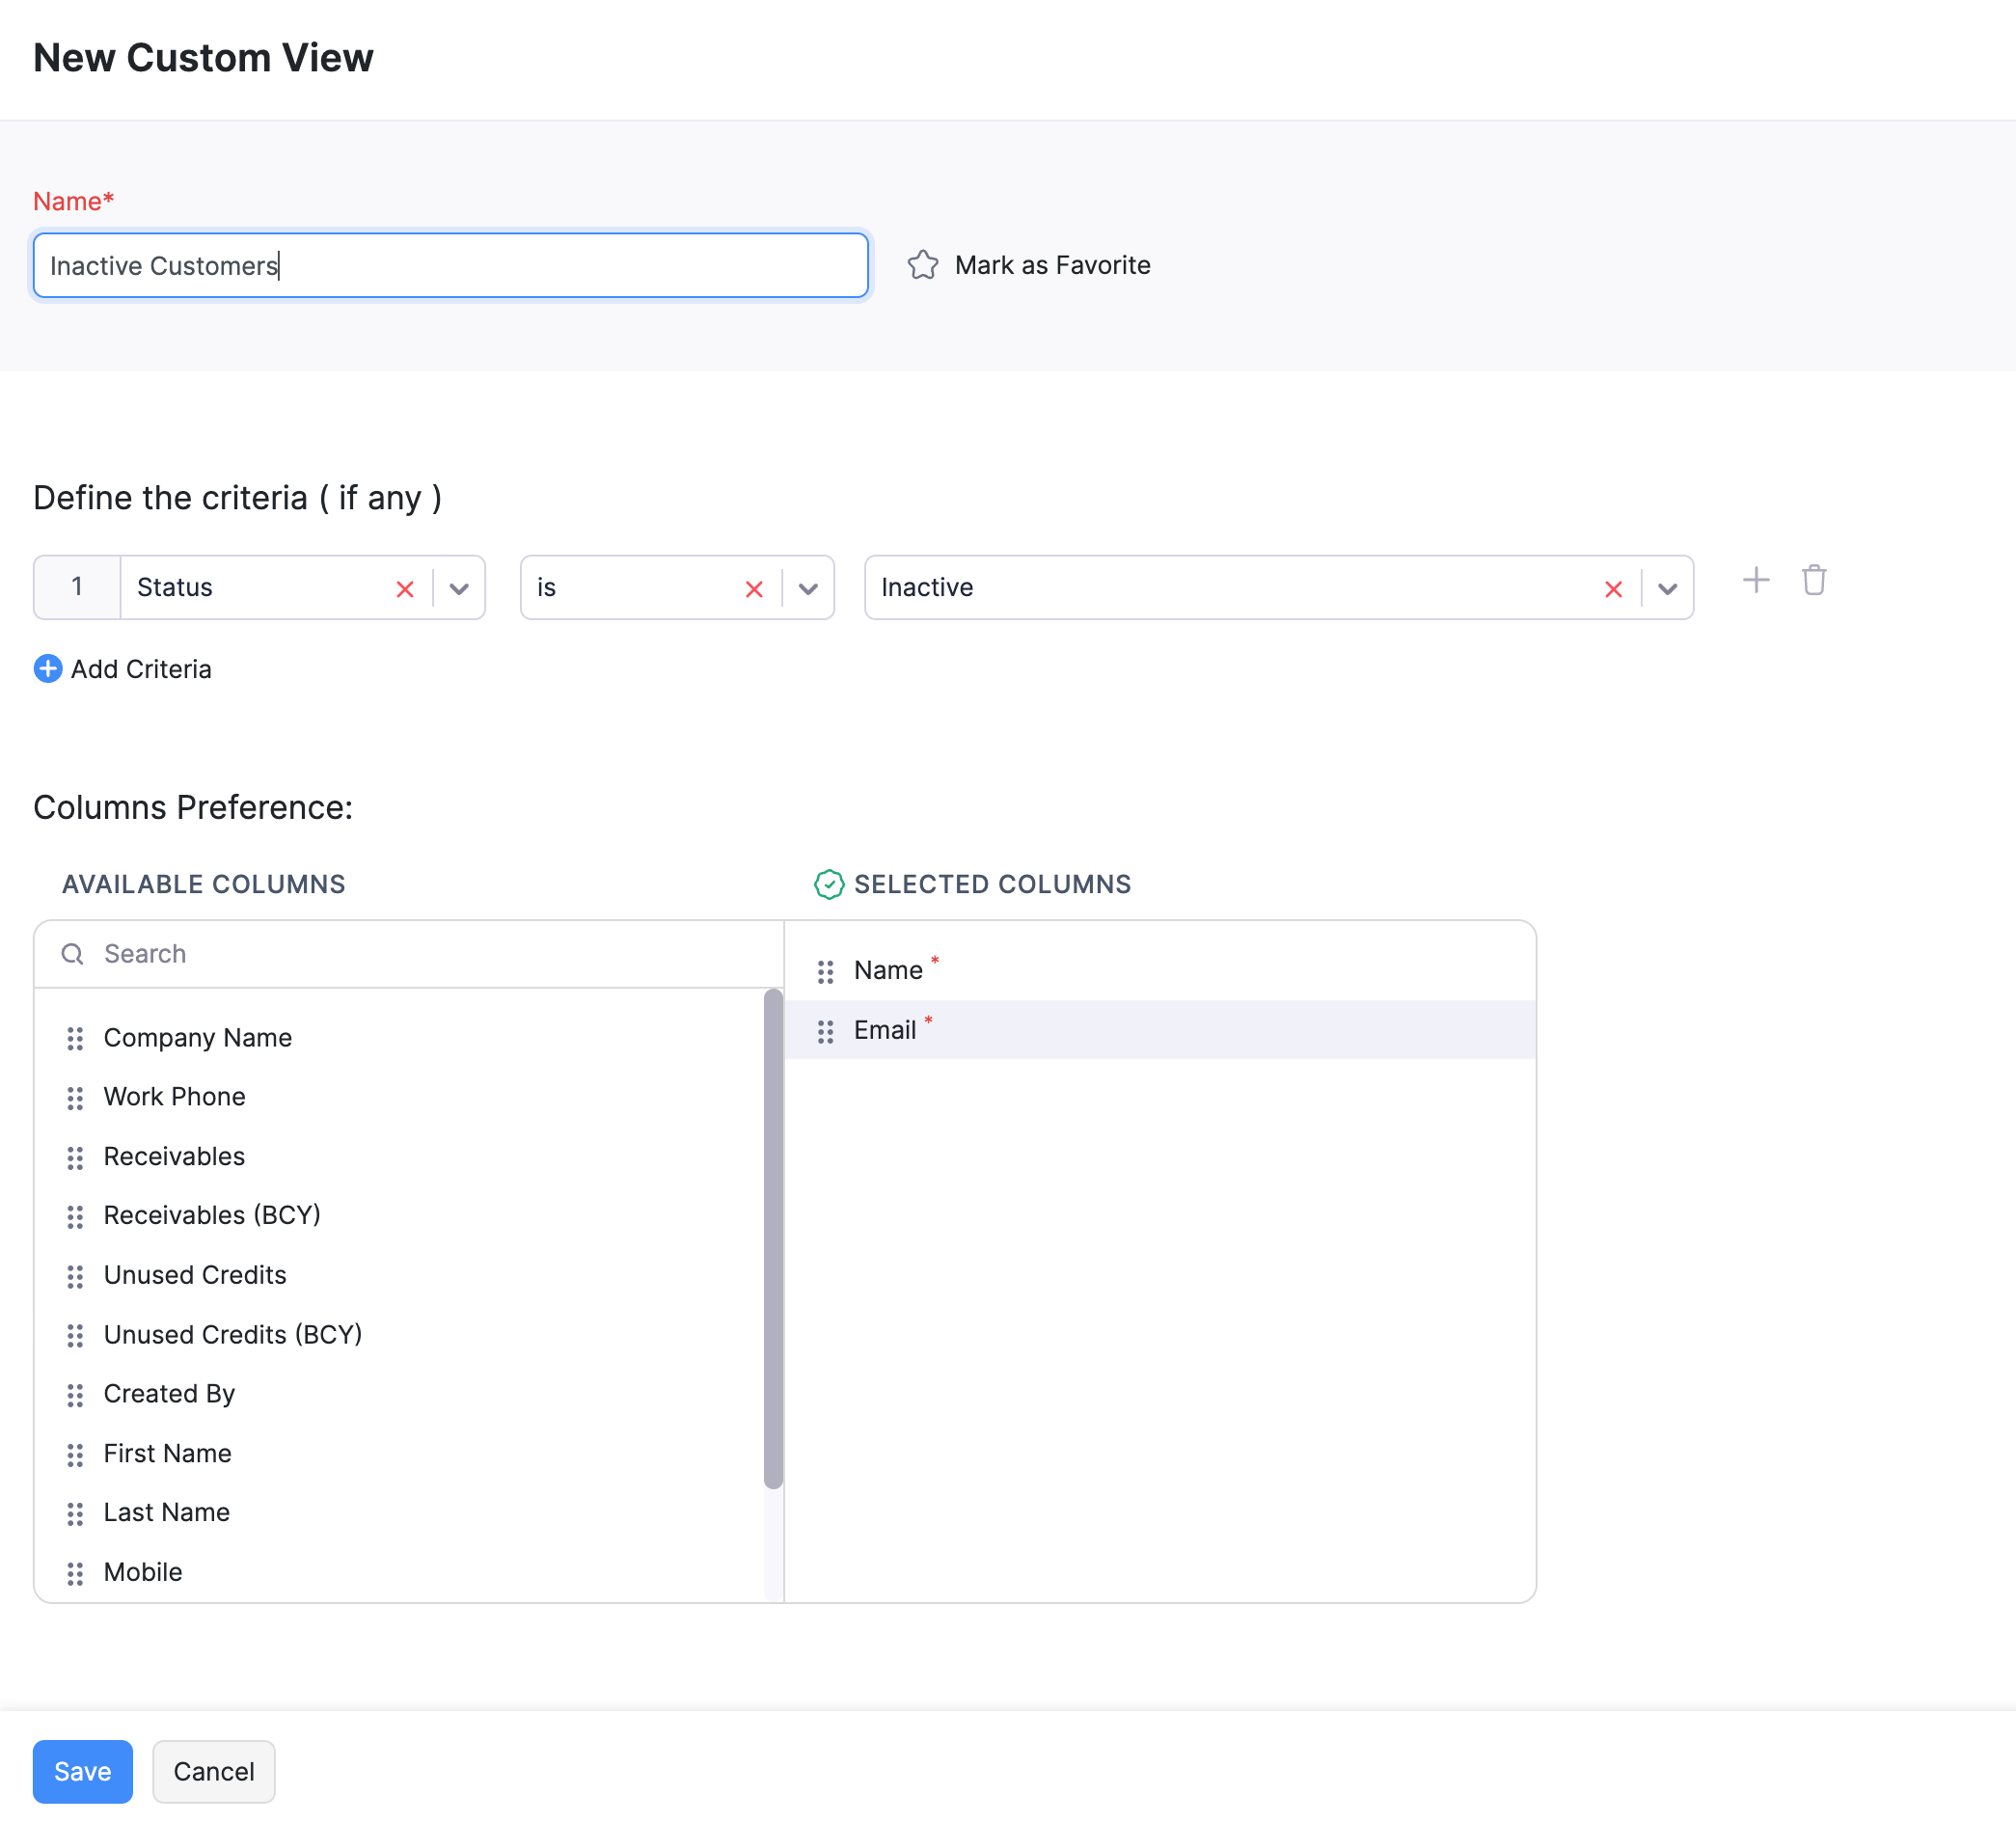
If any of the filters that you are looking for is not present in the default list of customers, you can create a custom filter based on your preference. For example, you may want to filter customers based on their company name. In such cases, you can use custom filters. Here’s how:
Go to Customers.
Click the All Customers drop-down on top of the page.
Select + New Custom View.
Fill in the necessary fields and click Save.
Multiple Addresses for Customers
Does your customer have multiple addresses? By default, a customer can have two addresses in Zoho Billing, i.e. the billing and shipping address. However, you can add more. Here’s how:
Go to Customers.
Select the customer for whom you want to add an additional address.
Click Add Additional Address in the right side of the page.
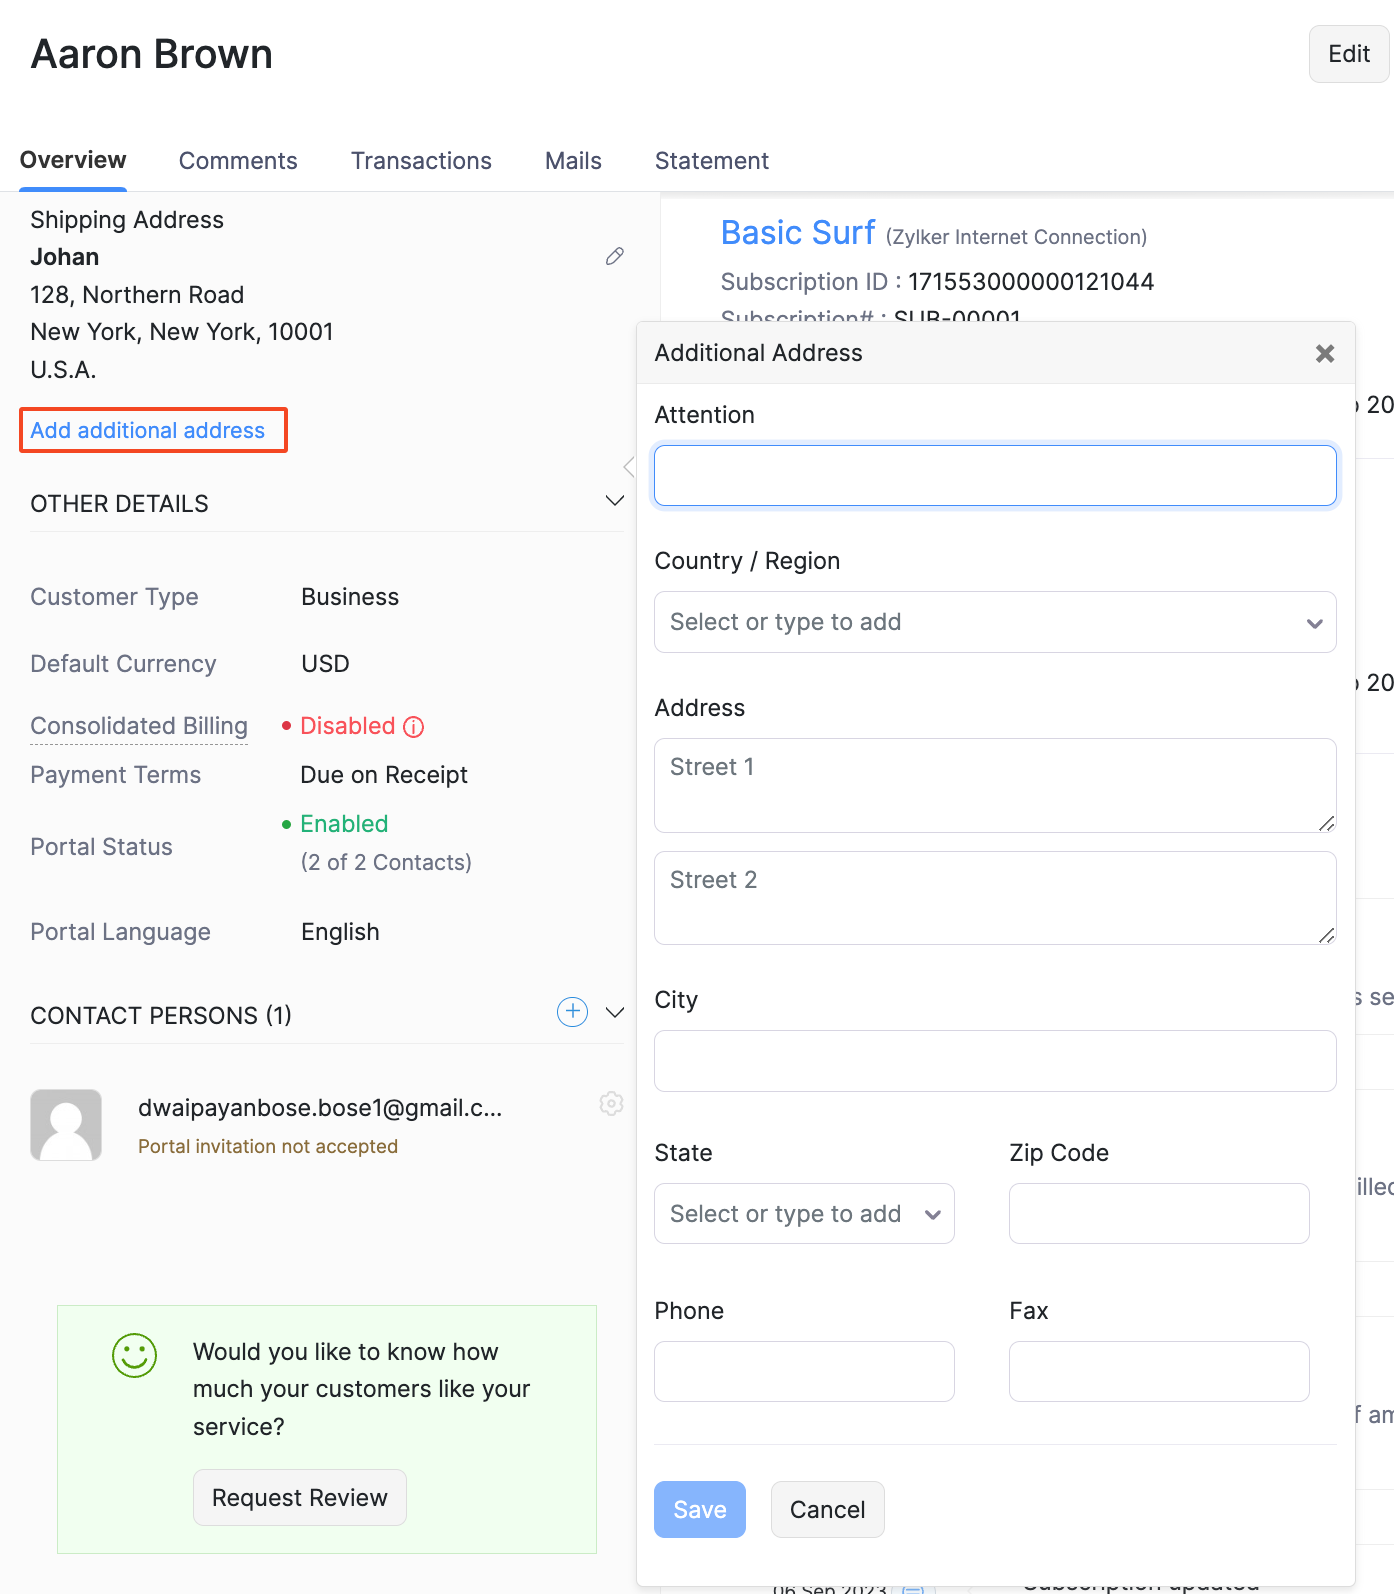
Fill in the additional address.
Click Save.
You can choose to display the additional addresses of your customers in the transactions that you create for them.
Merge Customers
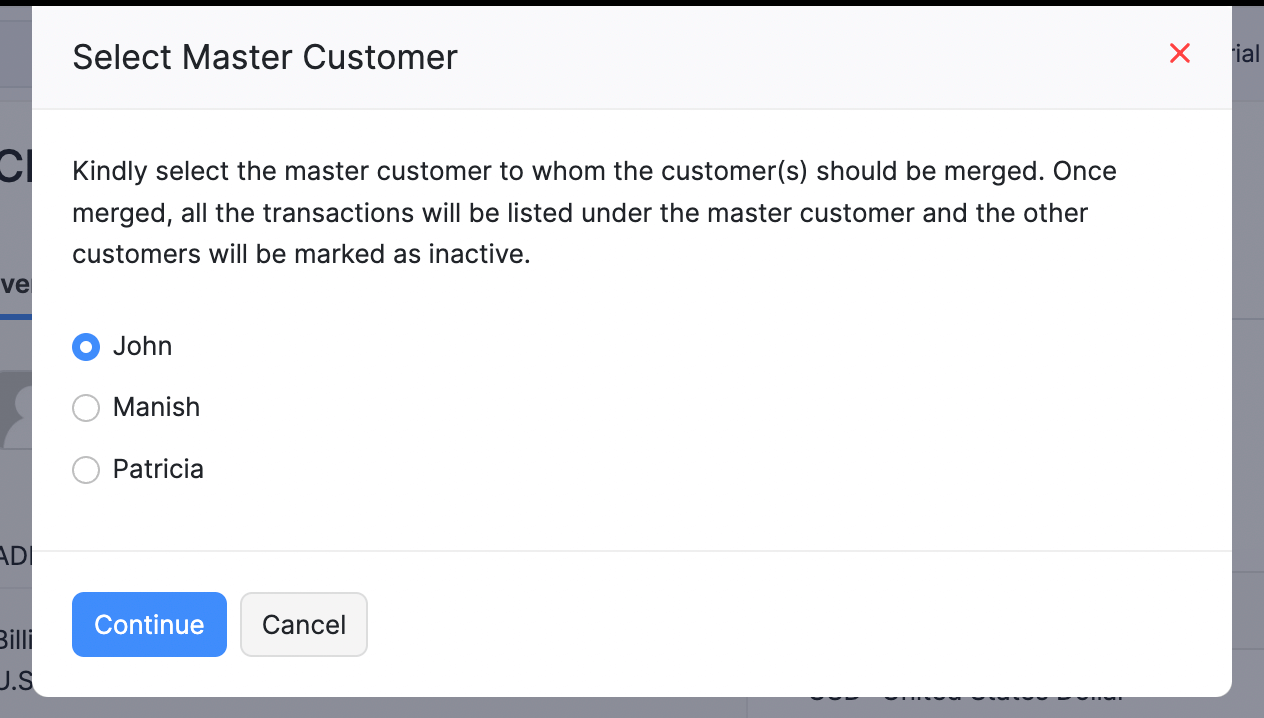
Sometimes, you would want to merge customers when you have multiple customers with the same name. Here’s how you can do it:
Go to Customers and select the customers you want to merge.
Click the More icon and select Merge Customers.
Select the primary or master customer and click Continue.
Click Confirm.
Recent Activities
You can view all the recent activities you have performed with your customer in Zoho Billing. Here’s how:
- Go to Customers and select the customer.
- You can view the recent activities of the customers as a timeline in the bottom right side of the page.
Mark Customers as Inactive
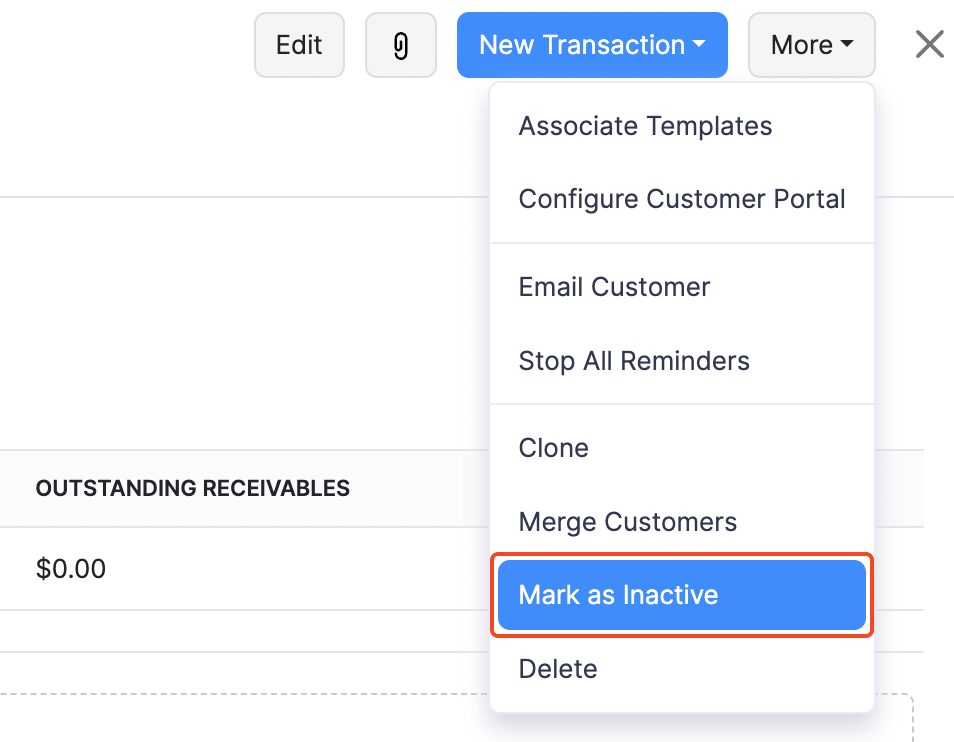
If you are no longer performing any transactions with a customer, you can mark them as inactive. Here’s how:
Go to Customers and select the customer you want to mark as inactive.
Click the More icon and select Mark as Inactive.
Attach Files to Customers
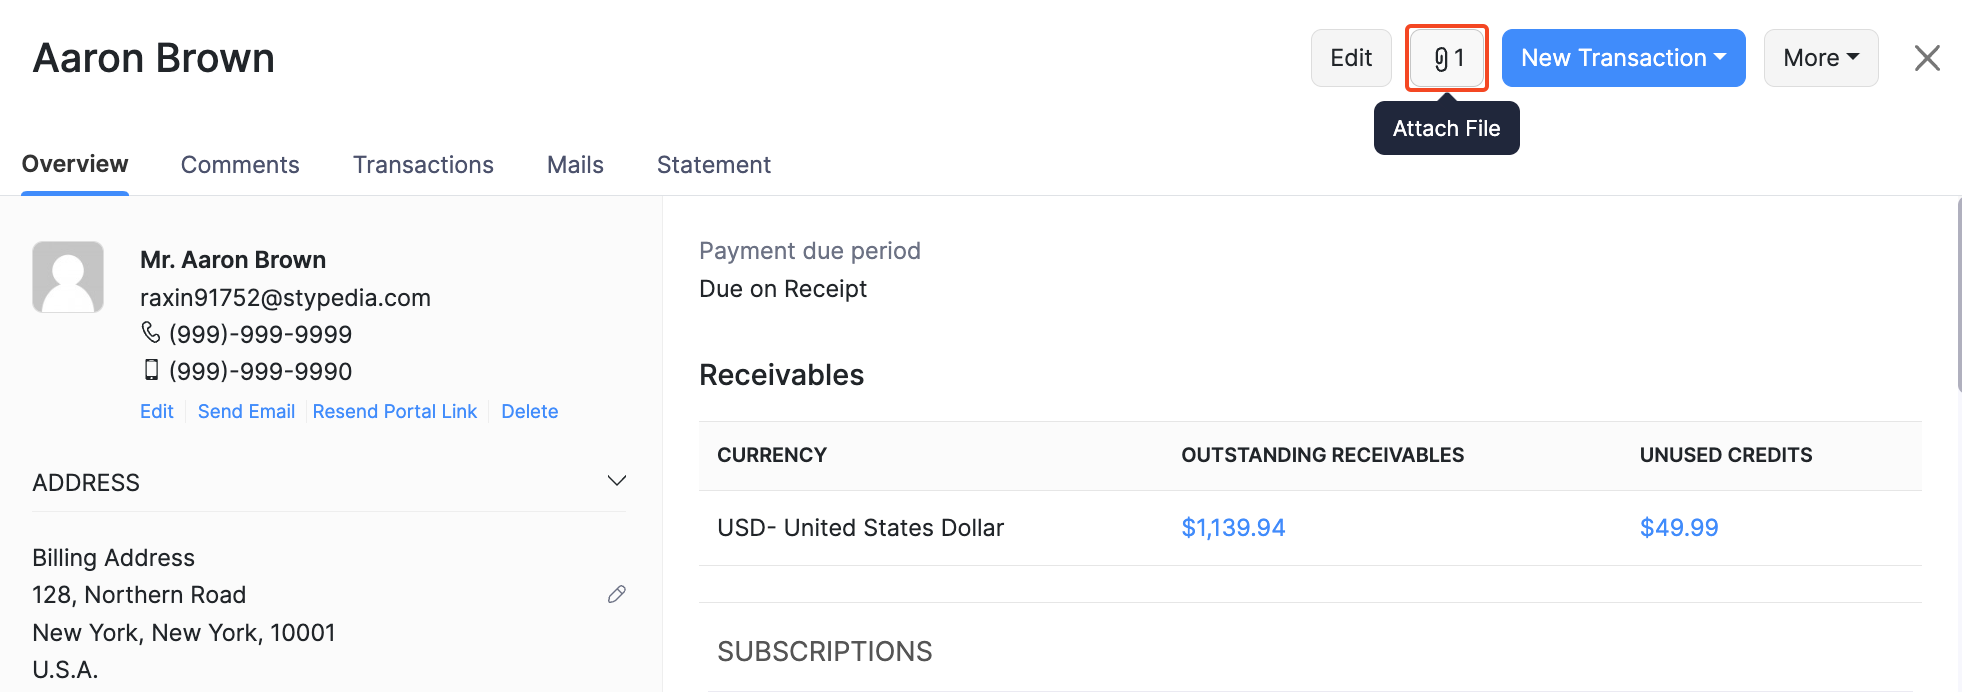
You can attach files to your customers.
- Go to Customers and select the customer.
- Click the Attach icon in the top-right side of the page.
Customer Statement
You can view your customer statement based on all the transactions that you have recorded in Zoho Billing.
- Go to Customers and select the customer.
- Click the Statement tab.
- Select the time period for which the statement is to be generated.
You can download the PDF, take a print-out or email the statement to your customer by clicking the icons on top of the statement.
- When you email your customer their customer statement, you can add a list of their unpaid invoices by checking the box Attach unpaid invoices list.
- Customer statement does not include any sales or unused credits when the transaction date is in the future or does not lie in the specified date range while generating the statement.
Stop Reminders for Customers
Go to Customers and select the customer for whom you wish to stop all the reminders.
Click the More icon and select Stop all Reminders.
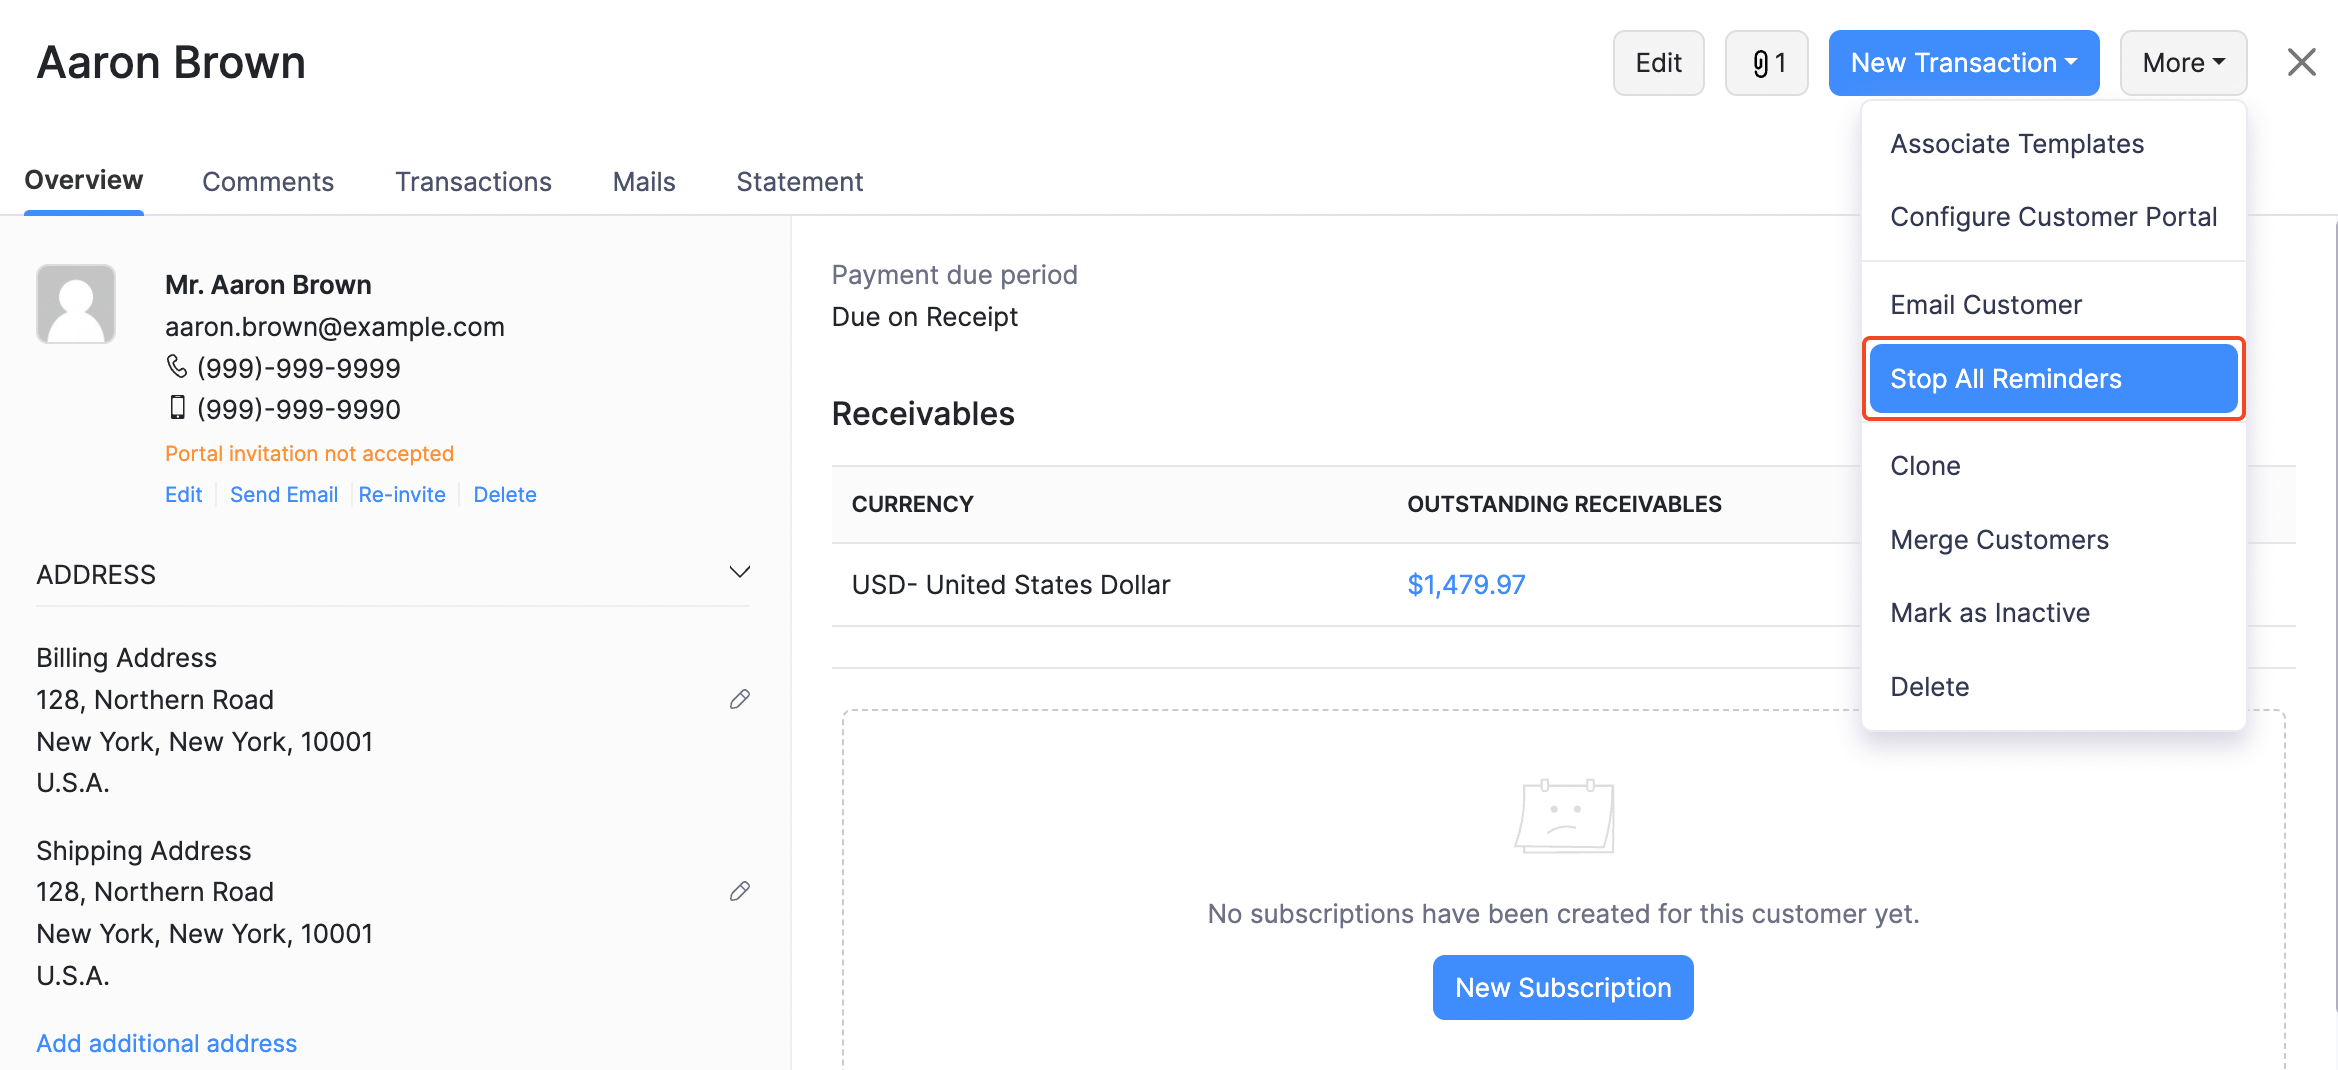
You can revert these changes by clicking the More icon and then selecting Enable all Reminders.
Customer Mails
Emails that you send to your customers will be in a specific format. To view or edit this format:
- Go to Settings.
- Select Email Notifications under Reminders & Notifications.
- Select the type of email template you want to view or edit (for example, invoice notification).
- Click Show Mail Content in the bottom of the default template.
- Make the necessary changes and click Save.
View all the mail activity between you and your customer.
Go to Customers and select the customer.
Click the Mails tab on the right side of the page.

Customer Comments
You can add comments for your customers for your personal reference. Here’s how:
- Go to Customers and select the customer for whom you want to add the comments.
- Click the Comments tab on the right side of the page.
- Enter a comment and click Add Comment. Comments that you add for your customers will not be shown to them.

Bulk Actions
You can perform bulk actions in the Customers module. Some of them include:
- Mark as Inactive
- Delete
- Print Customer Statement
- Send Customer Statement
- Merge
To perform bulk actions on multiple customers:
- Go to Customers.
- Select the customers on whom you want to perform the bulk action.
- Click the desired action on top of the page.
Delete Customers
If you are temporarily not transacting with any customer, you can mark them as inactive.
However, if you still want to delete the customer, you will have to delete all the sales transactions that you created for them.
To view the sales transactions of your customer:
- Go to Customers and select the customer.
- Select the Sales tab to the right side of the page.
After you’ve deleted the transactions of the customer, you can delete the customer. Here’s how:
- Go to Customers and select the customer you wish to delete.
- Click the More icon and select Delete.
- Click Delete again to confirm.
To delete multiple customers at once:
- Go to Customers and check the boxes next to the customers you wish to delete.
- Click the More icon and select Delete.
- Select Delete to confirm.
Export Customers
You can export all the customers and contact persons that you’ve added in Zoho Billing to your system in the CSV or the XLS format. Here’s how:
Go to Customers.
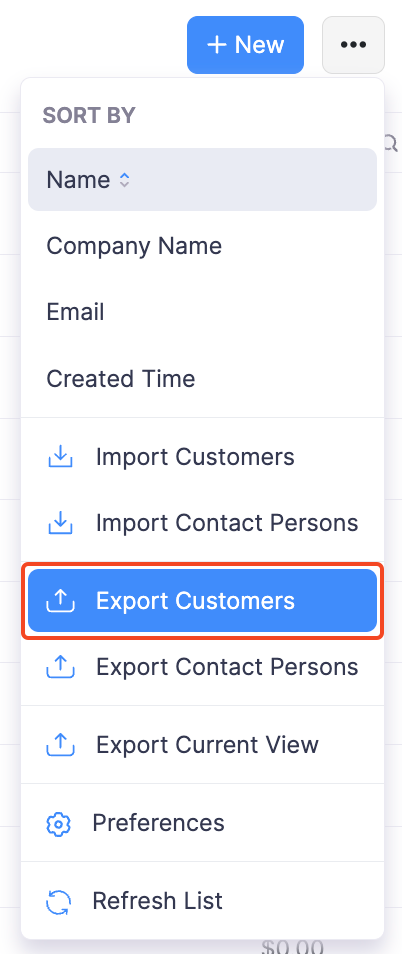
Click the More icon on the right side of the page.
Select Export Customers.
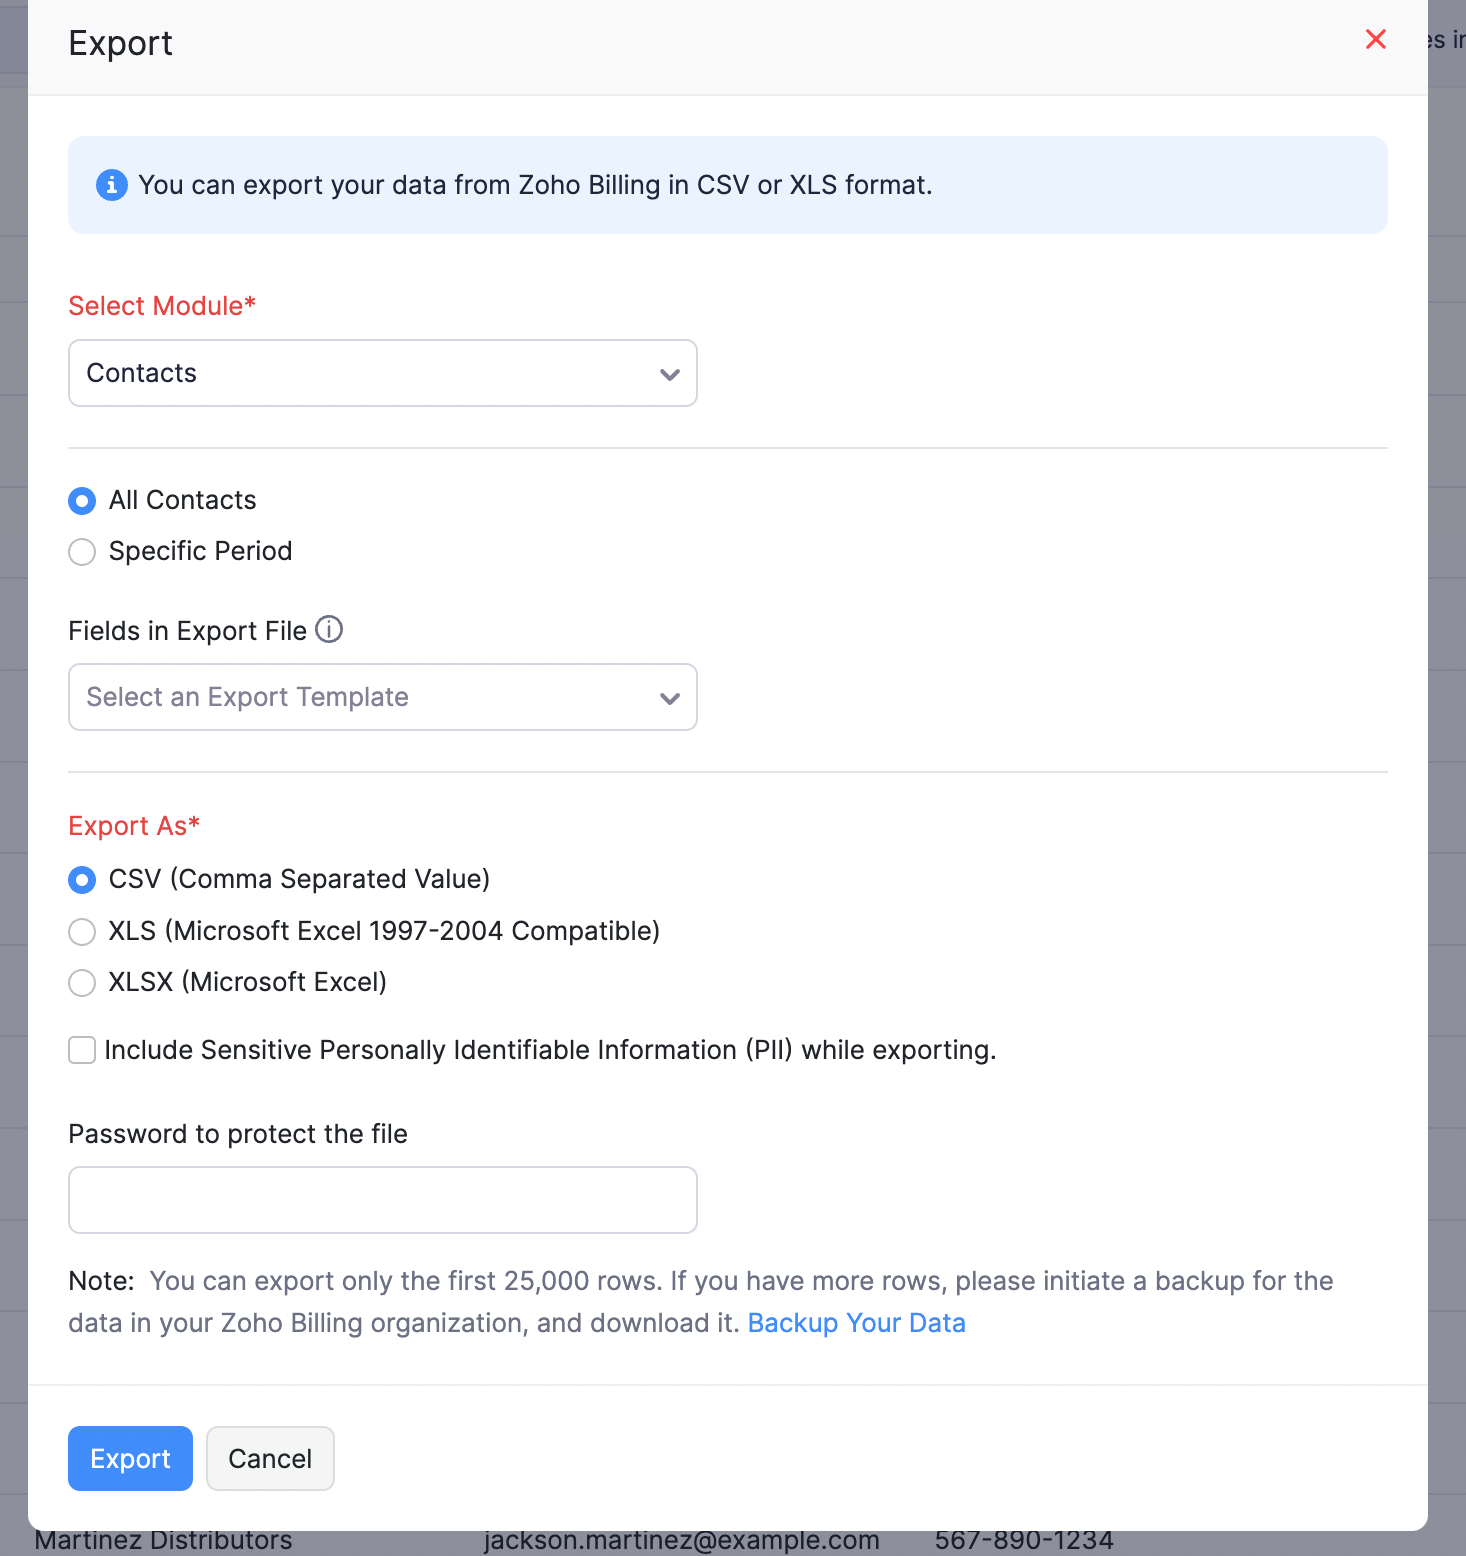
Select the module to export, i.e. Customers.
Choose if you want to export the Customers, Customer’s Contact Persons, or the Customer’s Addresses.
Choose if you want to export All Customers, or the customers during a Specific Period.
Select the export file format under the Export As field.
To export any Personally Identifiable Information (PII), mark Include Sensitive Personally Identifiable Information (PII) while exporting.
Enter a Password if you would like to secure your export file.
Click Export.
Edit Customers
To change the details of any customer that you have created:
- Go to Customers and select a customer to edit.
- Click Edit.
- Make the necessary changes.
- Click Save.
Filter Customers
Your customers can be sorted on the basis of their type. To filter your customers:
- Go to Customers.
- Click the All Customers dropdown.
- Select the filter.
Custom Filters
If any of the filters that you are looking for is not present in the default list of customers, you can create a custom filter based on your preference. For example, you may want to filter customers based on their company name. In such cases, you can use custom filters. Here’s how:
- Go to Customers.
- Click the All Customers dropdown.
- Select + New Custom View.
- Fill in the necessary fields and click Save.
Multiple Addresses for Customers
Does your customer have multiple addresses? By default, a customer can have two addresses in Zoho Billing, i.e. the billing and shipping address. However, you can add more. Here’s how:
- Go to Customers.
- Select the customer for whom you want to add an additional address.
- Click + New Address under Additional Address.
- Fill in the additional address.
- Click Save.
You can choose to display the additional addresses of your customers in the transactions that you create for them.
Merge Customers
Sometimes, you would want to merge customers when you have multiple customers with the same name. Here’s how you can do it:
- Go to Customers and select the customer you want to merge.
- Click the More icon and select Merge Customers.
- Select the master customer and click Continue.
- Click Confirm.
Recent Activities
To view all the recent activities you have performed with your customer in Zoho Billing:
- Go to Customers and select the customer.
- Navigate to Activity Logs tab in the Details pane.
You can view the recent activities of the customers as a timeline.
Mark Customers as Inactive
If you are no longer performing any transactions with a customer, you can mark them as inactive. Here’s how:
- Go to Customers and select the customer you want to mark as inactive.
- Click the More icon and select Mark as Inactive.
Attach Files to Customers
You can attach files to your customers.
- Go to Customers and select the customer.
- Click the Attach icon in the top-right side of the page.
Customer Statement
You can view your customer statement based on all the transactions that you have recorded in Zoho Billing.
- Go to Customers and select the customer.
- Click the Statement dropdown.
- You can choose to download the PDF, take a print-out or email the statement to your customer.
- Select the time period and filter for which the statement is to be generated.
Stop Reminders for Customers
- Go to Customers and select the customer for whom you wish to stop all the reminders.
- Click the More icon and select Stop all Reminders.
You can revert these changes by clicking the More icon and then selecting Enable all Reminders.
Customer Mails
Emails that you send to your customers will be in a specific format. To view or edit this format:
- Go to Settings.
- Select Email Notifications under Reminders & Notifications.
- Select the type of email template you want to view or edit (for example, invoice notification).
- Click Show Mail Content in the bottom of the default template.
- Make the necessary changes and click Save.
To view all the mail activity between you and your customer:
- Go to Customers and select the customer.
- Navigate to Emails tab in the Details tab.
The emails sent to your customers and received from them will be listed here.
Customer Comments
You can add comments for your customers for your personal reference. Here’s how:
- Go to Customers and select the customer for whom you want to add the comments.
- Click the Comments icon.
- Enter a comment and click Add Comment. Comments that you add for your customers will not be shown to them.
Bulk Actions
You can perform bulk actions in the Customers module. Some of them include:
- Mark as Inactive
- Delete
- Print Customer Statement
- Send Customer Statement
- Merge
To perform bulk actions on multiple customers:
- Go to Customers.
- Select the customers on whom you want to perform the bulk action.
- Click the desired action on top of the page.
Delete Customers
If you are temporarily not transacting with any customer, you can mark them as inactive.
However, if you still want to delete the customer, you will have to delete all the sales transactions that you created for them. After you’ve deleted the transactions of the customer, you can delete the customer. Here’s how:
- Go to Customers and select the customer you wish to delete.
- Click the More icon and select Delete.
- Click Delete again to confirm.
To delete multiple customers at once:
- Go to Customers and mark the customers you want to delete.
- Click the More icon and select Delete.
- Select Delete to confirm.
Export Customers
You can export all the customers and contact persons that you’ve added in Zoho Billing to your system in the CSV or the XLS format. Here’s how:
- Go to Customers.
- Click the More Actions icon.
- Select Export Customers.
- Choose if you want to export the Customers, Customer’s Contact Persons, or the Customer’s Addresses.
- Choose if you want to export All Customers, or the customers during a Specific Period.
- Select the export file format under the Export As field.
- To export any Personally Identifiable Information (PII), mark Include Sensitive Personally Identifiable Information (PII) while exporting.
- Enter a Password if you would like to secure your export file.
- Click Export.


 Yes
Yes