
Back

How to import item adjustments in Zoho Inventory?
You can import bulk data from your hard-drive into the item adjustments modules within Zoho Inventory. This saves you a lot of time from manual entry.
The import process involves three phases:
- Phase 1 - Uploading the import file
- Phase 2 - Mapping import fields
- Phase 3 - Preview before completion
Phase 1 - Uploading the import file
- Login to your Zoho Inventory account.
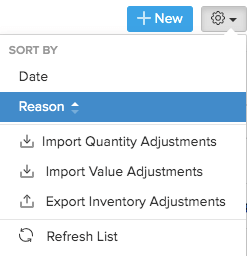
- Navigate to Items > Inventory Adjustments module on the side bar.
- Click the
 drop down.
 - Choose the type of adjustment you want to import.
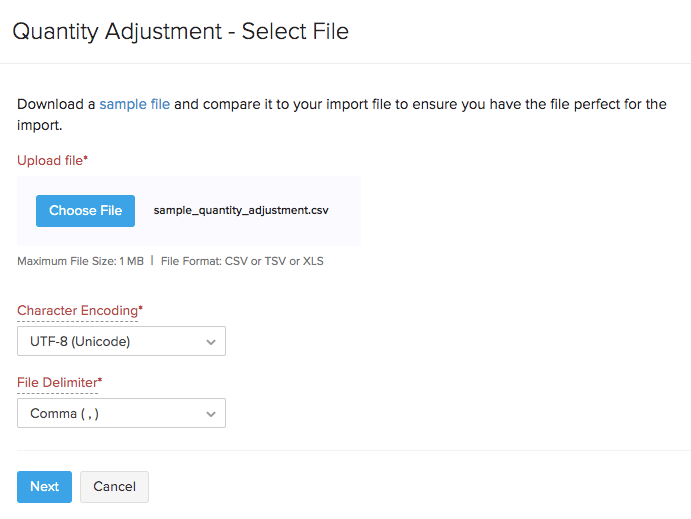
- Upload the relevant .csv or .tsv type file from your hard-drive.
Note: You can download and refer the sample file from this page for your reference to prepare the data on your import file.
- Choose the character encoding involved from the dropdown. By default, the character encoding is UTF-8(Unicode).
- Choose the File Delimiter(comma or semicolon). By default it will be comma for a .csv type file.
- Click Next to proceed to mapping the fields.
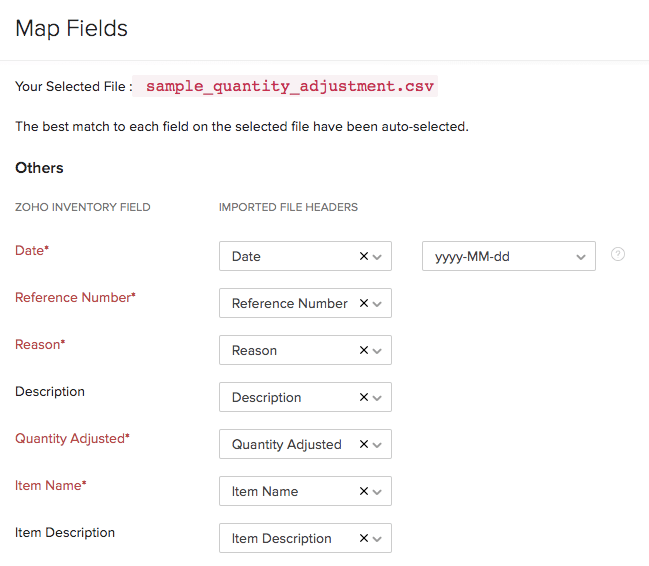
Phase 2 - Mapping import fields
- Zoho Inventory will automatically match the similar fields and map them. You can manually match the unmapped ones or alter mapped ones.
- At the bottom, enable the option Save these selections for use during future imports to automate mapping for future item imports.
- Click the Next button to proceed.
Phase 3 - Preview before completion
Here a synopsis of the no. of invoices ready for import, no. of skipped records and unmapped fields will be shown.
- You can make any changes by clicking the Previous button.
- If everything is ready, click Import button.
Likewise, you can swiftly upload large volume of data into the other modules in Zoho Inventory.