
User & Roles
Users
A user is someone who has access to your Zoho Books organization. An organization in Zoho Books can have multiple users.
Add User
When you create a Zoho Books account, you become the default admin of your organization. Once you are an admin, you can add multiple users with different roles to your organization. Here’s how you can do it:
Go to Settings in the top right corner of the page.
Under Organization Settings, select Users under Users & Roles.
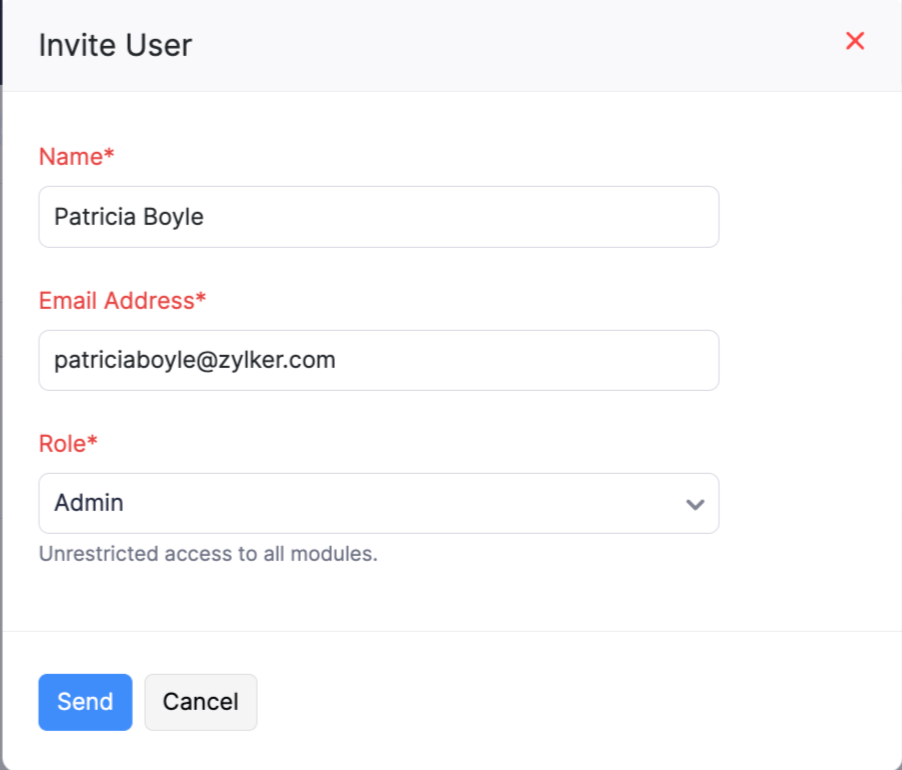
Click Invite User on the top right corner of the page.
Enter the Name and Email Address of the user you want to invite.
Select the Role for the user.
Under Restrict Access To:
- If Locations is enabled in your organization, go to the Locations tab and select the locations to assign to the user.
- If Advanced Reporting Tags is enabled in your organization, the reporting tag for which access control is enabled will appear as a tab. Select it and choose the tag options to assign to the user.
Review the selected locations and tag options in the ASSOCIATED VALUES pane on the right.
Click Save.
Once saved, an email will be sent to the new user. They need to verify the link and set a password to access your Zoho Books organization.
Users can access only the records that match all the values associated with them.
Scenario: Patricia is a user associated with the Head Office location and the Sales department. If segmented access control is configured for her role, she can access only the transactions associated with Sales department in Head Office but cannot access transactions associated with Marketing department or those from other locations.
Note:
- The records a user can access depend on the segmented access control configured at the role-level and the values associated at the user level.
- Only users with Admin access can add new users.
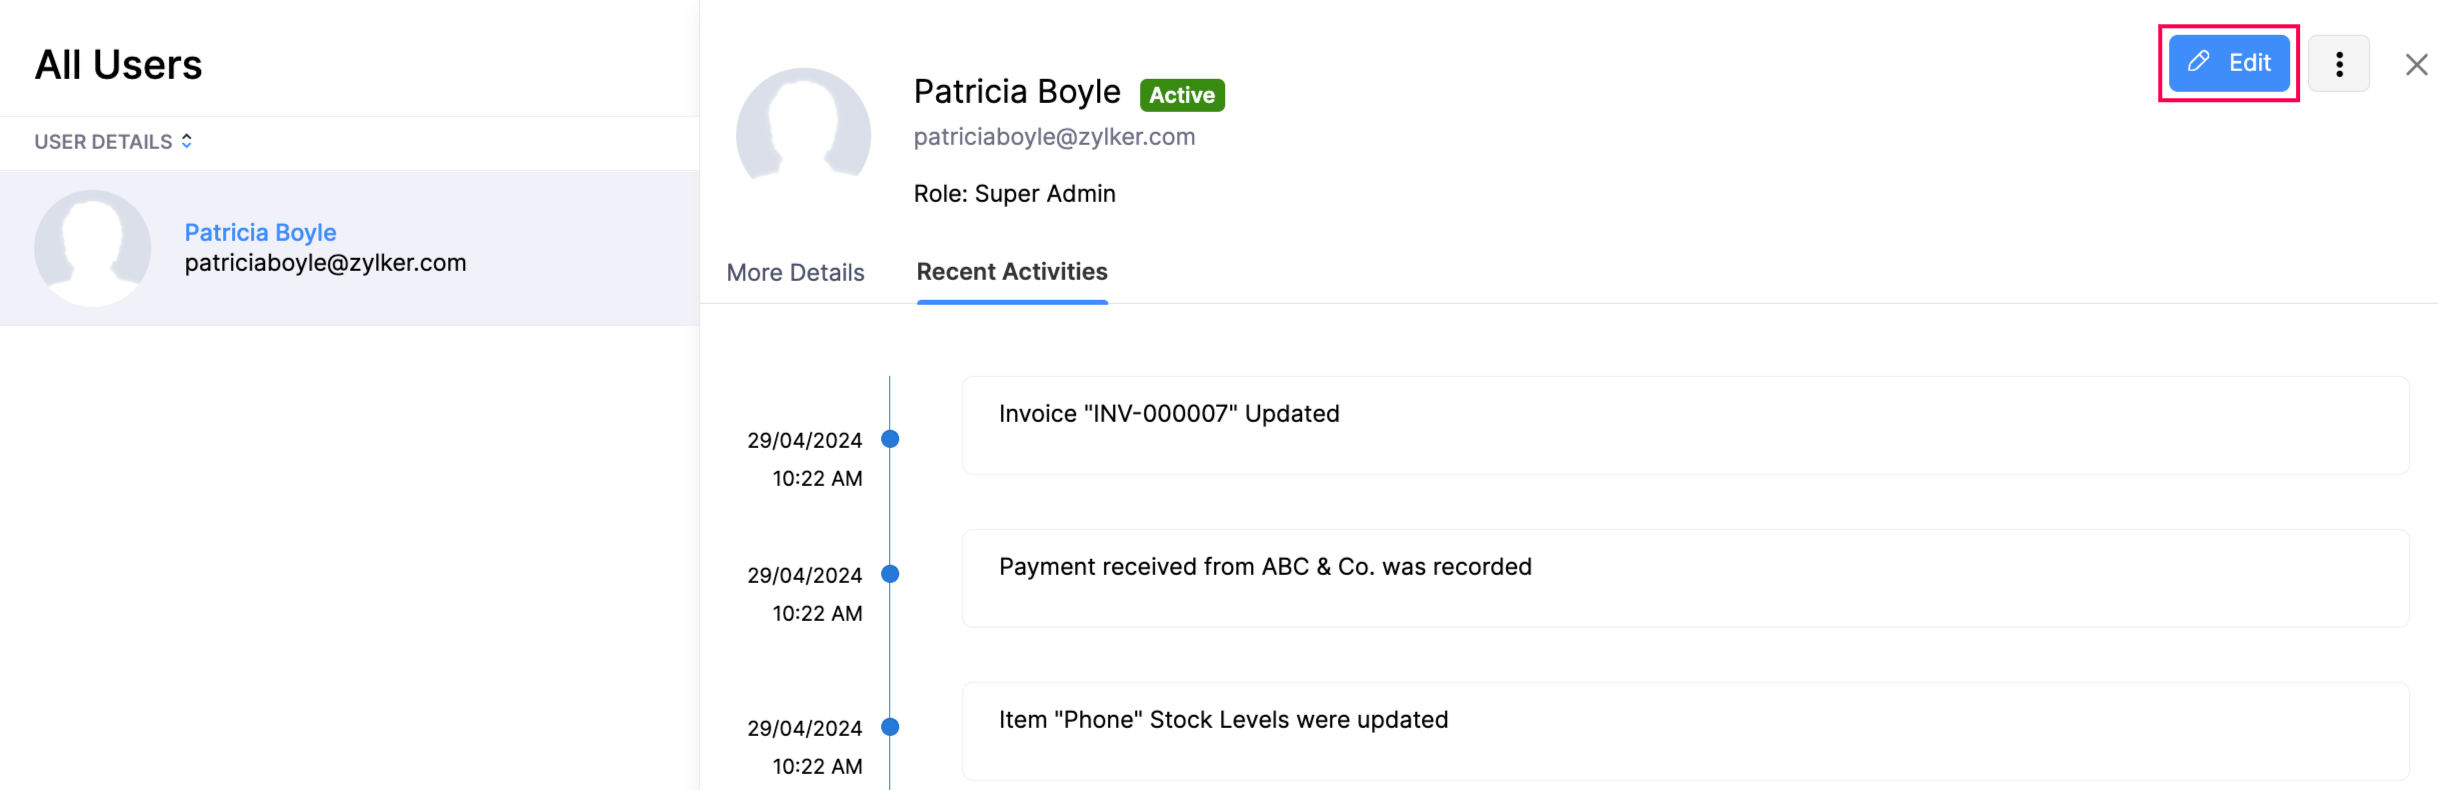
Edit User
After you have added a new user, you can edit their data if required. Here’s how:
- Go to Settings in the top right corner of the page.
- Under Organization Settings, select Users under Users & Roles.
- Click Edit.
- Make the required changes.
- Click Save.
Note: Only users with Admin access can edit user information.
Additional Fields for Users
By default, the details about a user in Zoho Books include their name and email address. If you want to add more details apart from this, you would have to create additional fields for users.
To create an additional field for users:
- Go to Settings in the top right corner of the page.
- Under Organization Settings, select User Preferences under Users & Roles.
- Select the Fields tab on top of the page.
- Click the + New Field button in the top right corner of the page.
- Enter the Label Name, select a Data Type for it, and fill in the other required details.
- If the field that you’re going to add is a Personally Identifiable Information (PII), mark it as such under Is this PII?
- Click Save.

This new field will be saved under the Fields tab. You can perform different actions on it by hovering over the field and clicking the Edit or drop-down arrow next to it.

The fields that you create under the Fields tab will be shown while adding a new user to your organization. Read our help document on Fields to know more about the different data types and how to use them.
Mark User as Inactive
Sometimes, you might want to restrict a user from accessing your organization. In such a case, you can mark a user as inactive. You can make the user active again if you wish.
To mark a user as inactive:
- Go to Settings in the top right corner of the page.
- Under Organization Settings, select Users under Users & Roles.
- Select the user you want to mark as inactive.
- Click Mark as Inactive.

Mark User as Active
In certain scenarios, there may be a need to change the status of an inactive user to active. In Zoho Books, you have the option to mark an inactive user as active.
To mark a user active:
- Go to Settings in the top right corner of the page.
- Under Organization Settings, select Users under Users & Roles.
- Select the inactive user you want to mark as active.
- Click Mark as Active.
Delete User
You can delete a user whom you no longer want to give access to your Zoho Books organization.
To delete a user:
- Go to Settings in the top right corner of the page.
- Under Organization Settings, select Users under Users & Roles.
- Select the user whom you want to delete.
- Click Delete.

The user will be deleted.
Roles
A role refers to the level of accessibility that a user can have in an organization. In Zoho Books, we have standard roles like:
Admin
An Admin in a Zoho Books organization has complete access to all modules, transactions, and settings. They can create and assign roles for other users in their organization.
Staff
The Staff role is assigned by the admin to other users who can access all modules except reports, settings, and accountant.
Timesheet Staff
The admin can assign the Timesheet Staff role to a user, who can access and log time entries within the Timesheet module.
Staff (Assigned Customers Only)
In Zoho Books, Staff (Assigned Customers Only) is a role that is given to users who are assigned to specific customers. They can access all modules, transactions, and data related to their assigned customers.
The default roles in Zoho Books cannot be edited or deleted. However, you can modify their access control. You can also create custom roles with more specific access permissions.
Custom Roles
Apart from the standard roles (such as Admin, Staff, etc.) in Zoho Books, you can add additional roles with different levels of access. These roles are called Custom Roles.
To add a custom role:
Go to Settings in the top right corner of the page.
Select Roles under Users & Roles.
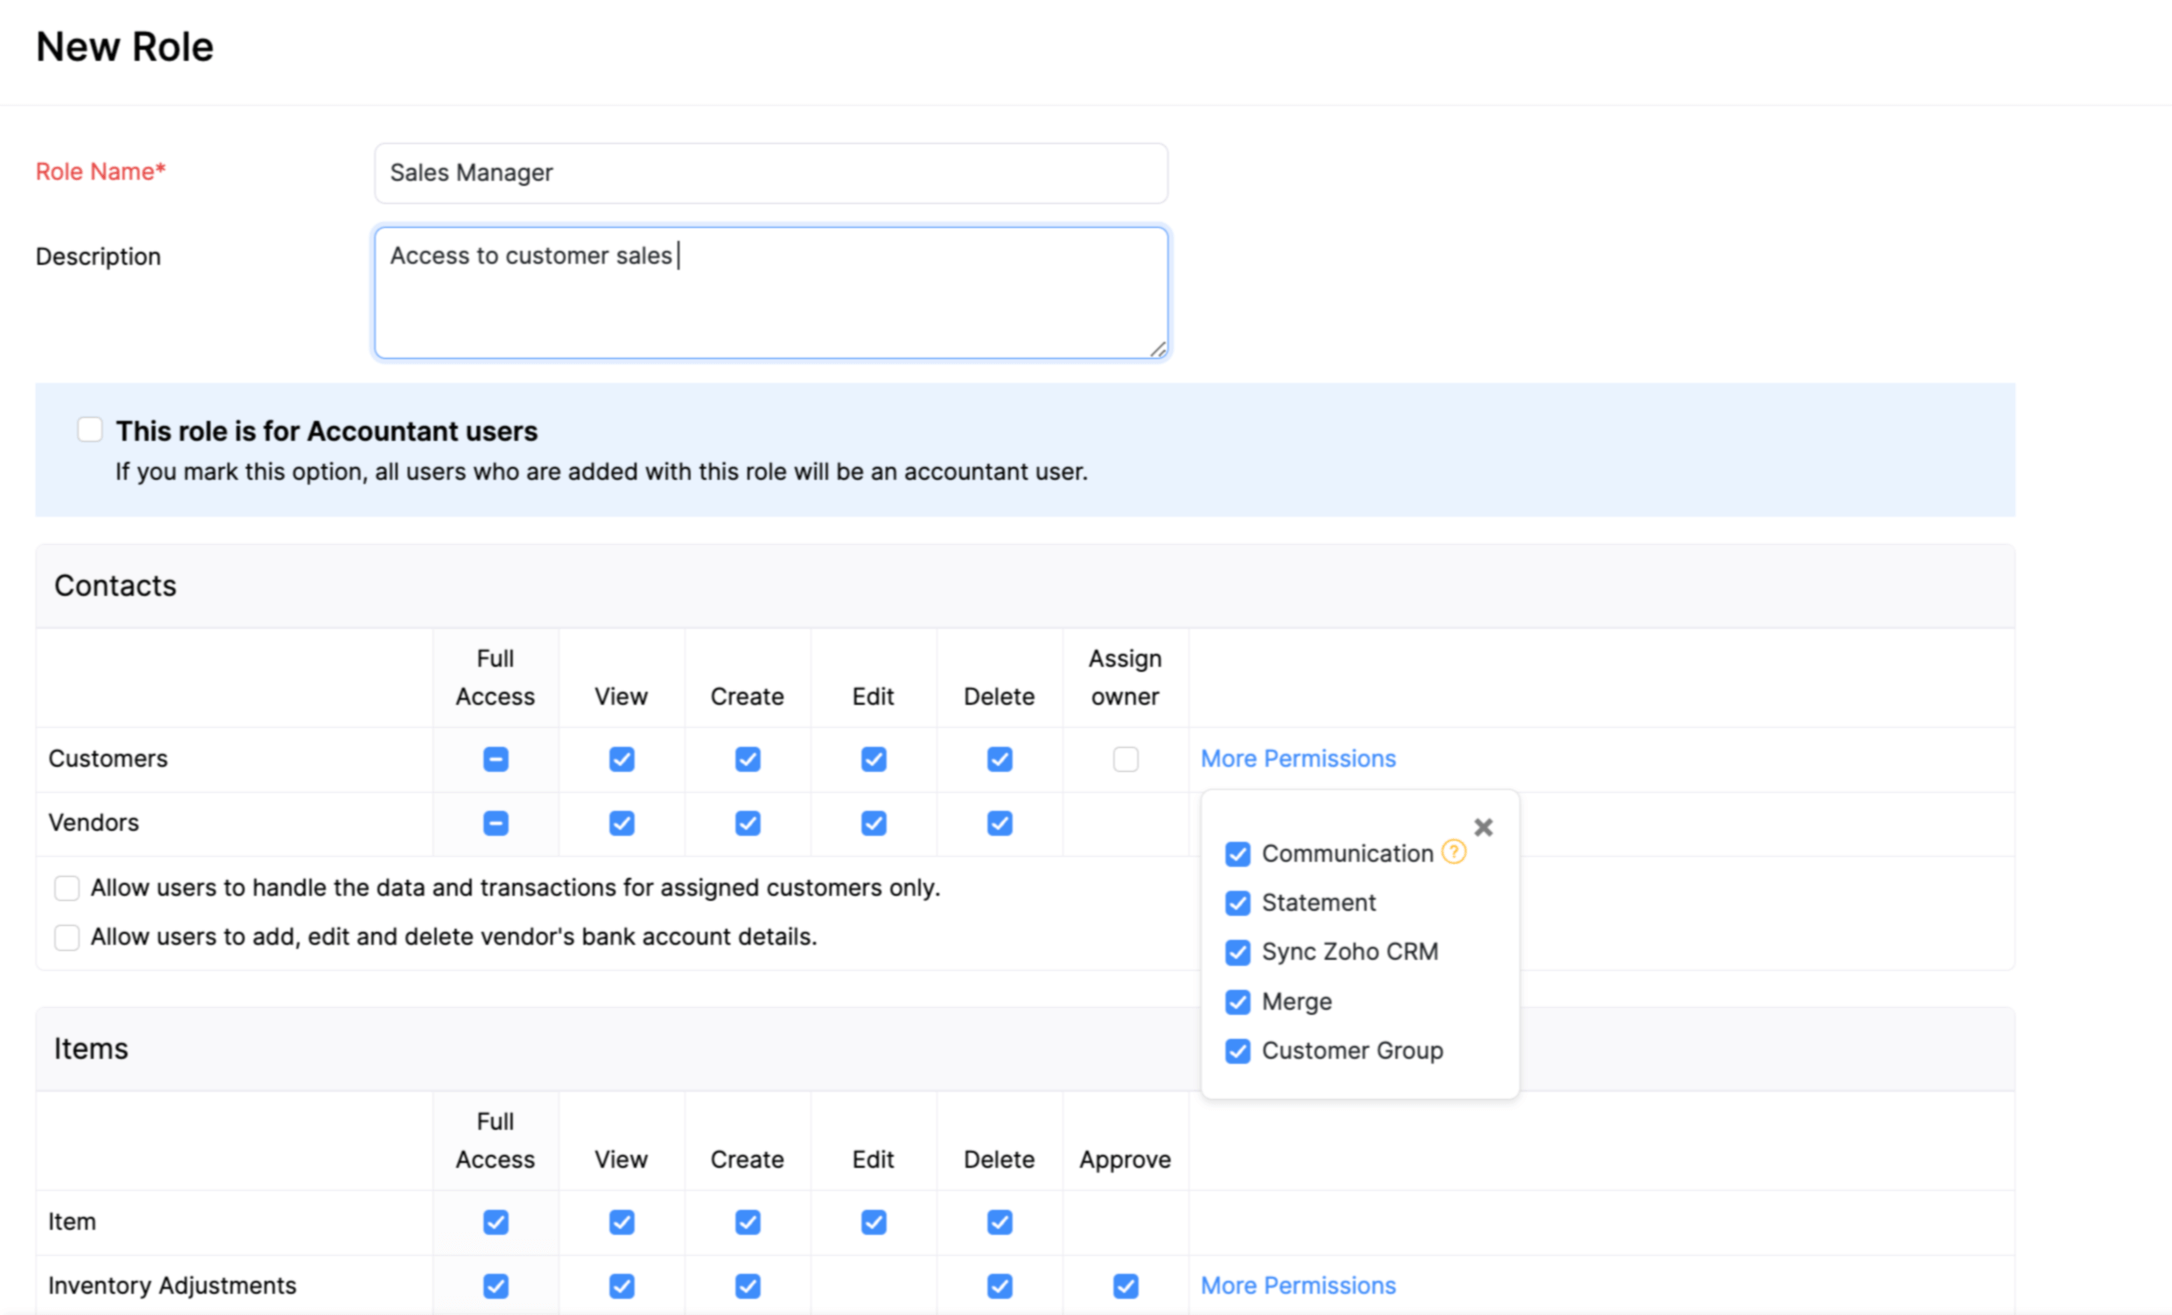
Click the New Role button in the top right corner of the page.
On the General tab, enter the Role Name.
Add a Description if required.
Select the modules and the level of access you want to provide for the role.
Click More Permissions for additional access options.
Click Proceed.
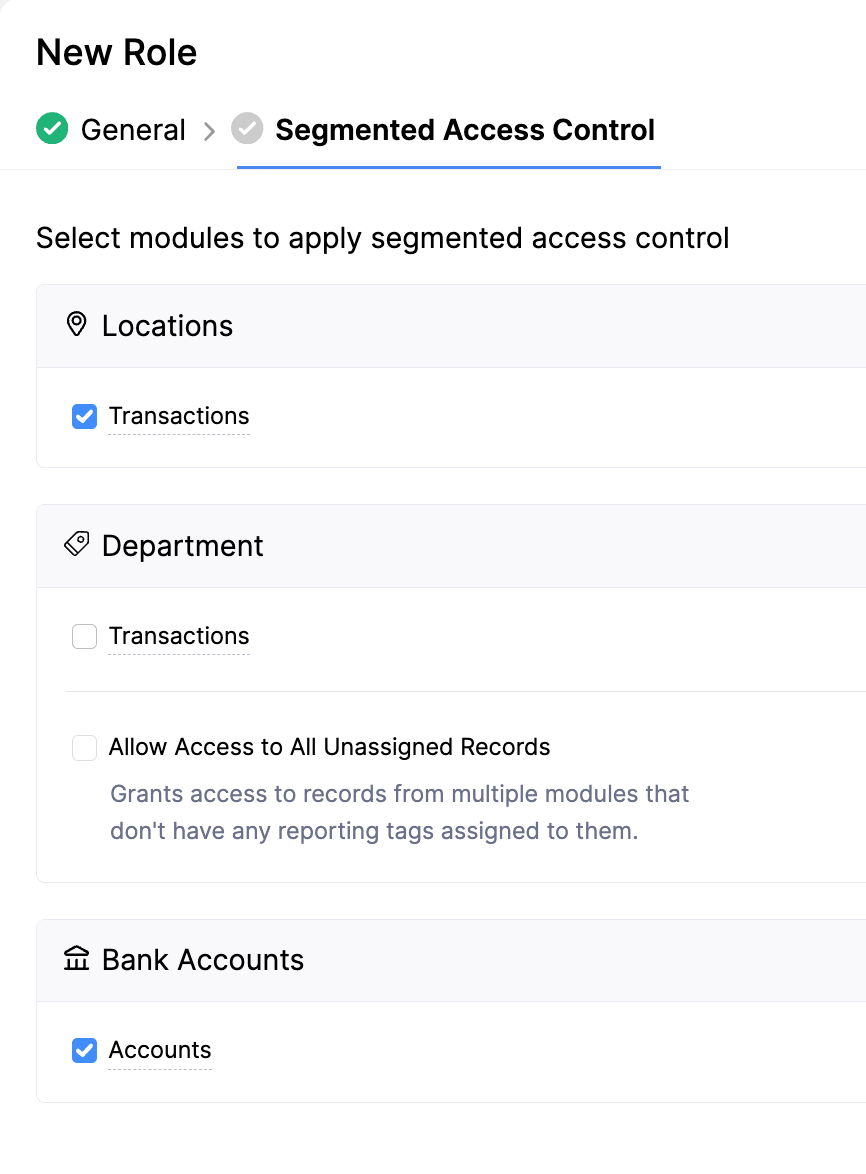
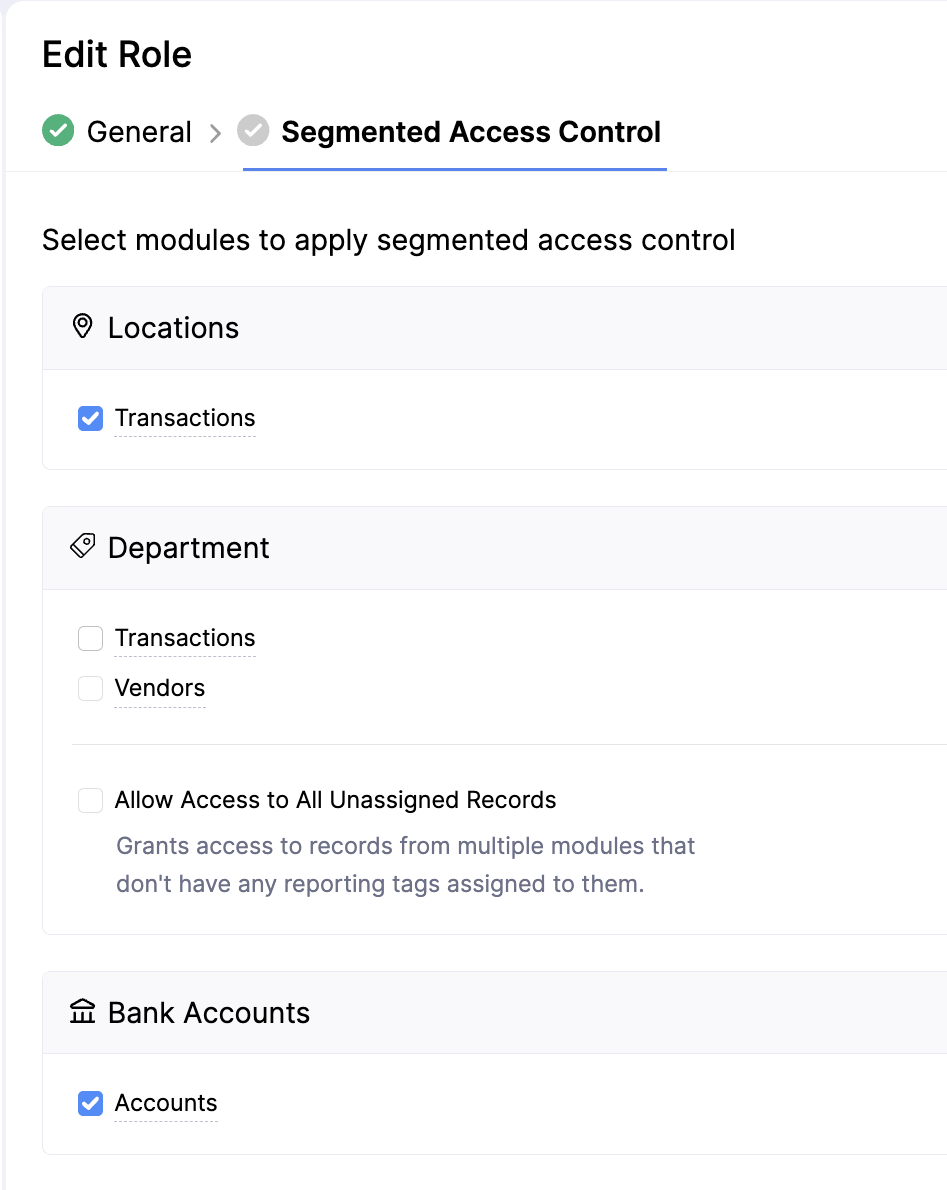
On the Segmented Access Control tab, select the module to which you want to apply access control.
Click Save.
Configure Segmented Access Control for Roles
Segmented access control lets you limit which records users can view and modify based on locations, reporting tags, or bank accounts. By default, users can access records based only on their role’s permissions. Locations, reporting tags, and bank accounts do not affect their access. To restrict access further, configure segmented access control for a role and choose the record types you want to restrict. Then, associate the required locations, reporting tag options, or bank accounts with each user when you add or edit them.
Once configured, users can view and modify only the records that are associated with the locations, reporting tag options, or bank accounts associated to them.
To configure segmented access control for a role:
- Go to Settings.
- Select Roles under Users & Roles.
- Hover over the role you want to edit and click the More icon.
- Select Edit Access Control if it’s a default role. Or select Edit if it’s a custom role.
- Under the Segmented Access Control tab, select the record types to which you want to apply access control.
- Click Save.
| Field | Description |
| Locations | Check the Transaction option under Locations. Users with this role can view and modify only the transactions associated with the locations associated with them. |
| Reporting Tags | Only the reporting tag for which you have configured access control appears here. Select the record types to which you want to apply the reporting tag. Check the Allow Access to All Unassigned Records option to allow users with this role to access records that do not have any reporting tag associated with them. |
| Bank Accounts | Users with this role can view and modify only their associated bank accounts. Note: To associate a user with a bank account, go to Banking, click the More icon next to the account, and select Edit. On the Edit Bank page, select the Users you want to associate with the account, and click Save. |
Scenario: Patricia runs a business with two locations, Head Office and Warehouse, and uses a Department reporting tag with Sales and Marketing options. She wants to create a Sales Manager role. To do this, she configures segmented access control and selects:
- Transactions under Locations
- Transactions and Customers under Department reporting tag
When she invites Aron as a sales manager, she associates the Head Office location and the Sales option with him.
As a result, Aron can now access only transactions associated with the Head Office location and the Sales option. He can also access only the customers associated with the Sales option. He cannot access transactions associated with Warehouse location or records with the Marketing option.
 Yes
No
Yes
No
Thank you for your feedback!