

Integrate Zoho Invoice with Avalara
Introduction
Avalara Integration in Zoho Invoice is an alternative to manually determining and associating sales tax rates to your transactions.
For a rapidly growing business it is often hard to fetch the right tax rate for every transaction.
With the new Avalara integration, Zoho Invoice not only automates your final calculations, but also fetches the right tax rates and exemption reasons for all your transactions.
When you setup the integration, your address, country and Avalara AvaTax credentials will be shared with Avalara AvaTax.
Integration
Prerequisites
- Avalara integration is only available for organizations in the U.S and Canada editions of Zoho Invoice.
- Make sure you’ve enabled accrual tax basis from under Settings - Organization profile. Avalara cannot be enabled if you’ve selected the cash option under tax basis.
- Make sure you have an account in Avalara. You can create tax codes for your organization there and use these later in Zoho Invoice.
Insight: You will need the credentials provided there (such as Account number, License key and Company code) to set up the integration here. If no company code is provided, the default company in Avalara will be integrated with Zoho Invoice.
Setting up integration
- Sign into your Zoho Invoice account.
- Click on Settings and select Taxes.
- Now, click on the Use Avalara Integration button in the top right corner.
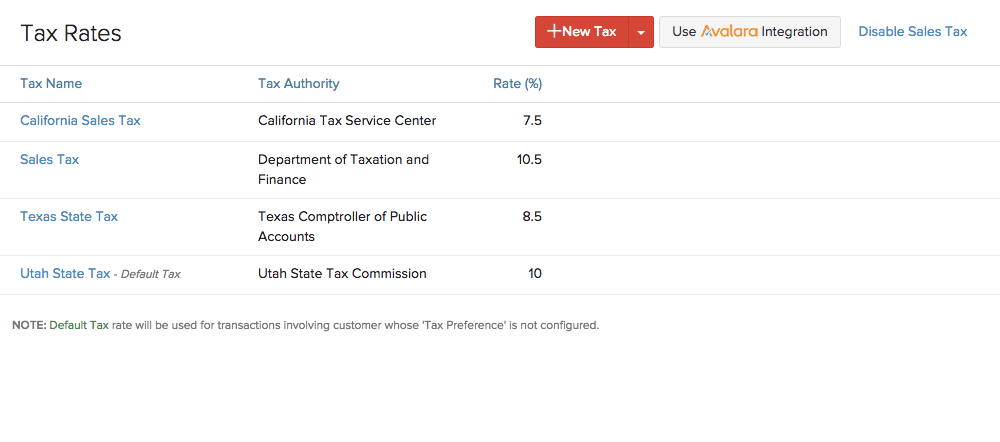
- Enter your Avalara credentials and save them to get started.
Taxes and tax rates
Items
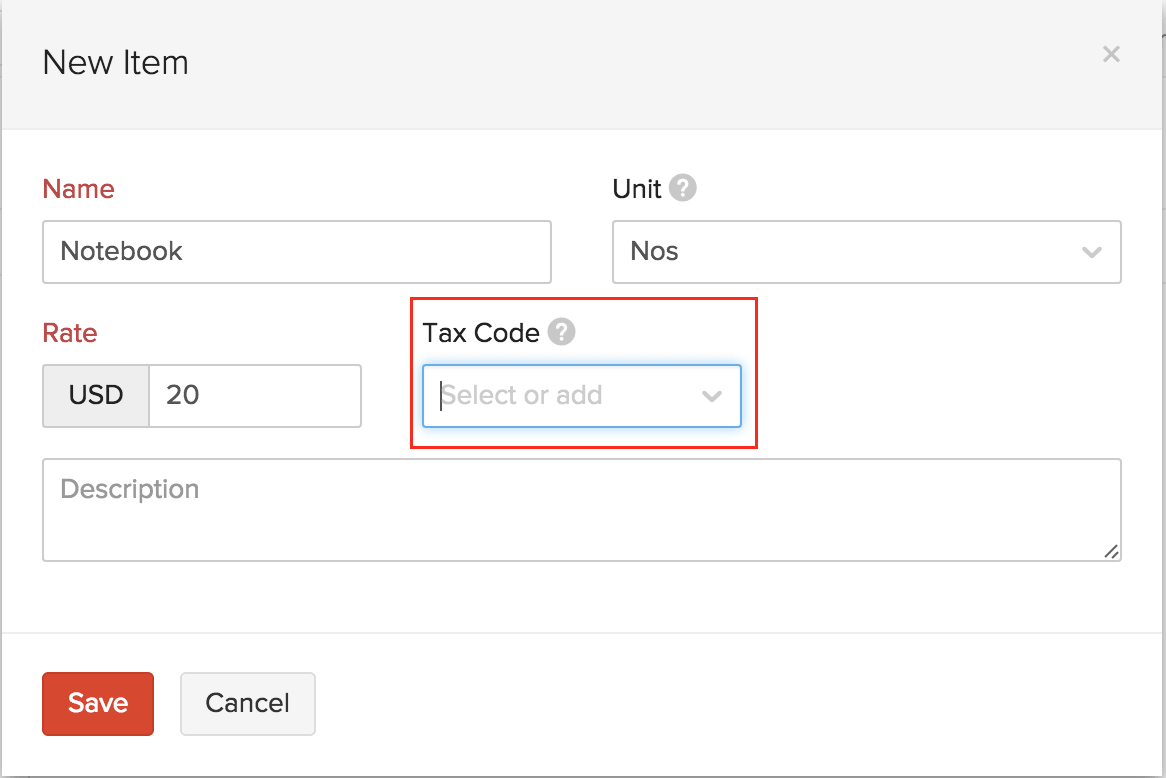
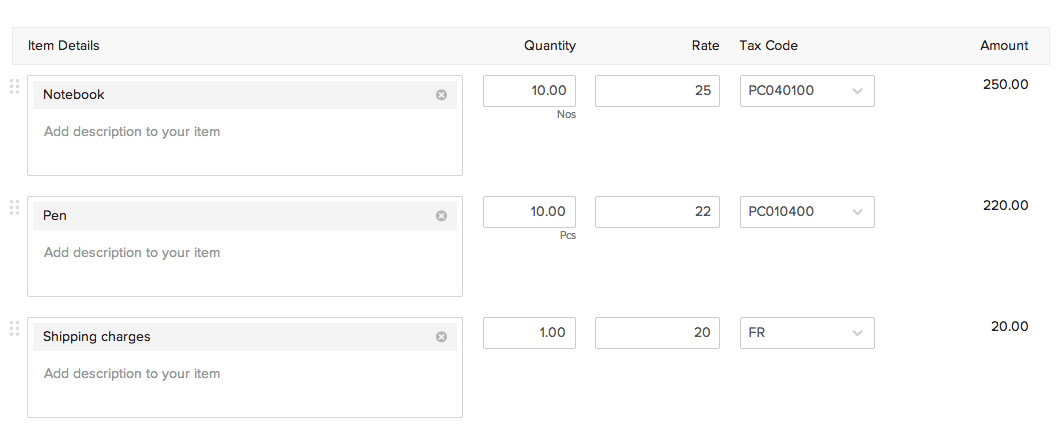
With Avalara integrated, you will not need to manually mark an item either Taxable or Non taxable. Instead, simply enter Tax Codes for each item. To do this, kindly follow the below mentioned steps:
- Go to Items in Zoho Invoice and select +New item or edit an existing item.
- Under the Tax code field, enter the appropriate tax code for that item as provided by Avalara.
Once a tax code is associated in Zoho Invoice, Avalara will use a combination of this and the address of the customer to determine the taxability status of the item (tax exempt, partially or fully taxable) in your customer’s location.
Insight: You can add/change the tax code for an item while creating a new transaction, from the tax code field in the item line.
Contacts
- Click on the Contacts tab in Zoho Invoice.
- Select the + button to create a new contact or edit an existing contact.
- Provide a valid address for the customer under the Address tab, ensuring authenticity in the street name and zip code that you provide.
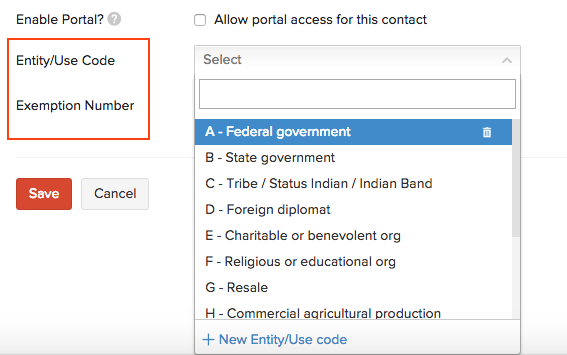
- If the customer is tax-exempt, enter the exemption number or select an entity code under the Tax and Payment Details sub tab before saving the contact. You can also create a new entity code from here.
- Contacts located outside the USA (such as the European union) are eligible for VAT handling. When a currency apart from USD is selected for a contact, you will be asked to specify the country and VAT ID. This information is used to handle all VAT calculations for this contact.
Similar to item creation, you no longer need to research a customer’s address and taxability status and manually associate a tax rate. It will be provided for you automatically based on the parameters you specified during contact creation.
- Address : Upon providing a valid address, Avalara will verify the address using geolocation technology. This will help you fetch the exact tax rates pertaining to the customer. If the address of a customer is not verified, the contact details will contain the text Not verified below the address. Under such cases, the tax rates will be fetched using the zip code. But, accuracy cannot be ensured in this method.
Exemption number/Entity code : If you’re dealing with a customer who does not need to pay sales tax (say a representative of a religious or charitable organization), you can simply add or select the right entity code from the list corresponding to the exemption status of the customer. Alternatively, if the customer possesses an exemption certificate issued by the government, the number on that certificate i.e., the exemption number will suffice to make that customer exempt from all tax calculations in Zoho Invoice.
VAT ID : Tax rates of contacts located outside the United states will be fetched and stored using the VAT ID and country details provided during contact creation.
Insight: You can change the entity code, exemption number or the contact address anytime before saving the transaction.
Transactions
Sales tax in Zoho Invoice is calculated on all Sales entities such as estimates, invoices, recurring invoices, sales orders and credit notes. When you raise such a transaction for a customer, select the item and save it, Avalara does the following :
- Determines the item’s taxability in the customer’s location.
- Determines if the customer is taxable or not.
- Fetches precise tax rates for the transaction by mapping to the right jurisdiction in that location.
As mentioned above, you can always change the item and contact tax criteria from within a new transaction as well. This is handy for isolated transactions where you might need to make a normally taxable customer tax exempt, or you’re shipping to a different address for a regular customer. Such changes will not be saved for future transactions unless you choose to do so.
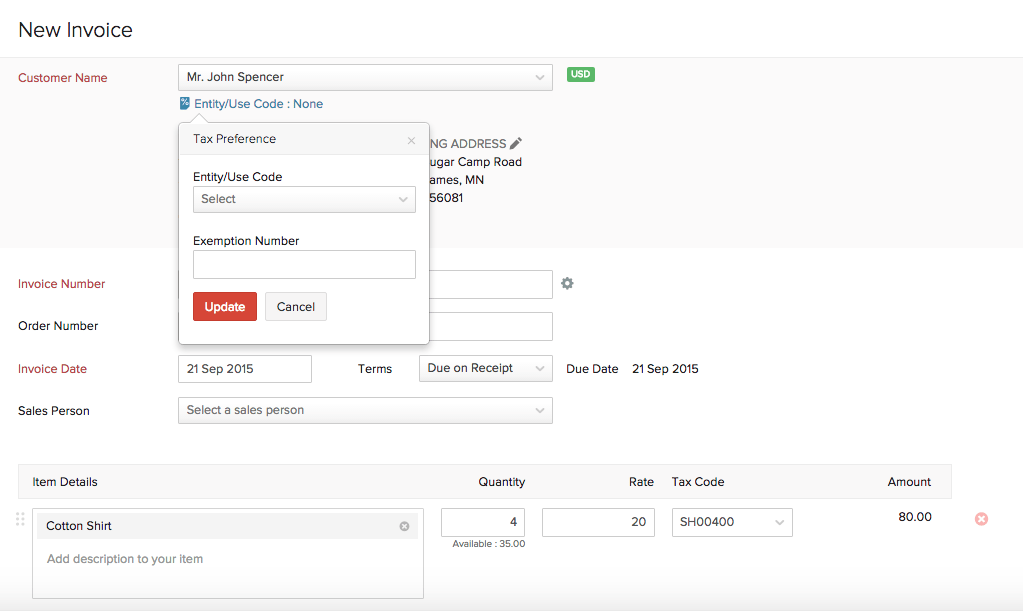
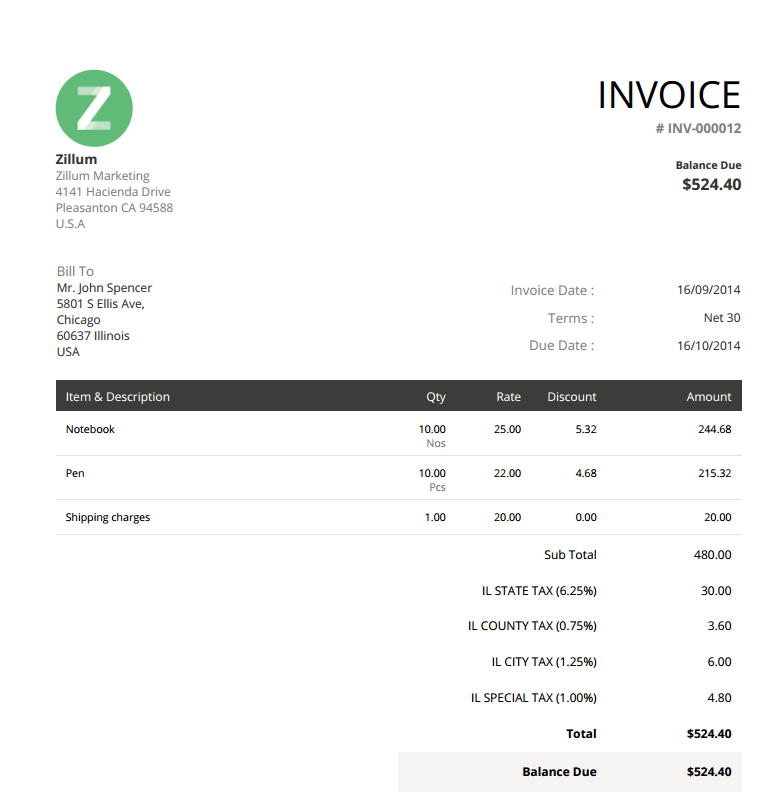
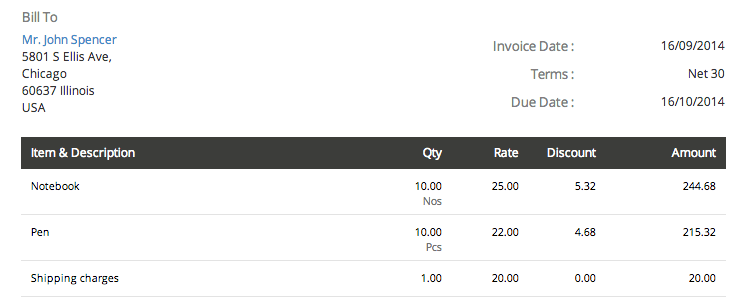
Here’s how the invoice looks like with the taxes fetched and calculated.
Other Actions
Taxes on shipping charges
Shipping charges are generally taxable if the item being shipped is taxable.
While creating a transaction, shipping charges need to be entered as a line item if you’ve enabled Avalara integration. To do this,
- Click on Add another line under the Item details section while creating a transaction.
- Enter Shipping charges and the appropriate charges.
- Associate the right tax code for it to fetch the tax rate on the shipping charges.
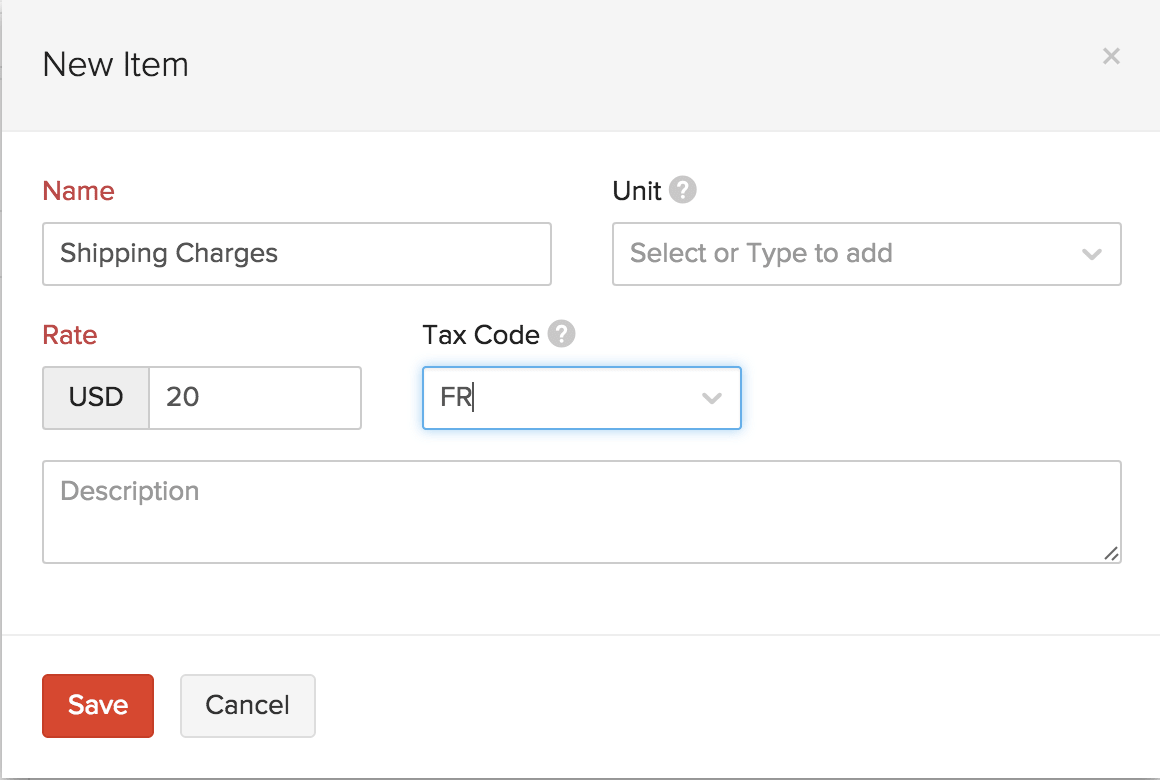
You can also take the easy way out and create shipping charges as an item. This means you can include it during any transaction and just vary the charges accordingly.
- Go to Items in Zoho Invoice and select +New item
- Enter item name as Shipping charges and provide the tax code mentioned for shipping and freight charges in Avalara.
Applying a discount
A discount rate cannot be entered while Avalara integration is enabled, although you can enter a flat discount fee that will be applied on the whole transaction. This amount will be split proportionally among the items in the transaction, except the shipping charges if any.
Disabling integration
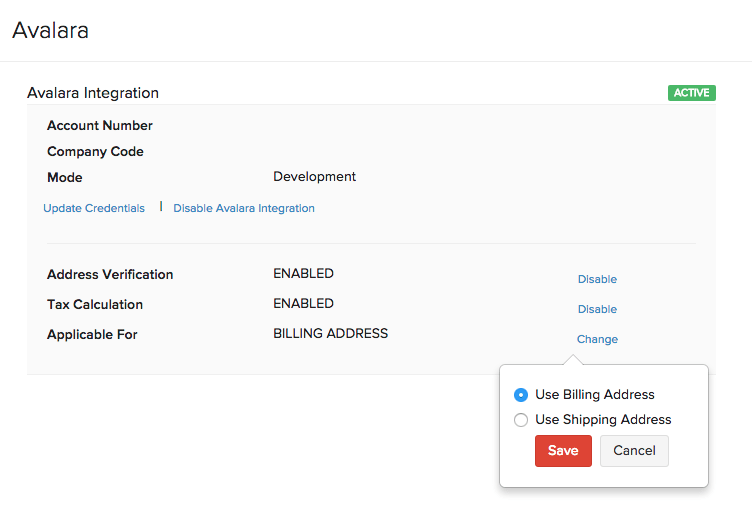
Integration with Avalara can be disabled anytime by going to Settings - Taxes and clicking on the settings icon next to your credentials.
Integration can be disabled at the following levels,
- Disable Address Verification - Address of your contacts will not be verified by Avalara to ensure accurate tax rates.
- Disable Tax Calculation - Taxes will not be calculated on any transaction created once this option is chosen.
- Disable Avalara Integration - The integration with Avalara is disabled and you can revert to using the sales tax rates created in Zoho Invoice.
Also, you can choose the address for which the tax is applicable by clicking on Change against the option Applicable For. Select either Use Billing Address or Use Shipping Address and click Save.
If an invoice is created after changing this setting, the address used for tax calculation on sales transactions will be based on the chosen address.
Insight: While Avalara integration is disabled, you can no longer edit or send out any transaction created using data from Avalara. In the case of recurring invoices set up using Avalara, invoices generated after Avalara was disabled will not be sent out.
 Yes
No
Yes
No
Thank you for your feedback!