

Tax Reports

The Taxes section contains all the reports related to the taxes collected, paid, and owed by your business.
Tax Summary
The Tax Summary report summarises the taxes collected and paid across all your transactions for a selected period.
To view the tax summary report:
- Go to Reports on the left sidebar.
- Navigate to Taxes and select Tax Summary.

The Tax Summary report contains the following columns:
| Column | Description |
|---|---|
| Tax Name | The name of the tax applied to the transaction. |
| Tax Percentage | The rate at which the tax is applied. |
| Taxable Amount | The total transaction value on which this tax was applied. |
| Tax Amount | The total tax collected or paid for this tax type. |
Customize Report
To customize this report:
- Click the Customize icon.
You can customize the report using the General and Show / Hide Columns tabs.
General
Under General, you can customize the report based on the following filters:
| Filters | Description |
|---|---|
| Date Range | Select the time period for generating the report. |
| Report Basis | Accrual: Values are generated based on the invoice date. Cash: Values are generated when payment is received or made. |
| Group By | Group the report by a specific field. |
| Include Manual Postings to Tax Payable | Check this option to include manual journal entries posted to the Tax Payable account in the report. |
| Entities | Select the transaction types to include in the report: Sales, Purchases, or Others. |
| Advanced Filters | Apply custom filters based on report fields, locations, contacts, and reporting tags. |
- Click Run Report to apply the filters.
Show / Hide Columns
In this section, you can choose which columns to display in the report.
- In the Available Columns section, hover over the column you want to add.
- Click the + icon next to a column, or drag and drop the column from Available Columns to Selected Columns.
- Click Run Report to apply the customization and view the report.
BAS
The Business Activity Statement (BAS) report is generated based on the transactions you record with tax across your business for a selected reporting period. Businesses registered for GST can use this report to review tax information and prepare their BAS for filing with the Australian Taxation Office (ATO).
View BAS List
To view the BAS list:
- Go to Reports on the left sidebar.
- Navigate to Taxes and select BAS.
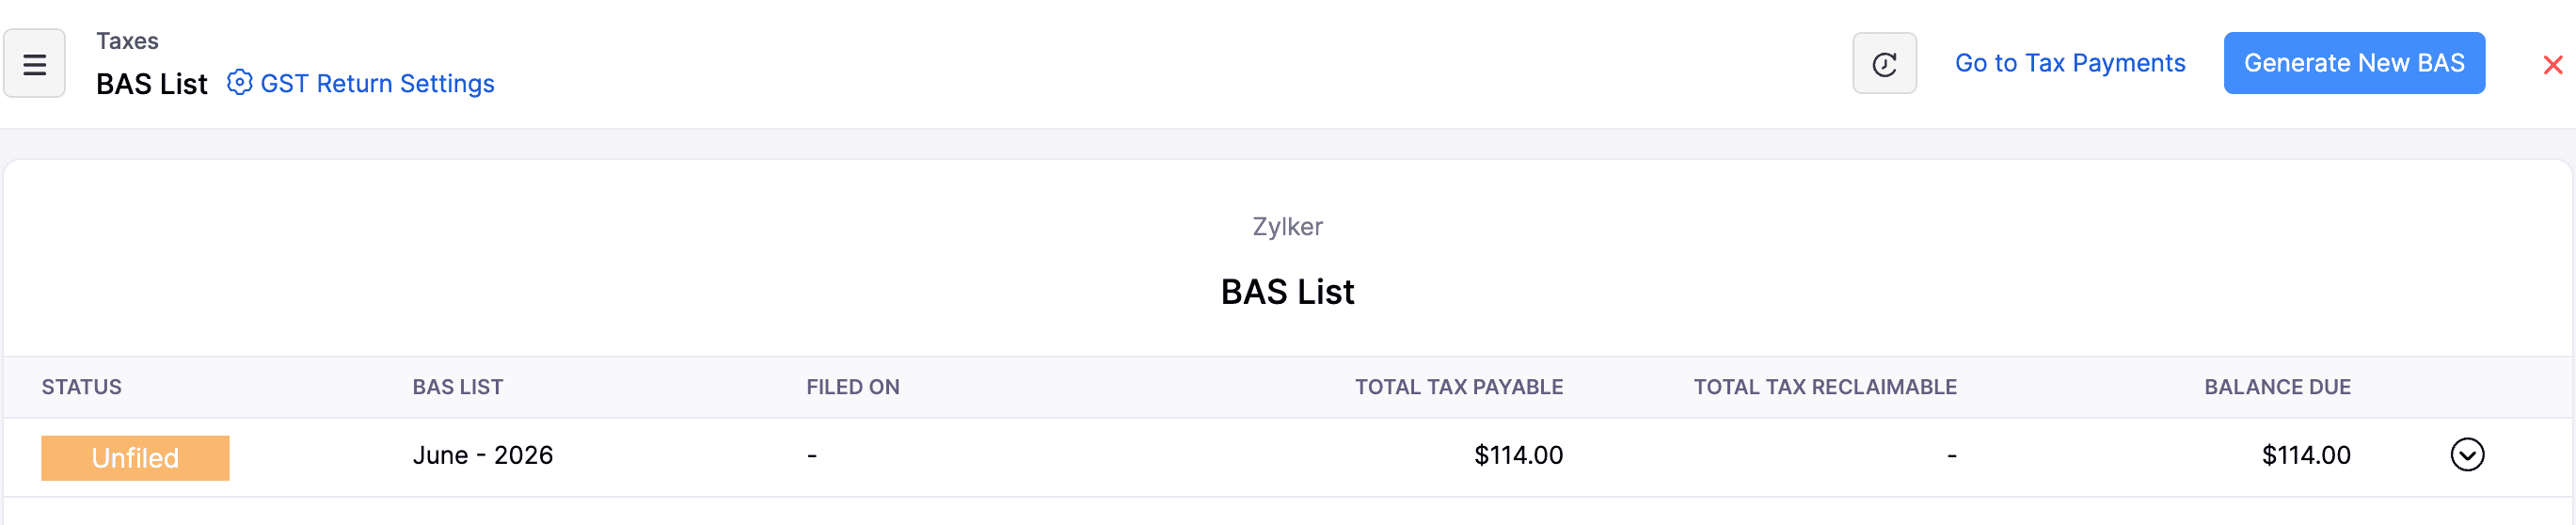
The BAS List contains the following columns:
| Column | Description |
|---|---|
| Status | Indicates the status of the BAS return. |
| BAS List | The list of all BAS returns generated. |
| Filed on | The date on which the BAS return is filed. |
| Total Tax Payable | The total amount of tax that your business owes. |
| Total Tax Reclaimable | The total amount of tax that your business can claim back. |
| Balance Due | The net tax amount payable or refundable. |
Generate BAS Report
You can generate your BAS report based on your BAS settings. Here’s how:
- Go to Reports on the left sidebar.
- Navigate to Taxes and select BAS.
- On the BAS List page, click Generate New BAS.
Note: Select Show Amount in Cents to view amounts with cents. As BAS does not allow cents, the values will be rounded and adjusted when the BAS is filed.
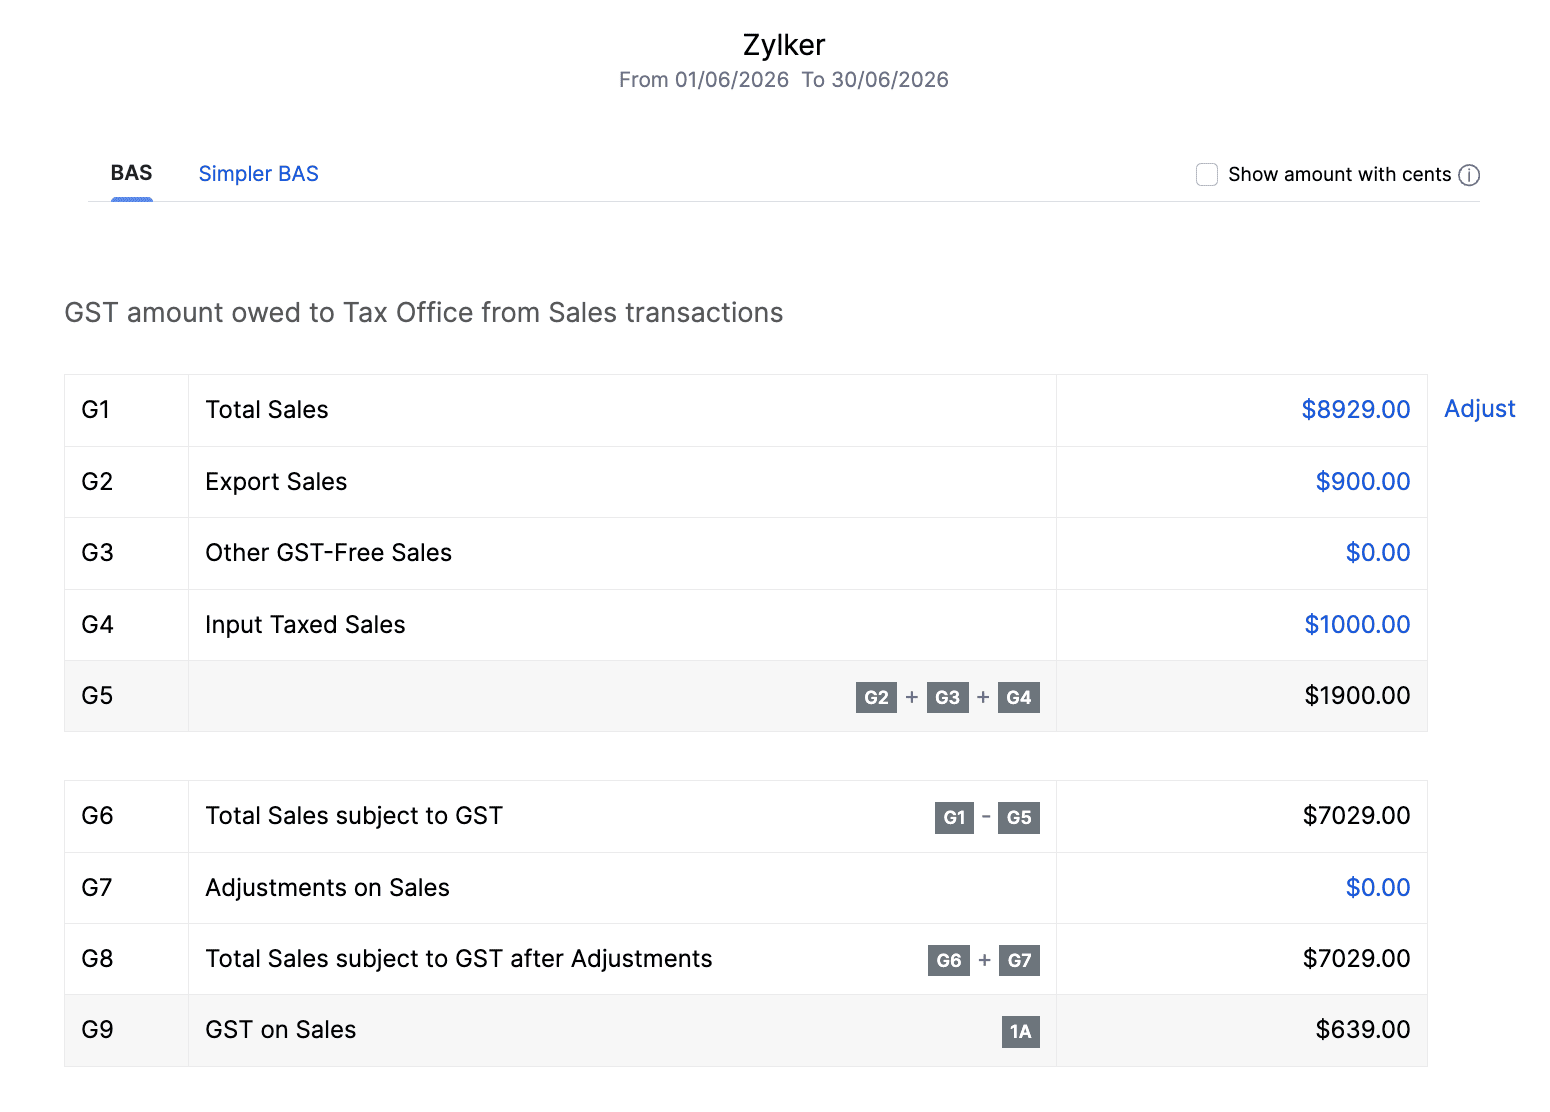
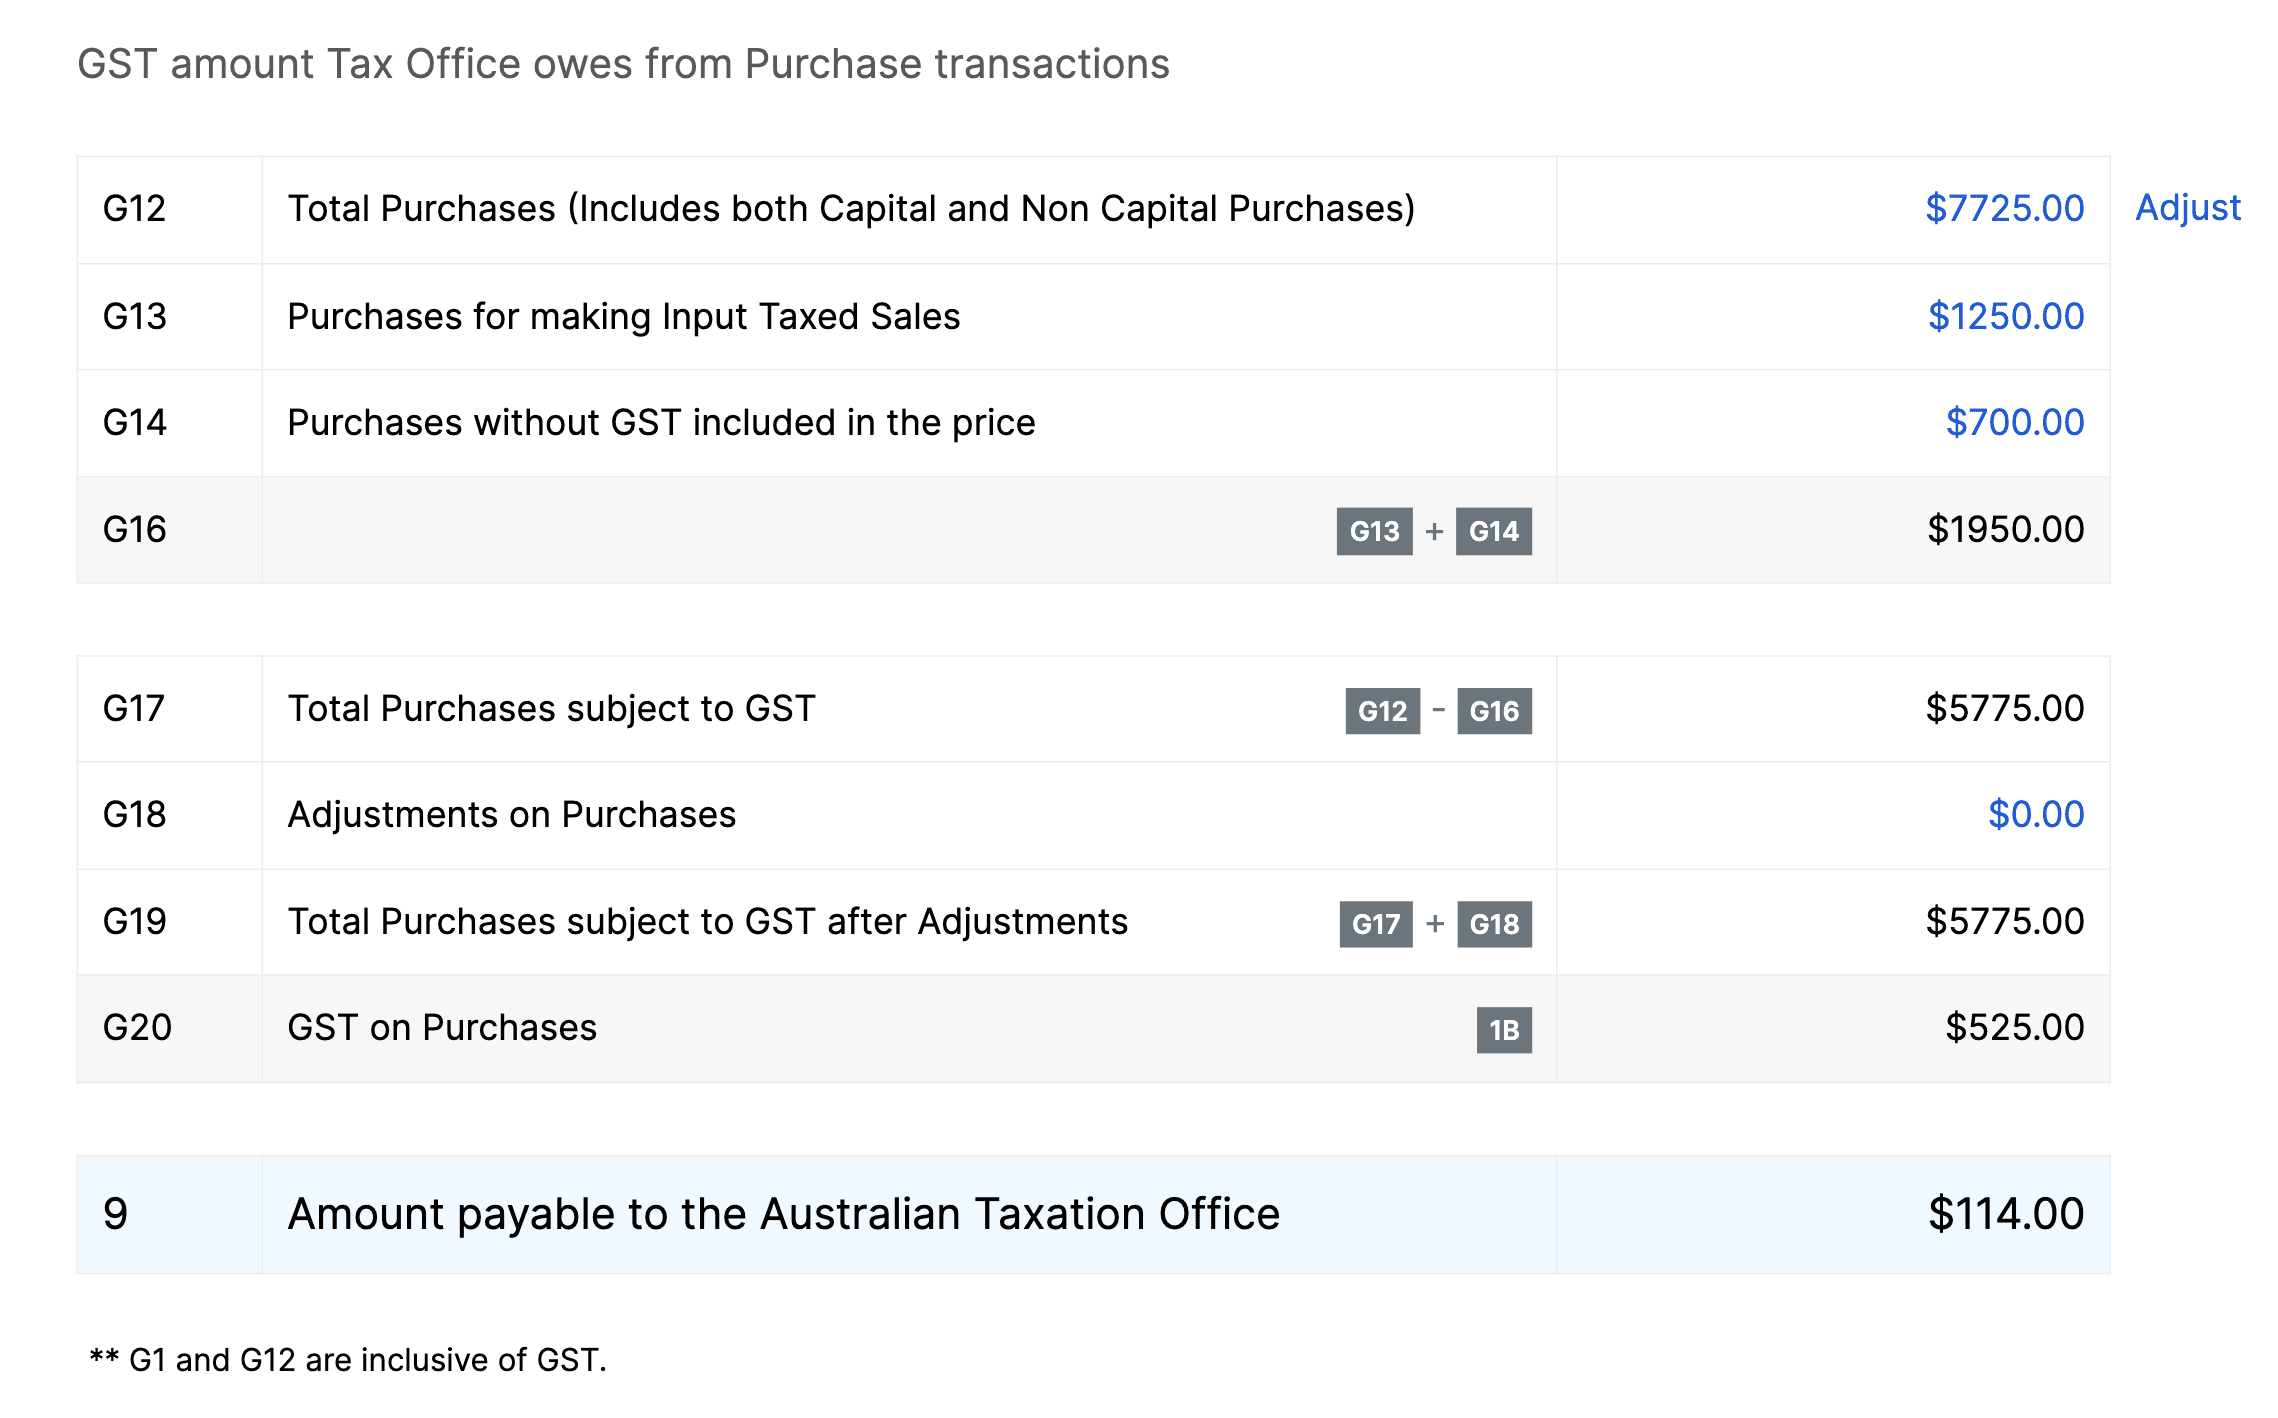
The BAS Report contains the following details:
Sales Entities
Purchase Entities
Simpler BAS
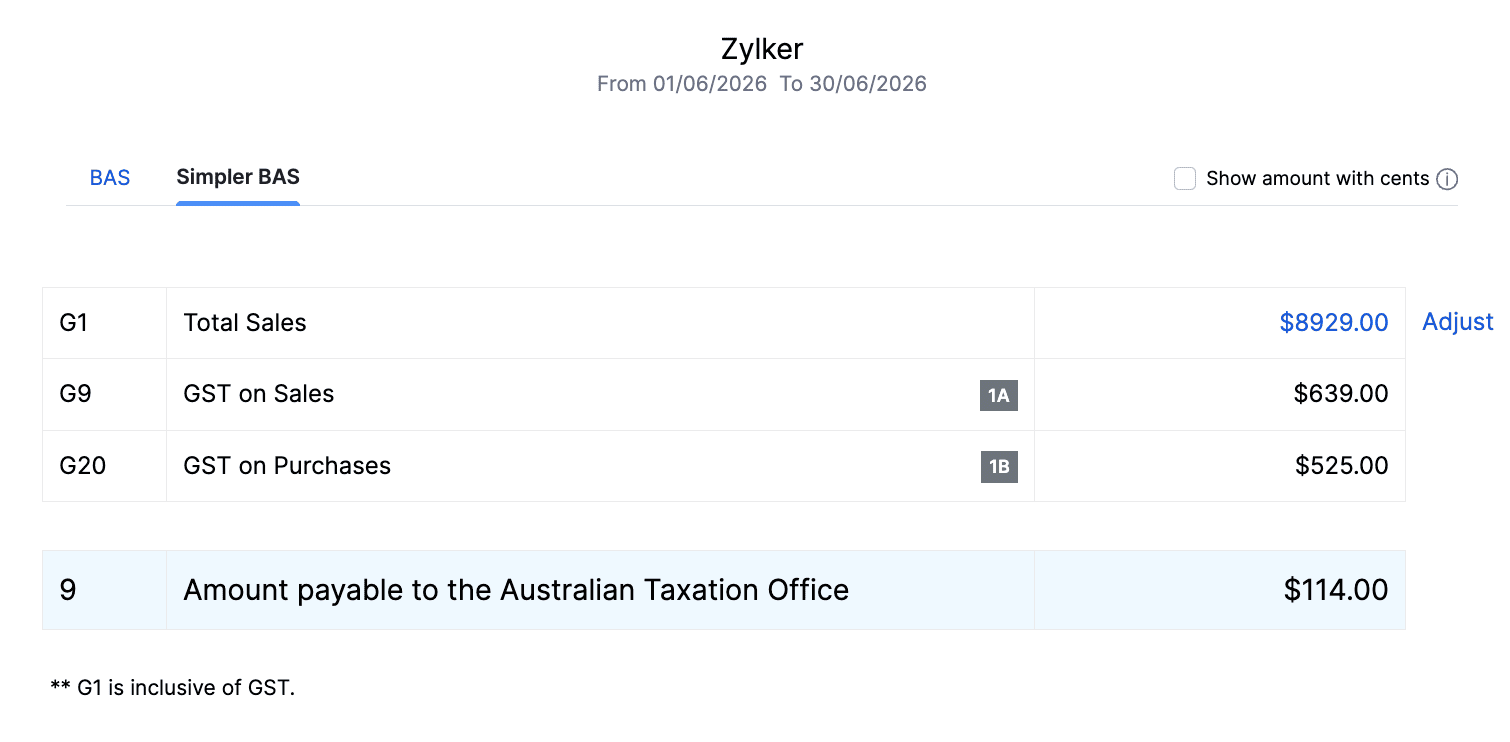
Simpler BAS is a simplified GST reporting method introduced by the ATO for small businesses (GST turnover of less than $10 million). Instead of reporting detailed GST information, businesses report only the GST collected on sales, GST paid on purchases, and total sales.
You can view the Simpler BAS Report for the return that you have generated. Here’s how:
- Go to Reports on the left sidebar.
- Navigate to Taxes and select BAS.
- Select the return for which you wish to view the Simpler BAS.
- Click the Simpler BAS tab on top of the page.
Include Unfiled Transactions
You can include transactions that haven’t been reported in any previously filed BAS return. Here’s how:
- Go to Reports on the left sidebar.
- Navigate to Taxes and select BAS.
- Select the return.
- Enable Include Unfiled Transactions.
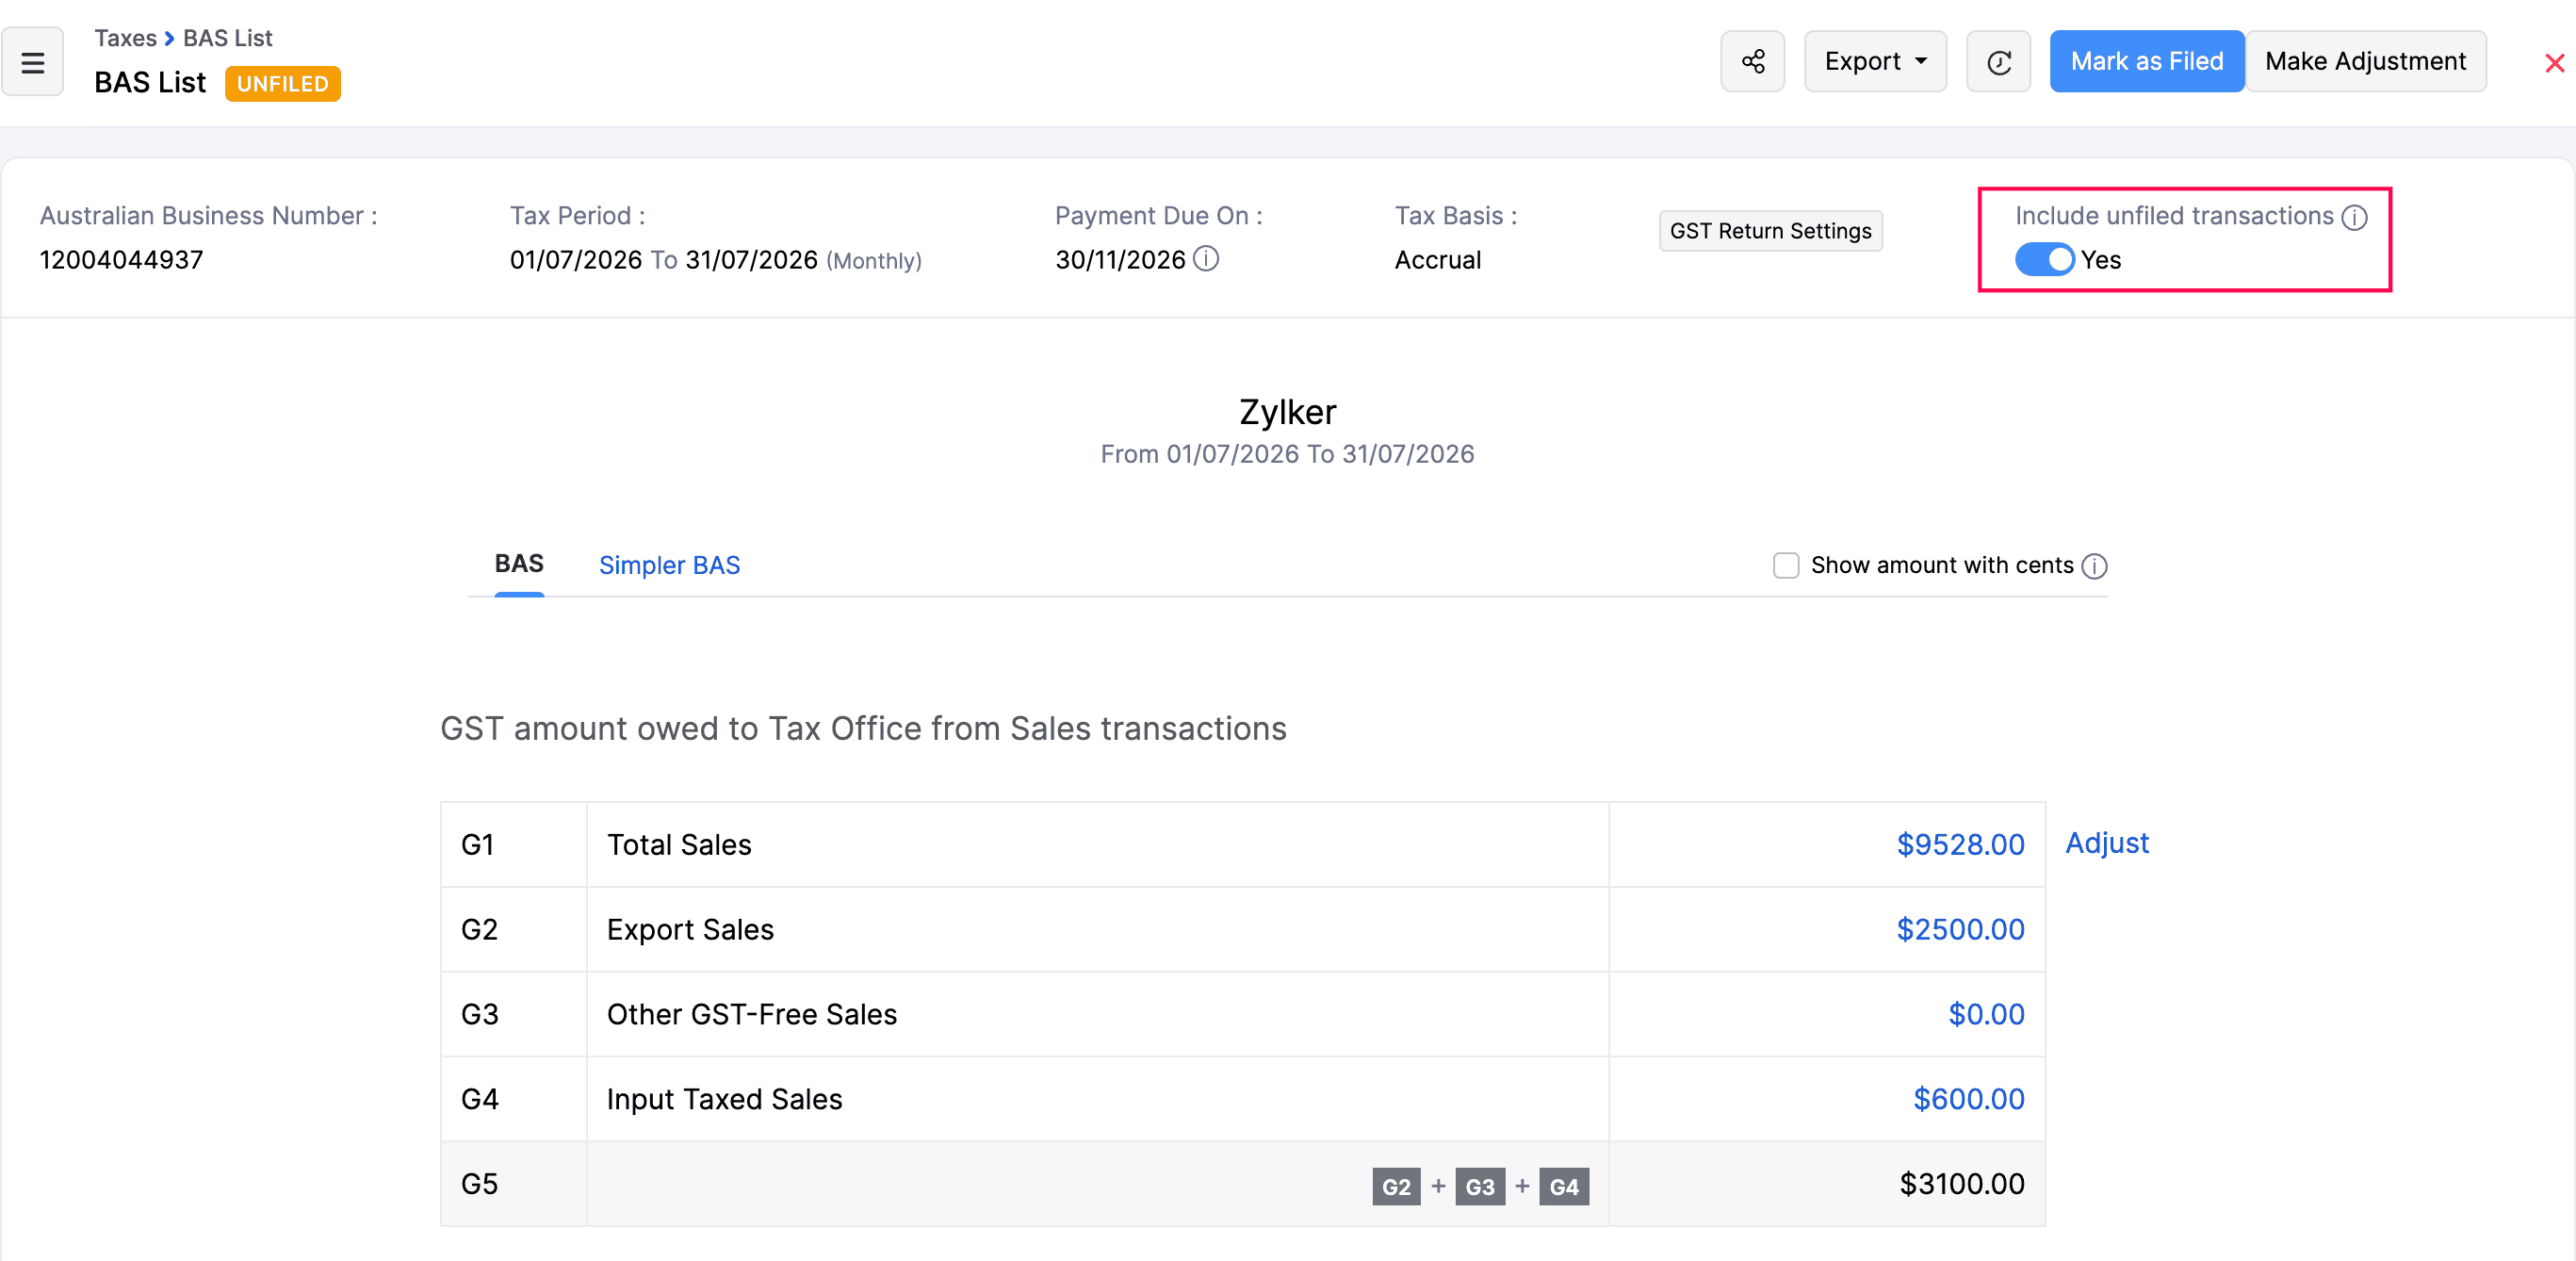
- In the confirmation popup, click OK.
This option helps ensure that all eligible transactions within the selected reporting period are considered when calculating your BAS amounts.
Note: The option to include unfiled transactions will not be available if all your transactions have already been reported in the previously filed BAS return.
Record BAS Adjustment
After generating a BAS report, you can make account adjustments. Here’s how:
- Go to Reports on the left sidebar.
- Navigate to Taxes and select BAS.
- Select the desired BAS return.
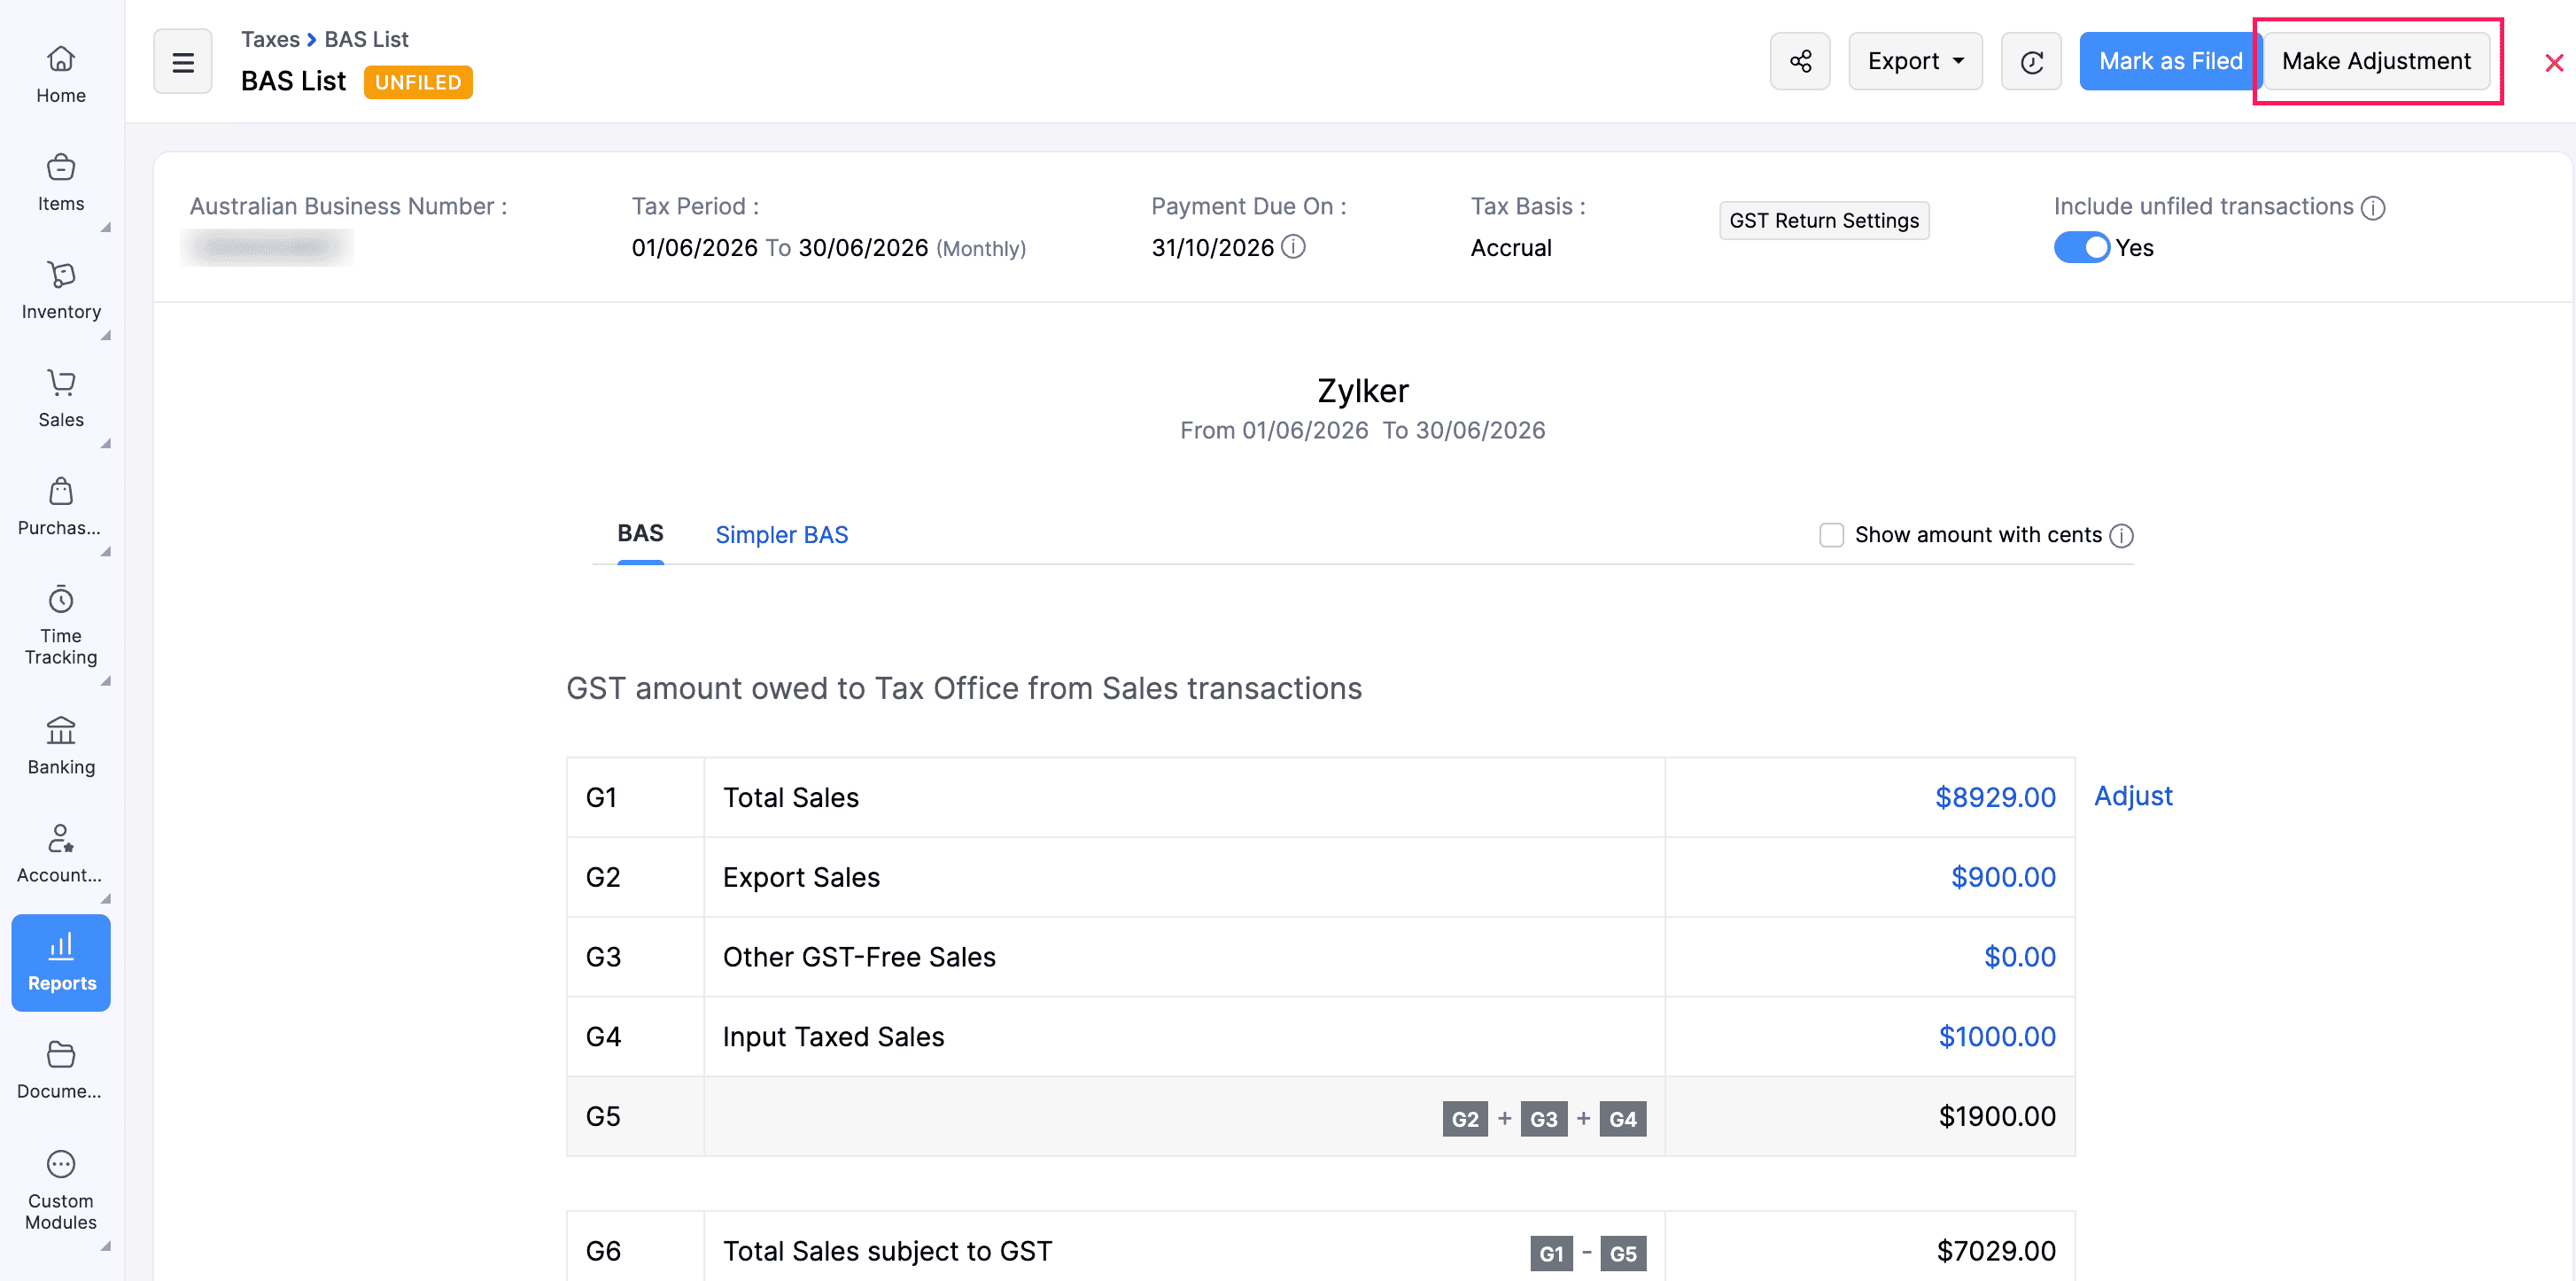
- Click Make Adjustment in the top right corner.
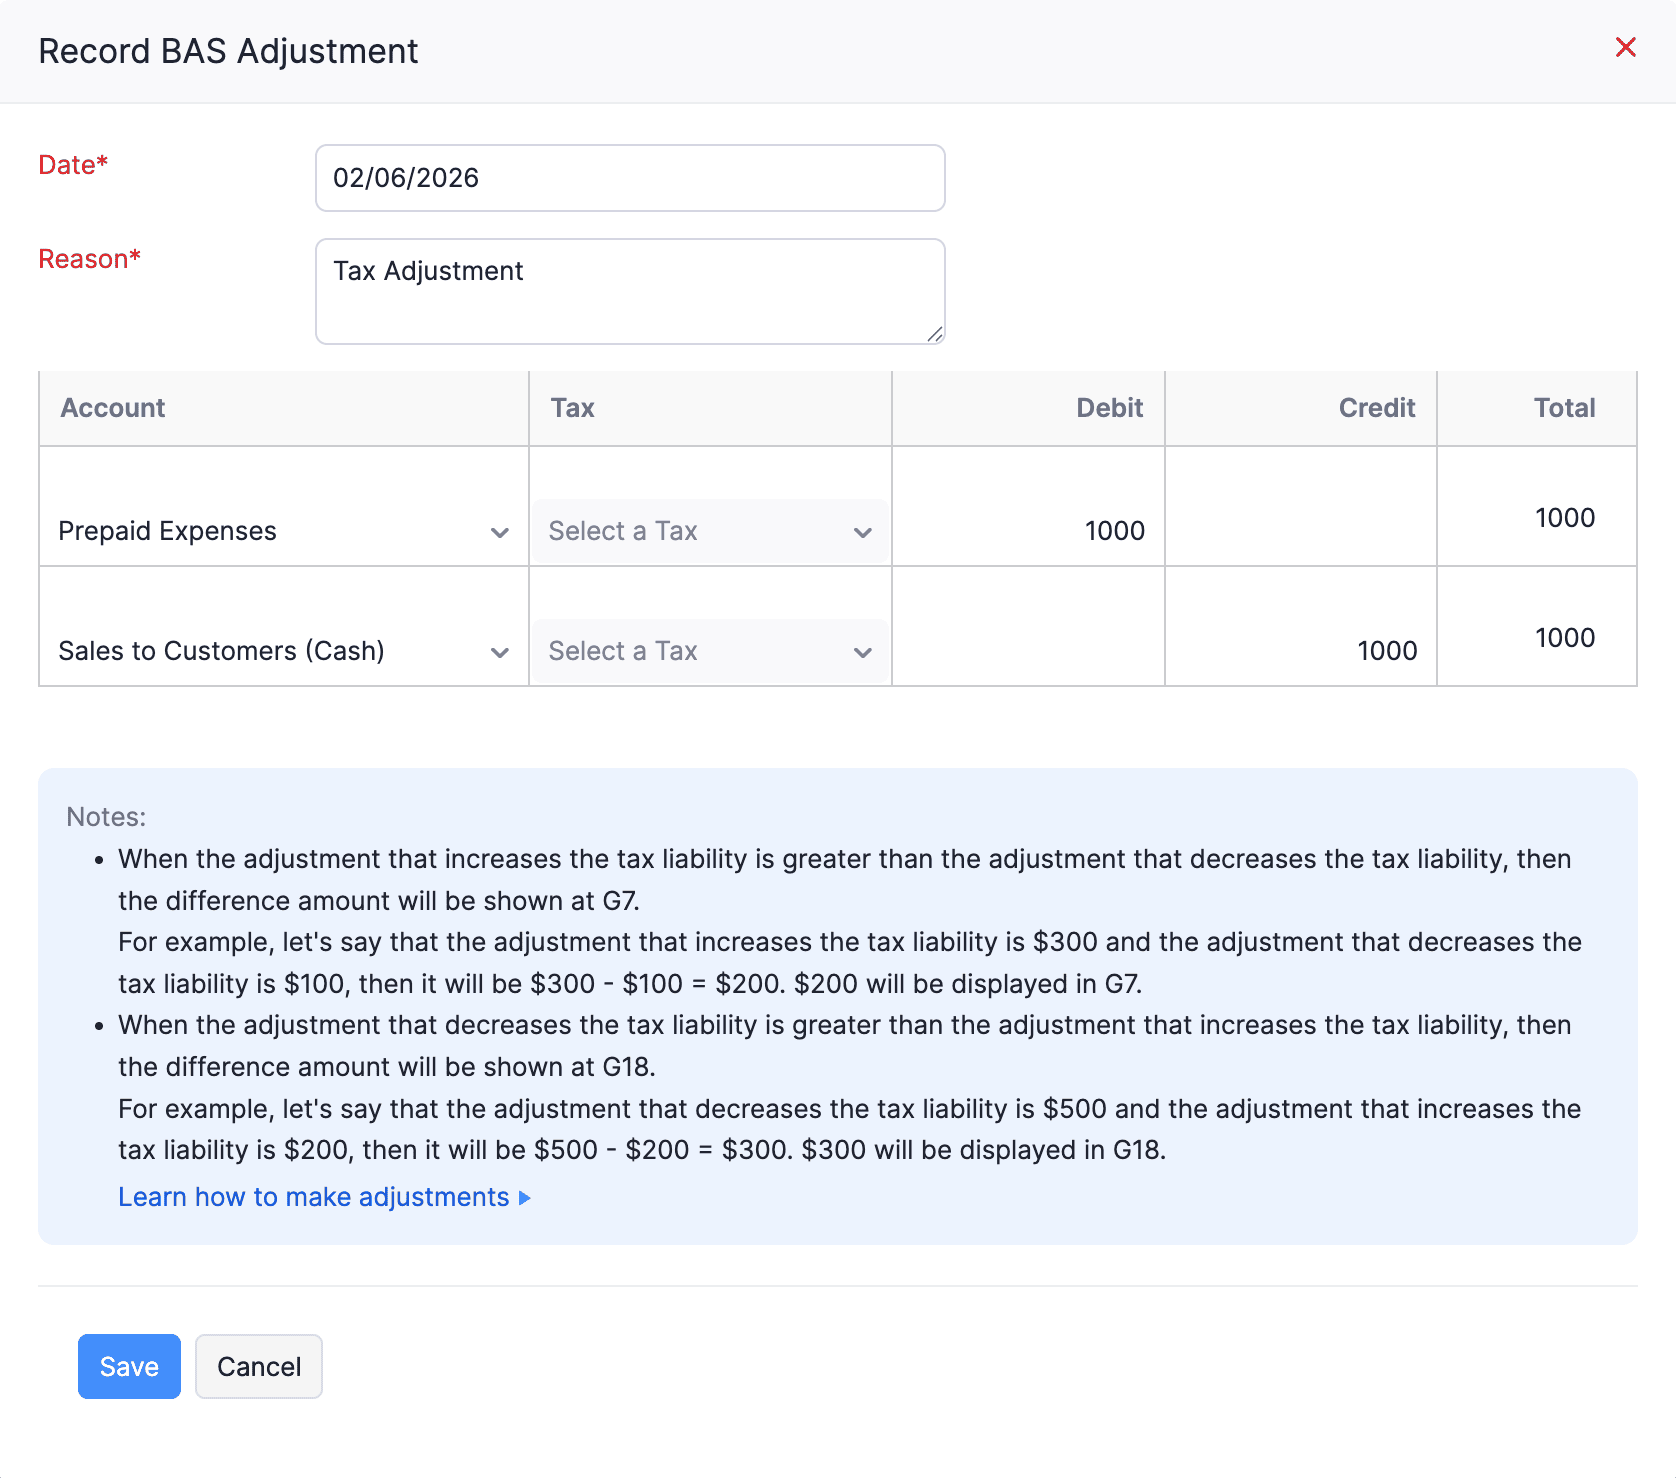
- In the Record BAS Adjustment popup window, select the Date and enter the Reason for the adjustment.
- Select the Account to Debit and Credit, and enter the respective amounts.
- Click Save.
Adjust Amount in Line - G1 (Total Sales)
- Click Adjust at the end of G1.
- In the Adjust amount in line - G1 page, enter the necessary details.
| Fields | Description |
|---|---|
| Date | Select the date on which the G1 adjustment is recorded. |
| Reference# | Enter a unique reference number for internal purposes. |
| Amount | Enter the amount applied to the G1 (Total Sales) amount. Use a negative (-) sign to decrease the G1 amount. |
| Account | Select the account to which the adjustment is recorded. |
| Reason | Enter a brief description about the adjustment. |
- Click Adjust.
Note: You can also adjust amount in line - G1 for Simpler BAS by following the same steps.
Adjust Amount in Line - G12 (Total Purchases)
- Click Adjust at the end of G12.
- In the Adjust amount in line - G12 page, enter the necessary details.
| Fields | Description |
|---|---|
| Date | Select the date on which the G12 adjustment is recorded. |
| Reference# | Enter a unique reference number for internal purposes. |
| Amount | Enter the amount applied to the G12 (Total Purchases) amount. Use a negative (-) sign to decrease the G12 amount. |
| Account | Select the account to which the adjustment is recorded. |
| Reason | Enter a brief description about the adjustment. |
- Click Adjust.
File BAS Return
After filing your BAS return on the ATO portal, you can mark it as filed in Zoho Books. Here’s how:
- Go to Reports on the left sidebar.
- Navigate to Taxes and select BAS.
- Select the desired BAS return to file.
- Click Mark as Filed.
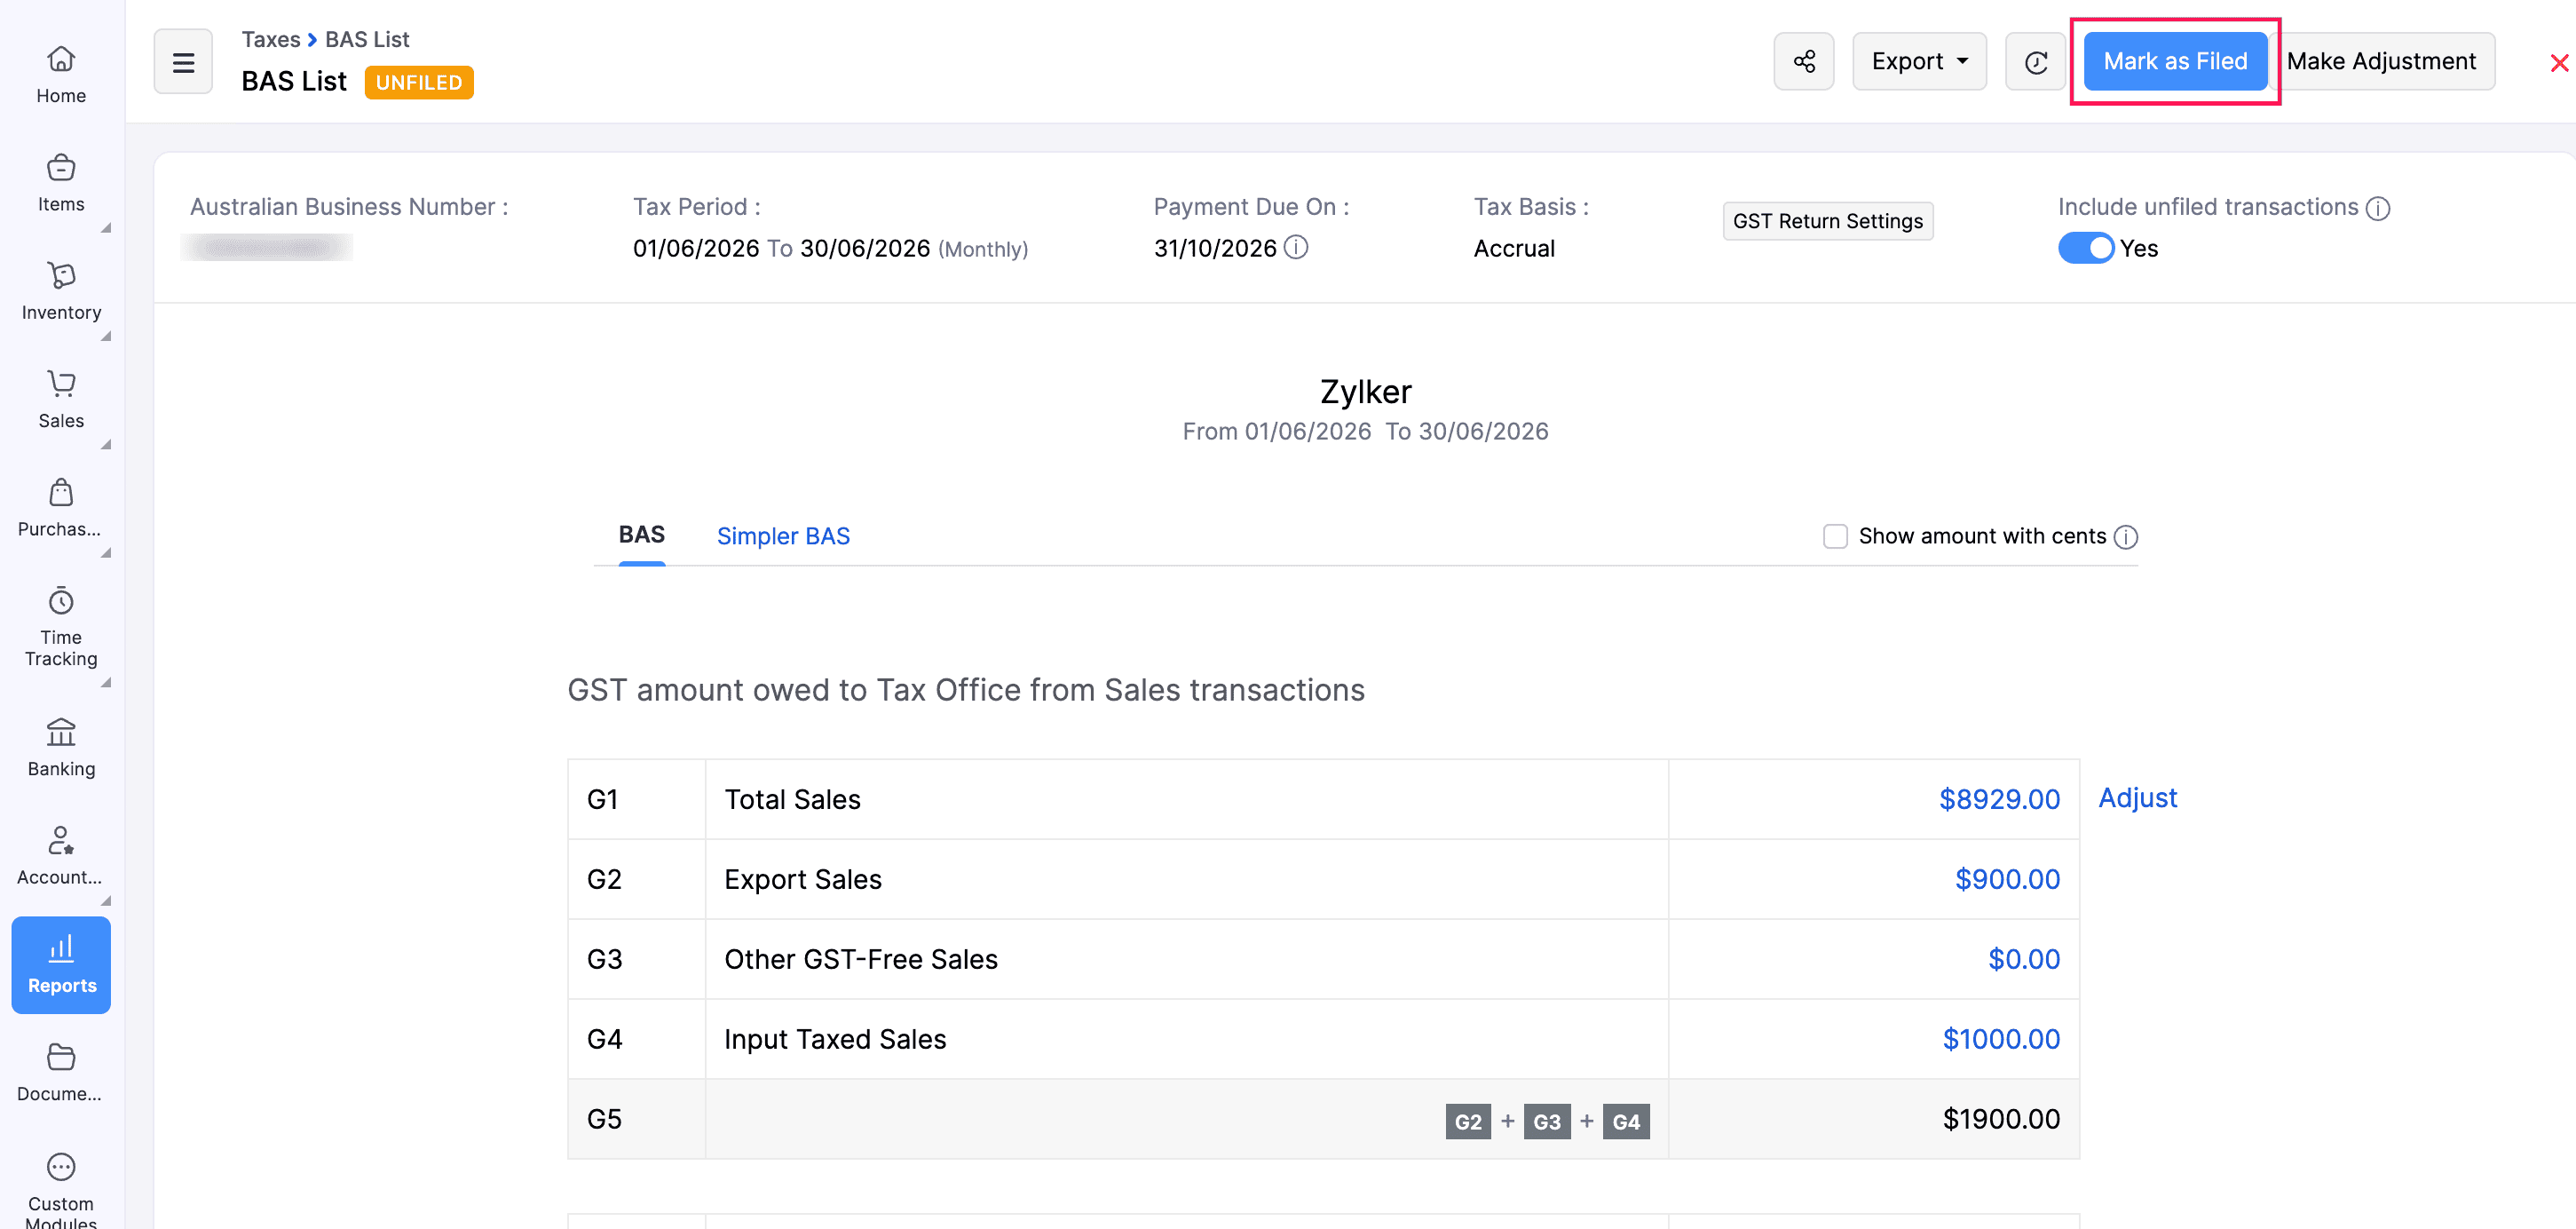
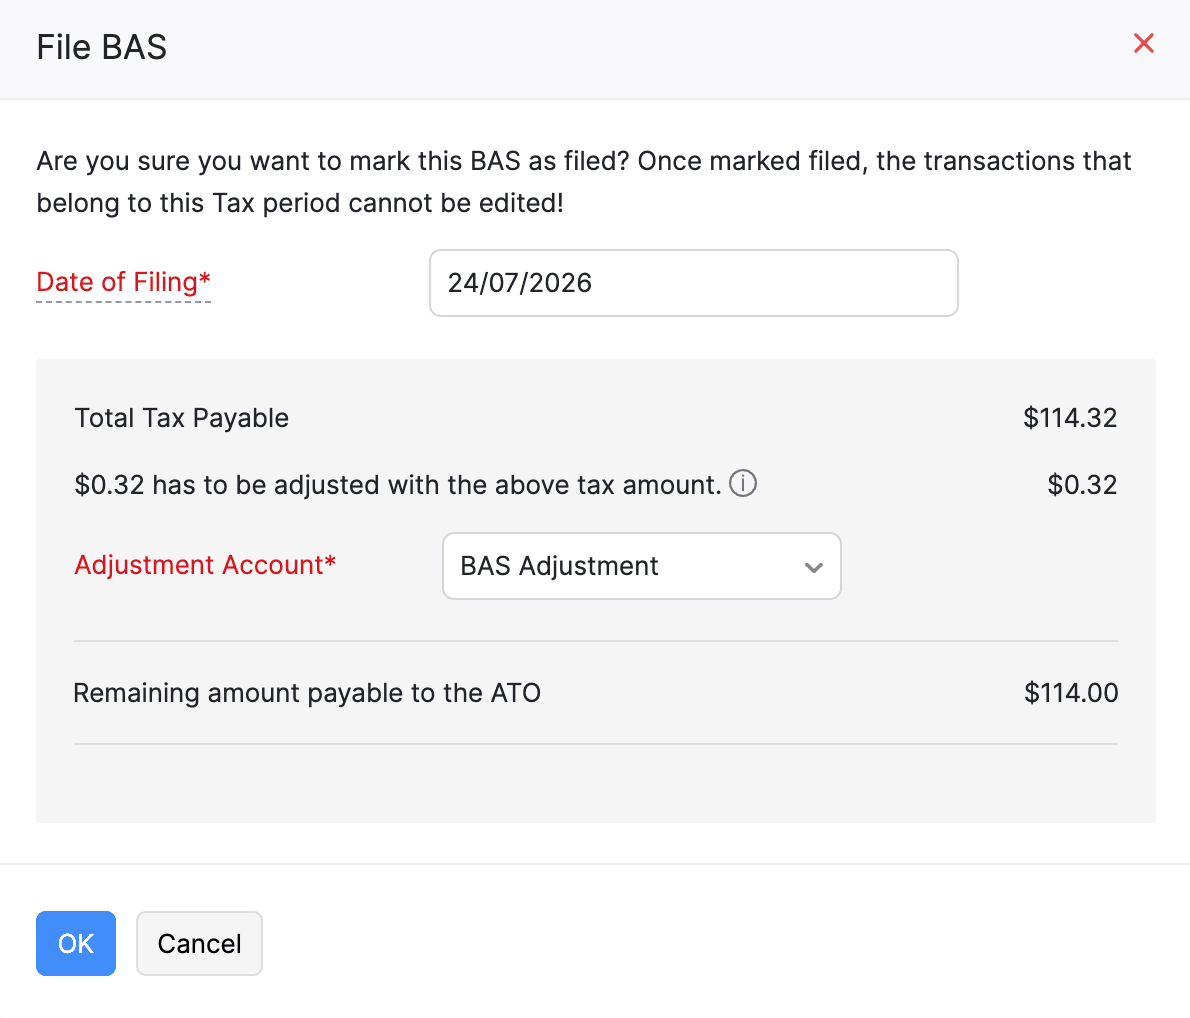
- In the File BAS popup, select the Date of Filing and the Adjustment Account.
- Click OK.
Unfile BAS Return
You may need to unfile a BAS return due to the following reasons:
- The price of a sale or purchase changes.
- The goods are returned and the sale is cancelled.
- To correct data entry errors.
- To remove duplicate purchase entries.
- To correct a GST free sale or purchase that was incorrectly classified as taxable and viceversa.
Once you’ve unfiled the BAS return in ATO portal, you can mark it as unfiled in Zoho Books. Here’s how:
- Go to Reports on the left sidebar.
- Navigate to Taxes and select BAS.
- Select the desired BAS return to unfile.
- Click Mark as Unfiled.
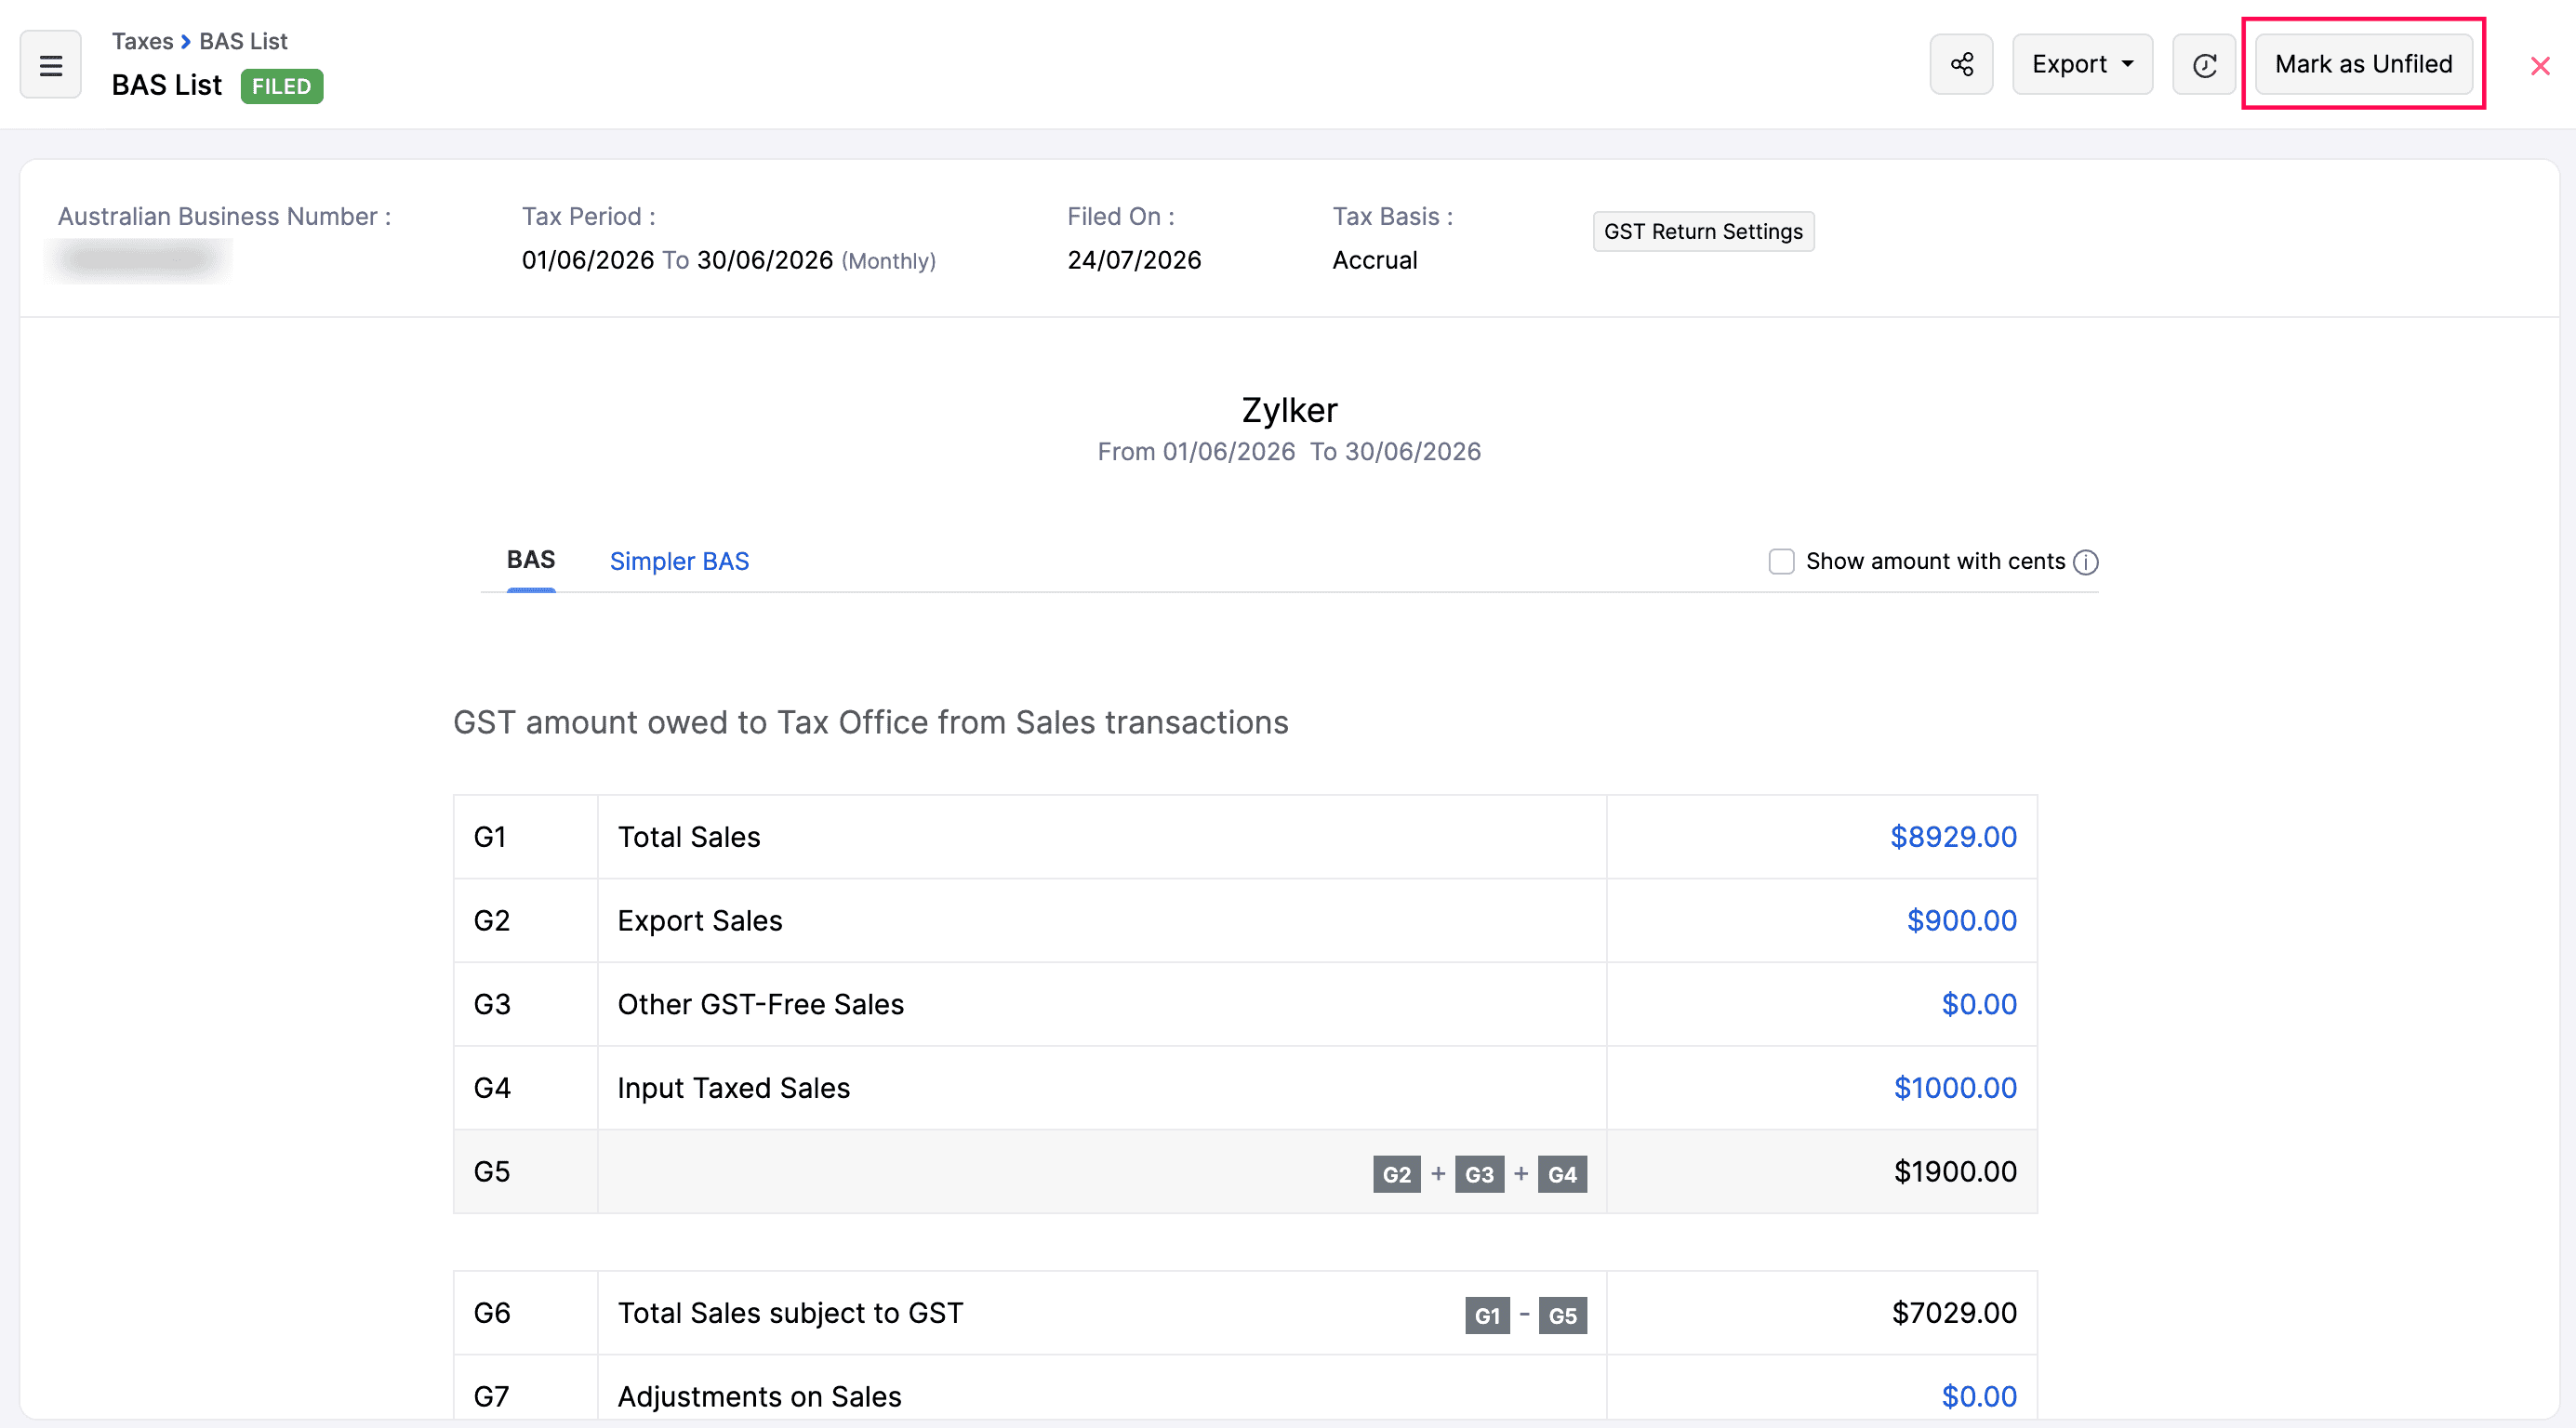
- In the Unfile BAS confirmation popup, click OK.
You can then make the necessary adjustments, file the BAS return on the ATO portal and record it in Zoho Books.
Record Tax Payment
You can record a tax payment only for a filed BAS return. Here’s how:
- Go to Reports on the left sidebar.
- Navigate to Taxes and select BAS.
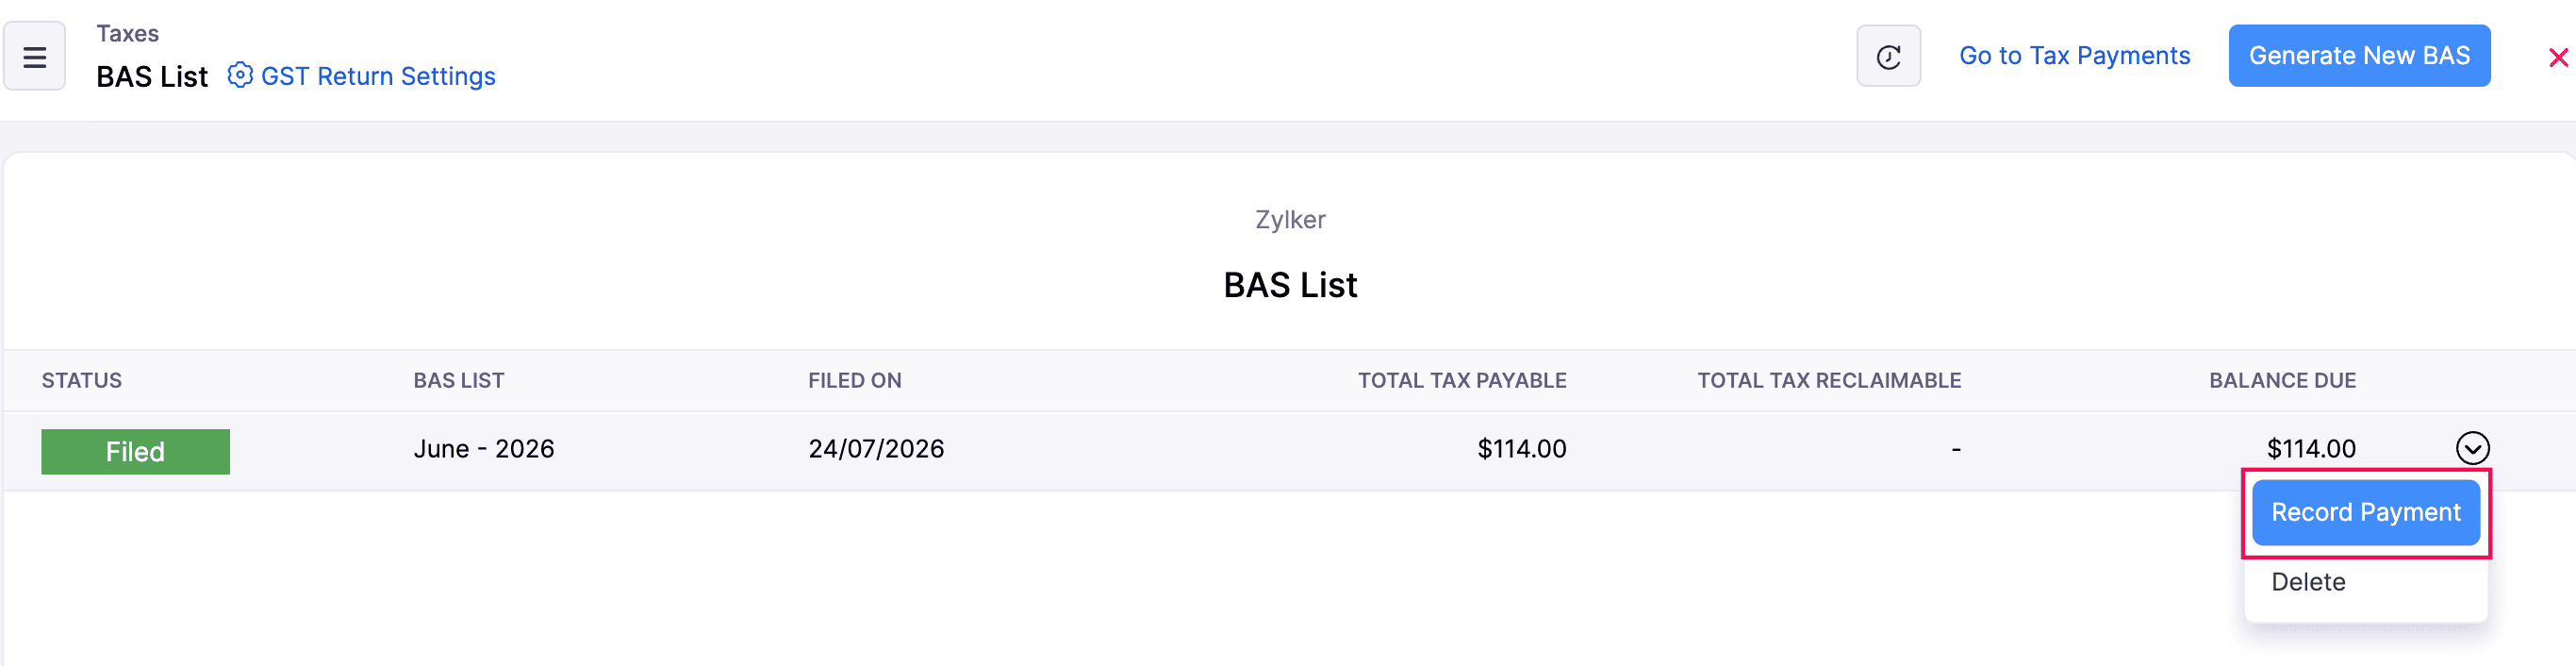
- In the BAS List page, hover over the downward arrow icon at the end of the BAS return for which you wish to record payment.
- Click Record Payment.
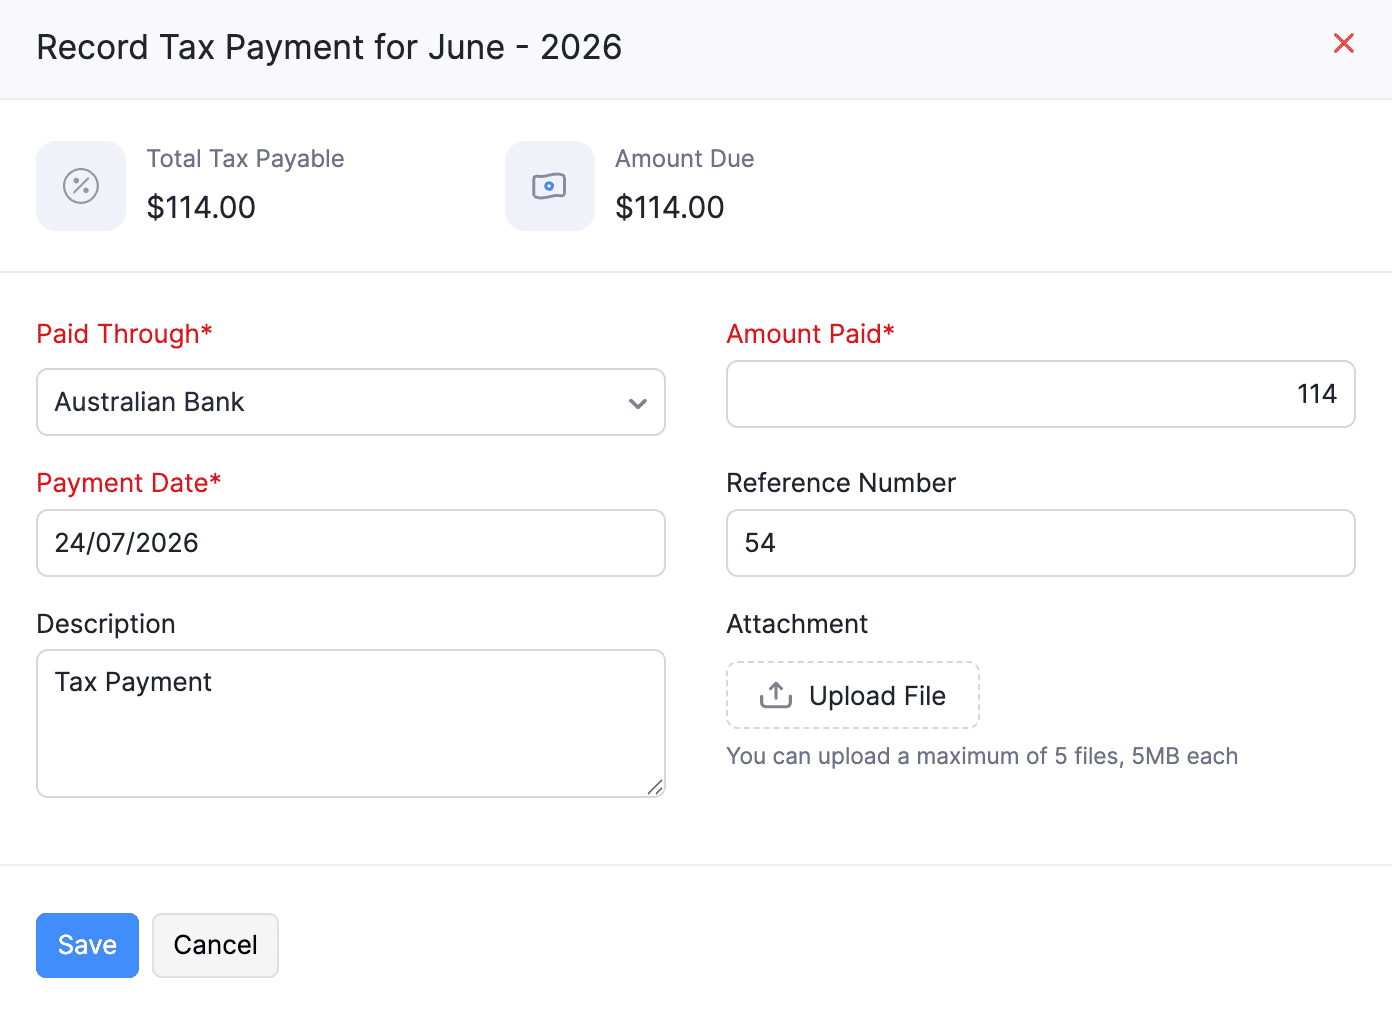
- In the Record Tax Payment popup, enter the following details.
| Fields | Description |
|---|---|
| Paid Through | Select the bank account used to record the payment. |
| Amount Paid | Enter the amount you’ve paid. |
| Payment Date | Select the date on which the payment was made. |
| Reference Number | Enter the reference number associated with the payment |
| Description | Enter a brief description about the payment. |
| Attachment | Click Upload File to attach a supporting document for this payment. |
- After entering the required details, click Save.
View Tax Payment
To view the tax payment that you have recorded for a BAS return:
- Go to Reports on the left sidebar.
- Navigate to Taxes and select BAS.
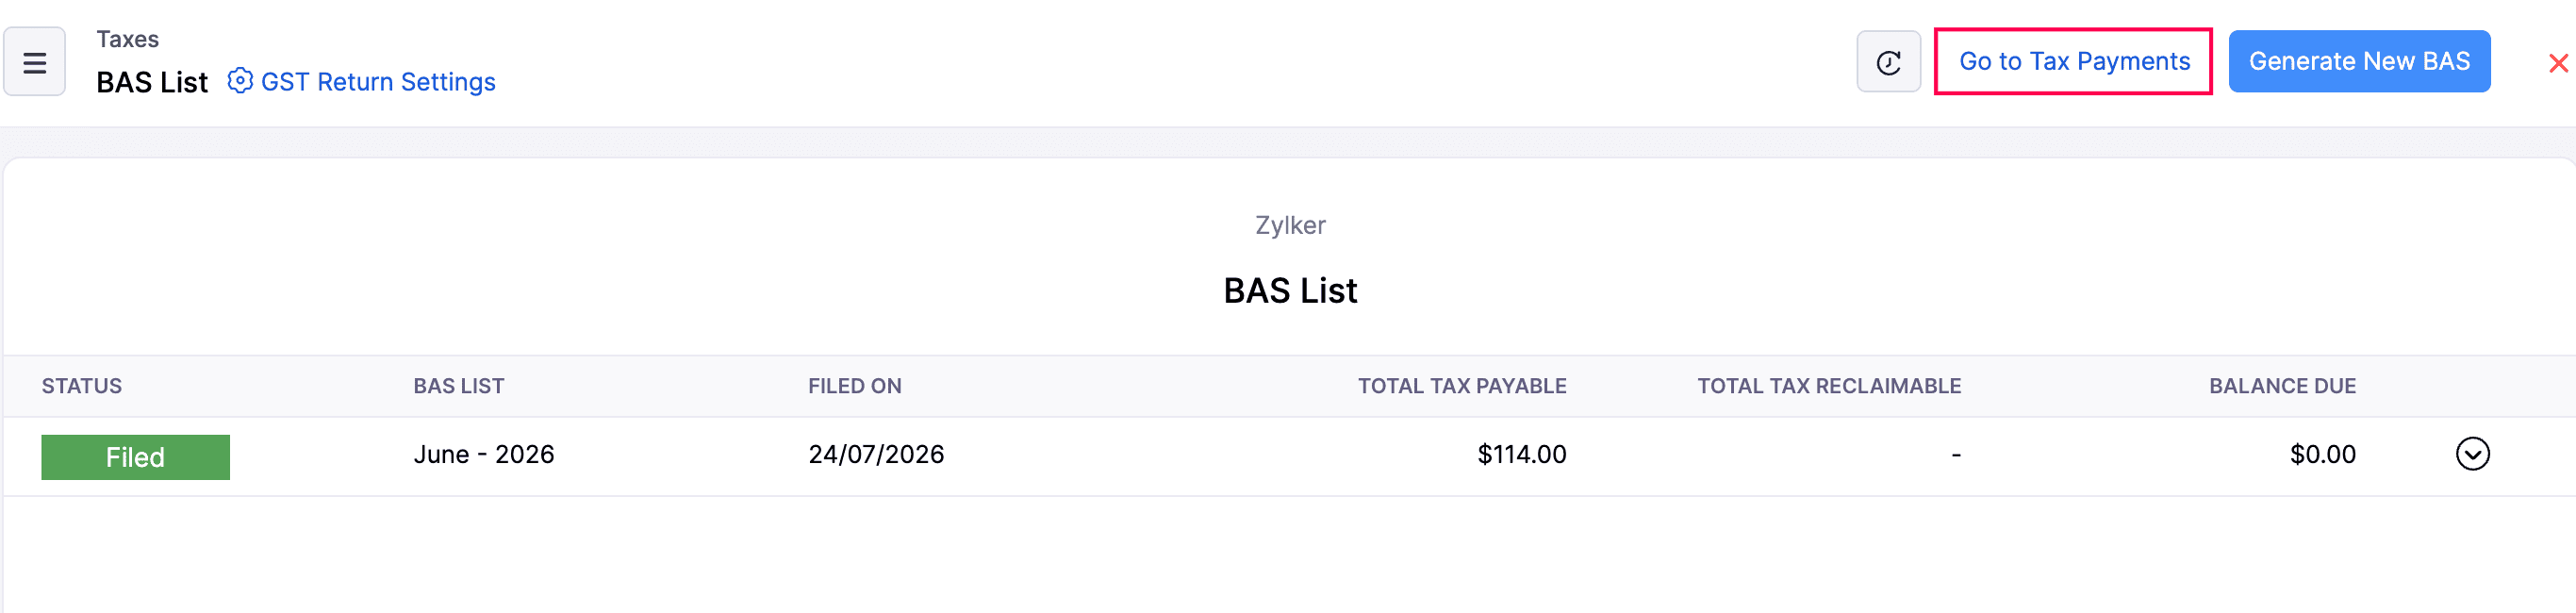
- Click Go to Tax Payments.
- Click the Payment History tab on the Tax Payments page.
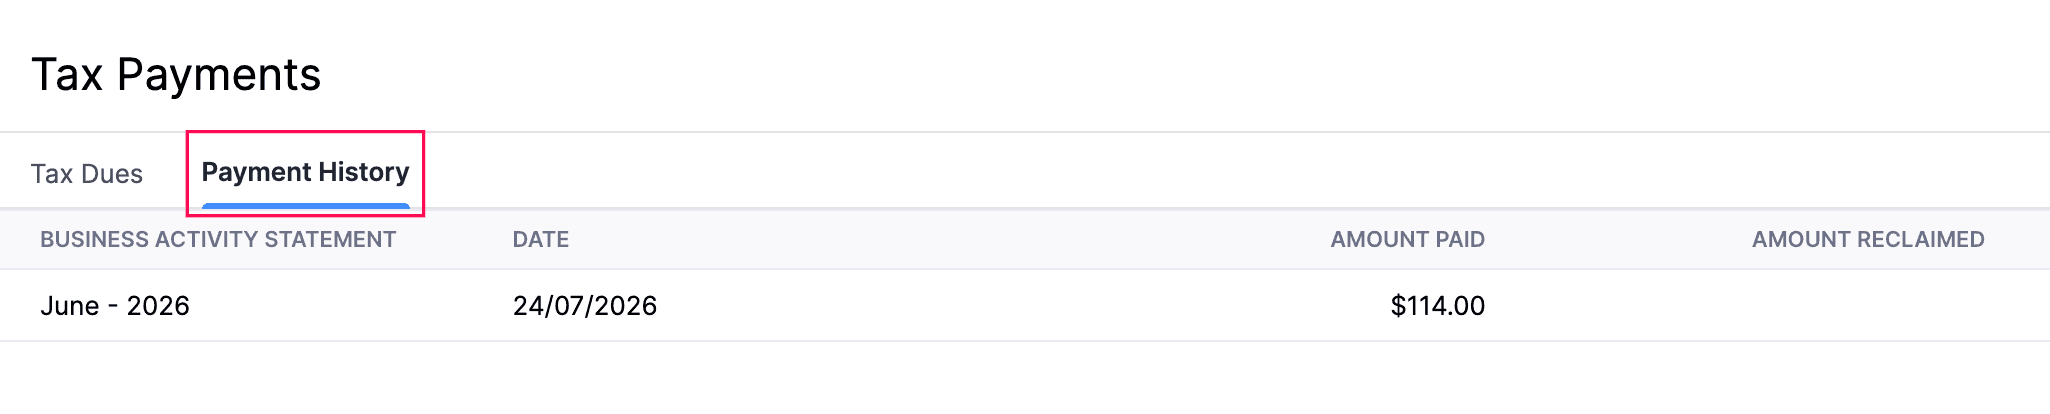
All the tax payments recorded for your BAS returns are listed here.
Delete Tax Payment
You can delete a tax payment only that was recorded in Zoho Books. Tax payments that have already been paid to the ATO cannot be deleted.
To delete the tax payment that you have recorded for a BAS return in Zoho Books:
- Go to Reports on the left sidebar.
- Navigate to Taxes and select BAS.
- Click Go to Tax Payments.
- Click the Payment History tab on top of the page.
- Hover over the payment and click the Delete icon.

- In the confirmation popup, click OK.
Record Tax Claim
You can record a tax claim for a BAS return that you have filed. Here’s how:
- Go to Reports on the left sidebar.
- Navigate to Taxes and select BAS.
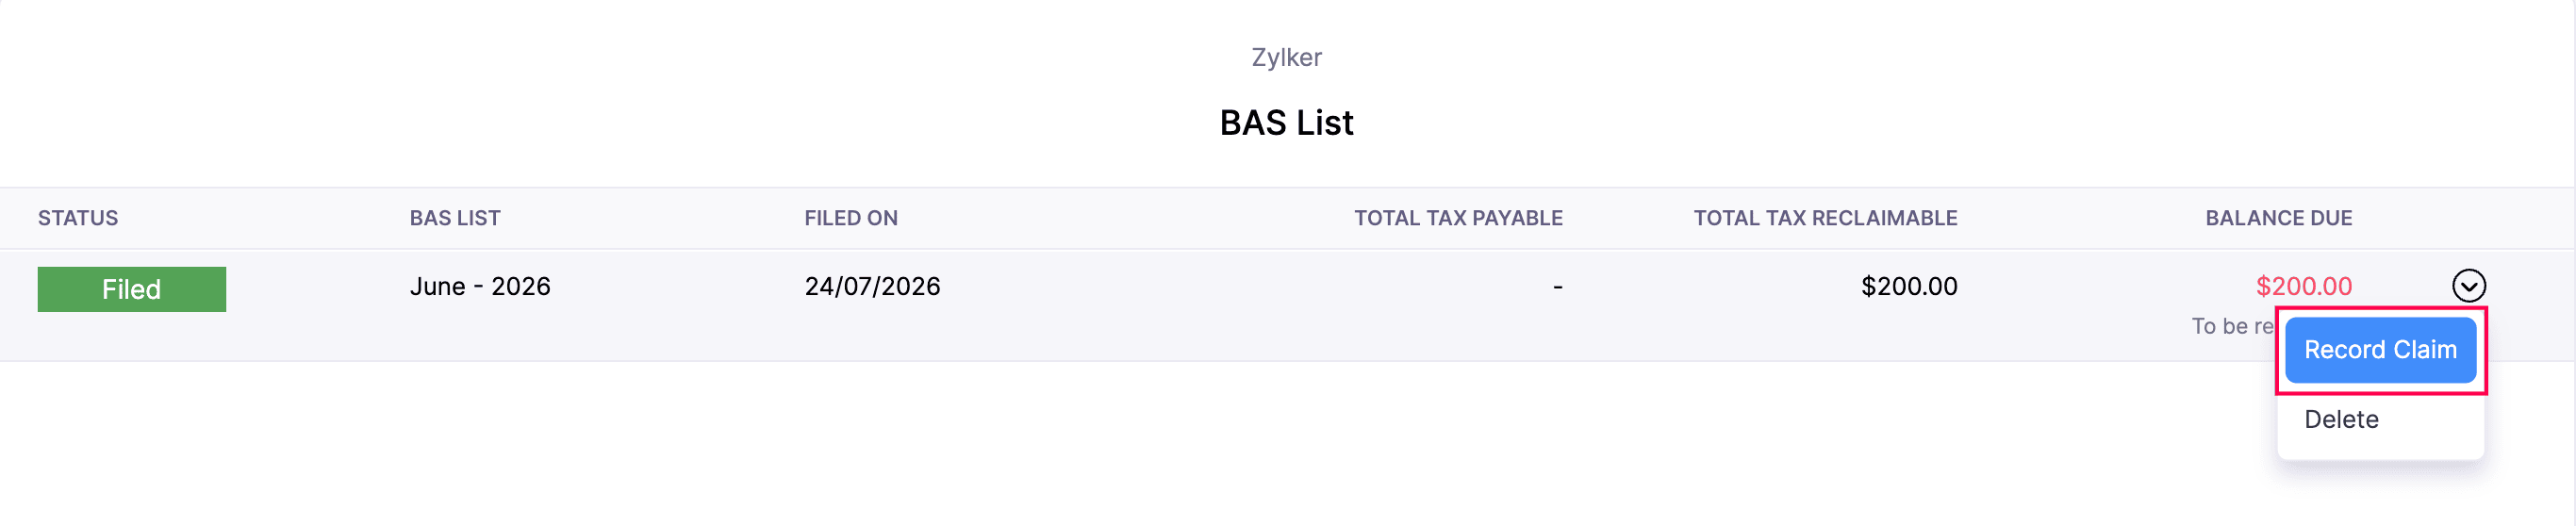
- On the BAS List page, hover over the downward arrow icon at the end of the BAS return for which you wish to record claim.
- Click Record Claim.
- In the Record Tax Claim popup, enter the following details.
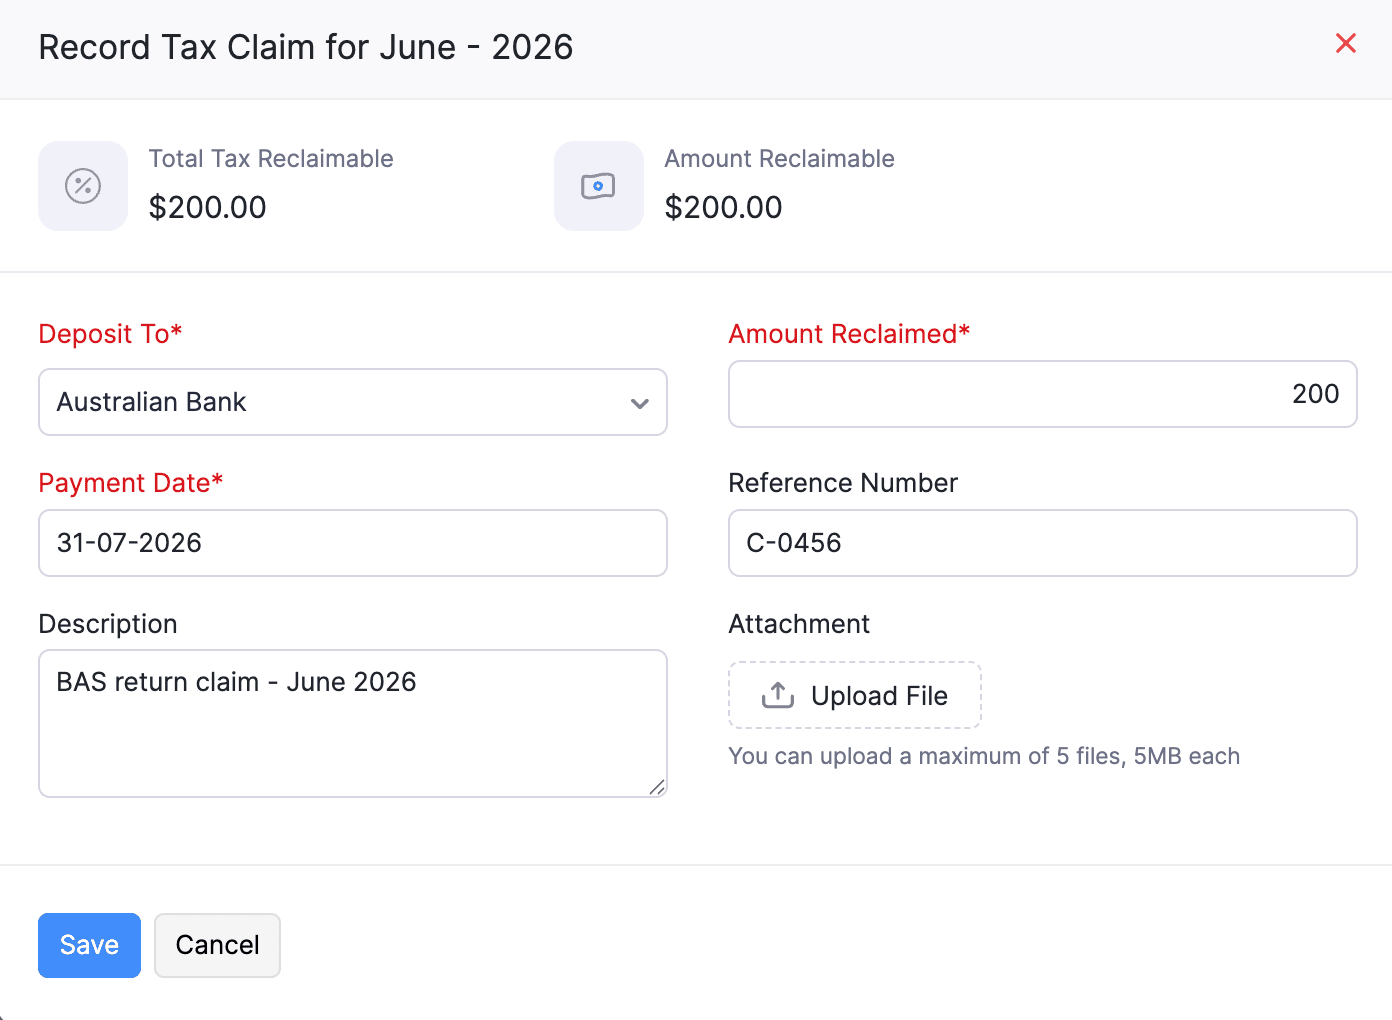
| Fields | Description |
|---|---|
| Deposit To | Select the bank account in which the BAS refund is deposited. |
| Amount Reclaimed | Enter the amount reclaimed from the ATO. |
| Payment Date | Select the date on which the claim was received. |
| Reference Number | Enter the reference number associated with the claim. |
| Description | Enter a brief description about the claim. |
| Attachment | Click Upload File to attach a supporting document to the BAS claim record. |
- After entering the required details, click Save.
Delete BAS Return
You cannot delete a BAS return once it has been lodged with the ATO portal. However, you can delete a BAS return that has been filed and recorded in Zoho Books for the following reasons:
- A BAS return generated for the wrong reporting period.
- A BAS return contains incorrect filing details.
- An unused BAS return that was created for review but never filed.
Note: If you have recorded a tax payment for the return, you need to first delete the tax payment before deleting the BAS return.
To delete a BAS return in Zoho Books:
- Go to Reports on the left sidebar.
- Navigate to Taxes and select BAS.
- In the BAS List page, hover over the downward arrow icon at the end of the BAS return that you wish to delete.
- Click Delete.
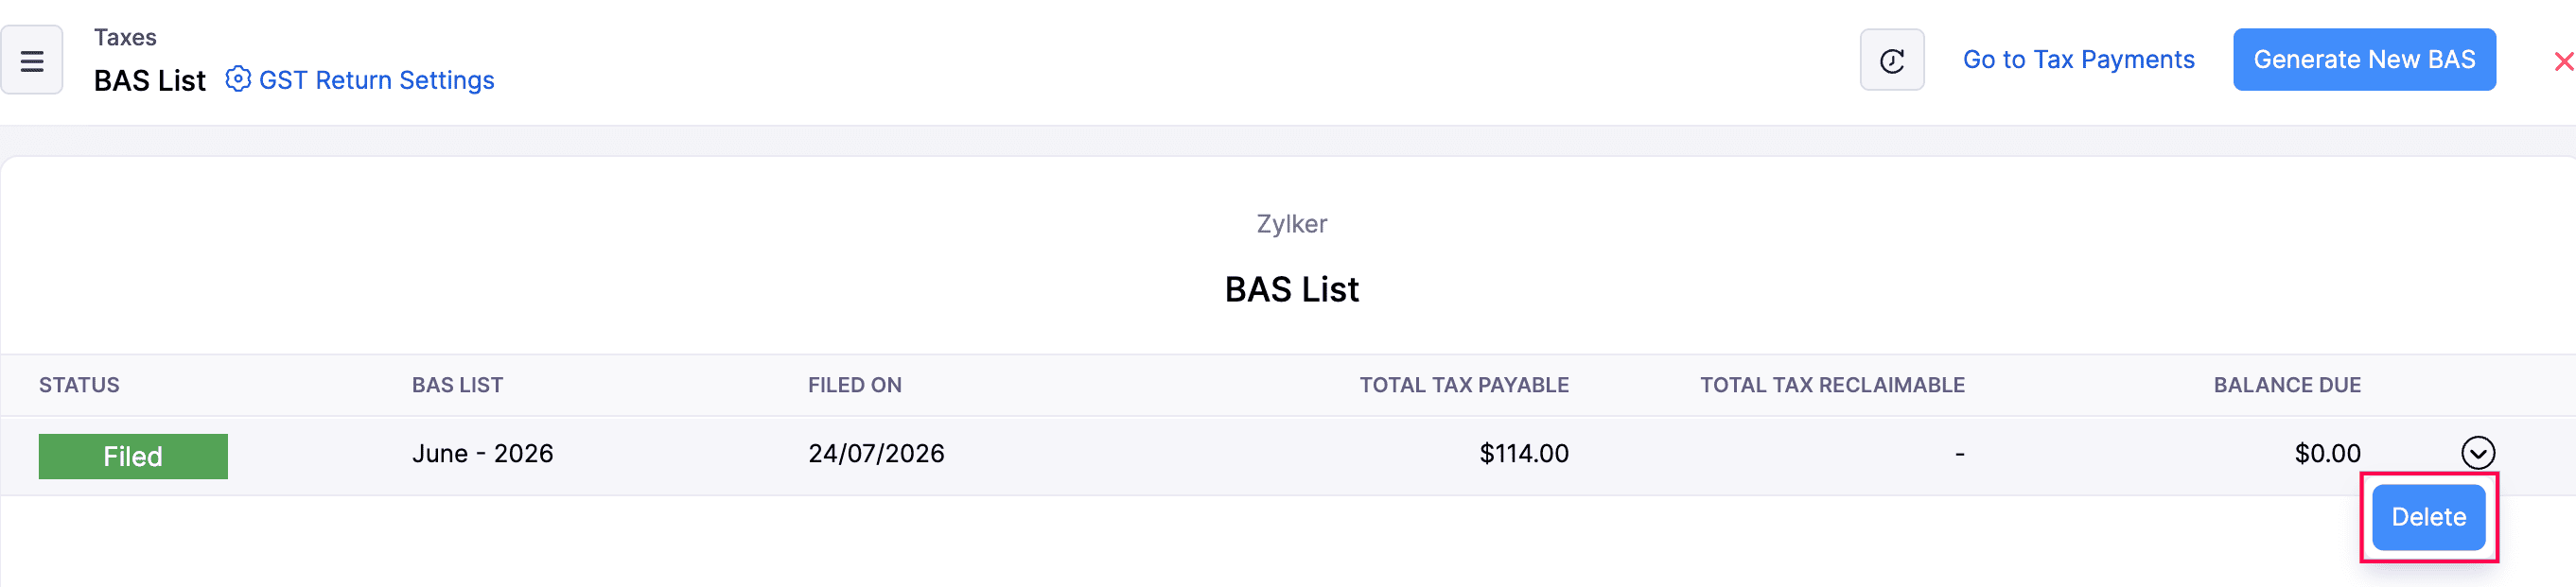
- In the confirmation popup, click OK.
PAYG Withheld Summary
The PAYG Withheld Summary report summarises the taxes withheld from your transactions for a selected period.
To view the report:
- Go to Reports on the left sidebar.
- Navigate to Taxes and select PAYG Withheld Summary.
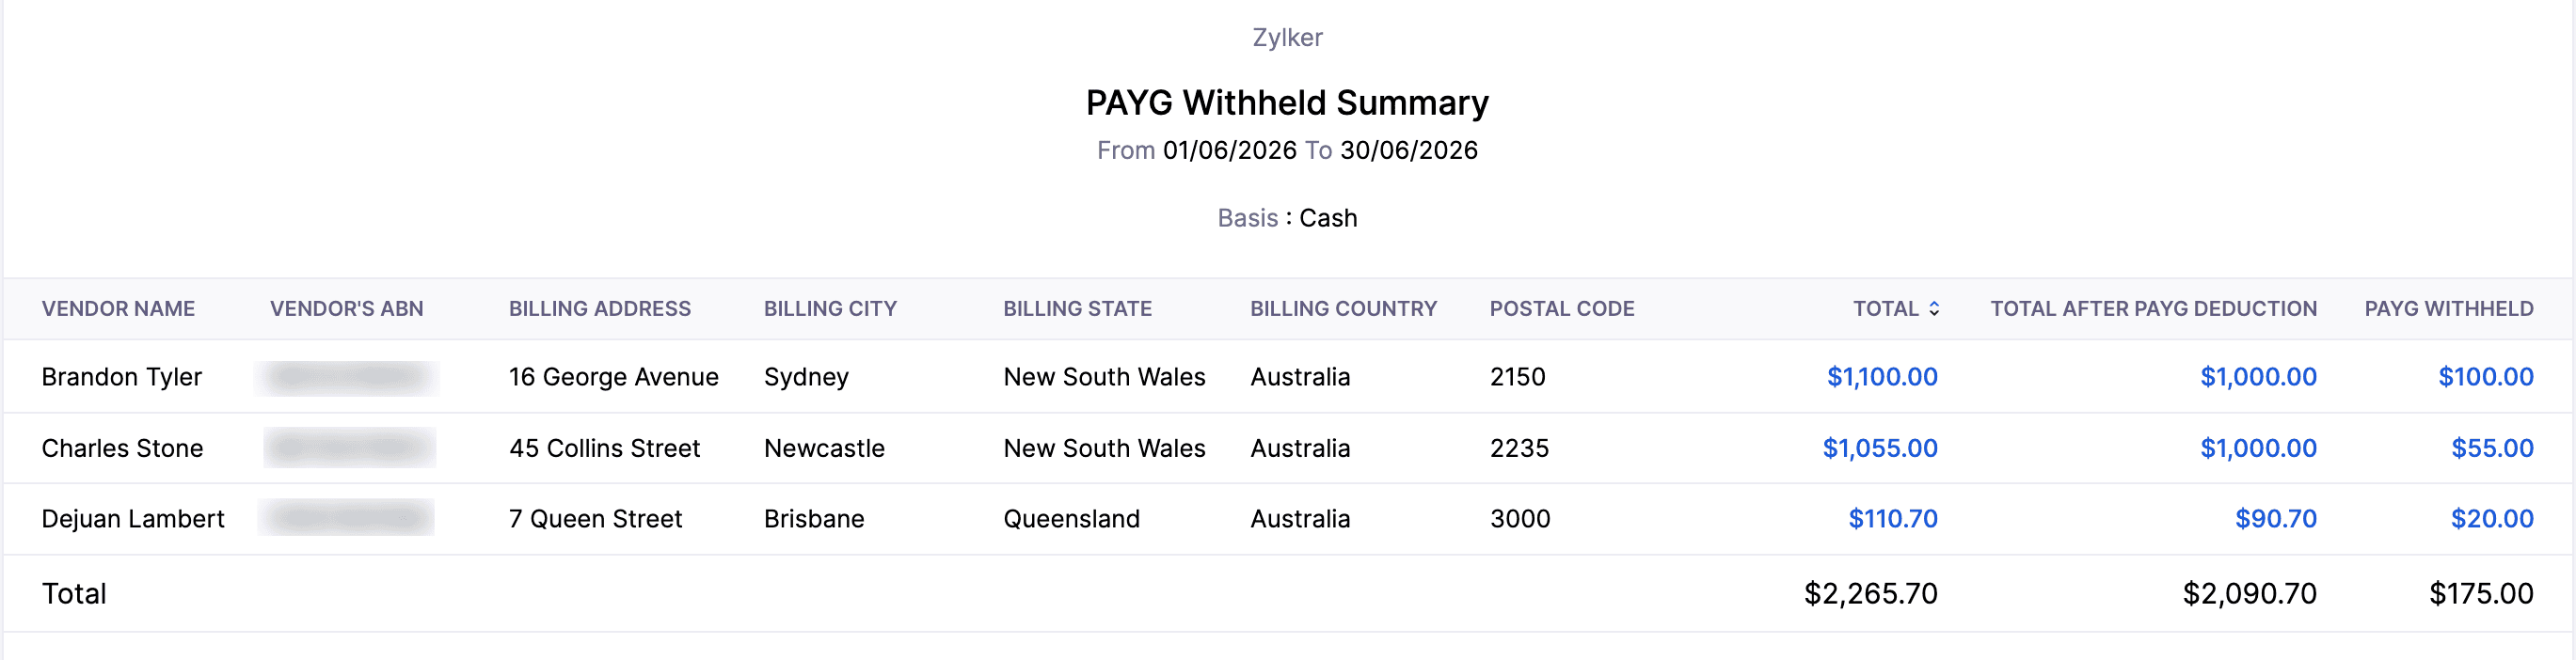
The PAYG withheld summary report contains the following columns:
| Column | Description |
|---|---|
| Vendor Name | The name of the vendor from whom tax was withheld. |
| Vendor’s ABN | The Australian Business Number of the vendor. |
| Billing Address | The vendor’s billing address. |
| Billing City | The city in the vendor’s billing address. |
| Billing State | The state or territory in the vendor’s billing address. |
| Billing Country | The country in the vendor’s billing address. |
| Postal Code | The postal code in the vendor’s billing address. |
| Total | The total value of the transactions, including the PAYG withheld amount. |
| Total After PAYG Deduction | The total payment after PAYG was withheld. |
| PAYG Withheld | The total PAYG withheld from the vendor’s payments. |
Customize Report
To customize this report:
- Click the Customize icon.
You can customize the report using the General and Show / Hide Columns tabs.
General
Under General, you can customize the report based on the following filters:
| Filters | Description |
|---|---|
| Date Range | Select the time period for generating the report. |
| Filter Transactions by ABN | Choose to include all transactions, only transactions with an ABN, or only transactions without an ABN in the report. |
- Click Run Report to apply the filters.
Show / Hide Columns
In this section, you can choose which columns to display in the report.
- In the Available Columns section, hover over the column you want to add.
- Click the + icon next to a column, or drag and drop the column from Available Columns to Selected Columns.
- Click Run Report to apply the customization and view the report.
Pro tip: You can also select Customize Report Columns from the PAYG Withheld Summary page to customize the columns displayed in the report.
 Yes
Yes