
Taxable Payments Annual Report (TPAR)
The Taxable Payments Annual Report (TPAR) is an annual report that businesses in Australia use to report payments made to vendors for services. The Australian Taxation Office (ATO) uses the information reported in a TPAR to help ensure vendors correctly report their income and meet their tax obligations. Certain industries, including building and construction, cleaning, courier, information technology, security, investigation, and surveillance services, are required to lodge a TPAR if they make payments to vendors for these services.
Scenario: Sarah runs a building and construction company in Sydney and engages several vendors each financial year. To meet her ATO obligations, she enables TPAR tracking in Zoho Books for each vendor, generates the TPAR at year-end, exports it as a CSV file, and lodges it through the ATO Business Portal.
How TPAR Works
In Zoho Books, enable the Include payments made to this vendor when generating TPAR option while creating or editing a vendor to track the payments made to the respective vendor. Once enabled, all paid transactions of that vendor will be tracked as payments to be included in the TPAR report.
Next, you can generate TPAR for the applicable financial year by selecting the vendors and reviewing the payment details.
Once TPAR is generated in Zoho Books, you can download it as a CSV file. You can then mark it as Filed and email the transaction details to the respective vendors.
Enable TPAR Tracking for Vendors
You can enable TPAR tracking for vendors who are vendors or subvendors providing services in an applicable industry. To enable:
Go to Purchases on the left sidebar, and select Vendors.
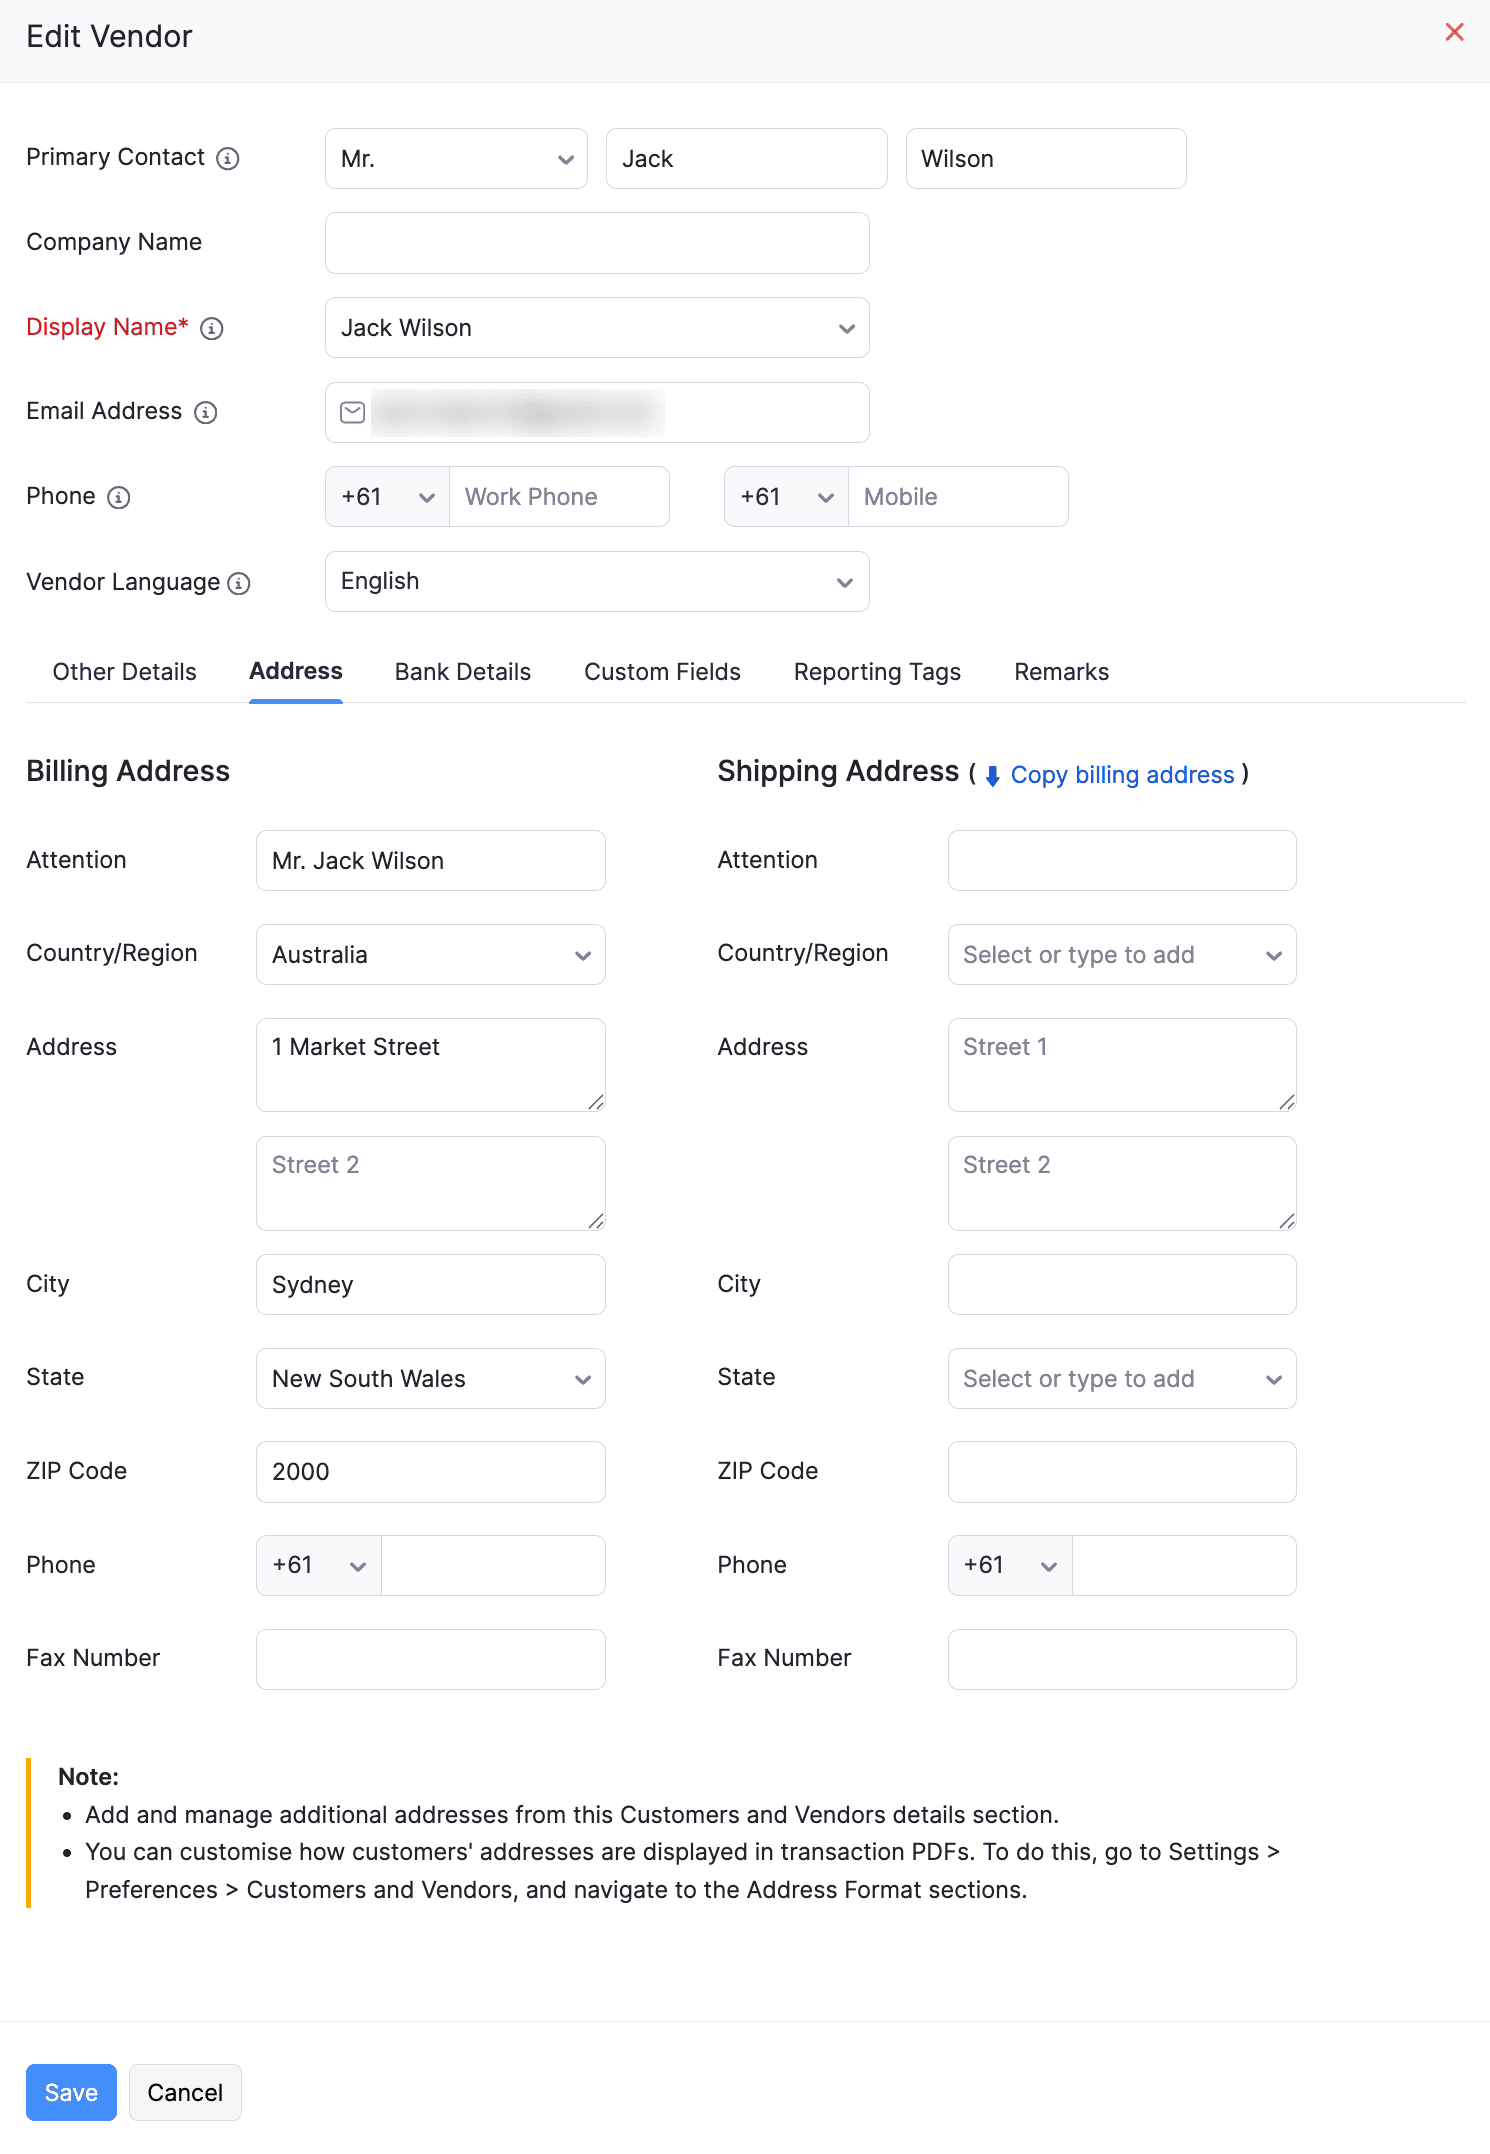
Click + New in the top right corner to create a new vendor, or select an existing vendor, and click Edit on the Details page.
In the Other Details tab, check Include payments made to this vendor when generating TPAR, and enter the vendor’s ABN (Australian Business Number).
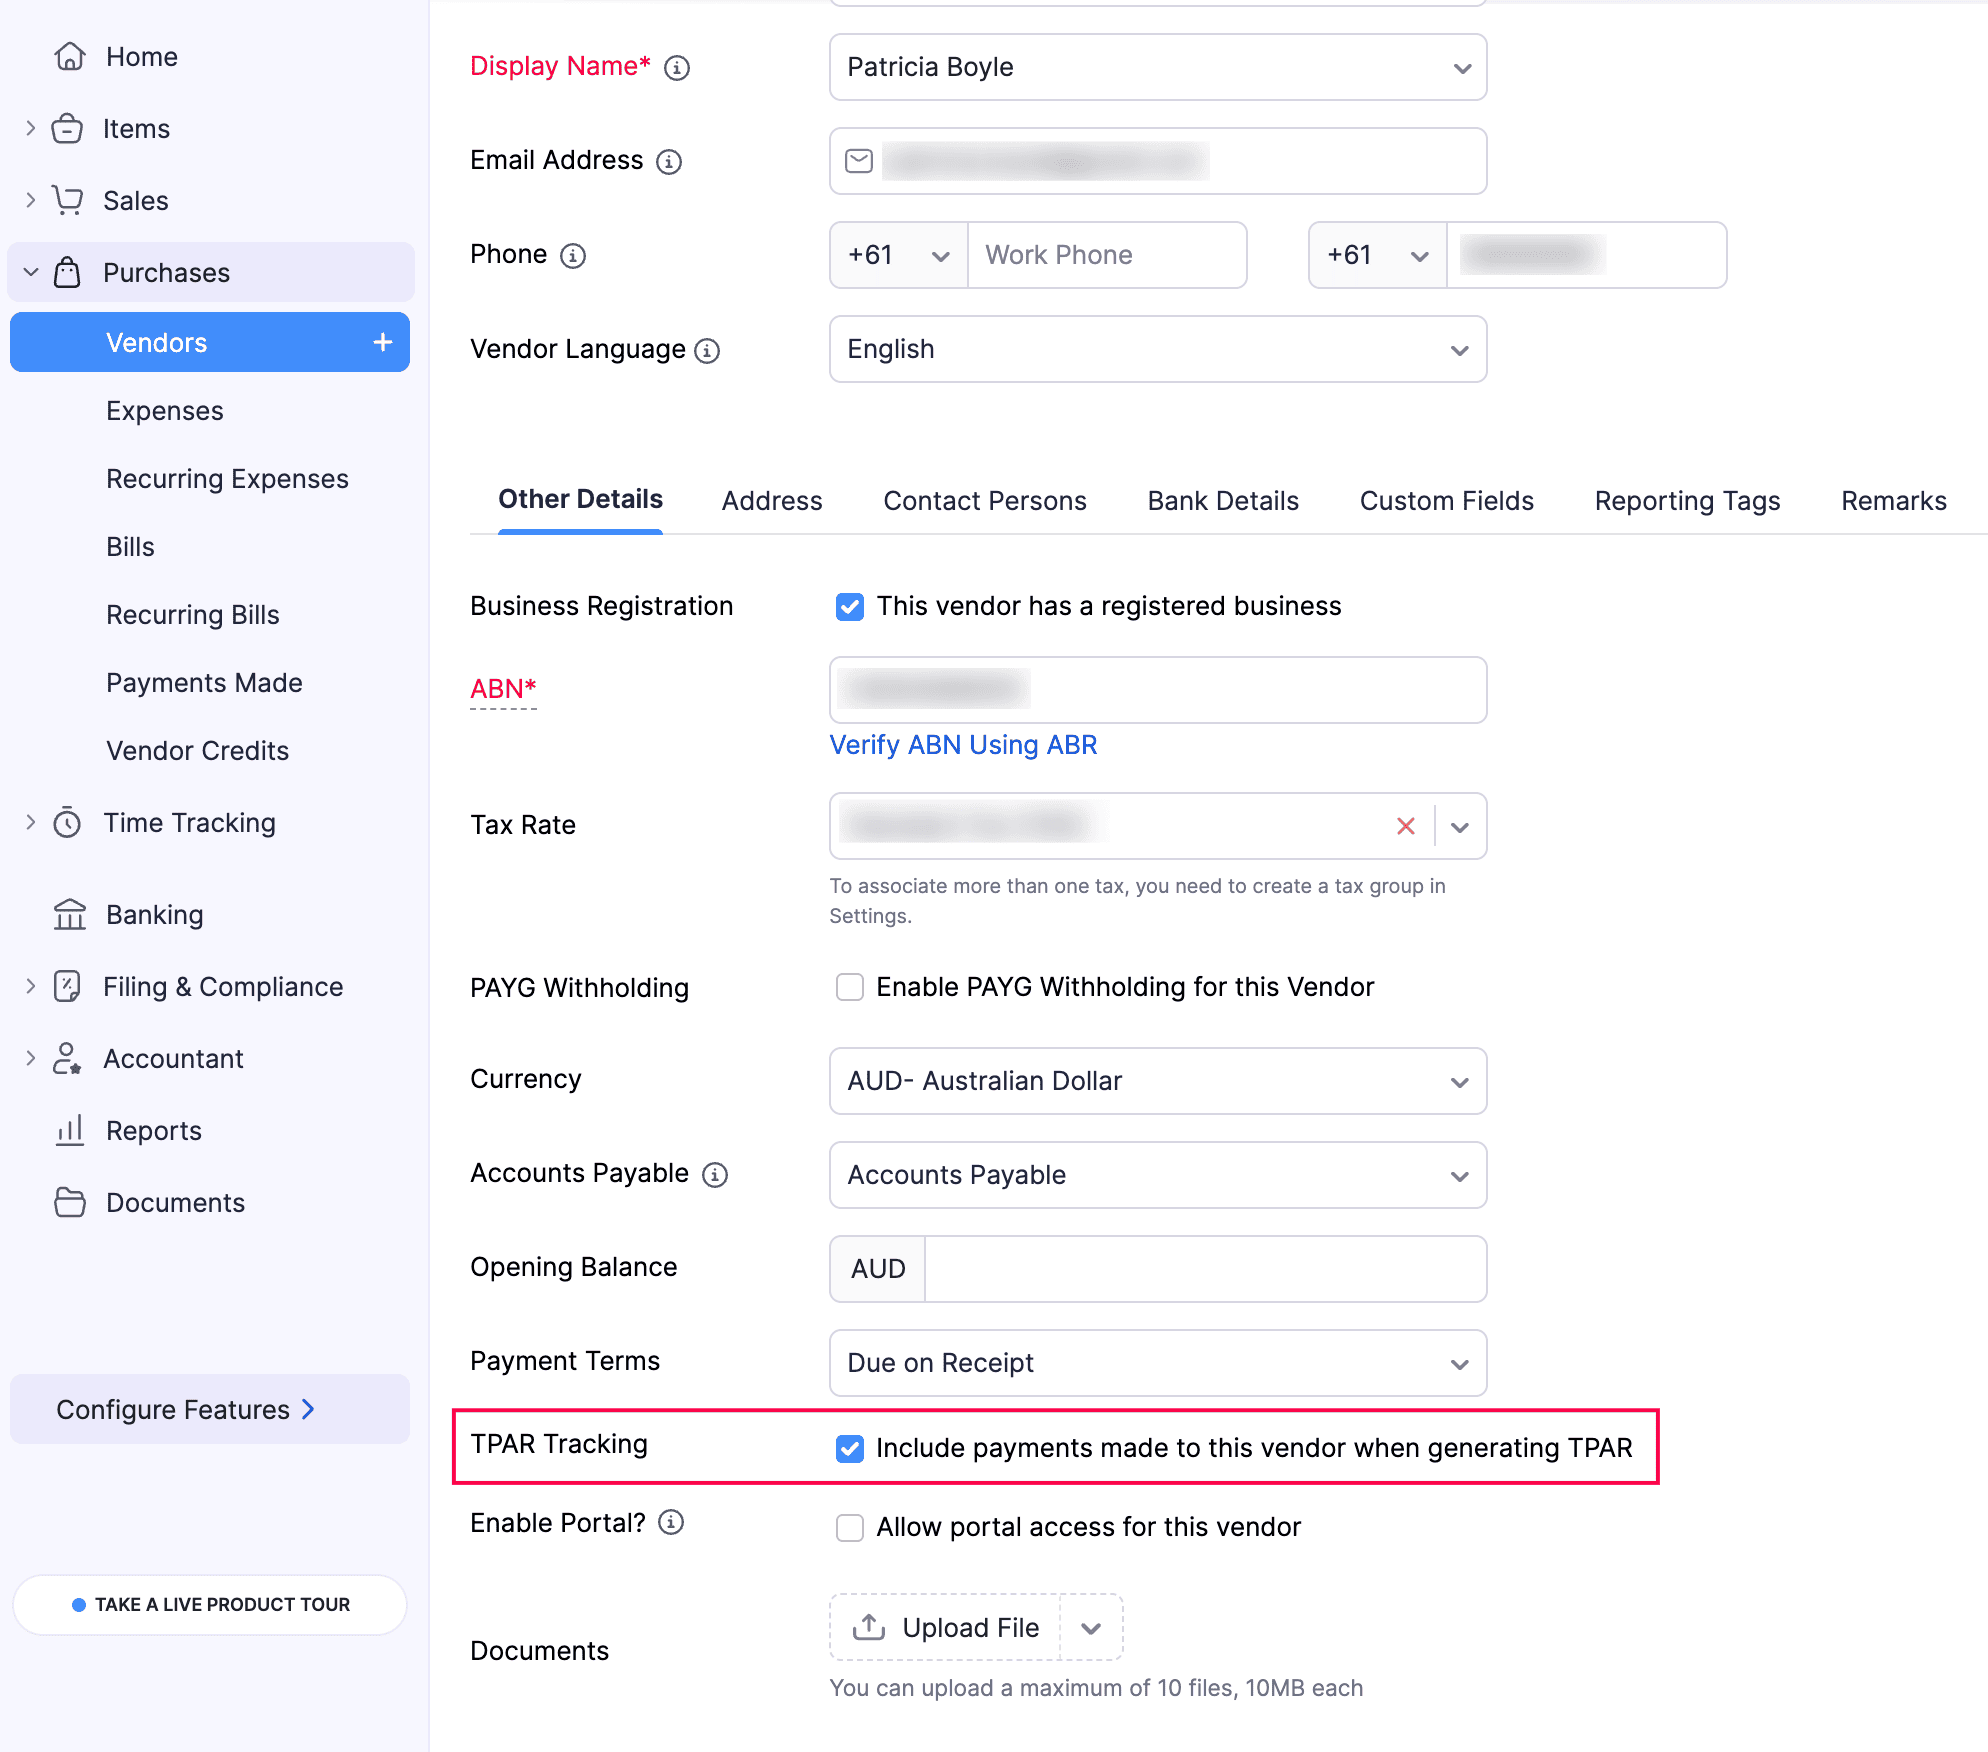
If the vendor has not provided an ABN, leave the ABN field blank. Payments made to vendors without an ABN must still be reported in the TPAR.
Click Save.
Once you enable this option for the vendor, their transactions will be tracked. You can include the vendor in the TPAR, and all paid transactions recorded against that vendor for the financial year will be included in the generated report.
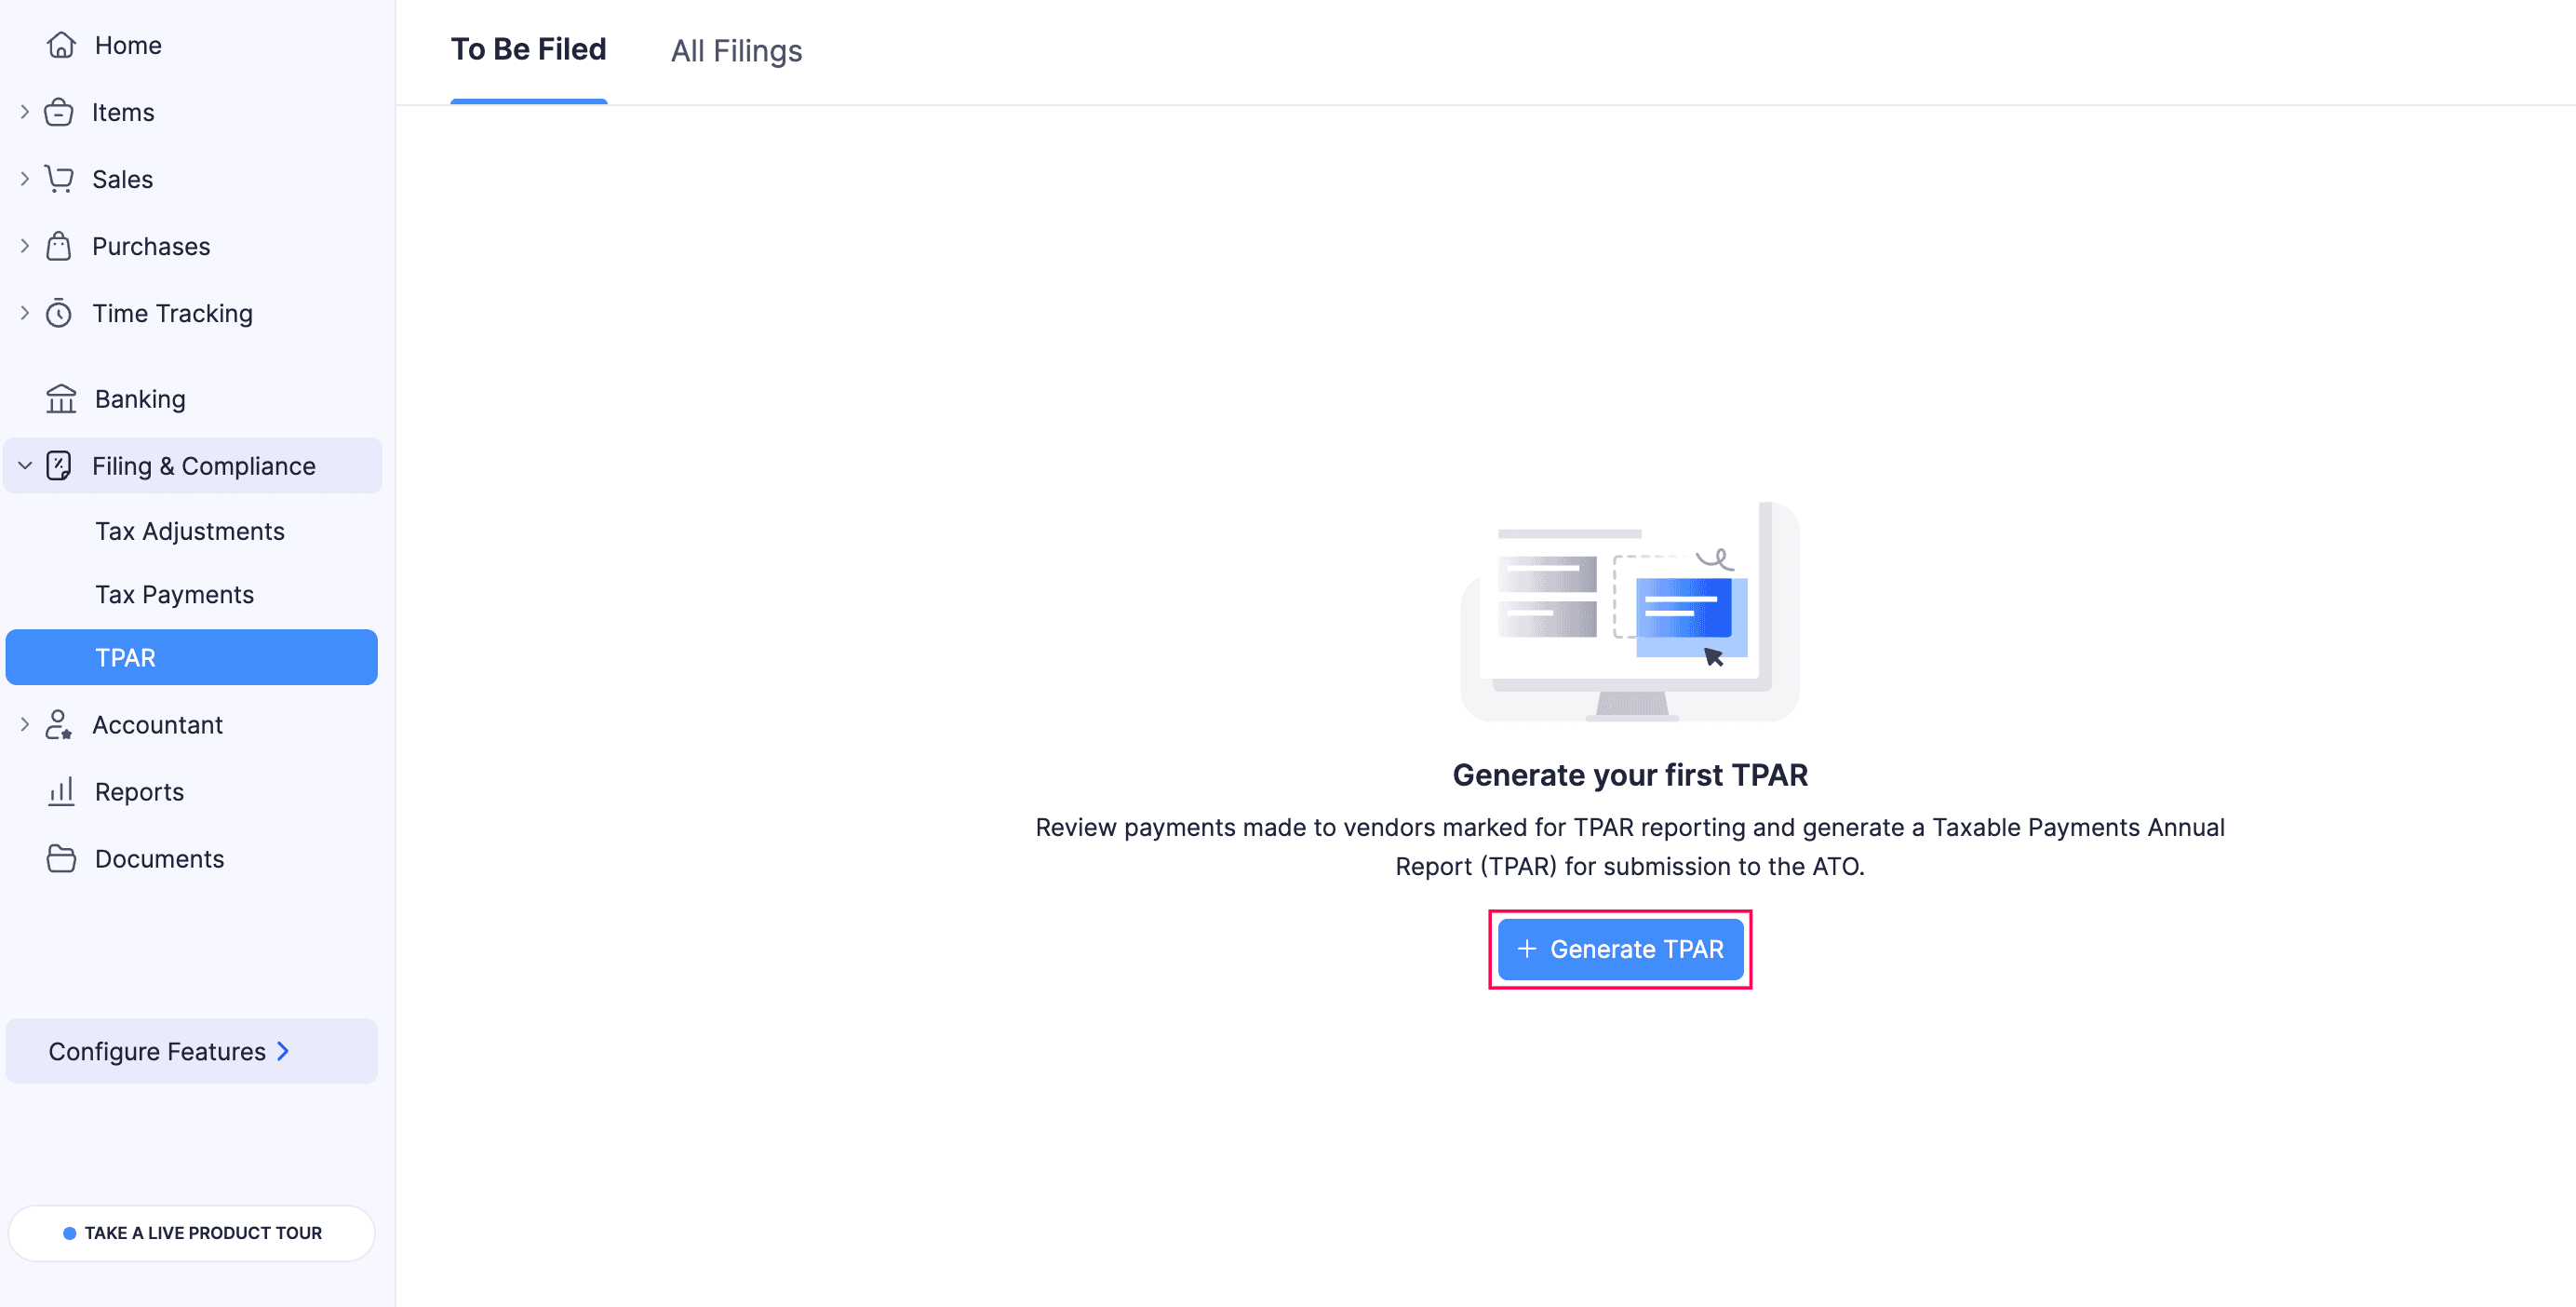
Generate TPAR
Once TPAR payment tracking is enabled for a vendor, all paid transactions to that vendor will be tracked. Zoho Books will use these transactions to help you generate the TPAR for the specified financial year. To generate TPAR:
Go to Filing & Compliance on the left sidebar, and select TPAR.
Click + Generate TPAR.
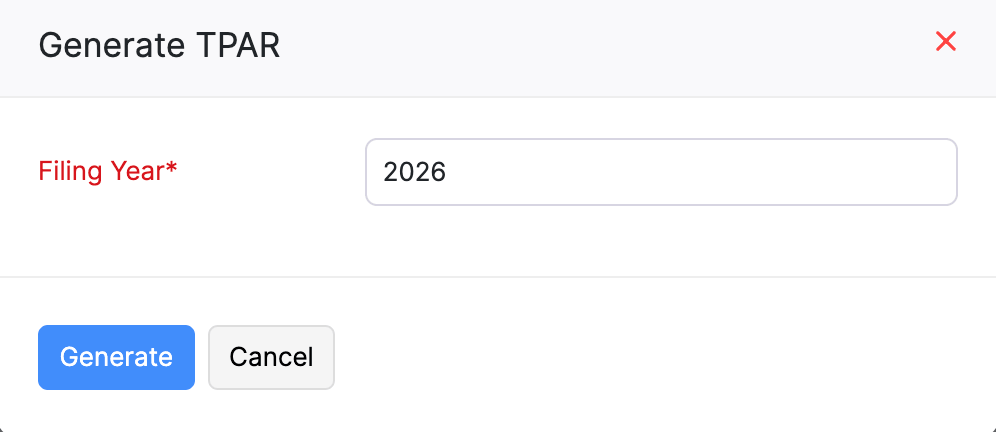
In the Generate TPAR pop-up, select the required Filing Year. Click Generate.
In the Select Vendors tab, the list of vendors tracked under TPAR will be displayed.
- Tracked Vendors: This filter shows all vendors for whom TPAR tracking has been enabled.
- All these vendors are preselected by default. To exclude a particular vendor, unselect them.
- To exclude specific transactions with a vendor:
- Select the vendor for whom you want to exclude transactions.
- On the next page, in the Reportable Payments tab, hover over the transaction and click Exclude.
- To include a previously excluded transaction, go to the Excluded Payments tab, hover over the transaction, and click Include.
- Click Save to apply the changes.
- Non-Tracked Vendors: This filter includes vendors whose payments are not currently tracked for TPAR. Hover over the required vendor, and click Track for TPAR to start tracking their payments.
- Tracked Vendors: This filter shows all vendors for whom TPAR tracking has been enabled.
Insight: When you click Track for TPAR, the vendor’s existing paid transactions for the selected financial year will be captured and included in the report. You can review their transactions in the Reportable Payments tab before generating the report.
- Click Next.
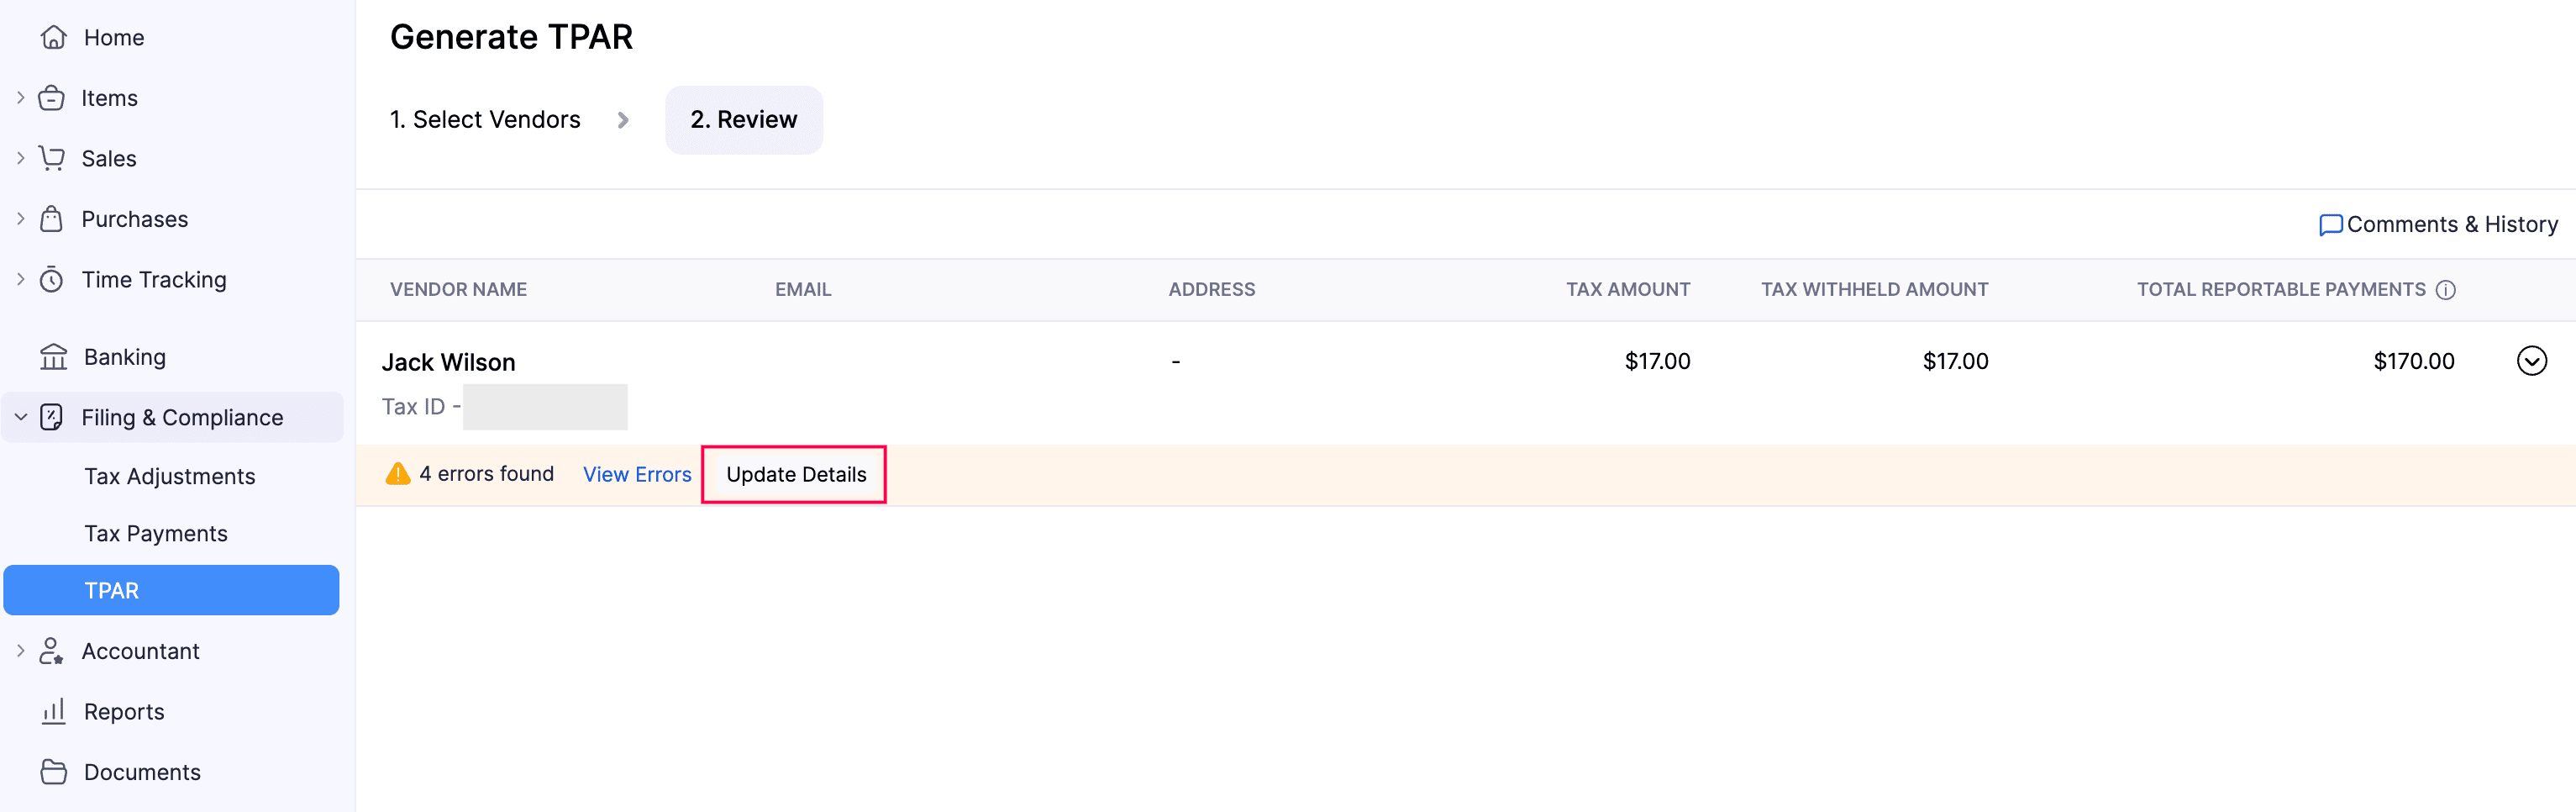
- In the Review tab, check each vendor’s ABN, Name, Address, and total payment values.
- If any details are missing, click View Errors to see the list of errors for that vendor.
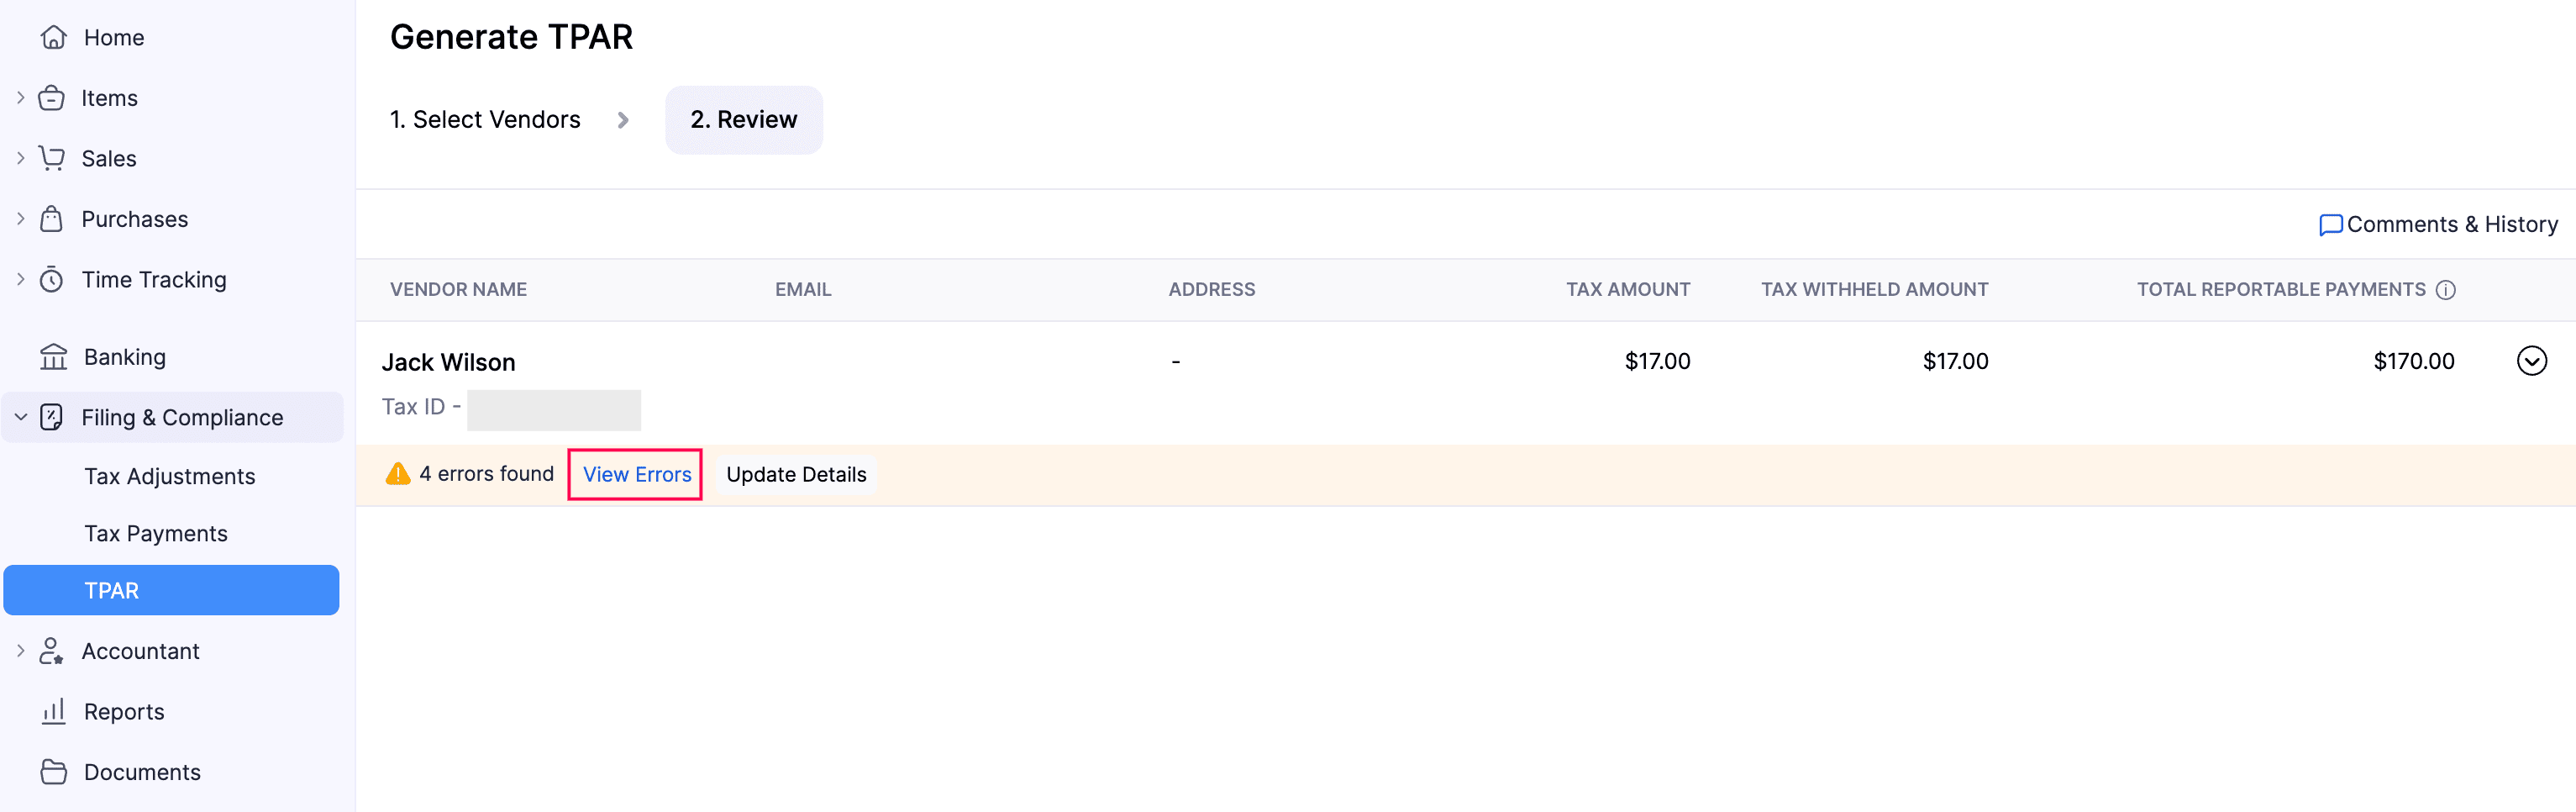
- Click Update Details to edit and fill in the missing information.
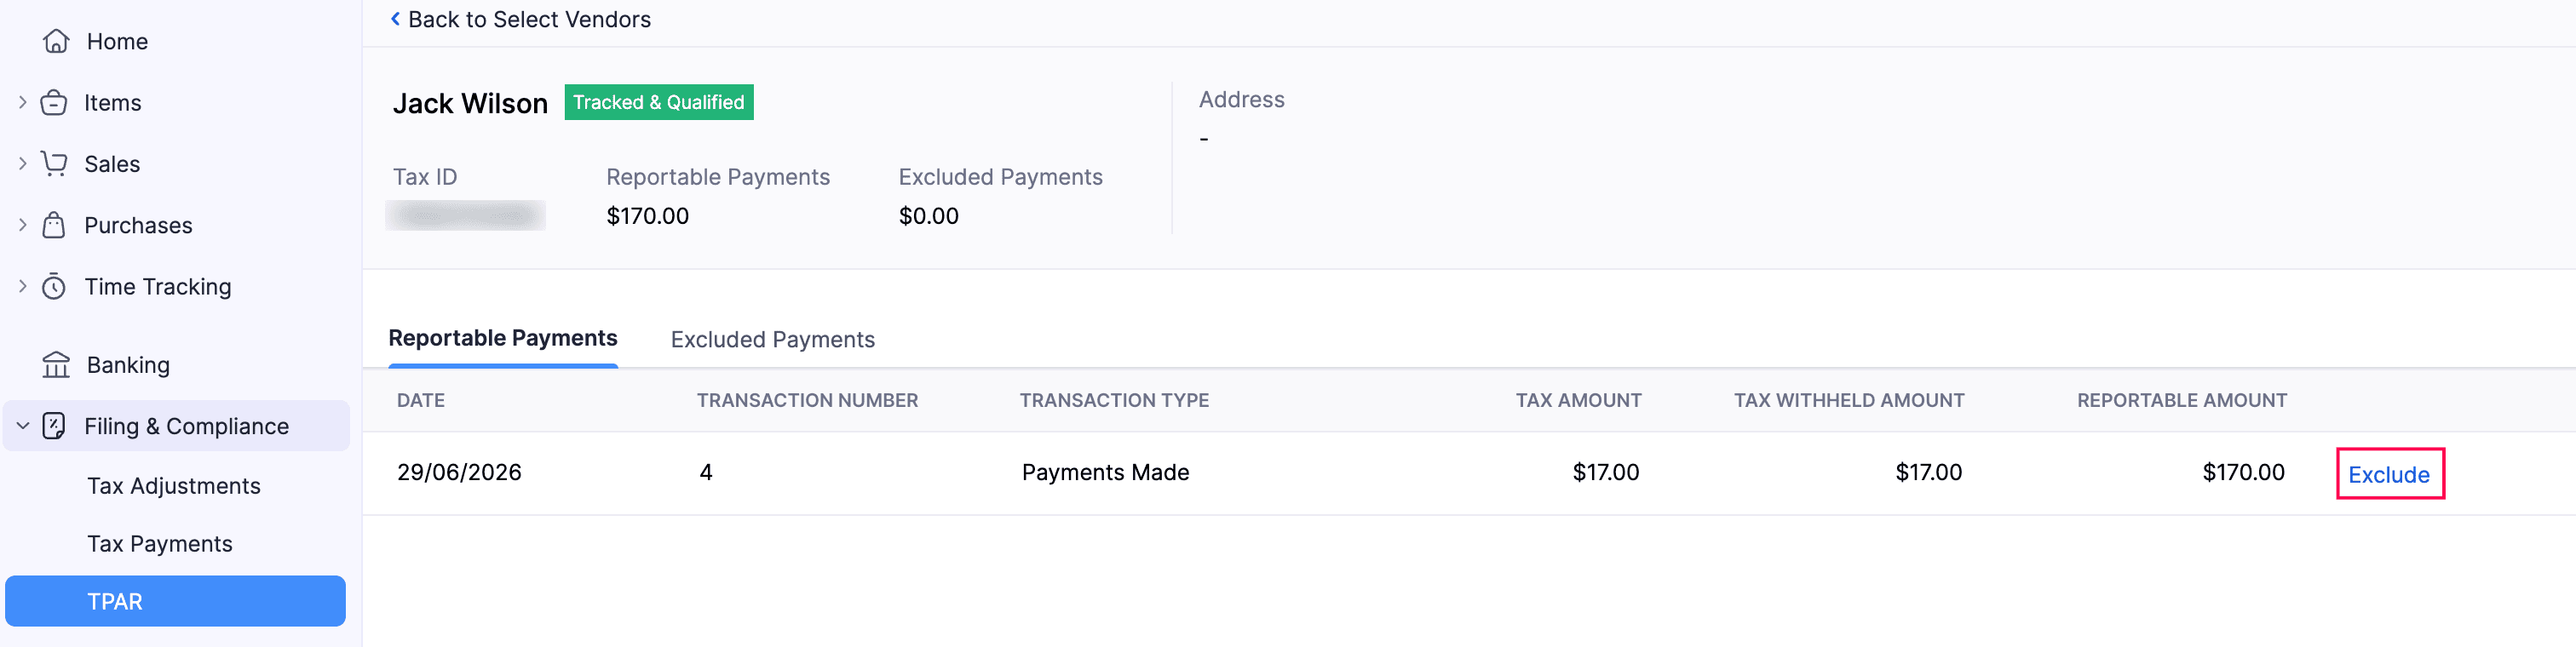
- To exclude or include any reportable payments, click View Details to the right of the vendor.
- On the page that follows, under Reportable Payments, hover over the transaction you want to exclude and click Exclude.
- After reviewing the details, click Save and Generate at the bottom.
Insight:
- Reportable Payments are the total payments made to the vendor from tracked transactions, including the GST component.
- Excluded Payments are payments that have been manually excluded from the report.
- The GST amount reported in the TPAR is the GST included in each payment.
Export TPAR From Zoho Books
Once you generate the TPAR, you can export it as a CSV file. To export TPAR from Zoho Books:
On the TPAR Report page, click Export for Filing in the top right corner.

In the confirmation pop-up, click Export again.
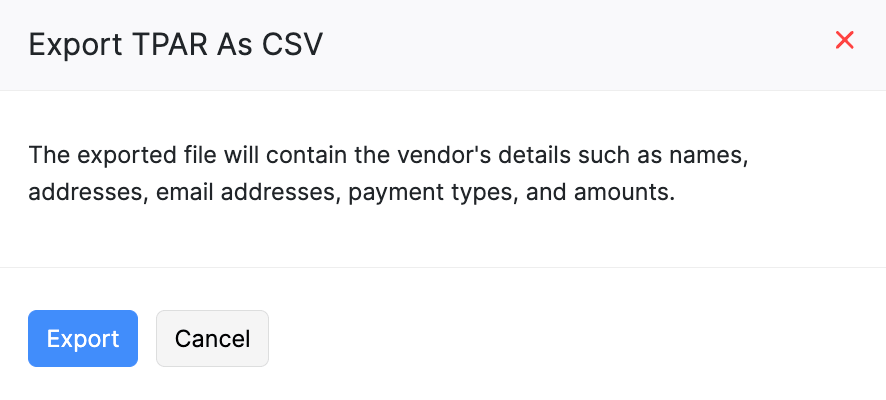
The TPAR will be downloaded onto your device in CSV format.
Mark TPAR as Filed
After lodging the generated TPAR with the ATO, you can return to Zoho Books and manually mark the TPAR as Filed on the generated TPAR page. To mark as filed:
On the TPAR page, click the More icon in the top right corner, and select Mark as Filed from the dropdown.
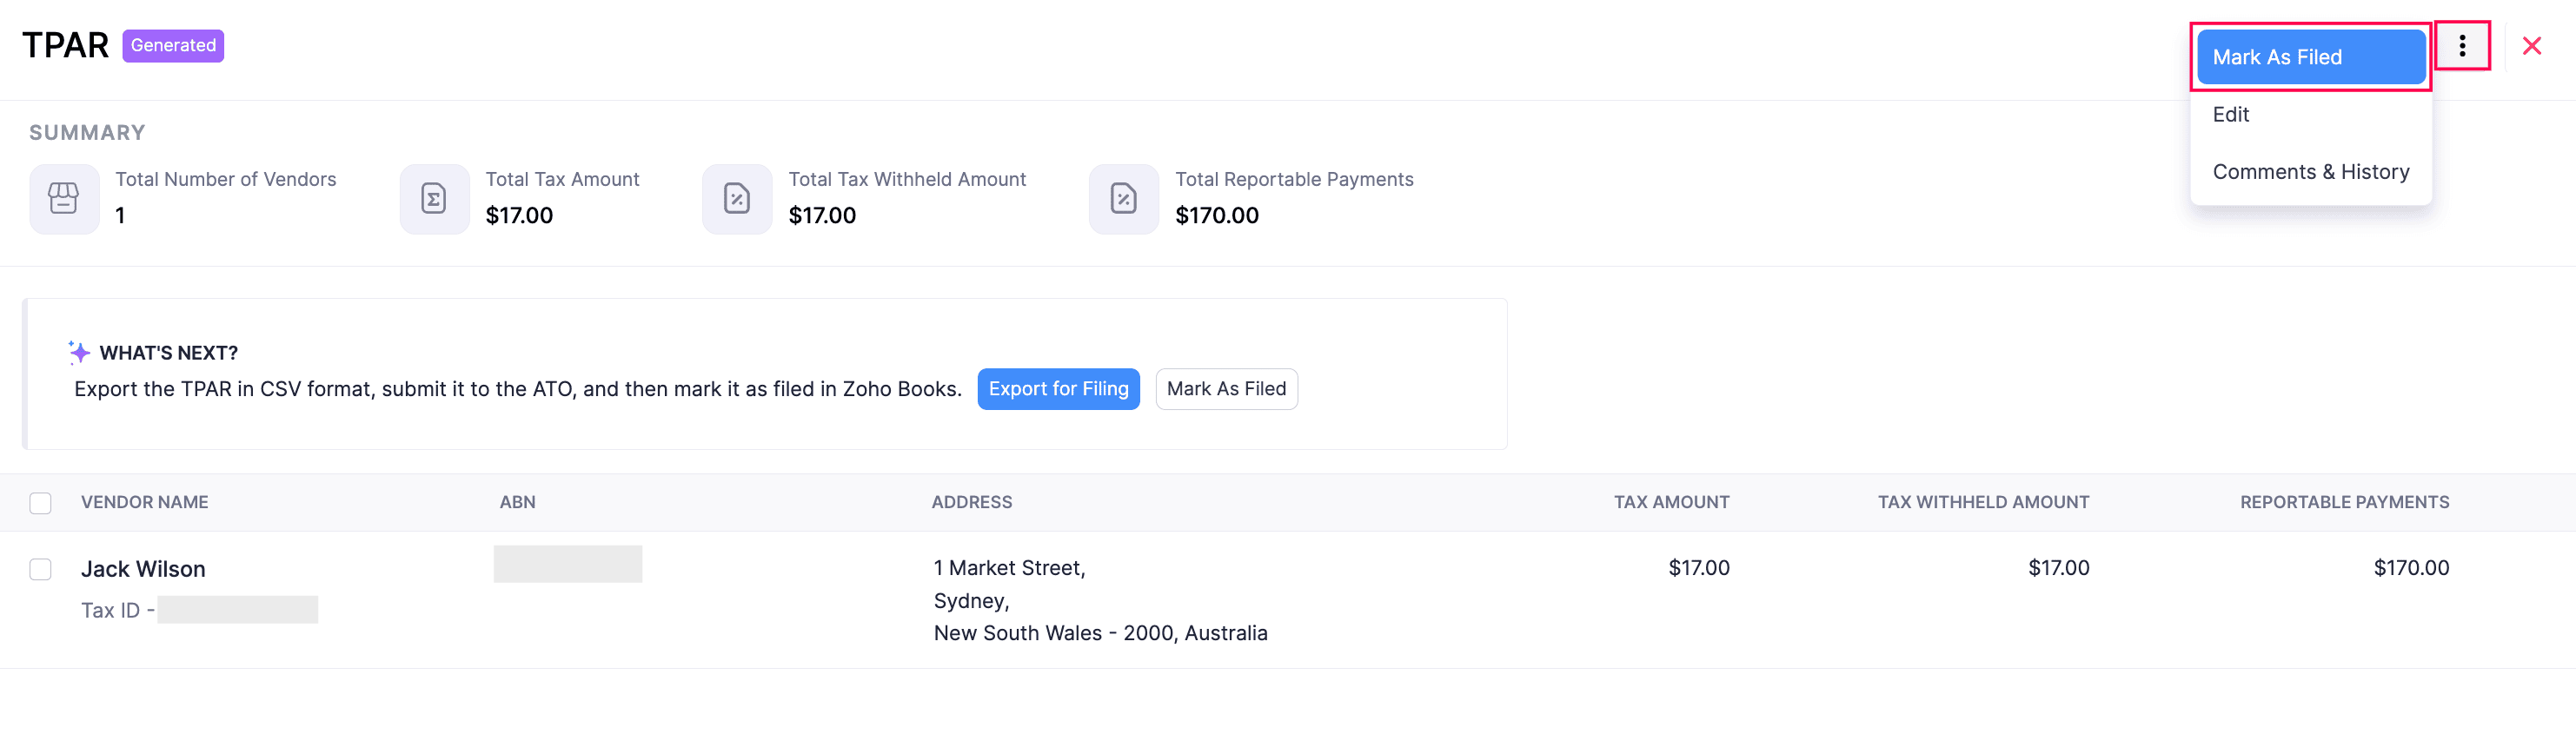
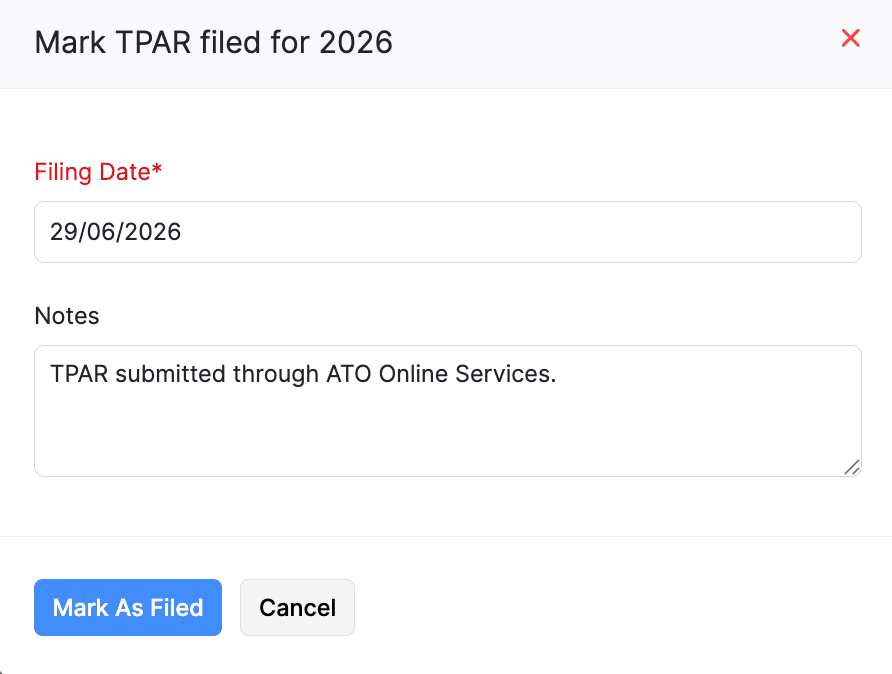
In the Mark TPAR for the Selected Year as Filed pop-up, complete the following fields:
- Filing Date: Choose the date you lodged the TPAR with the ATO.
- Notes: Add any relevant notes if needed. This is mandatory to file TPAR.
Click Mark as Filed.
The TPAR will be marked as Filed.
Insight: You can undo the action by following the same steps and clicking Mark as Unfiled from the dropdown.
Email TPAR to Vendors
Once you’ve marked the TPAR as Filed, you can email a copy of the TPAR summary to the respective vendors in bulk. To email the TPAR:
On the TPAR page, click hover over the required vendor, click the Dropdown icon to the right, and select Email Form to Vendor.
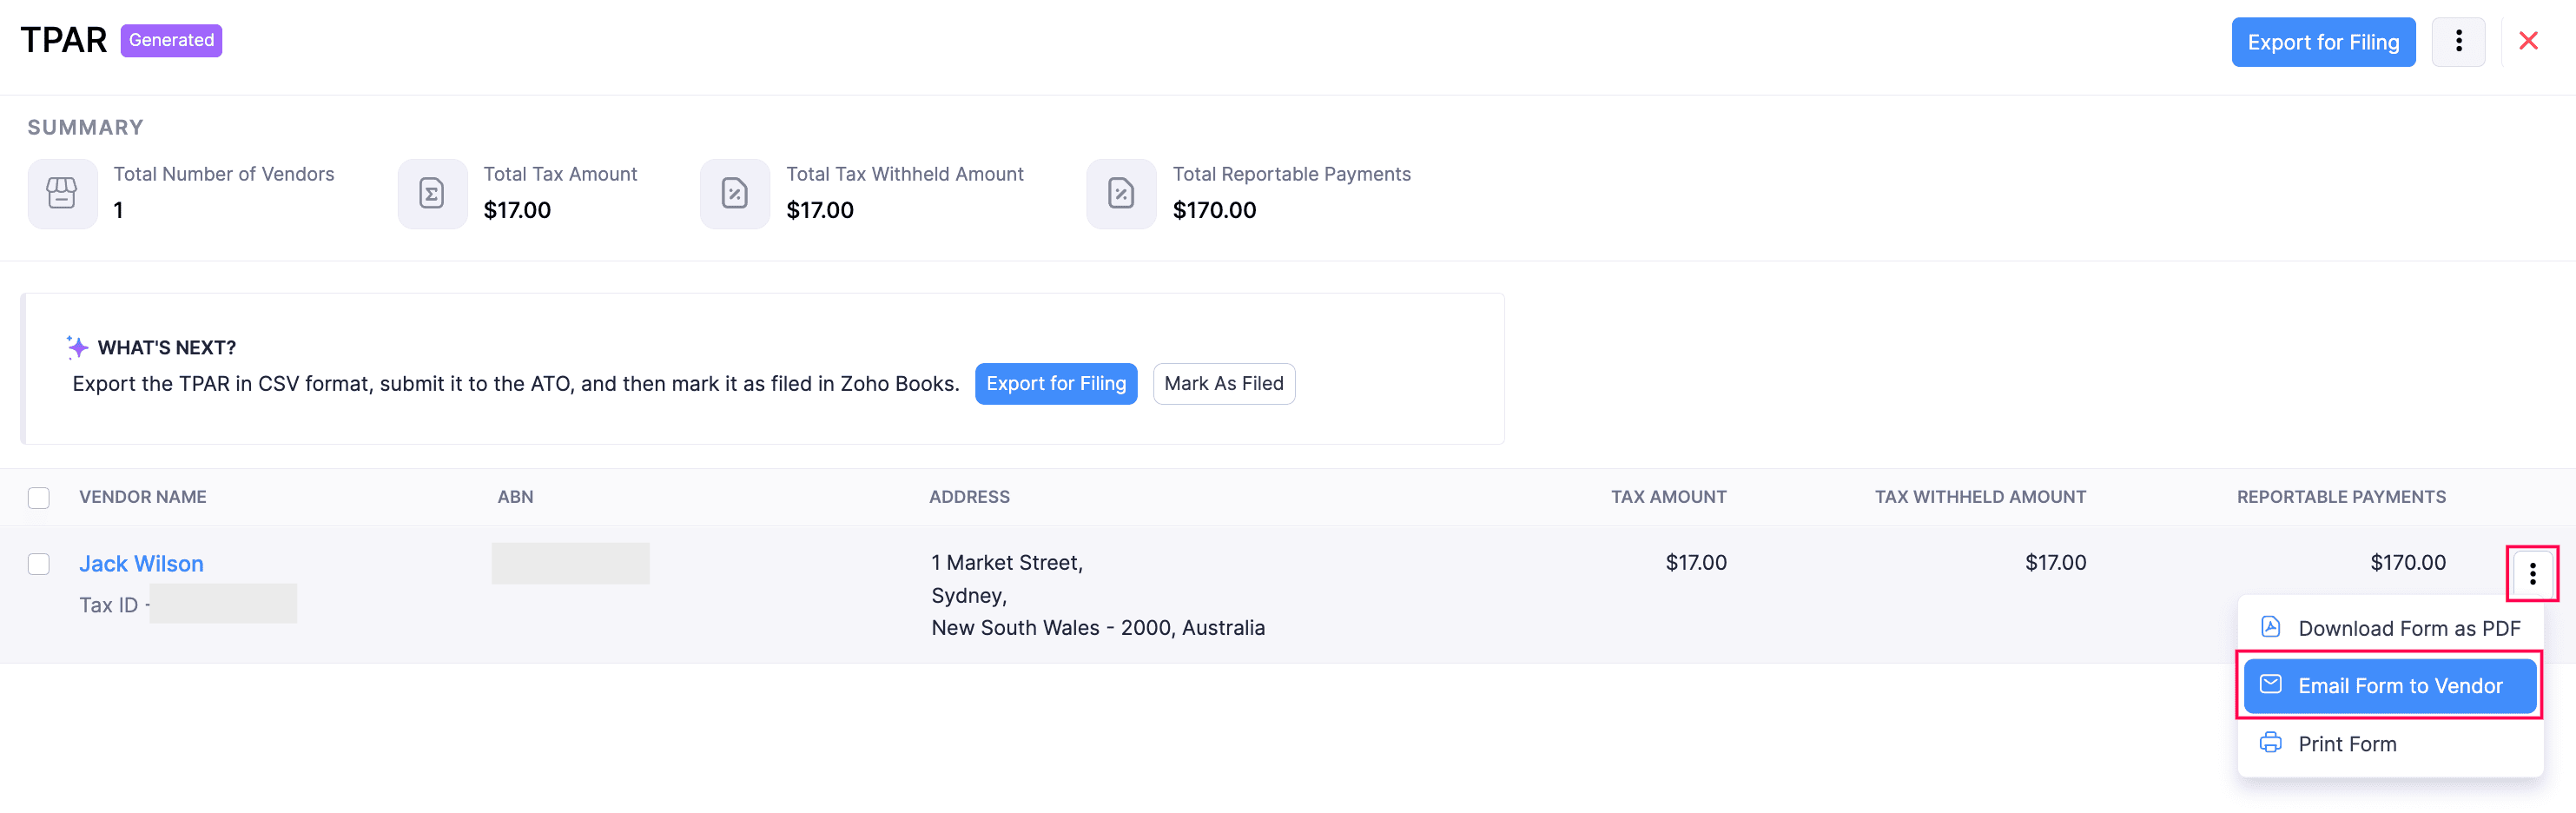
The TPAR summary will be scheduled to be sent to the respective vendors.
Insights:
- If you’ve already shared the TPAR summary with your vendors directly, use the Mark as Sent option to update the status to Sent in Zoho Books.
- To email the TPAR summary to only specific vendors, select the vendors you want to send the email to, and click the More dropdown in the top right corner and select Send Email.
Other Actions in TPAR
View the Details of Vendors Included in TPAR
To view the details of the vendors included in a TPAR:
Go to Filing & Compliance on the left sidebar, and select TPAR.
On the List View page, select the TPAR you generated to view the vendor details.
On the TPAR page, click on the required vendor to view their details.
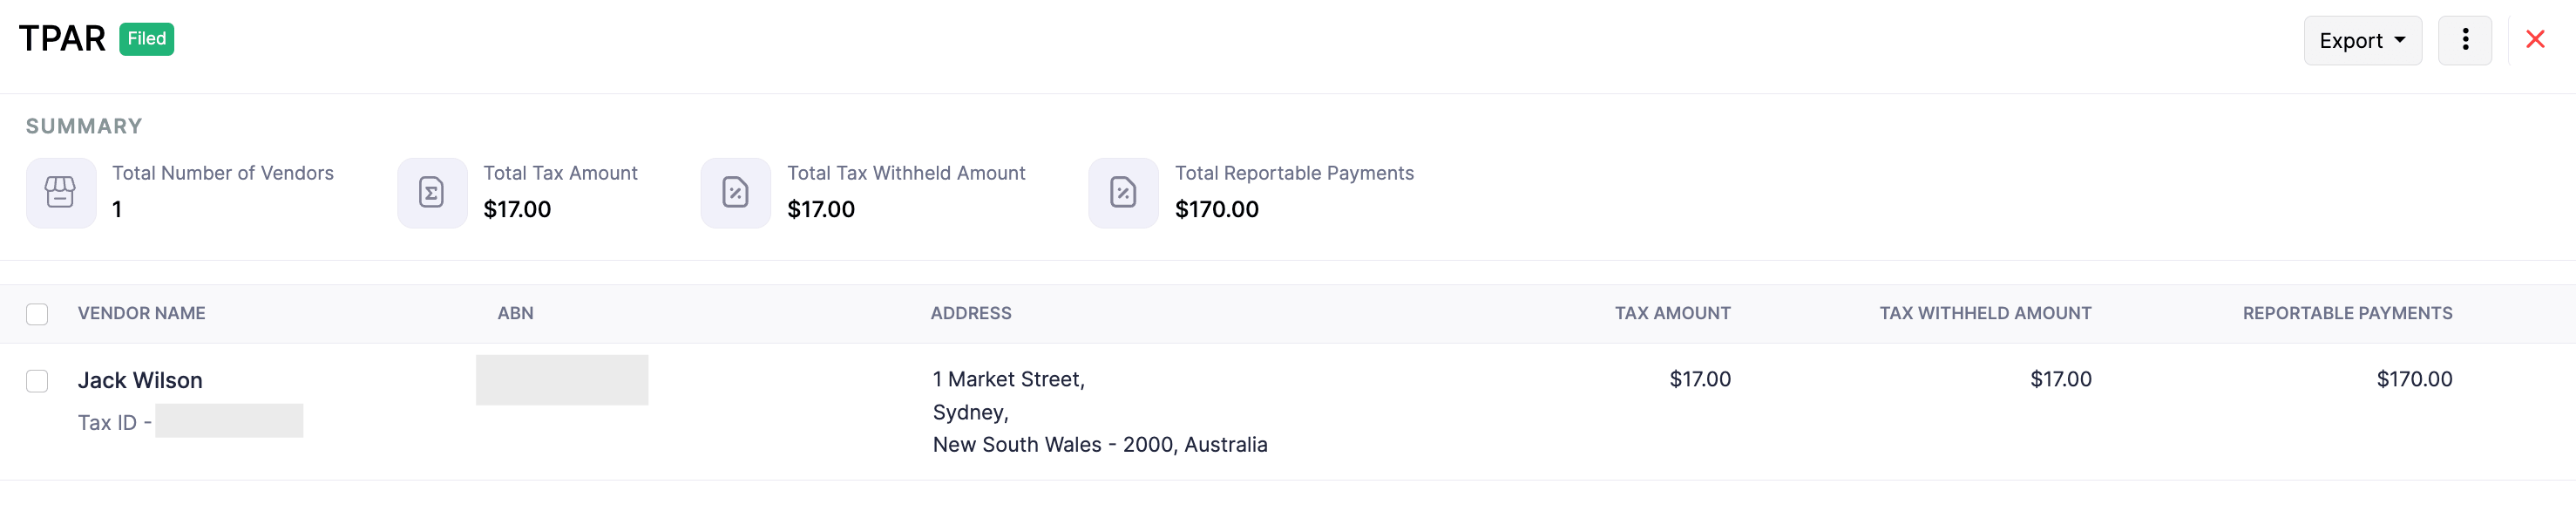
You will see the vendor’s details and the transactions you’ve included in the TPAR you generated and filed with the ATO.
Download Vendor Details as PDFs
To download a selected vendor’s details as a PDF file:
Go to Filing & Compliance on the left sidebar, and select TPAR.
On the List View page, select the TPAR you generated.
On the TPAR page, hover over the required vendor, click the Dropdown icon to the right, and select Download as PDF.
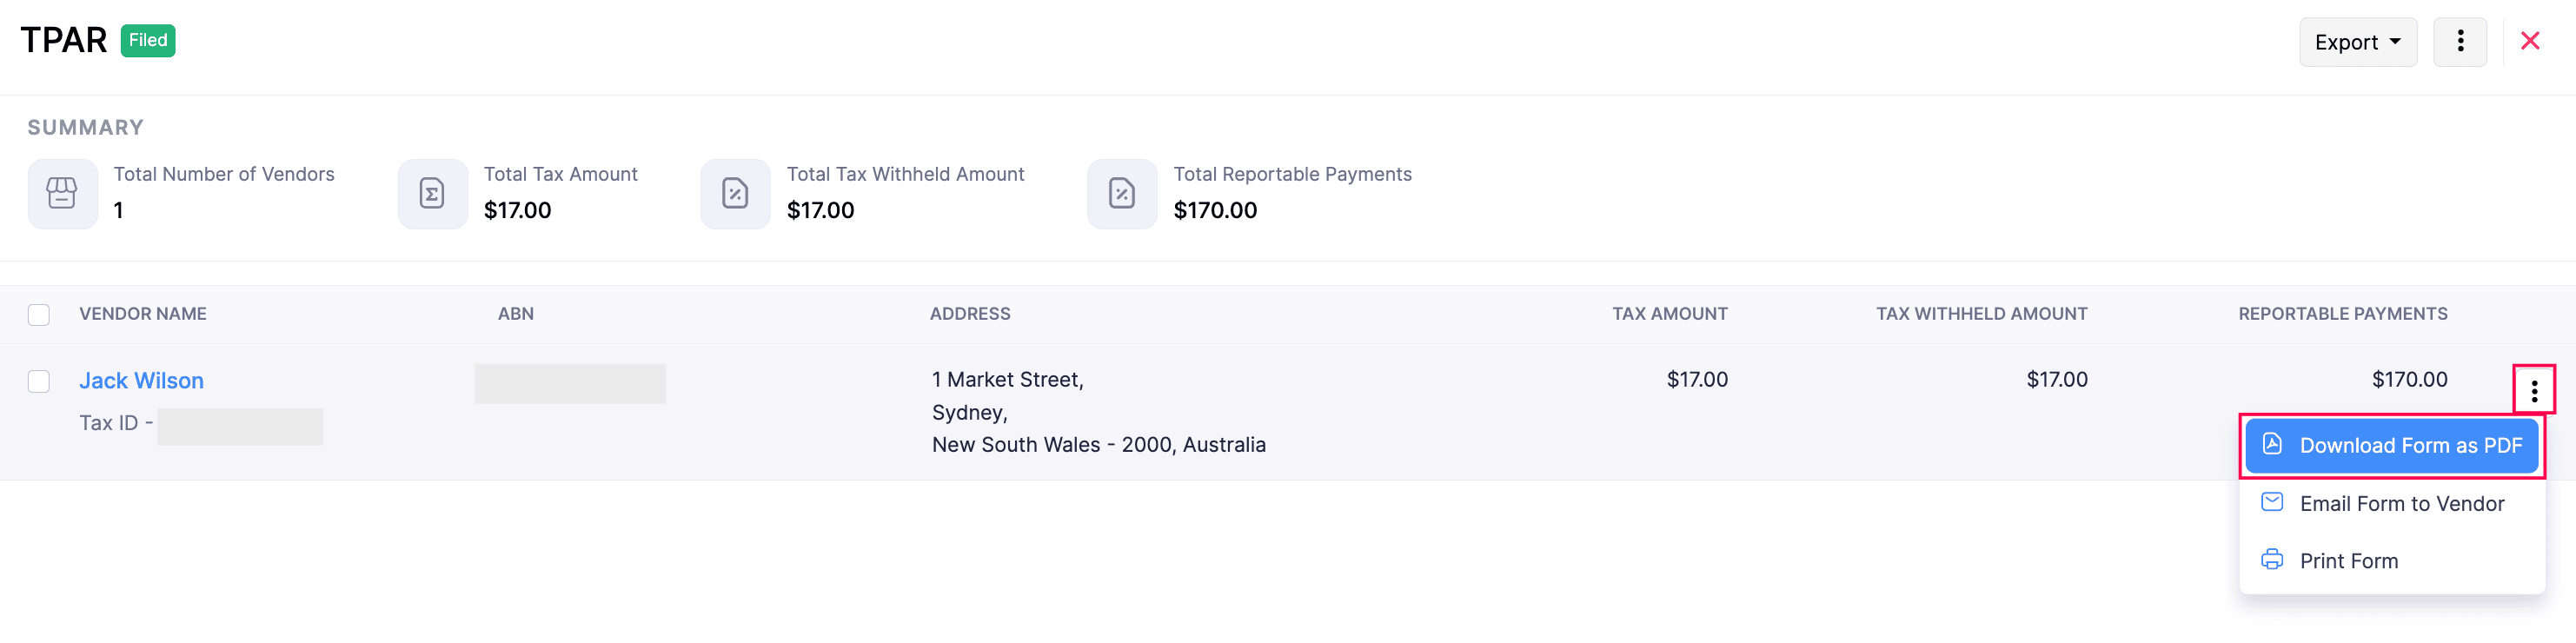
The vendor’s details, along with the transactions from the TPAR you filed with the ATO, will be downloaded in PDF format.
 Yes
No
Yes
No
Thank you for your feedback!