
Functions in Projects
Let us have a look at some of the functions that can be performed in the Projects module.
Log Time
Once you create a task for a project, you can log time for the time spent on each task.
- Select the project that you created from the Projects page.
- Click on the Log Time button placed on top of the project dashboard.
You can also log time in two other ways:
Record Manually
You can enter the time you’ve spent on a project manually. Here’s how:
- Go to Time Tracking > Projects.
- Select a Project.
- Click Log Time from the top of the page.

- Enter the Date, select the Project and the Task you’re associating it with.
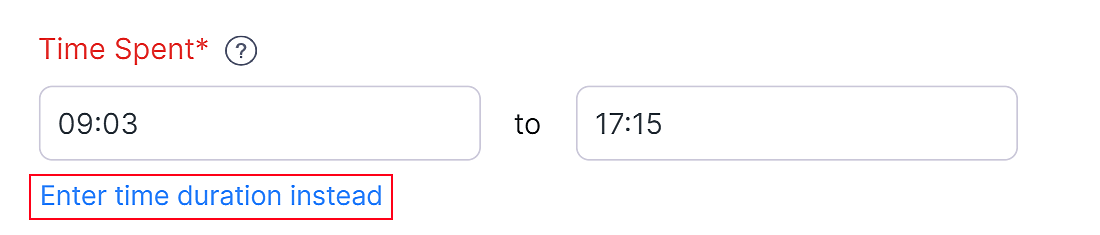
- Enter the Time Spent.
or
Choose the start and end time by clicking the Enter time duration instead option.
- Check the Billable box off if you do not wish to bill the task and select the User.
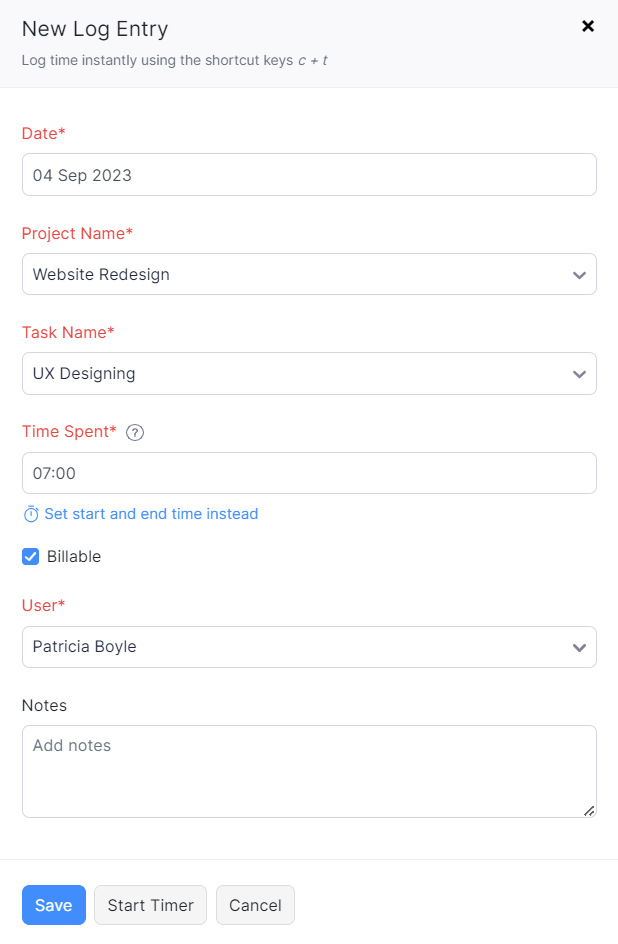
- Click Save.
Start Timer
You can log time for a particular project using the timer. Here’s how:
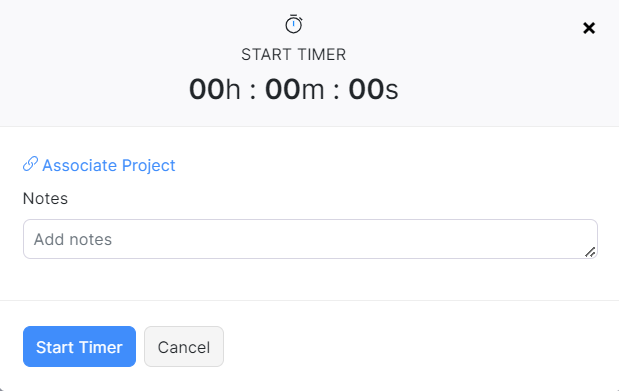
- Click Start in the top right of the page or using the keyboard shortcut Ctrl/cmd + t.

- Enter the Note and click Start Timer.
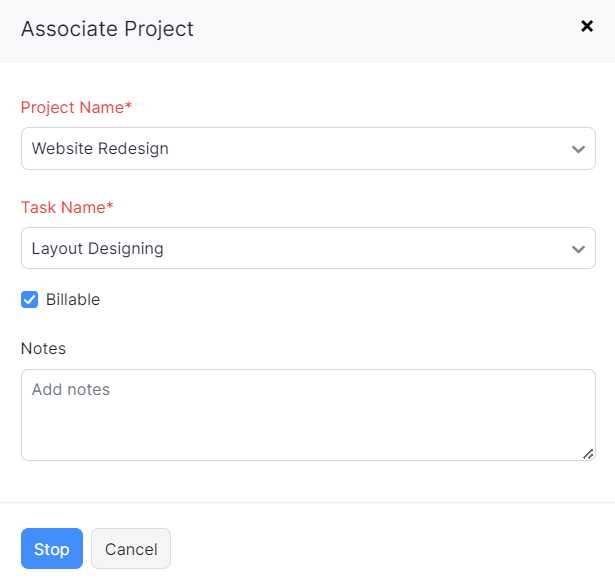
- The timer will run on the left sidebar and you can choose to Pause, Stop or Discard the entry.
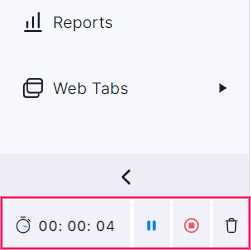
Once you stop the timer, you can enter the project details in the following popup.
Track Project Cost and Revenue
When accounting for a project based company, you might want to track the project’s cost and revenue, and also summarize it accordingly. In Zoho Billing, this process can be done by associating projects with transactions. Once the projects are associated with transactions, you can view the summary of the project’s profitability from the Reports module.
Create and Send Project Quotes
Before you begin working on the project, you can send a quote of the project and the prices to your customers. They can either accept, reject, or comment on the quote. After a quote is confirmed, it can be converted into an invoice. To create a quote for a project:
- Go to Time Tracking > Projects.
- Select the project for which you want to create a quote.
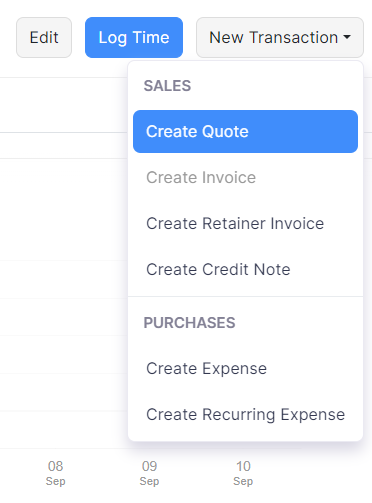
- Click New Transaction from the top right corner of the page.
- Select Create Quote.
- Enter all the necessary details.
- Click Save.
You can also create a quote from the Quotes module and associate a project to it. Here’s how:
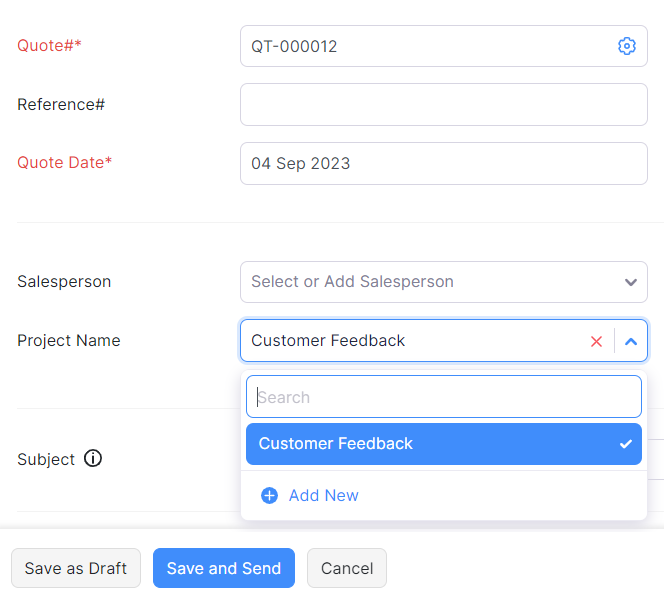
- Go to Sales > Quotes.
- Click + New on the top right corner of the page.
- Fill in the customer details, item details, and other required fields.
- Click the Project Name drop down and select the project with which you want to associate the quote.
The total expense will be created and the projects details will be available in the timesheets module.
Invoice customers for projects
You can create an Invoice and send it to your customers for partial or full completion of a project.
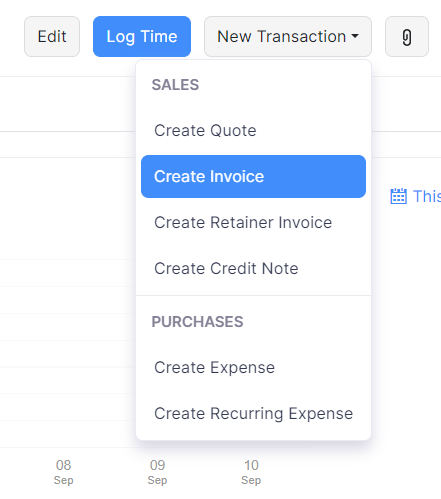
- Go to Time Tracking > Projects.
- Select the project for which you want to raise an invoice.
- Click New Transaction from the top right corner of the page.
- Click Create Invoice.
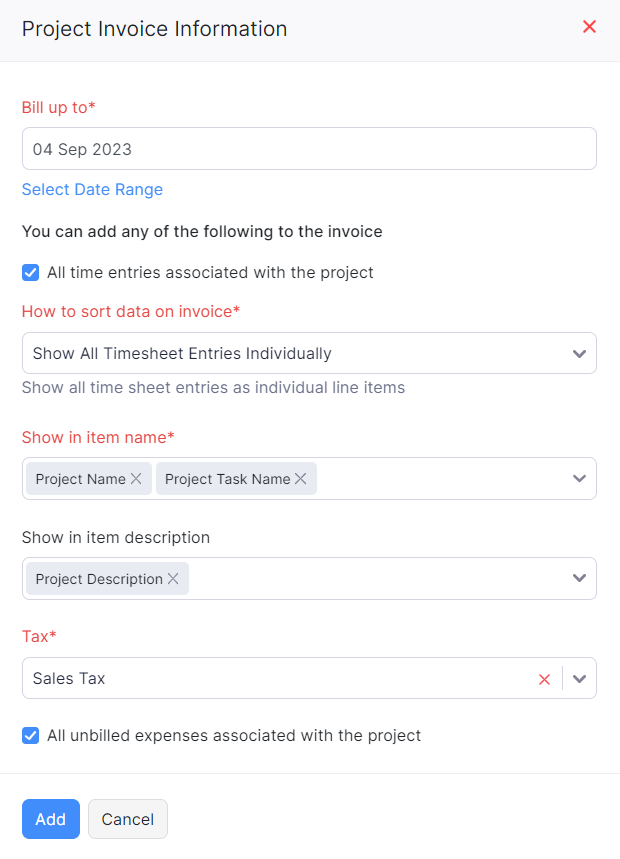
- In the Bill up to field, enter the date up to which you wish to bill your customer.
- Select the method in which you like the data on invoice to be sorted from How to sort data on invoice dropdown.
- Click Add.
- Make the necessary changes to your invoice.
- Click Save and Send.
| Billing Method | Available Options |
|---|---|
| Fixed Cost for Projects | Only Single line for the project option will be shown. |
| Based on Task Hours | The option Group by users will not be shown. |
| Based on Staff Hours | The option Group by users will not be shown. |
| Based on Project Hours | All the options will be shown. |
Similarly you can associate other sales transactions such as Sales Orders and Credit Notes to a project.
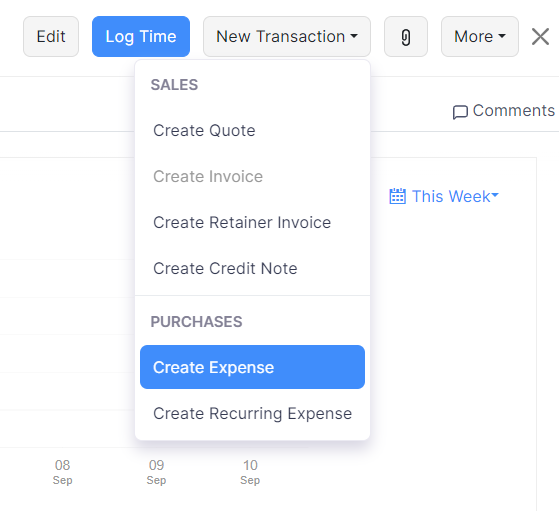
Record Project Expenses
Projects have certain expenses. It can be anything from buying a coffee for your user to purchase tools for a task. To record expenses for a project:
- Go to Time Tracking > Projects.
- Select the project for which you need to record an expense.
- Click New Transaction from the top right corner of the page.
- Click Create Expense.
- Fill in the required details in the Expense creation page.
- Click Save.
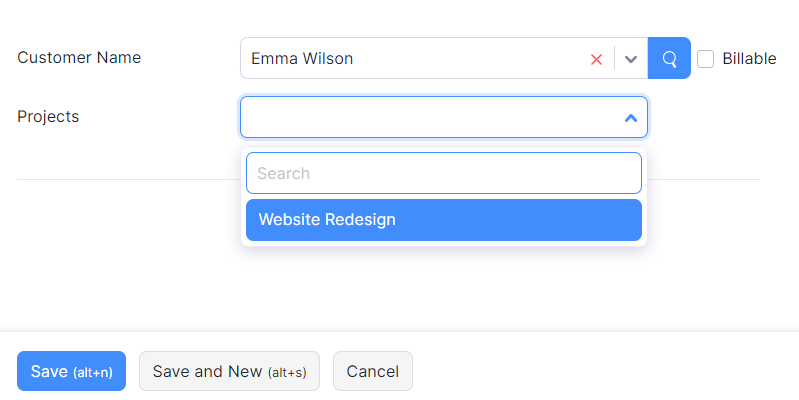
You can also create an expense for a project from the Expense module. Here’s how:
- Go to Purchases > Expenses.
- Click the + New button in the top right corner.
- Fill the required details.
- Select the Customer Name from the dropdown. The Project dropdown will appear on selecting the customer name.
- Mark the Billable checkbox if you want to bill this customer for this expense.
- Click Save.
Create Retainer Invoices for Projects
At times you might have to take an advance payment to arrange the resources for the project you are going to work on. Create a retainer invoice for the project and accept advance payments. You can later adjust them with the invoice you create from the project.
To record an advance payment for a project:
- Go to Time Tracking > Projects.
- Select the project for which you need to create a retainer invoice.
- Click New Transaction from the top right corner of the page.
- Click Create Retainer Invoice.
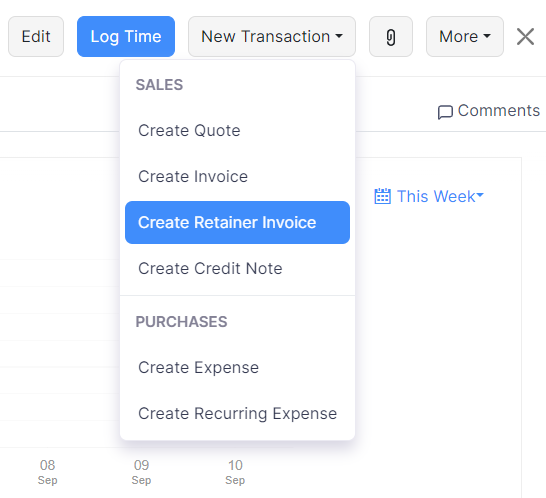
- Fill the required details in the following page.
- Click Save or Save and Send.
You can also record advance payments from the Retainer Invoices module. Here’s how:
- Go to Sales > Retainer Invoices.
- Create a new transaction or edit an existing one.
- Select the project from the Project Name dropdown.
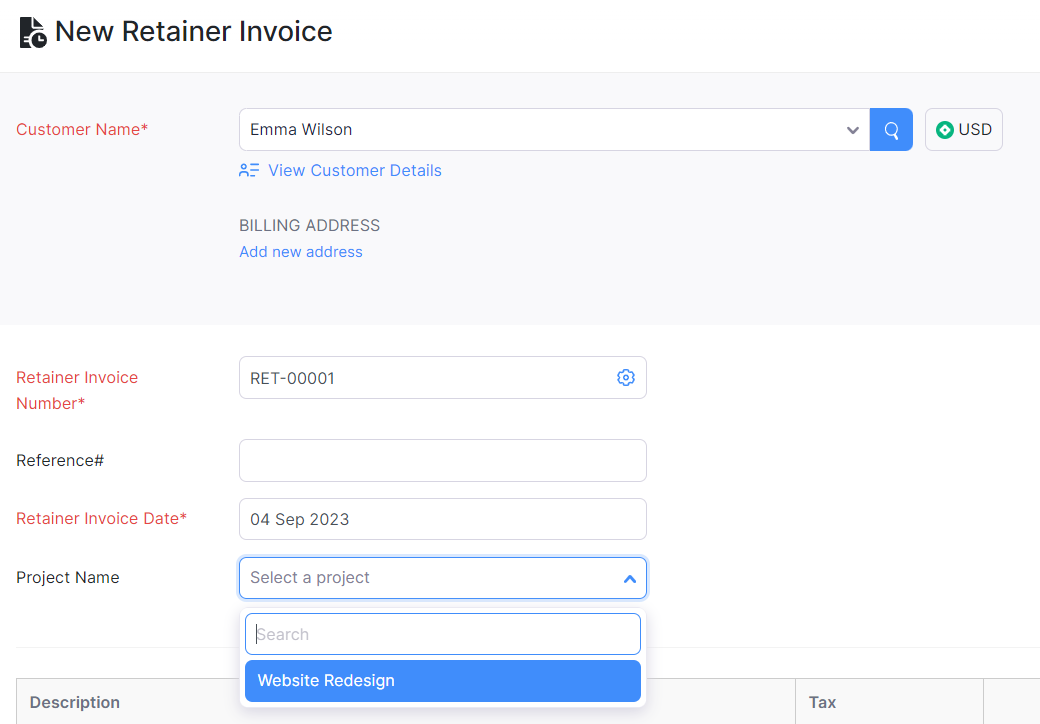
- Enter the other required details.
- Click Save.
Once the Retainers are in the paid status, you can choose to apply them to your invoice. Here’s how:
- Go to Time Tracking > Projects.
- Select the project for which you have created a retainer invoice and recorded payment.
- Go to the New Transaction drop-down and click Create Invoice.
- In the Project Invoice Information page, mark the Would you like to apply the retainers collected to the invoice checkbox.
- Click Add and you will be taken to the invoice creation page
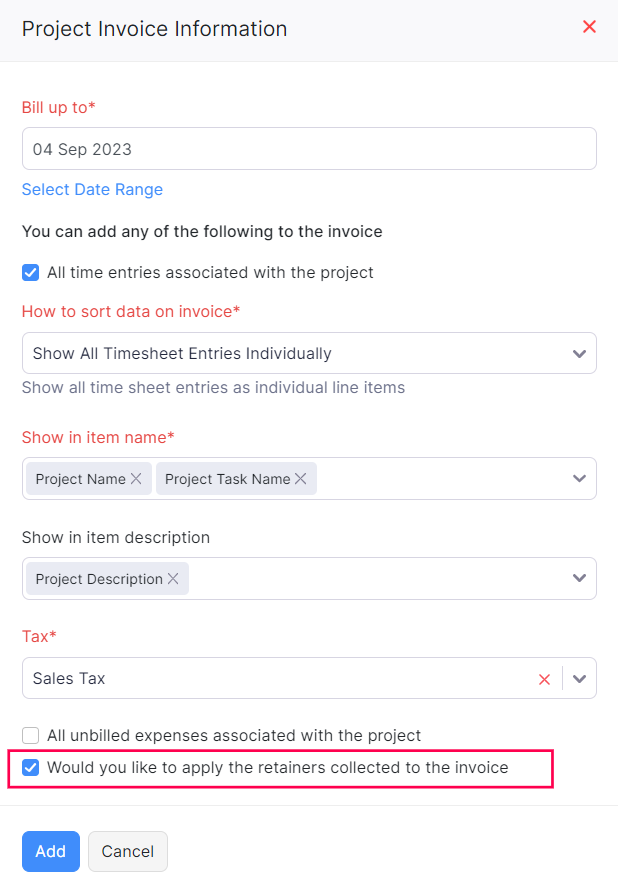
- Enter the necessary invoice details and click Save and Send.
The retainer amount will be deducted from the invoice. You can then view this in the total section.
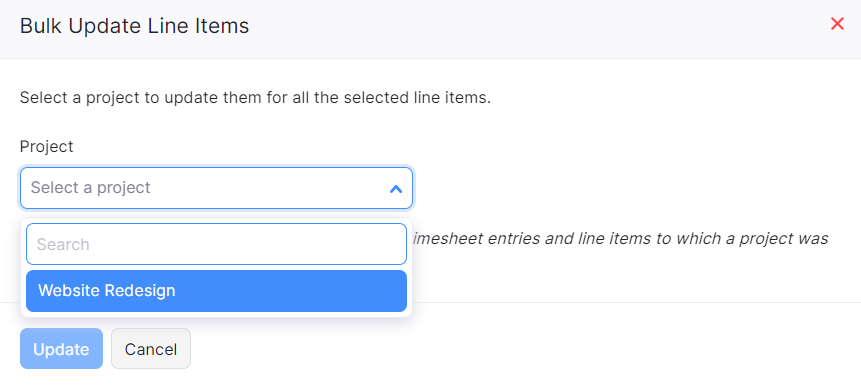
Bulk Update Line Items
You can bulk associate projects to line items of an invoice. You can select multiple items and associate projects easily in just one click. To bulk update projects:
- Go to Sales > Invoices.
- Click + New in the top right corner of the page.
- Enter the other required details.
- Click the Bulk Update Line Items option above the Item Details table on the right.

- Click Update Projects.

- Select the projects to update from the Projects dropdown.
- Click Update.
Tracking Transactions
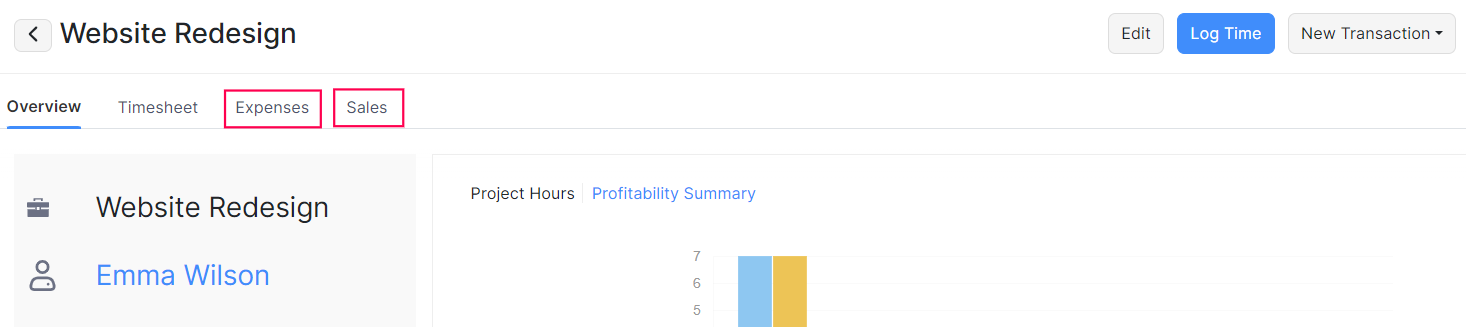
The transactions that you’ve recorded for a project can be tracked in the project module. Here’s how:
- Go to Time Tracking > Projects.
- Select the project for which you wish to see the transactions.
- You can view all the expenses under the Expenses tab and all the sales transactions under the Sales tab.
Projects Revenue Summary Report
Based on the project you’ve worked on for the client, invoices are raised along with the progress of the project. The total revenue raised on each project can be viewed in the form of a report in Zoho Books. Here’s how:
- Navigate to Reports module on the left sidebar.
- Click Projects Revenue Summary under the Projects and Timesheet heading.
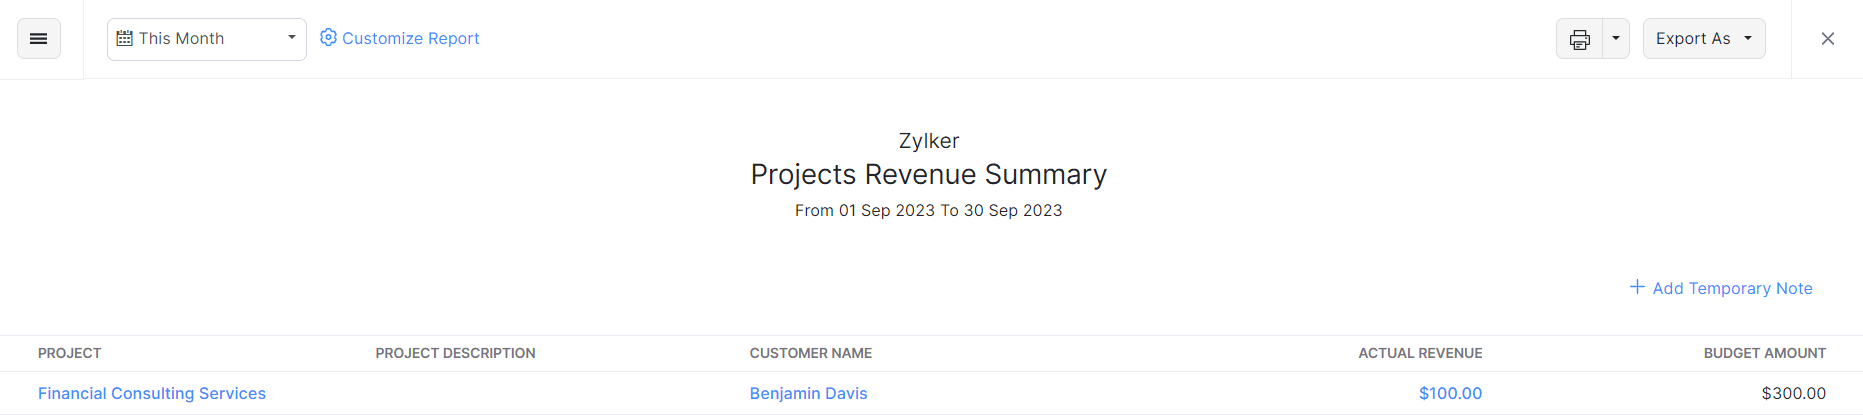
The report contains the following fields such as Project Name, Description, Customer Name, Actual Revenue, and Budget Amount. You can pick different date ranges from the calendar dropdown.
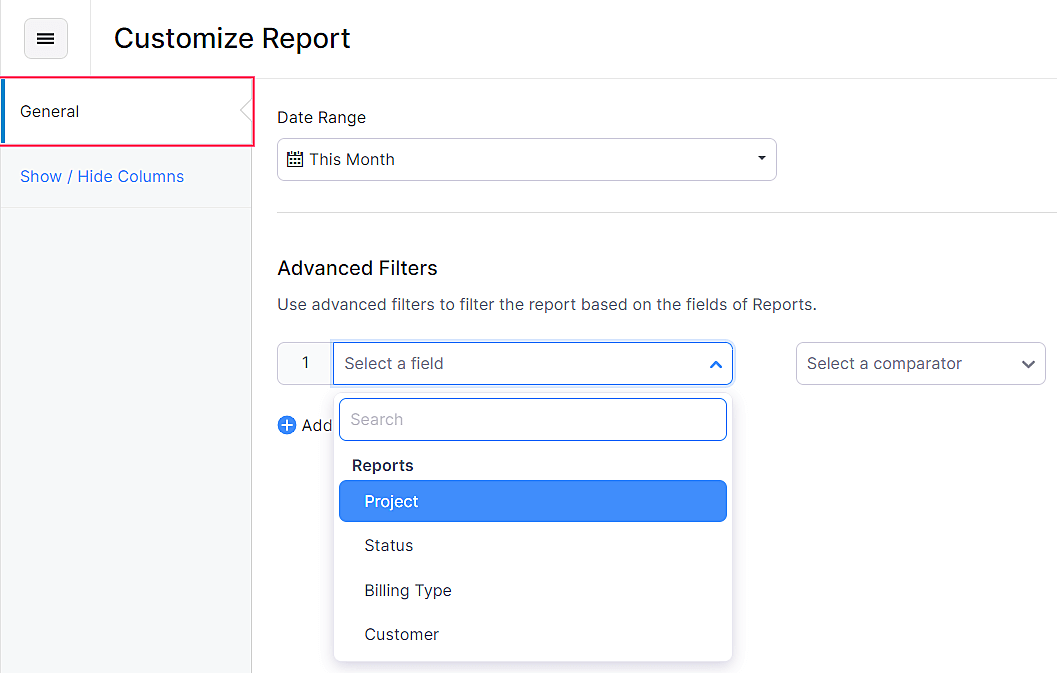
To customize the report:
- Click the Customize Report option at the top bar.
- Under the General section, the report can be filtered based on Project Name, Project Status, Project Billing Method and Customer Name.
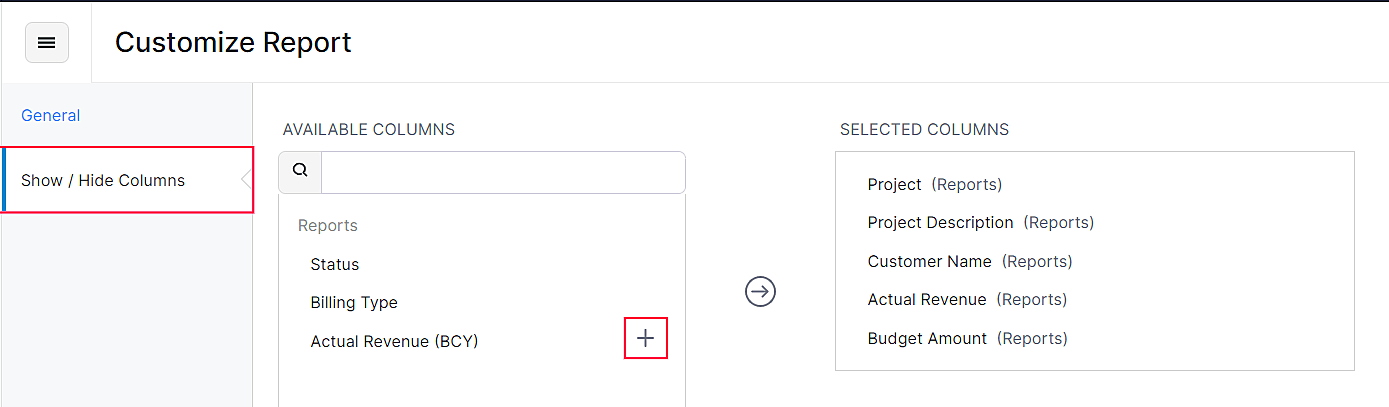
- You can also decide the columns that you wish to have in the Report. To do so, click on Show/Hide Columns to add or remove the columns from the Selected Column box.
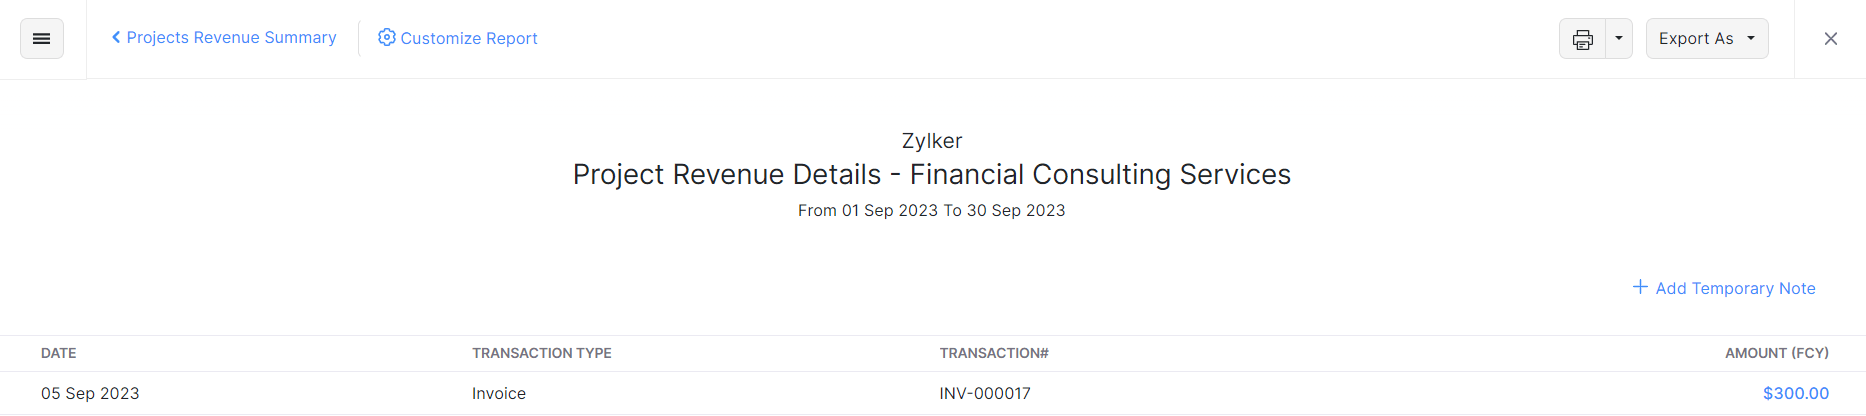
Once you run the report, the Actual Revenue will be shown. By clicking on a revenue amount of a project, you can view the drilled-down report with the list of sales transactions created for the project.
Also, you can export the report to Zoho Sheet and in PDF, CSV, XLS, and XLSX formats.
Next >
Manage Projects
Related
 Yes
No
Yes
No
Thank you for your feedback!