
Integrate Zoho Billing with GoCardless
GoCardless is a payment gateway that allows your customers to make direct debit payments for their invoices and recurring invoices. You can use the GoCardless integration in Zoho Billing to receive payments in AUD, CAD, EUR, GBP, and NZD.
Prerequisites
- Your GoCardless account must be connected with a AUD, CAD, EUR, GBP, or NZD bank account, to accept direct debit payments.
Points to Remember
- You can allow customers to pay via GoCardless by enabling the Direct Debit option in the Other Details section of the customer creation/edit page.
- Payouts are only possible once your account is fully verified. So, verify your account before you proceed.
- The payment timings may vary for each country.
- The payments that you receive will be reconciled automatically, so manual data entry will not be required.
Connect GoCardless with Zoho Billing
You can connect Zoho Billing to an existing GoCardless, or create a new one:
New GoCardless Users
If you don’t have an existing account with GoCardless, you must create one first. To do this:
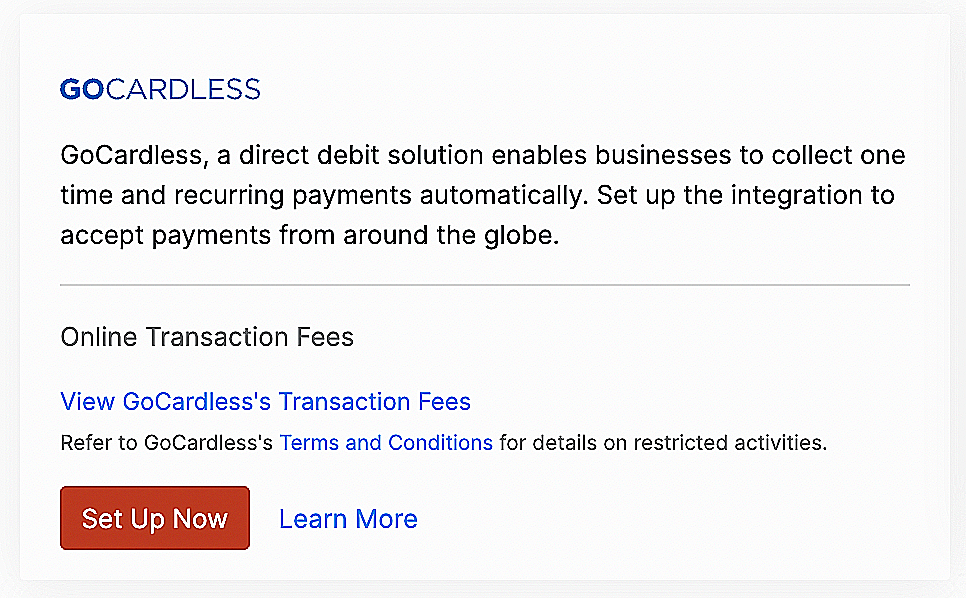
- Go to Zoho Billing > Settings > Online Payments.
- Click Set up Now near GoCardless.
- Create a new GoCardless account in the following screen by clicking Sign Up.
- Enter the required details and click Create Account.
You will receive a verification email from GoCardless.
- Sign in to your GoCardless account using the link provided in the email.
- Go to Settings in the top-right corner and select Company Info.
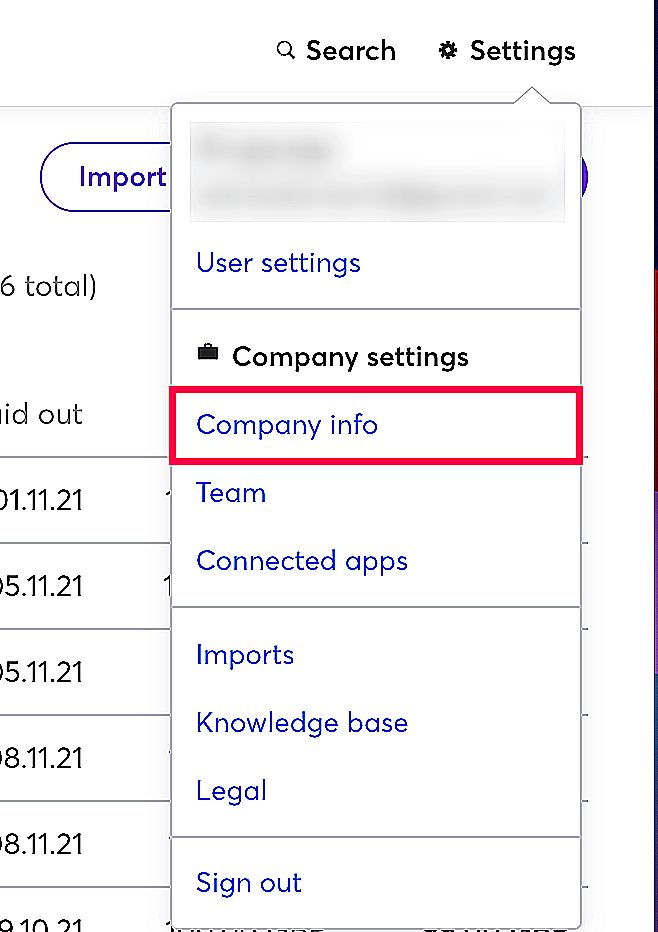
- Fill in your company details and the bank account details that you’d like to use to send/receive payments in the page that follows.
Once you’ve set up the company information, you can initiate a mandate sync.
Existing GoCardless User
If you have an account with GoCardless, you can proceed to set up the integration in Zoho Billing.
- Go to Zoho Billing > Settings > Online Payments.
- Click Set up Now near GoCardless.
- Enter your GoCardless credentials in the following screen and click Connect Account.
Initiate Mandate Sync
Once you have connected your GoCardless account with Zoho Billing, you can fetch your customers’ mandate details from your GoCardless account using the Mandate sync feature.
To initiate a mandate sync:
- Go to Settings > Online Payments > GoCardless.
- Click Fetch Details if you’re using it for the first time or Sync Now if you’ve fetched your details before.

Here are a few points you should remember while performing a mandate sync:
- The primary email address of your customer in Zoho Billing should match their email address in GoCardless.
- Only active mandates in GoCardless will be fetched.
- Mandates cannot be fetched for different customers who have the same primary email address in Zoho Billing.
Configure Customers
You can configure your customers to pay via their bank account when you send an invoice to them for the first time, to enable this:
- Go to Sales from the left sidebar and click Customers.
- Create a new customer or select an existing customer.
- In the Other Details section, check the Allow this customer to pay via their bank account option next to Bank Account Payment.
- Enter the other necessary details if it’s a new customer.
- Click Save.
Receive Payments
Once you have configured customers for direct debit payments, you can select GoCardless as the payment mode for your invoices. Here’s how:
- Go to Sales from the left sidebar and click Invoices.
- Click the + New button on the top right corner of the page.
- Select a customer and enter the other necessary details.
- Select GoCardless from the Payment Gateway section under the Items table.
- Click Save.

Your customers’ saved payment information can be used in the following way to make invoice payments:
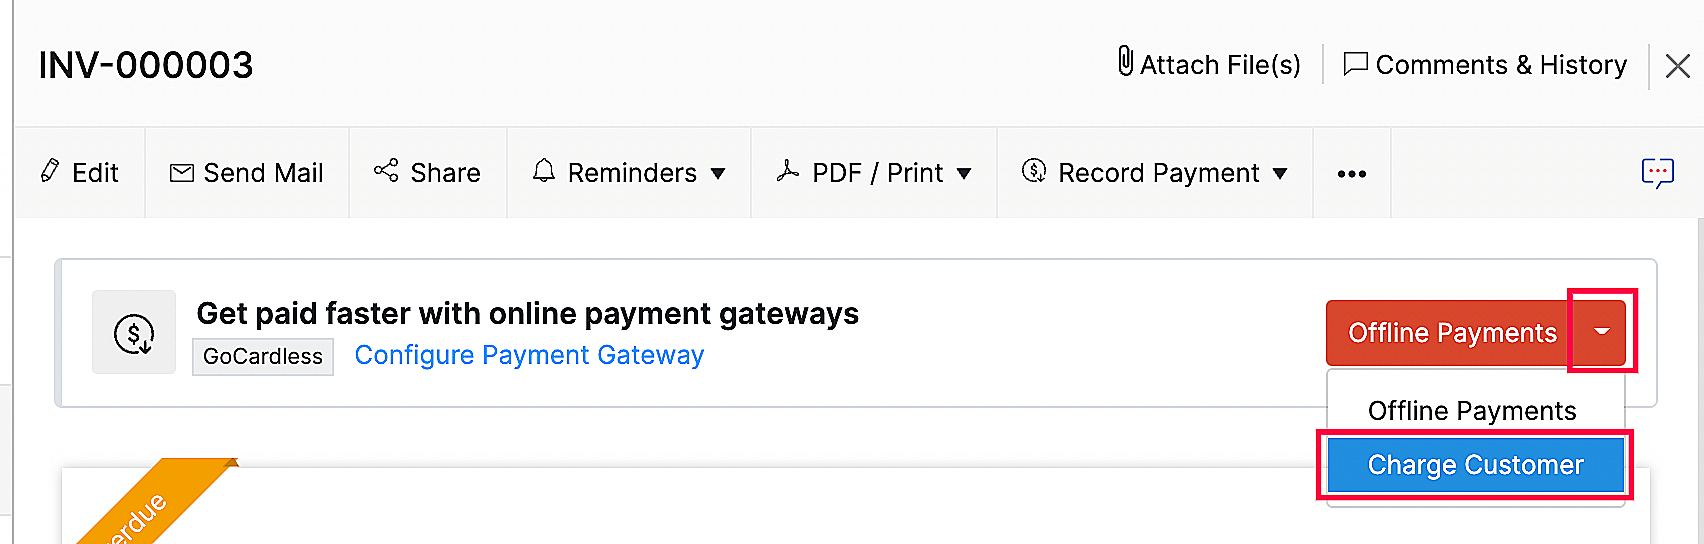
Charge Customers
You can use the charge customer option to charge your customer automatically for their outstanding invoices:
- Go to the invoice for which you want to charge your customer.
- Click the Offline Payments dropdown and select Charge Customer.
For recurring invoices, you can associate the payment method or your customer can make their first payment and choose to save the card details, after which, they will be automatically charged for future invoices.
Payments via Customer Portal
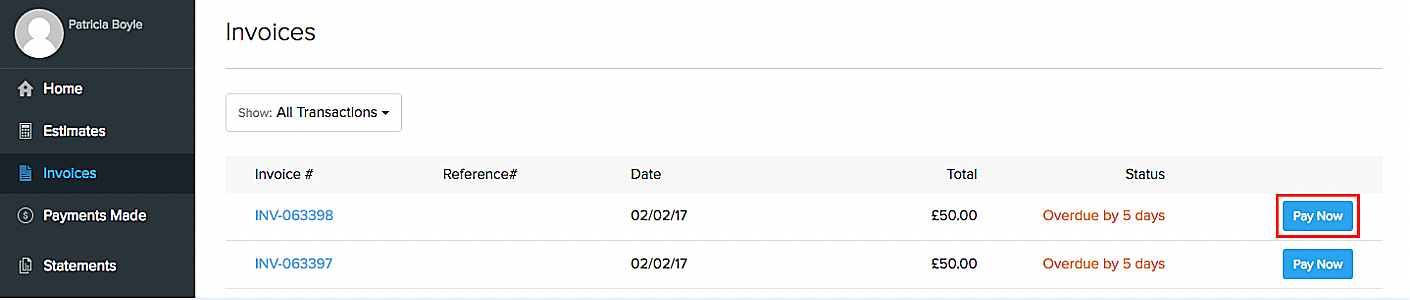
Your customers can use their stored payment information to make payments via the customer portal. Here’s how:
- Go to Invoices.
- Click Pay Now next to an unpaid invoice.
- Choose Direct Debit and click Proceed to Payment. Your customer will be directed to GoCardless’ payment page.
- Enter their account details and initiate the Direct Debit process.
The next time your customer wants to pay for an invoice, they can either pay using an already saved account or use another account.
Your customers can also make payments from the secure payment page shared with them via email or shared URL.
Other Actions
Preferences
You can change the header content of the payment page by changing the Mandate Description. To do this:
- Go to Settings > Online Payments > GoCardless.
- Click Preferences.
- Edit the Mandate Description in the pop-up.
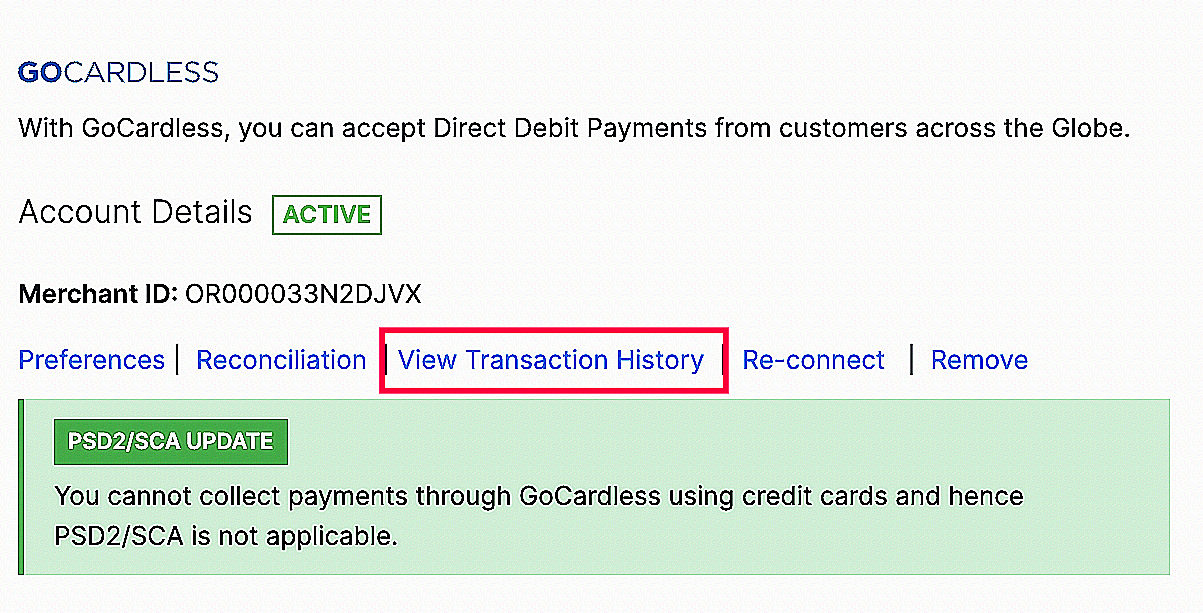
Transaction History
You can view the list of all your transactions under Transaction History. To do so:
- Go to Settings > Online Payments > GoCardless.
- Click View Transaction History. You will be redirected to GoCardless, where all your transactions will be listed.
Transaction Charges
The online transaction fees are levied by GoCardless. Check out GoCardless’s pricing page to view the transaction charges.
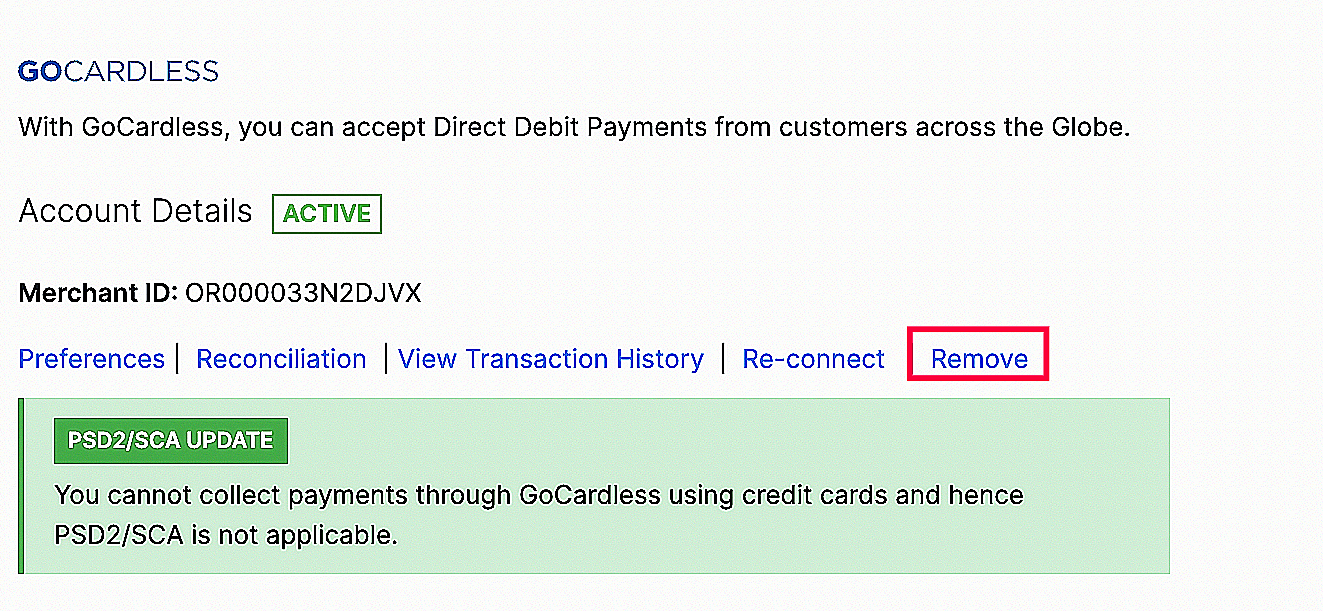
Remove Integration
To disable the GoCardless integration:
- Go to Settings > Online Payments > GoCardless.
- Click Remove to disable the integration.
If you have already removed/disabled the integration, you can click Re-connect and enable the integration once again.