Unattended Access Installation for Linux
Configure a Linux computer for unattended access by installing the unattended access installer. Once you complete the configuration process, you can view, access, and troubleshoot the computer remotely.
To download the unattended access installer in Zoho Assist:
- Log in to Zoho Assist.
- Navigate to the Unattended Access tab present in the top pane.
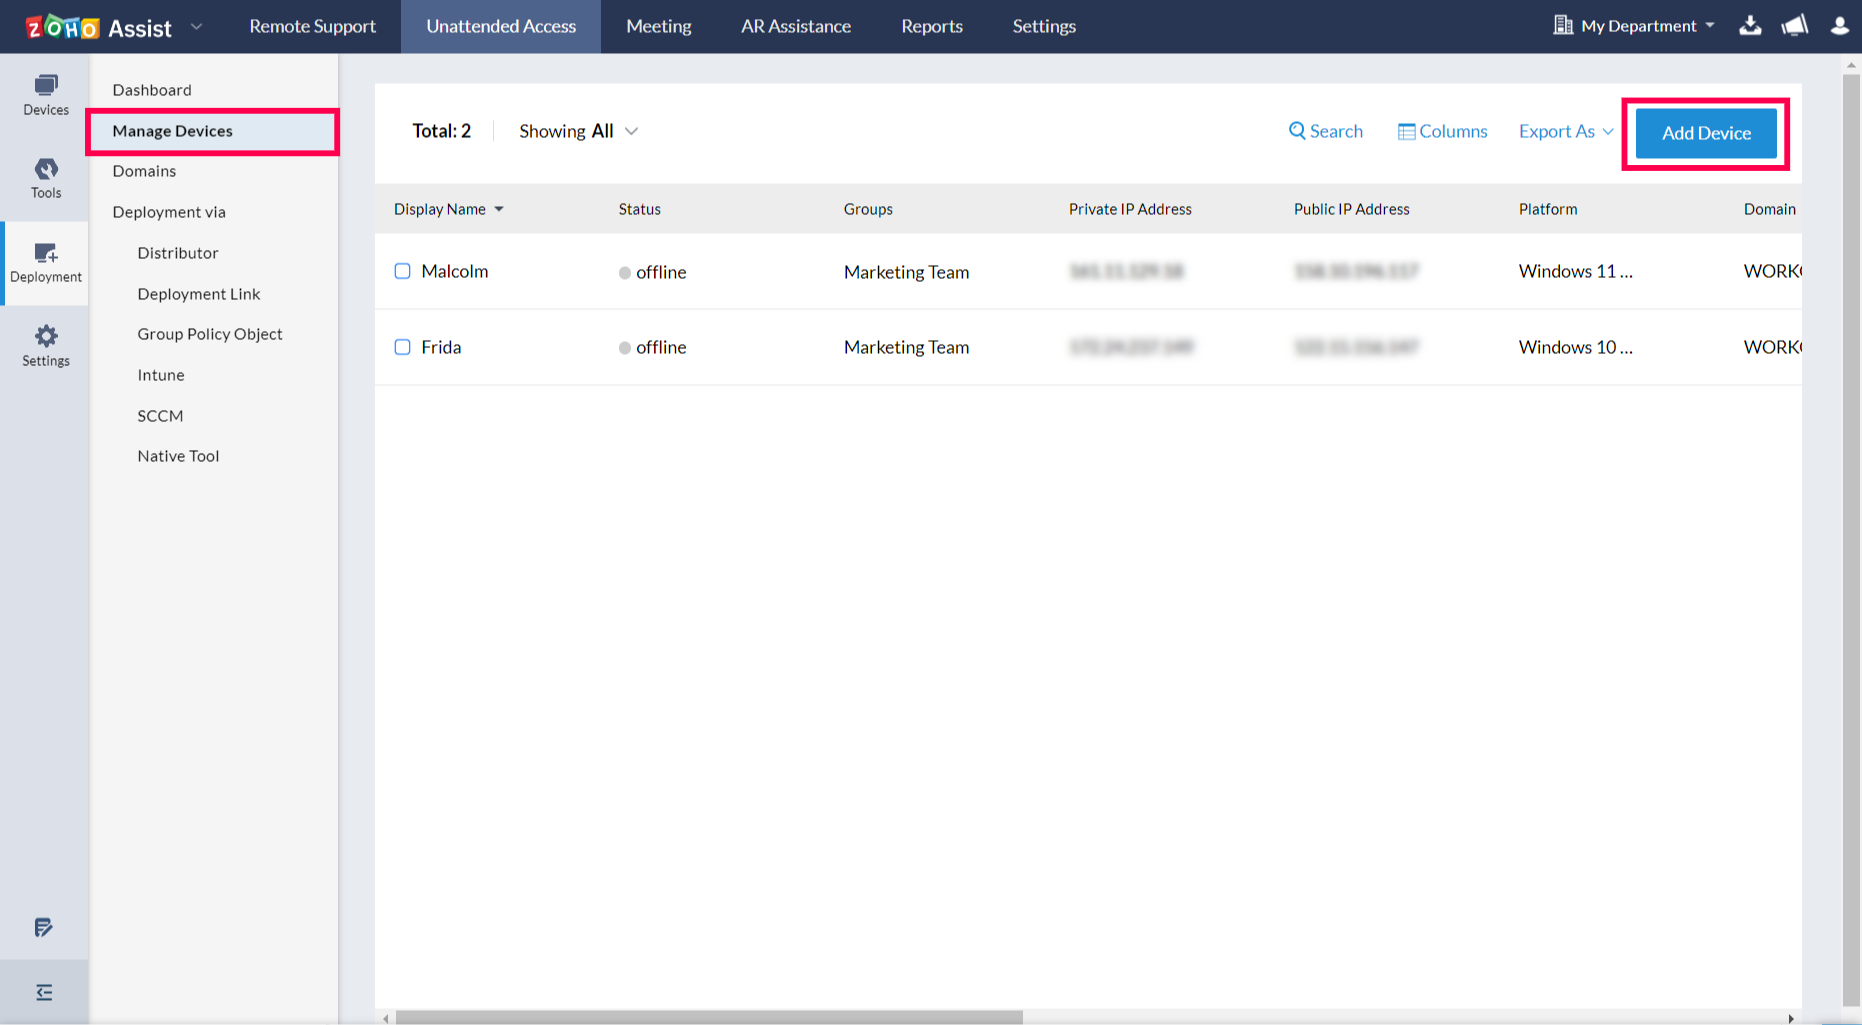
- Select Deployment on the left, then choose Manage Devices.
Click Add Device in the top-right corner.
Choose Linux Installer to download the unattended access installer for Linux.
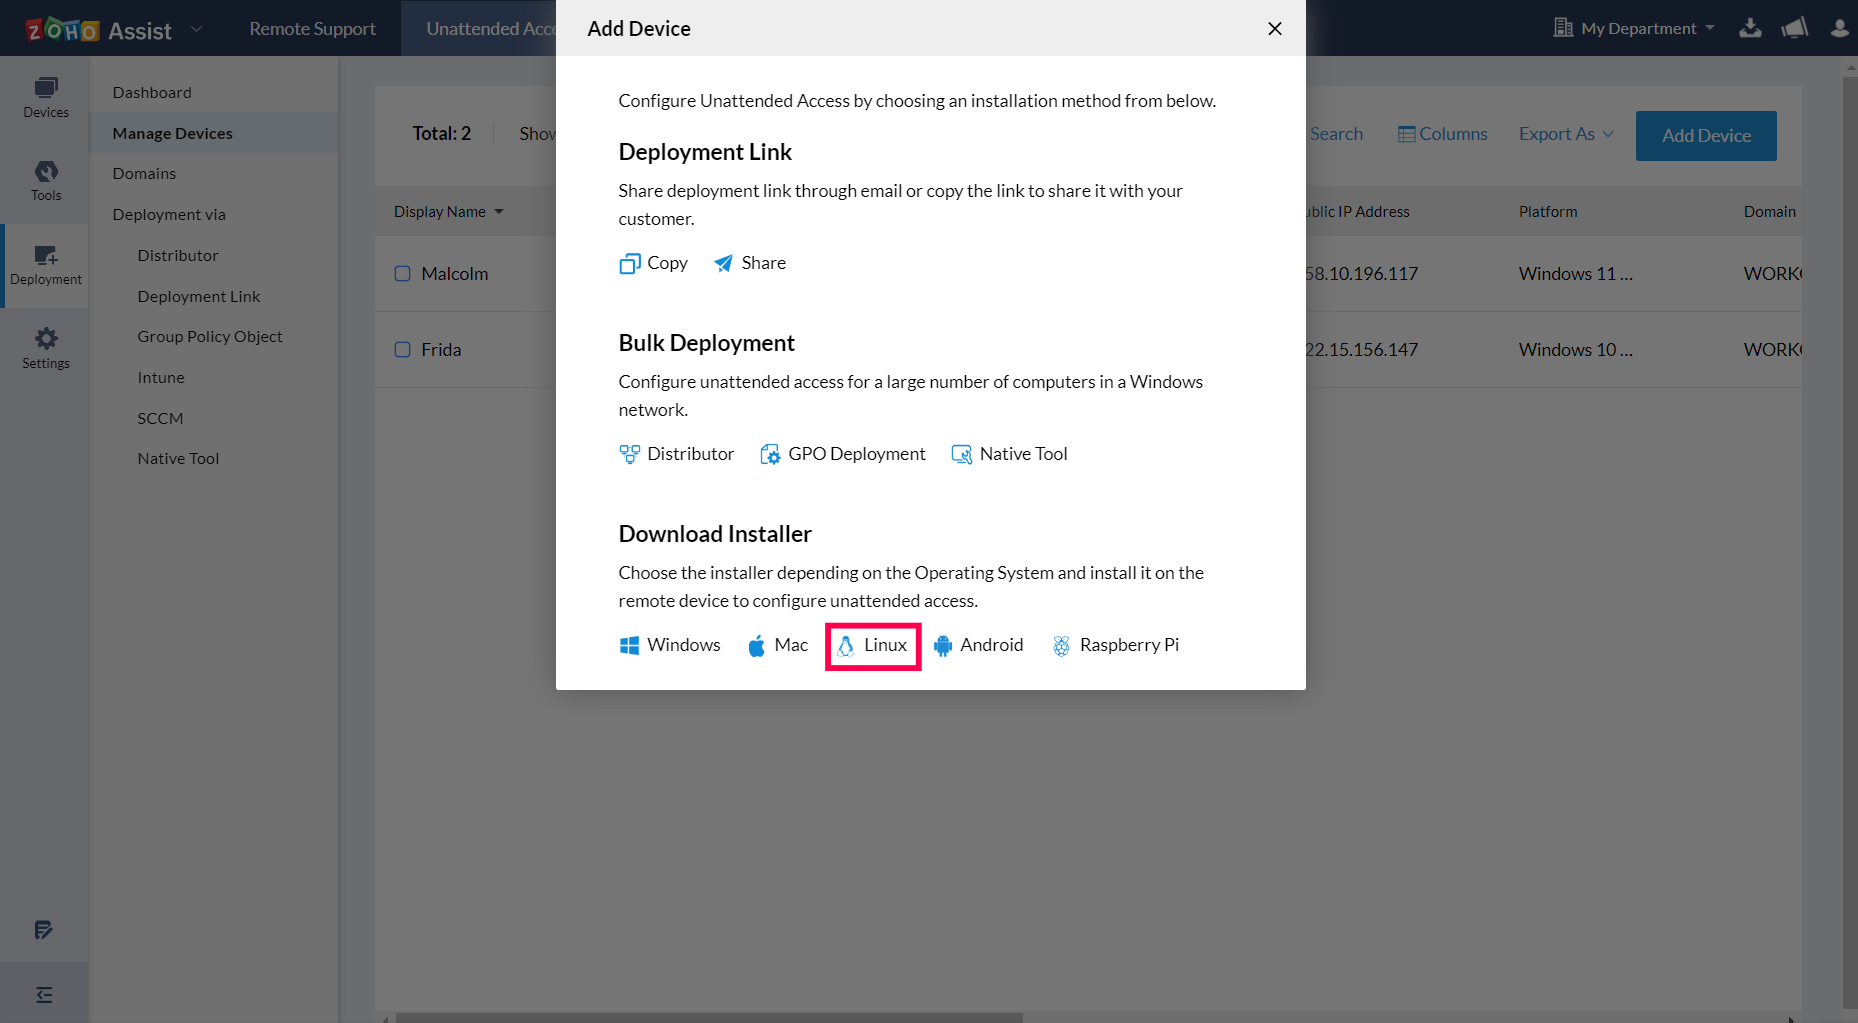
You can either choose Debian or other distribution OS (Fedora, CentOS, or Red Hat).
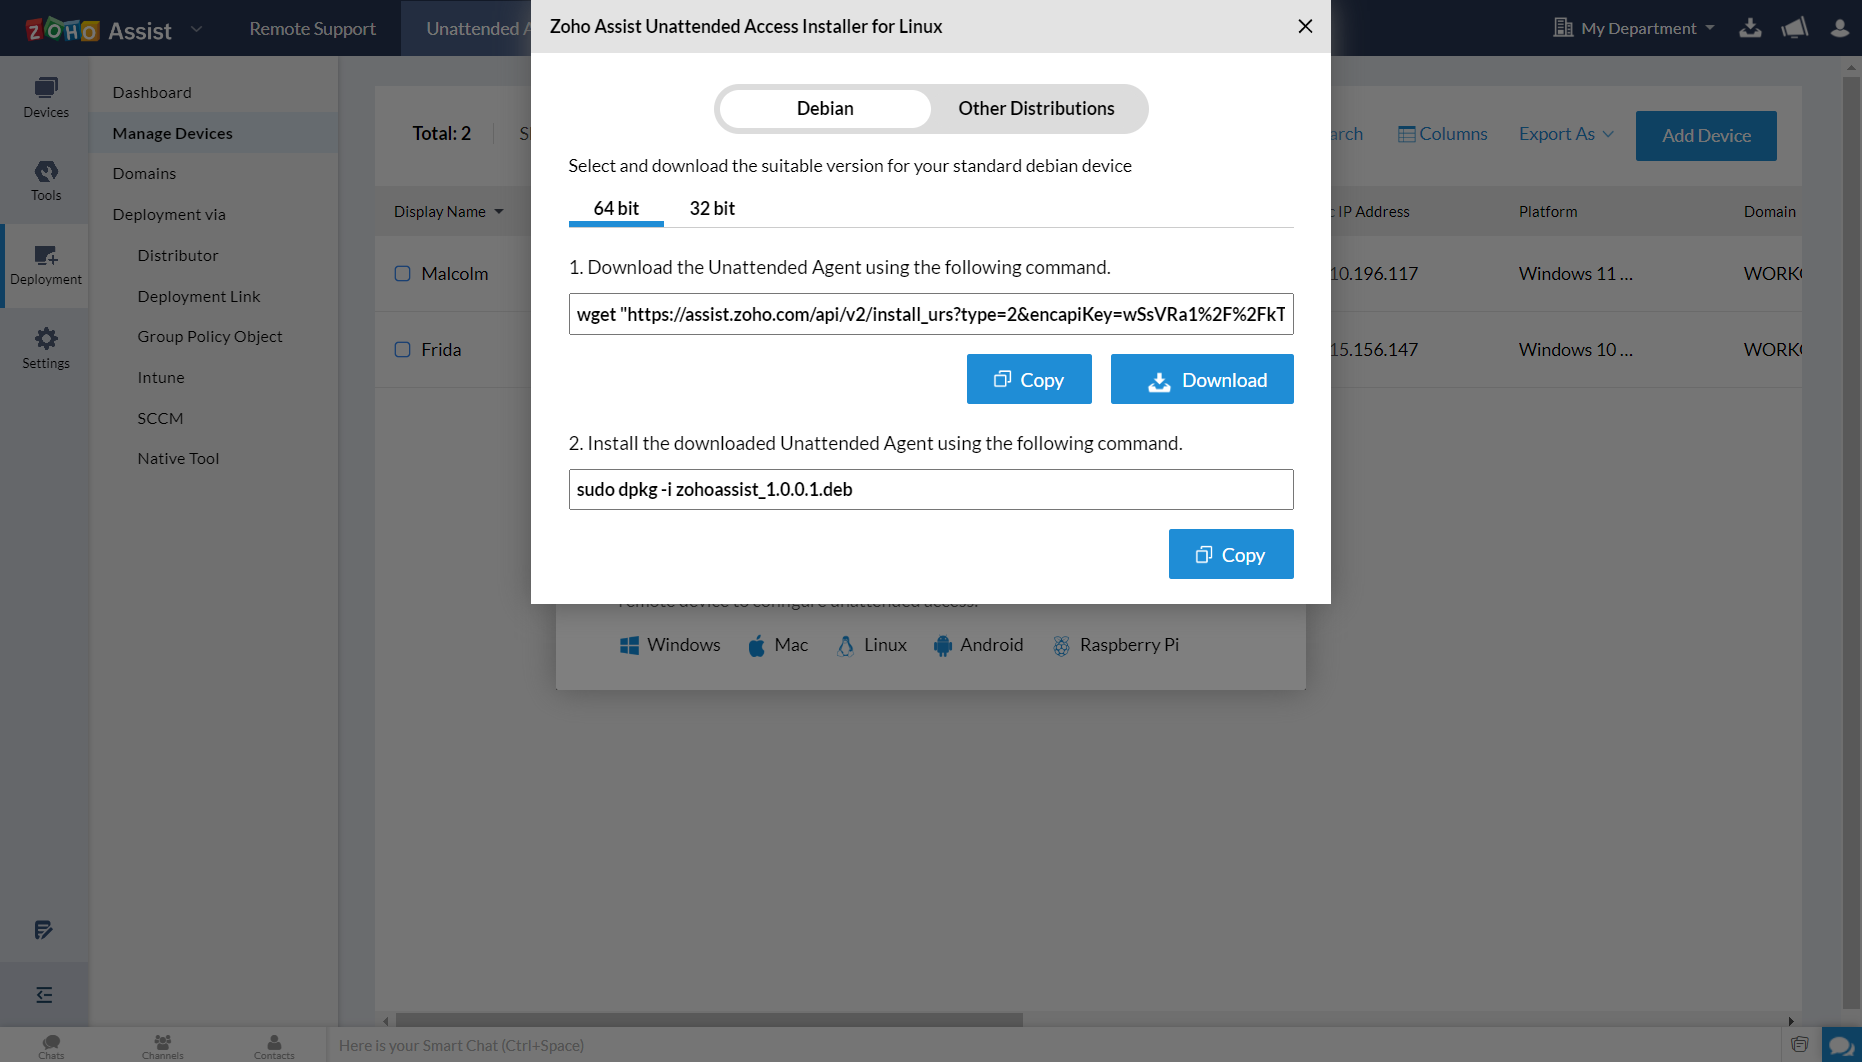
- To install the unattended access installer, you can either copy the wget link or download the installer file.


To install the unattended access installer in Debian or Ubuntu:
Copy the wget link
- Click Copy to copy the wget link for Debian or Ubuntu OS.
- Open the Terminal and run the copied wget link to execute.
Download the installer file
- Click Download to download the installer file.
- Once the download is complete, run the file in the remote device to install the unattended access installer.
To install the unattended access installer in Fedora, CentOS, or Red Hat:
Copy the wget link
- Click Copy to copy the wget link for other distribution OS (Fedora, CentOS, or Red Hat).
- Open the Terminal and run the copied wget link to execute.
Download the installer file
- Click Download to download the installer file.
- Extract the downloaded file zohoassist-1.0.0.1-1.*.zip.
- Open the terminal.
- Use the command
cd ~/Downloads/zohoassist-1.0.0.1-1.*to switch to the downloads directory. - Execute the command
chmod +x install.binto grant permission to make the file runnable. - Execute the command
sudo (PWD)/install.binto run the application using sudo. Once installed, you will see the prompt “Application installed successfully”. - Restart the computer. The Zoho Assist icon should appear in the system tray.
Note: If you are facing dependency issues, please refer to "How to install libappindicator - GTK3?" given below to install libappindicator - GTK3.
How to install the libappindicator - GTK3:
- Install the library by executing
sudo yum install libappindicator-gtk3 or sudo dnf install libappindicator-gtk3. - However, if you are using openSUSE, download the libappindicator-gtk3-12.10.0-11.el7.x86_64.rpm package from https://pkgs.org/download/libappindicator-gtk3
- Install the package using the command
zapper in /libappindicator-gtk3-12.10.0-11.el7.x86_64.rpm.