Install Unattended Access via Deployment Link
Just copy the deployment link directly from the website or share it with your customers via email. Customers can simply run the downloaded file to complete the unattended access setup. This method is ideal when the end user is present but the technician does not have physical access to the device.
Sharing the Default Deployment Link
Log in to your Zoho Assist account.
Navigate to the Unattended Access tab.
Select Deployment from the left side of the page and choose Manage Devices.
Click +Add in the top-right corner of the page. You will be shown with the "Add Device" window as shown below.
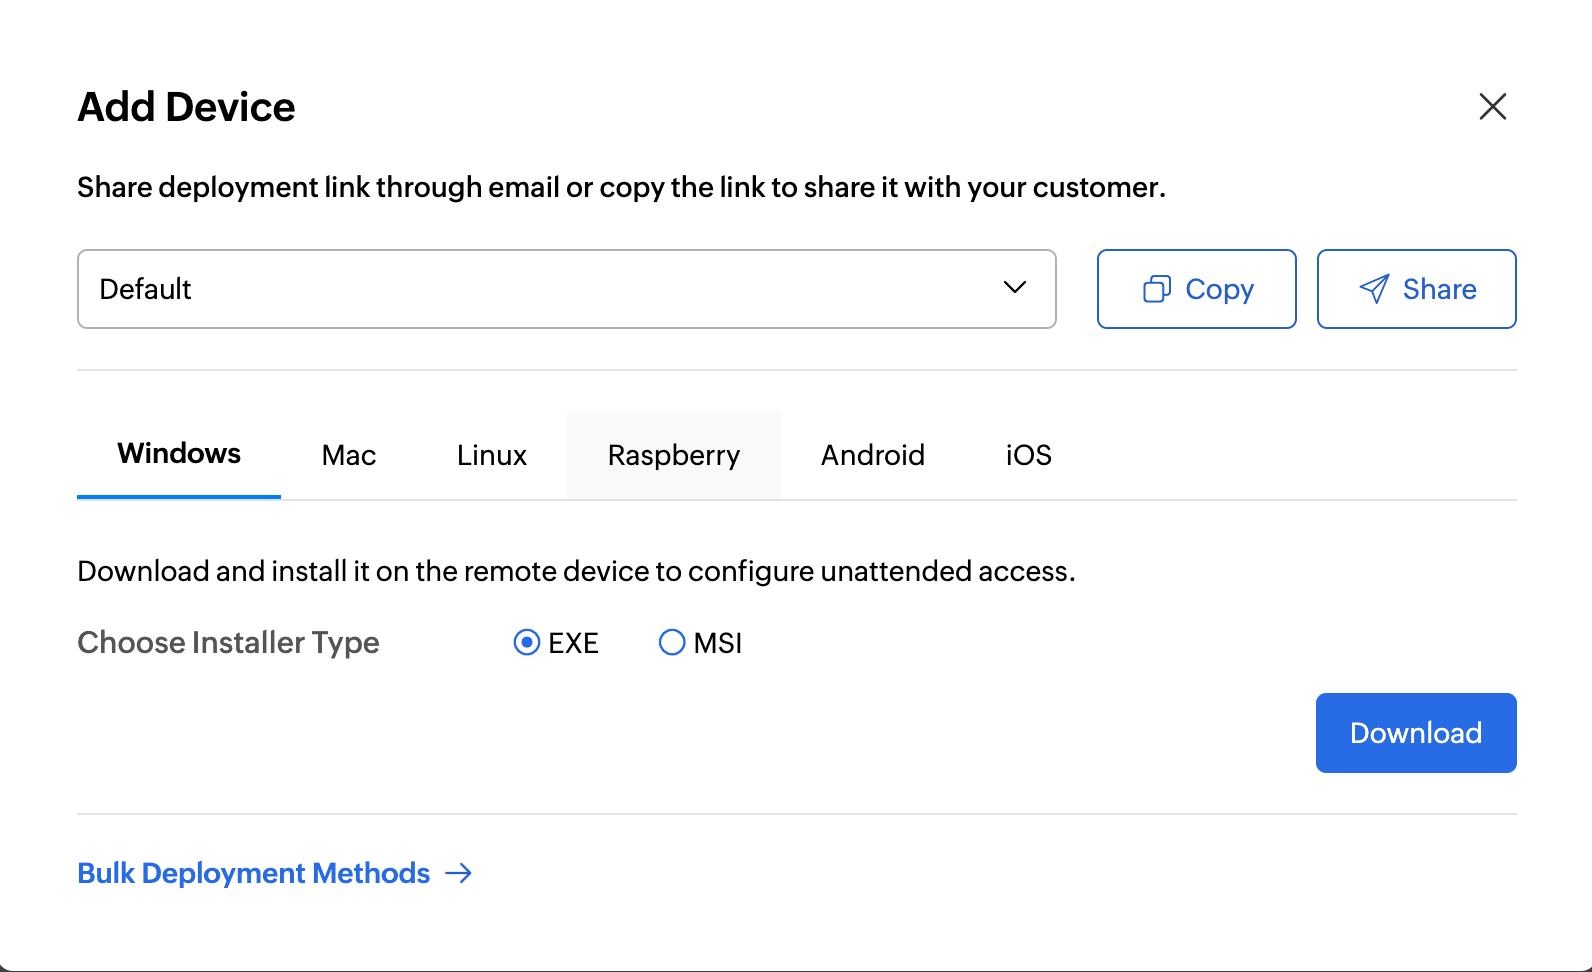
Share the link using one of the following options:
Click Copy: Share it manually through chat or any other preferred communication channel.
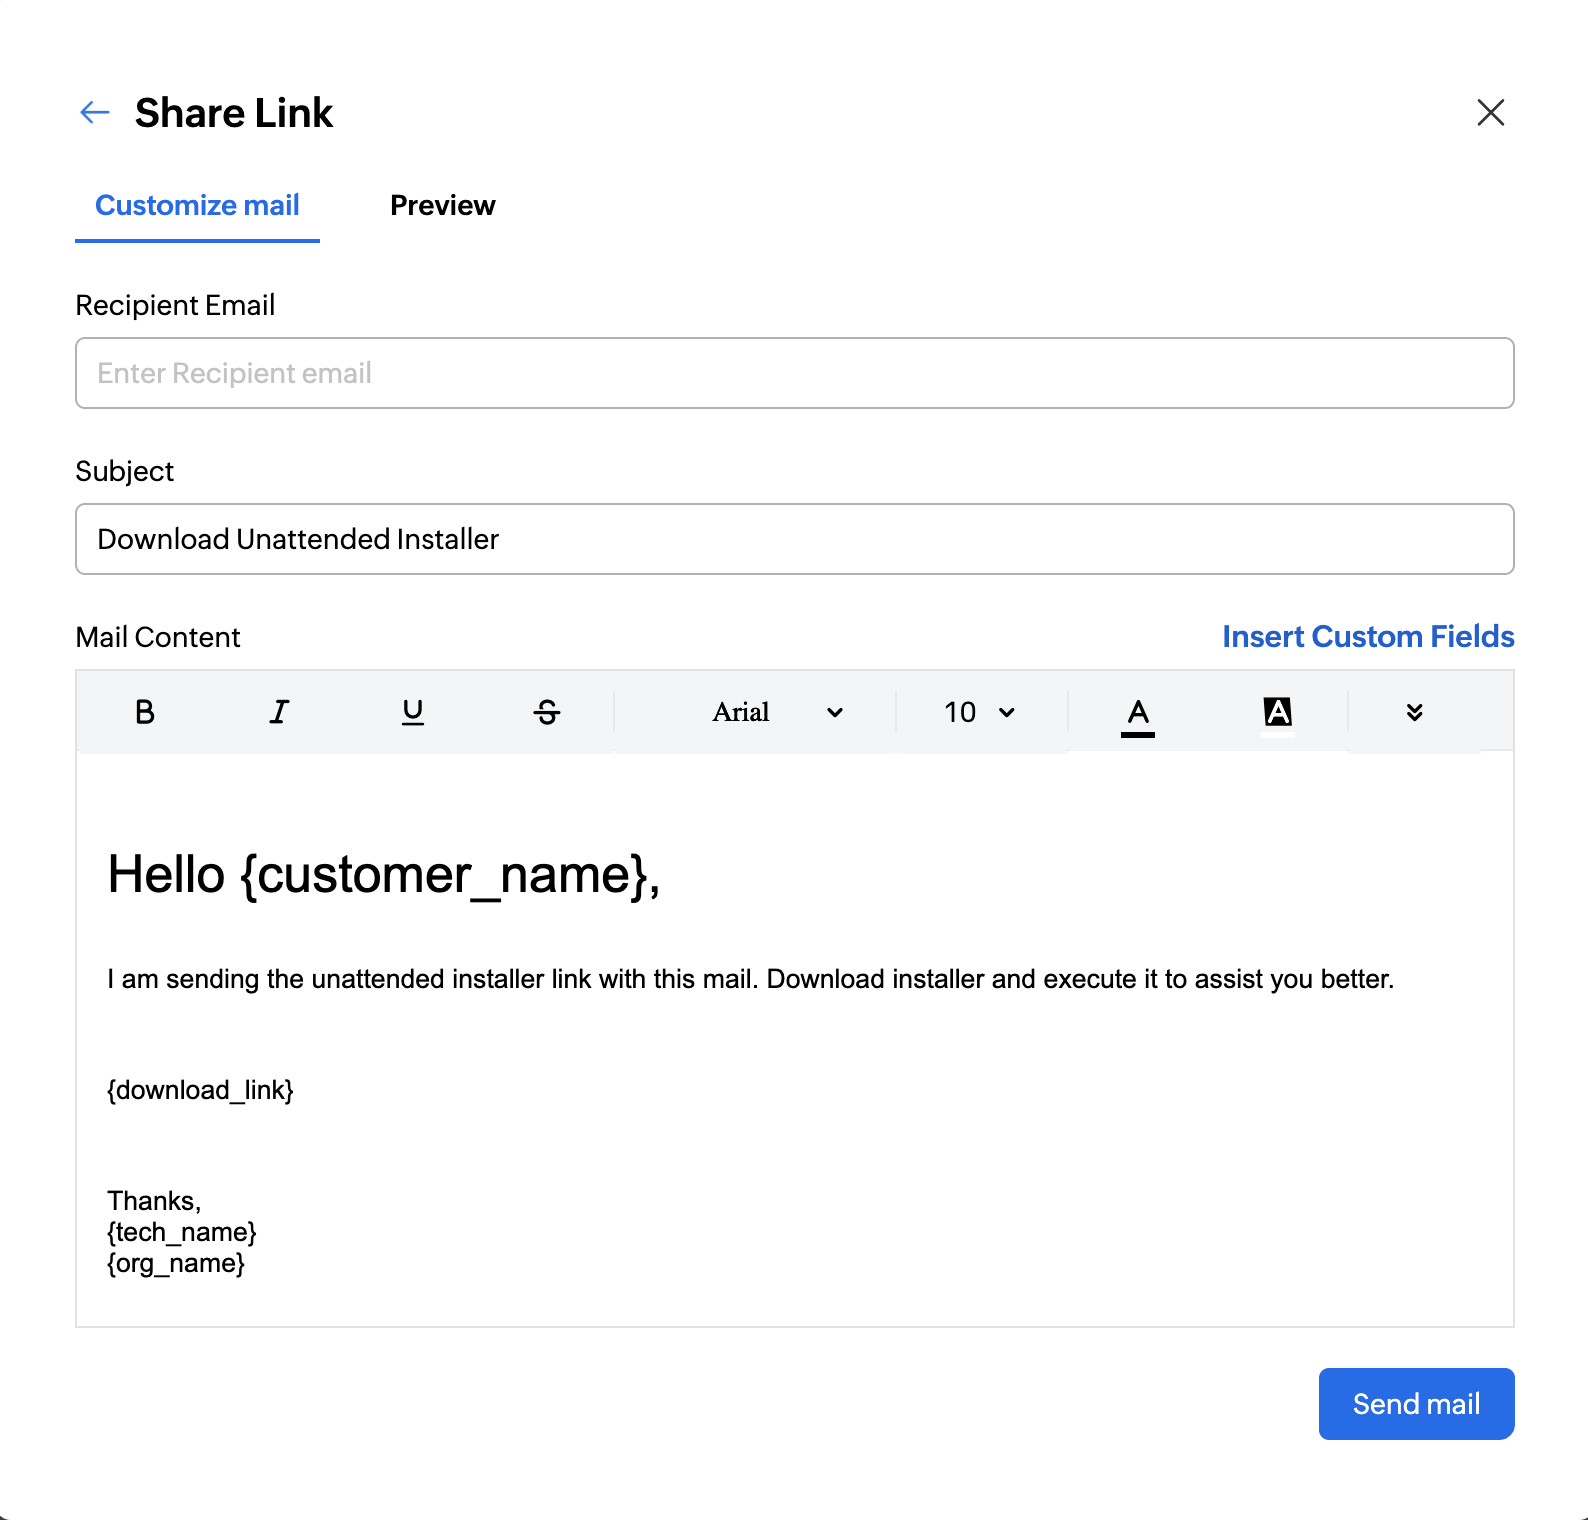
Click Share: Automatically send the link to the user by email. Enter the user's mail address in the Recipient email address field and then click Send Mail.


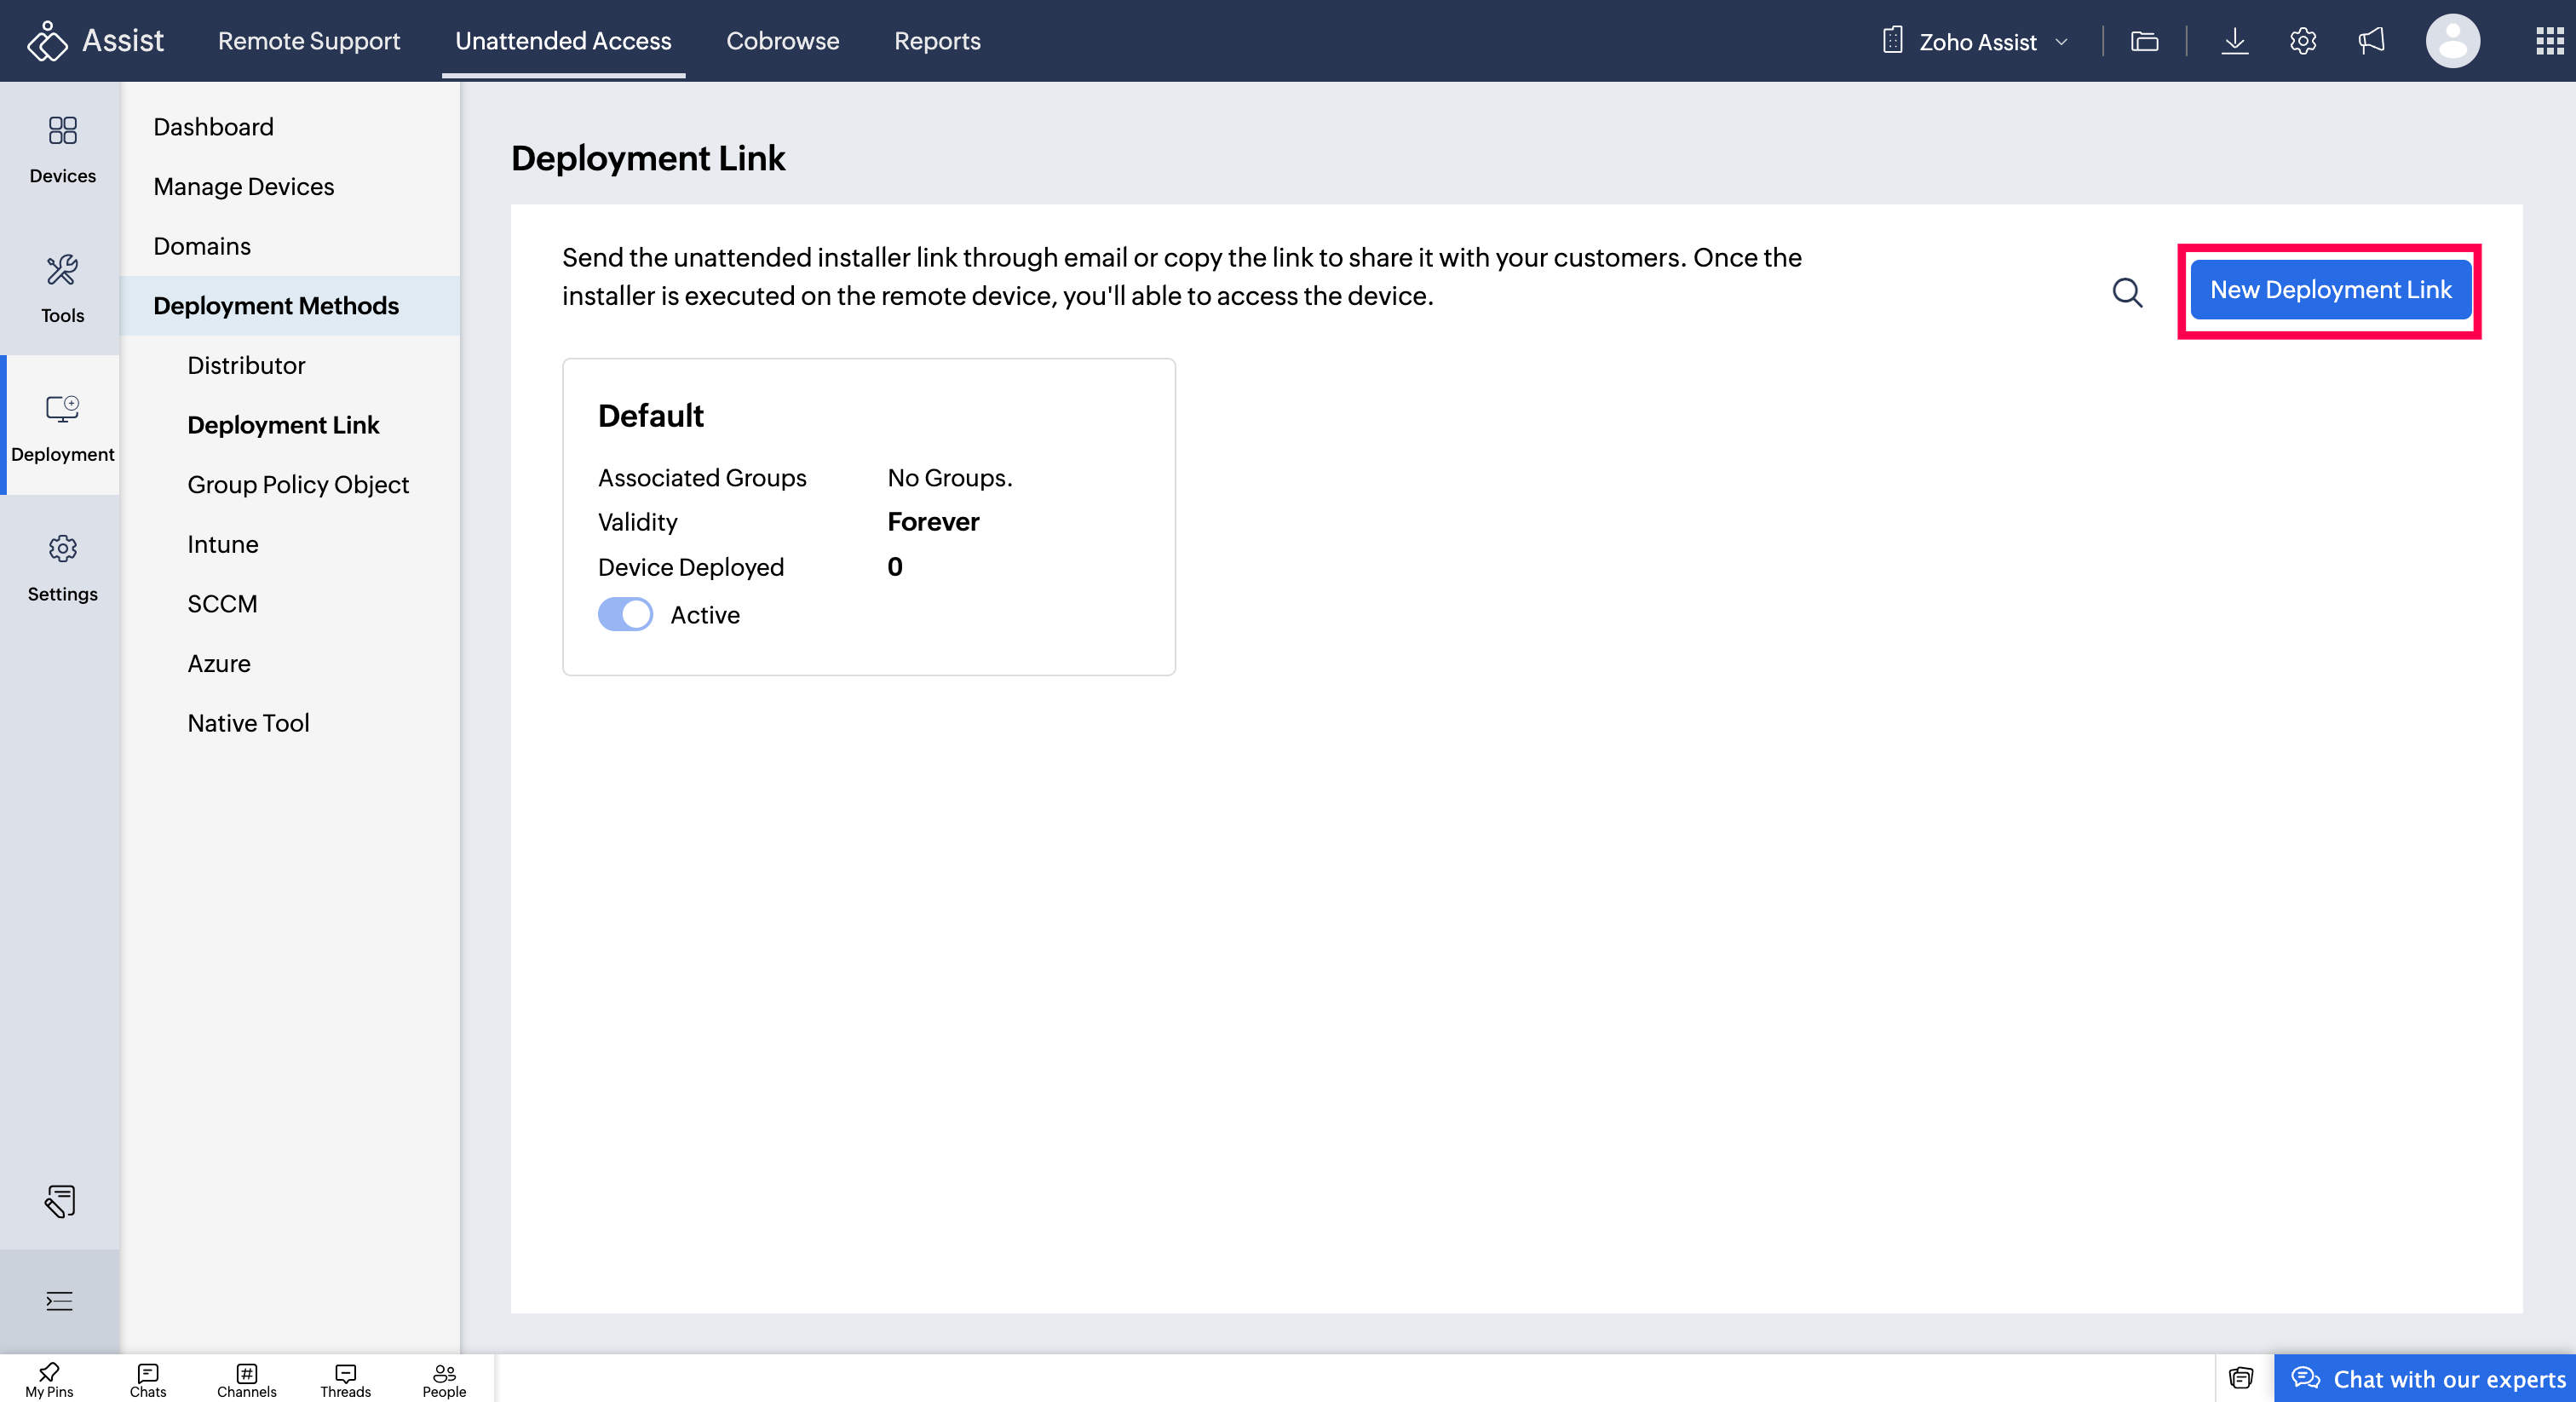
You can also share the default deployment link from Unattended Access > Deployment > Deployment Link under Deployment Methods and click the copy or share icon.
How to Create a New Deployment Link
You can create a new deployment link and set its validity to specific group(s).
Navigate to Unattended Access > Deployment > Deployment Link.
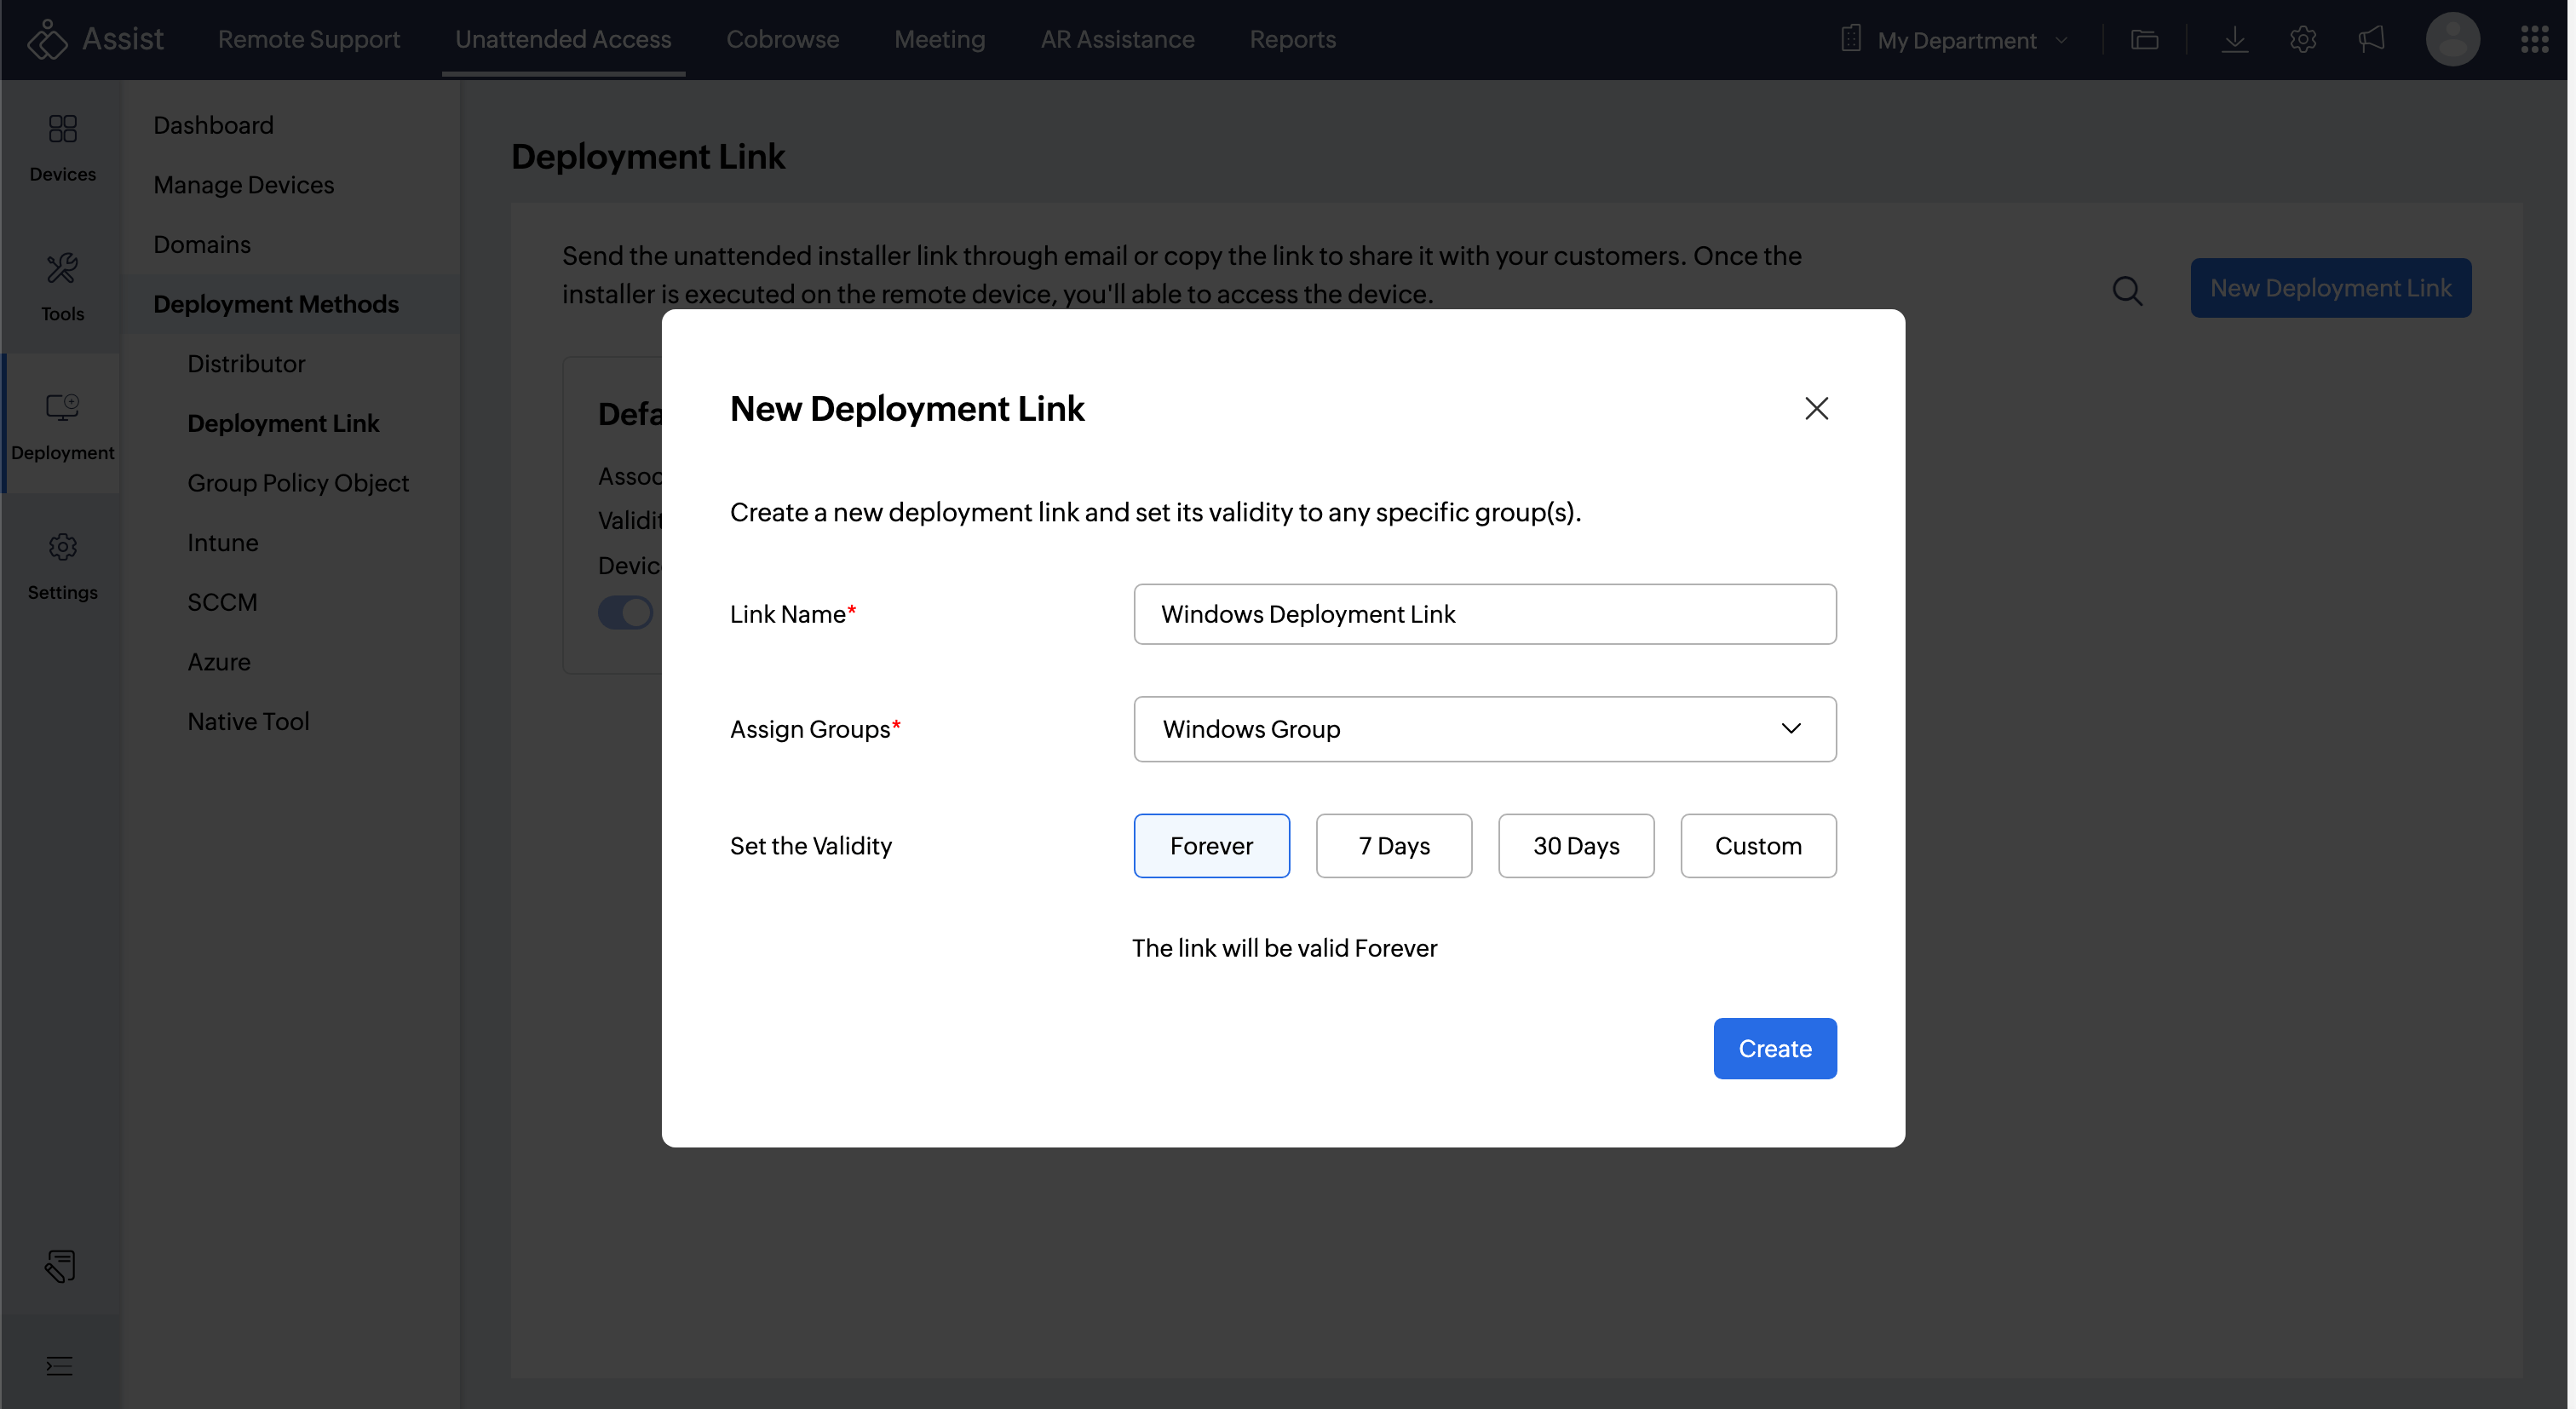
You will see the default deployment link. To configure a new deployment link, click New Deployment Link.
Enter the Link Name, assign the Groups, and set the Validity as per your requirement.
Link Name: Provide a name for easy identification of the link.
Assign Group: Assign the deployment link to a specific group for organizational management. Once the device is set up, it will automatically be added to the assigned group.
Link Validity: Set the validity period of the link, defining how long the link will remain active for use.
After entering the details, click Create to generate the deployment link.
Once created, Share the link using one of the following options:
Click Copy: Share it manually through chat or any other preferred communication channel.
Click Share: Automatically send the link to the user by email. Enter the user's mail address in the Recipient email address field and then click Send Mail.


You can also share the created deployment link from navigating to Manage Devices, clicking +Add, and choosing the created link from the drop-down menu.

Once shared, instruct your customer to:
Click on the shared link.
Once the page opens, click Download.
Double-click the downloaded file and run the application. Once executed, the configured computer will be added to your unattended computers' list.
Once added, go to Unattended Access and click CONNECT next to the newly added computer to start a remote access session.
Managing the deployment link
After creating the deployment link, you can manage it from the same interface:
Enable or disable the link: Toggle the Active option to control the availability of the deployment link.
Edit link details: Update properties such as the link name, group assignment, or validity period.
Delete the link: Permanently remove the deployment link when it is no longer required.

