Custom Report
Custom Report gives you a detailed view of all your remote support session data in one place. You can filter, sort, and analyze session information such as session type, technician details, and duration to track activity and gain actionable insights.
Views in Custom Report
Custom Report uses Views to control which data is displayed. A View is a saved filter configuration that determines what session data appears in the report. There are two types:
Standard View
The Standard View is the default view that loads when you open Custom Report. It displays all available session data with no filters applied, giving you a complete, unfiltered look at your data. The Standard View cannot be edited or deleted.
Custom View
Custom Views let you save frequently used filter configurations and switch between them instantly without reapplying filters each time. You can create multiple Custom Views based on different filter criteria and switch between them from the view dropdown. You can also set a Custom View as the default so it loads automatically when you open Custom Report.
Note: Views are user specific. A View created by one user is visible only to that user and is not shared across the organization.
Creating a View
- Go to Reports > Custom Report.
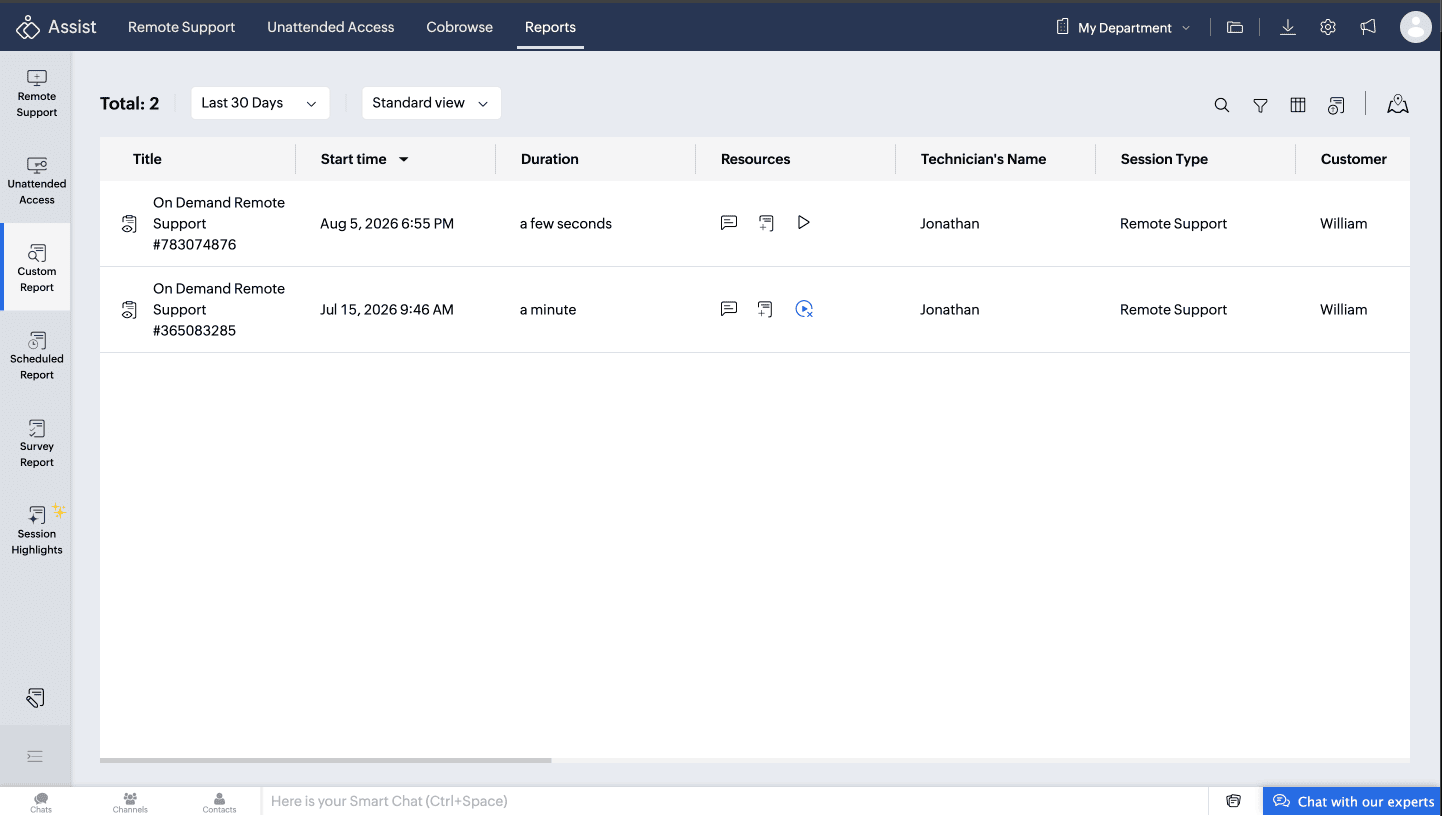
- Click the Standard View dropdown.
- Click the + icon next to the Views header.
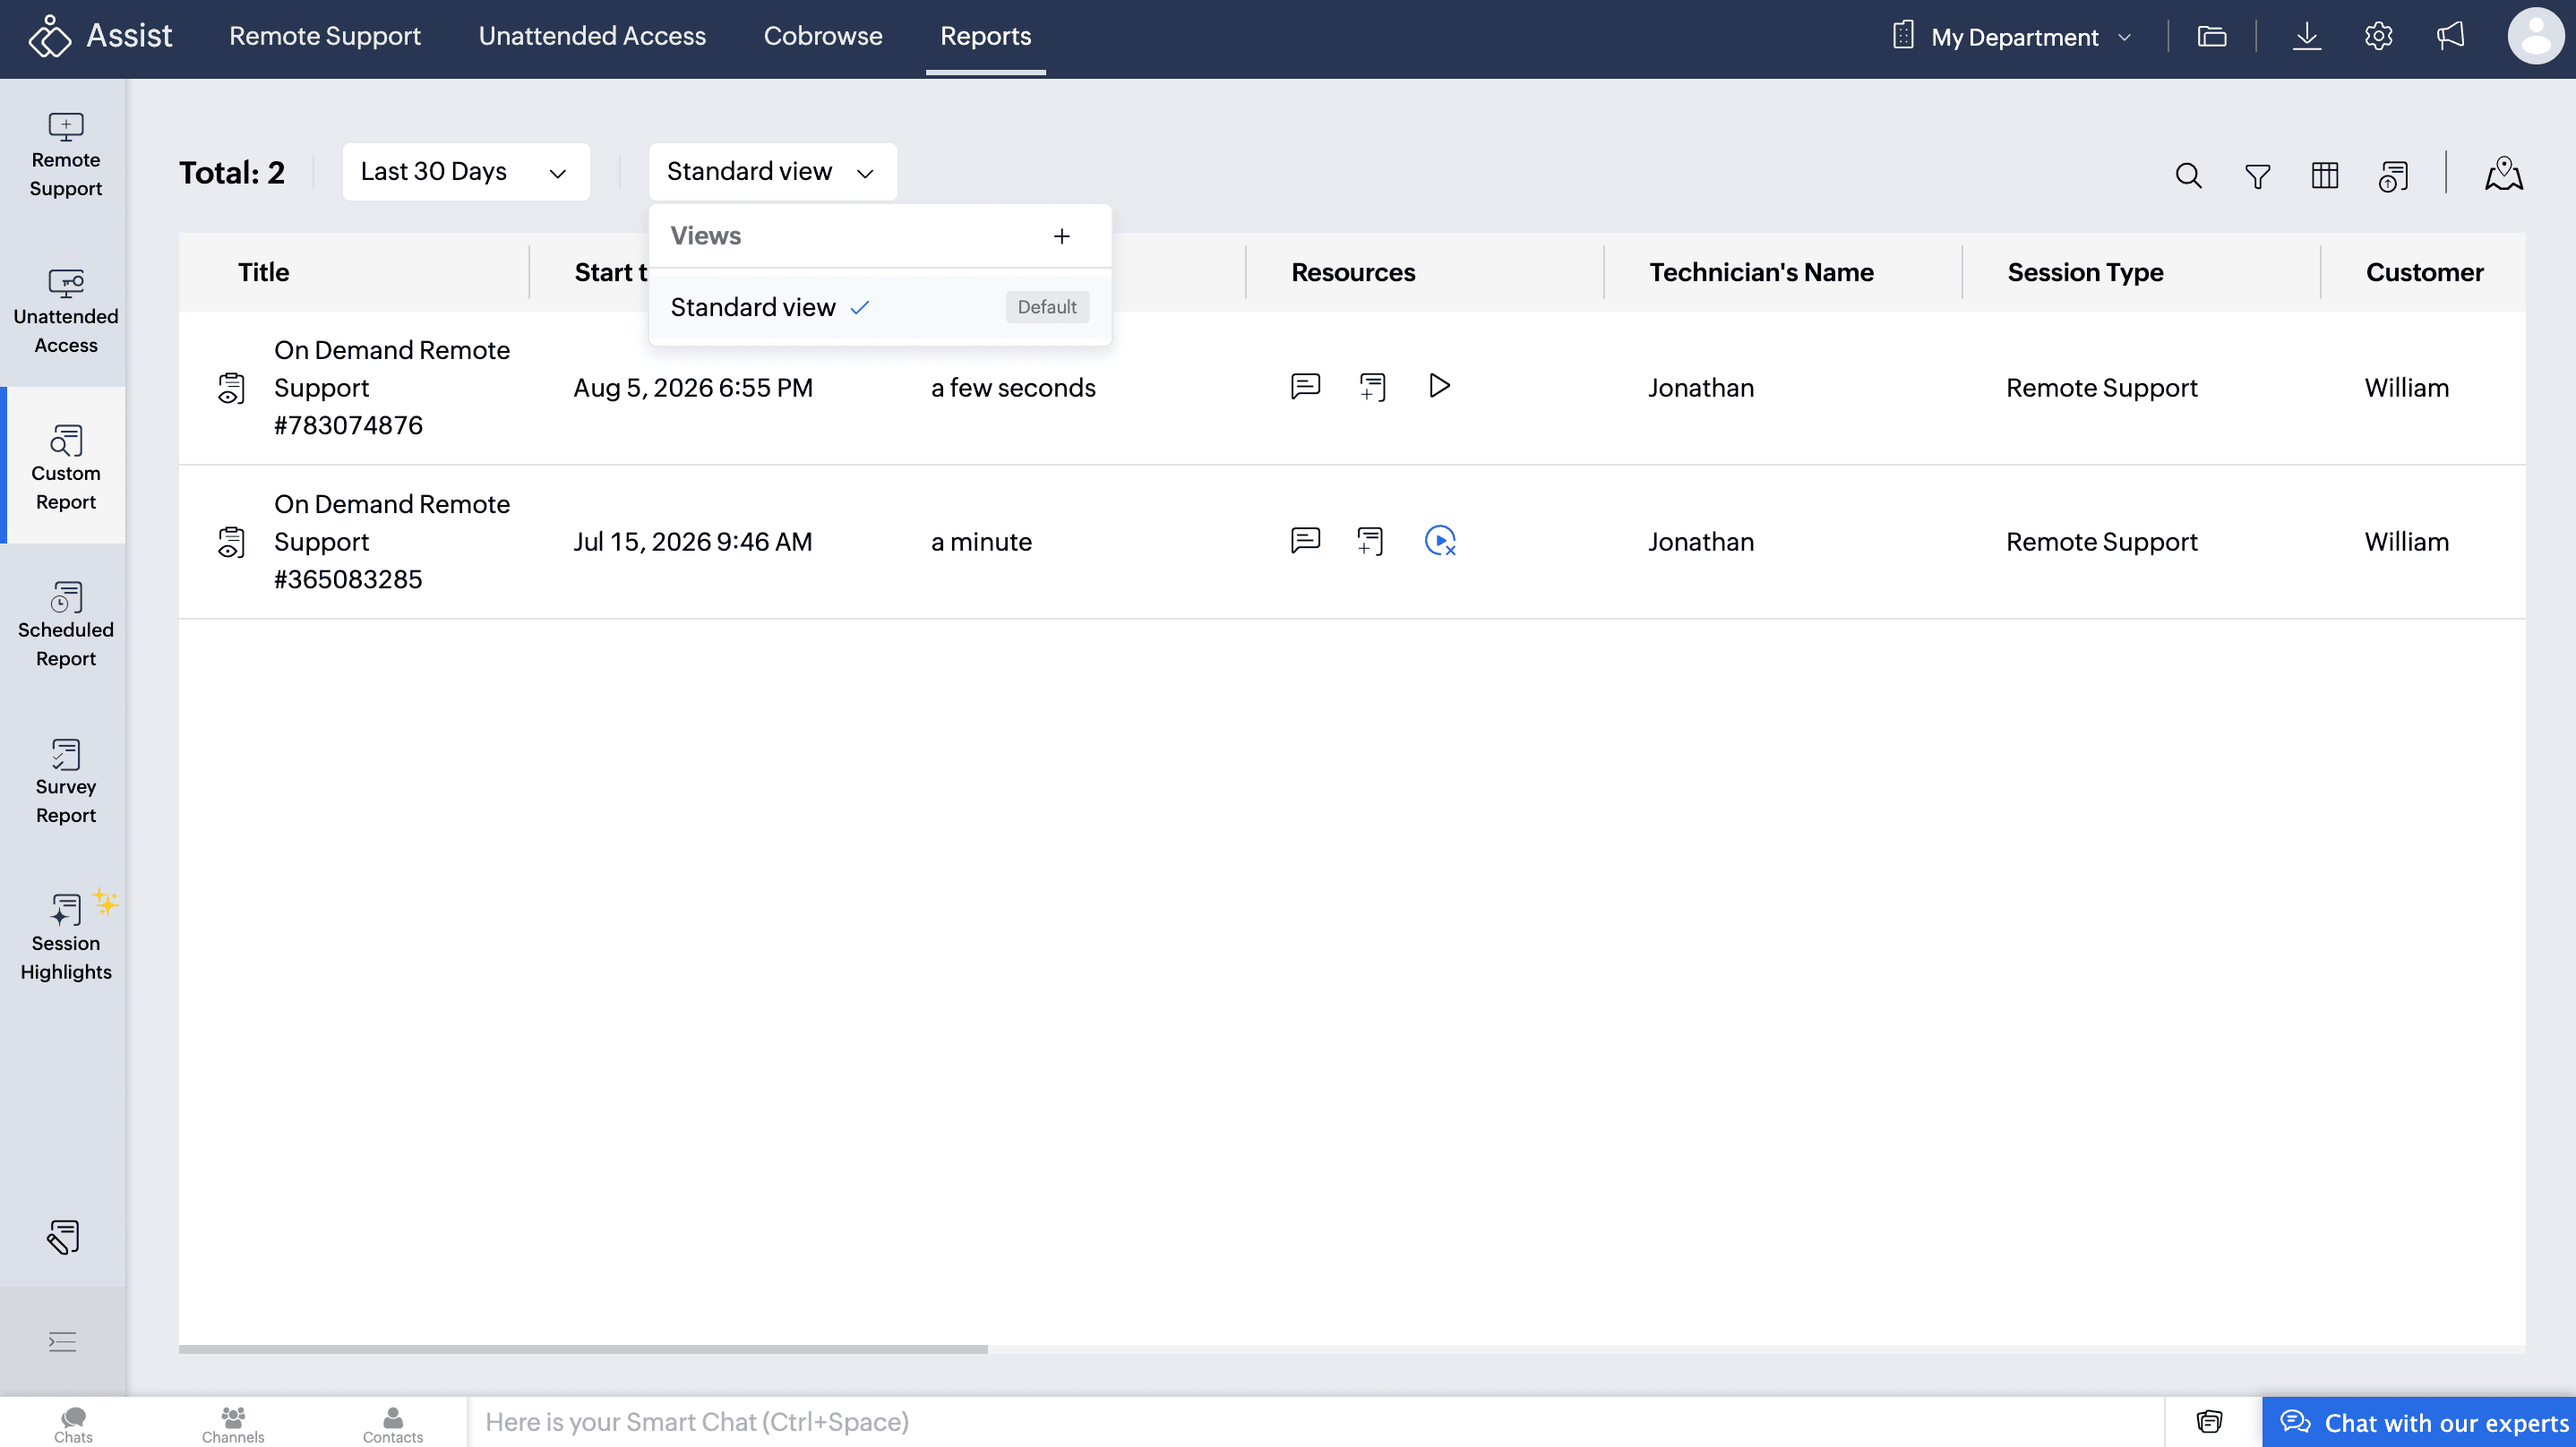
- In the Create View panel, enter a View Name.
- Select your filter criteria (such as Session Type, Technician, or Technician Type).
- Click Create.
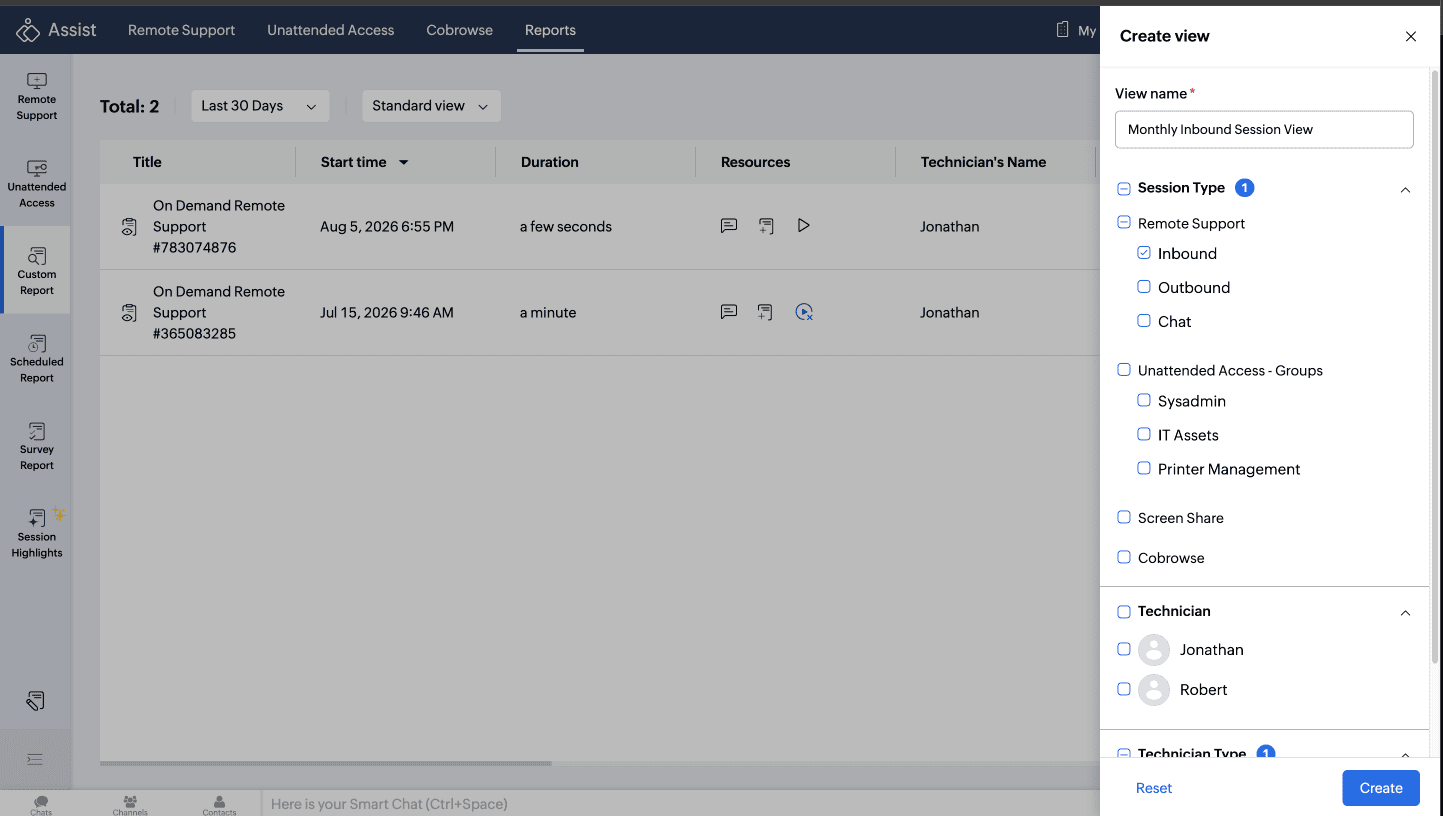
The new View will appear in the view dropdown and can be selected at any time.
Managing Views
Once a view is created, you can manage it from the view dropdown. Click the three dot icon next to the view name to access the following options:
- Edit: Update the filter criteria or rename the view.
- Set as Default: Set the view to load automatically whenever Custom Report is opened.
- Delete: Permanently remove the view and its saved filters.
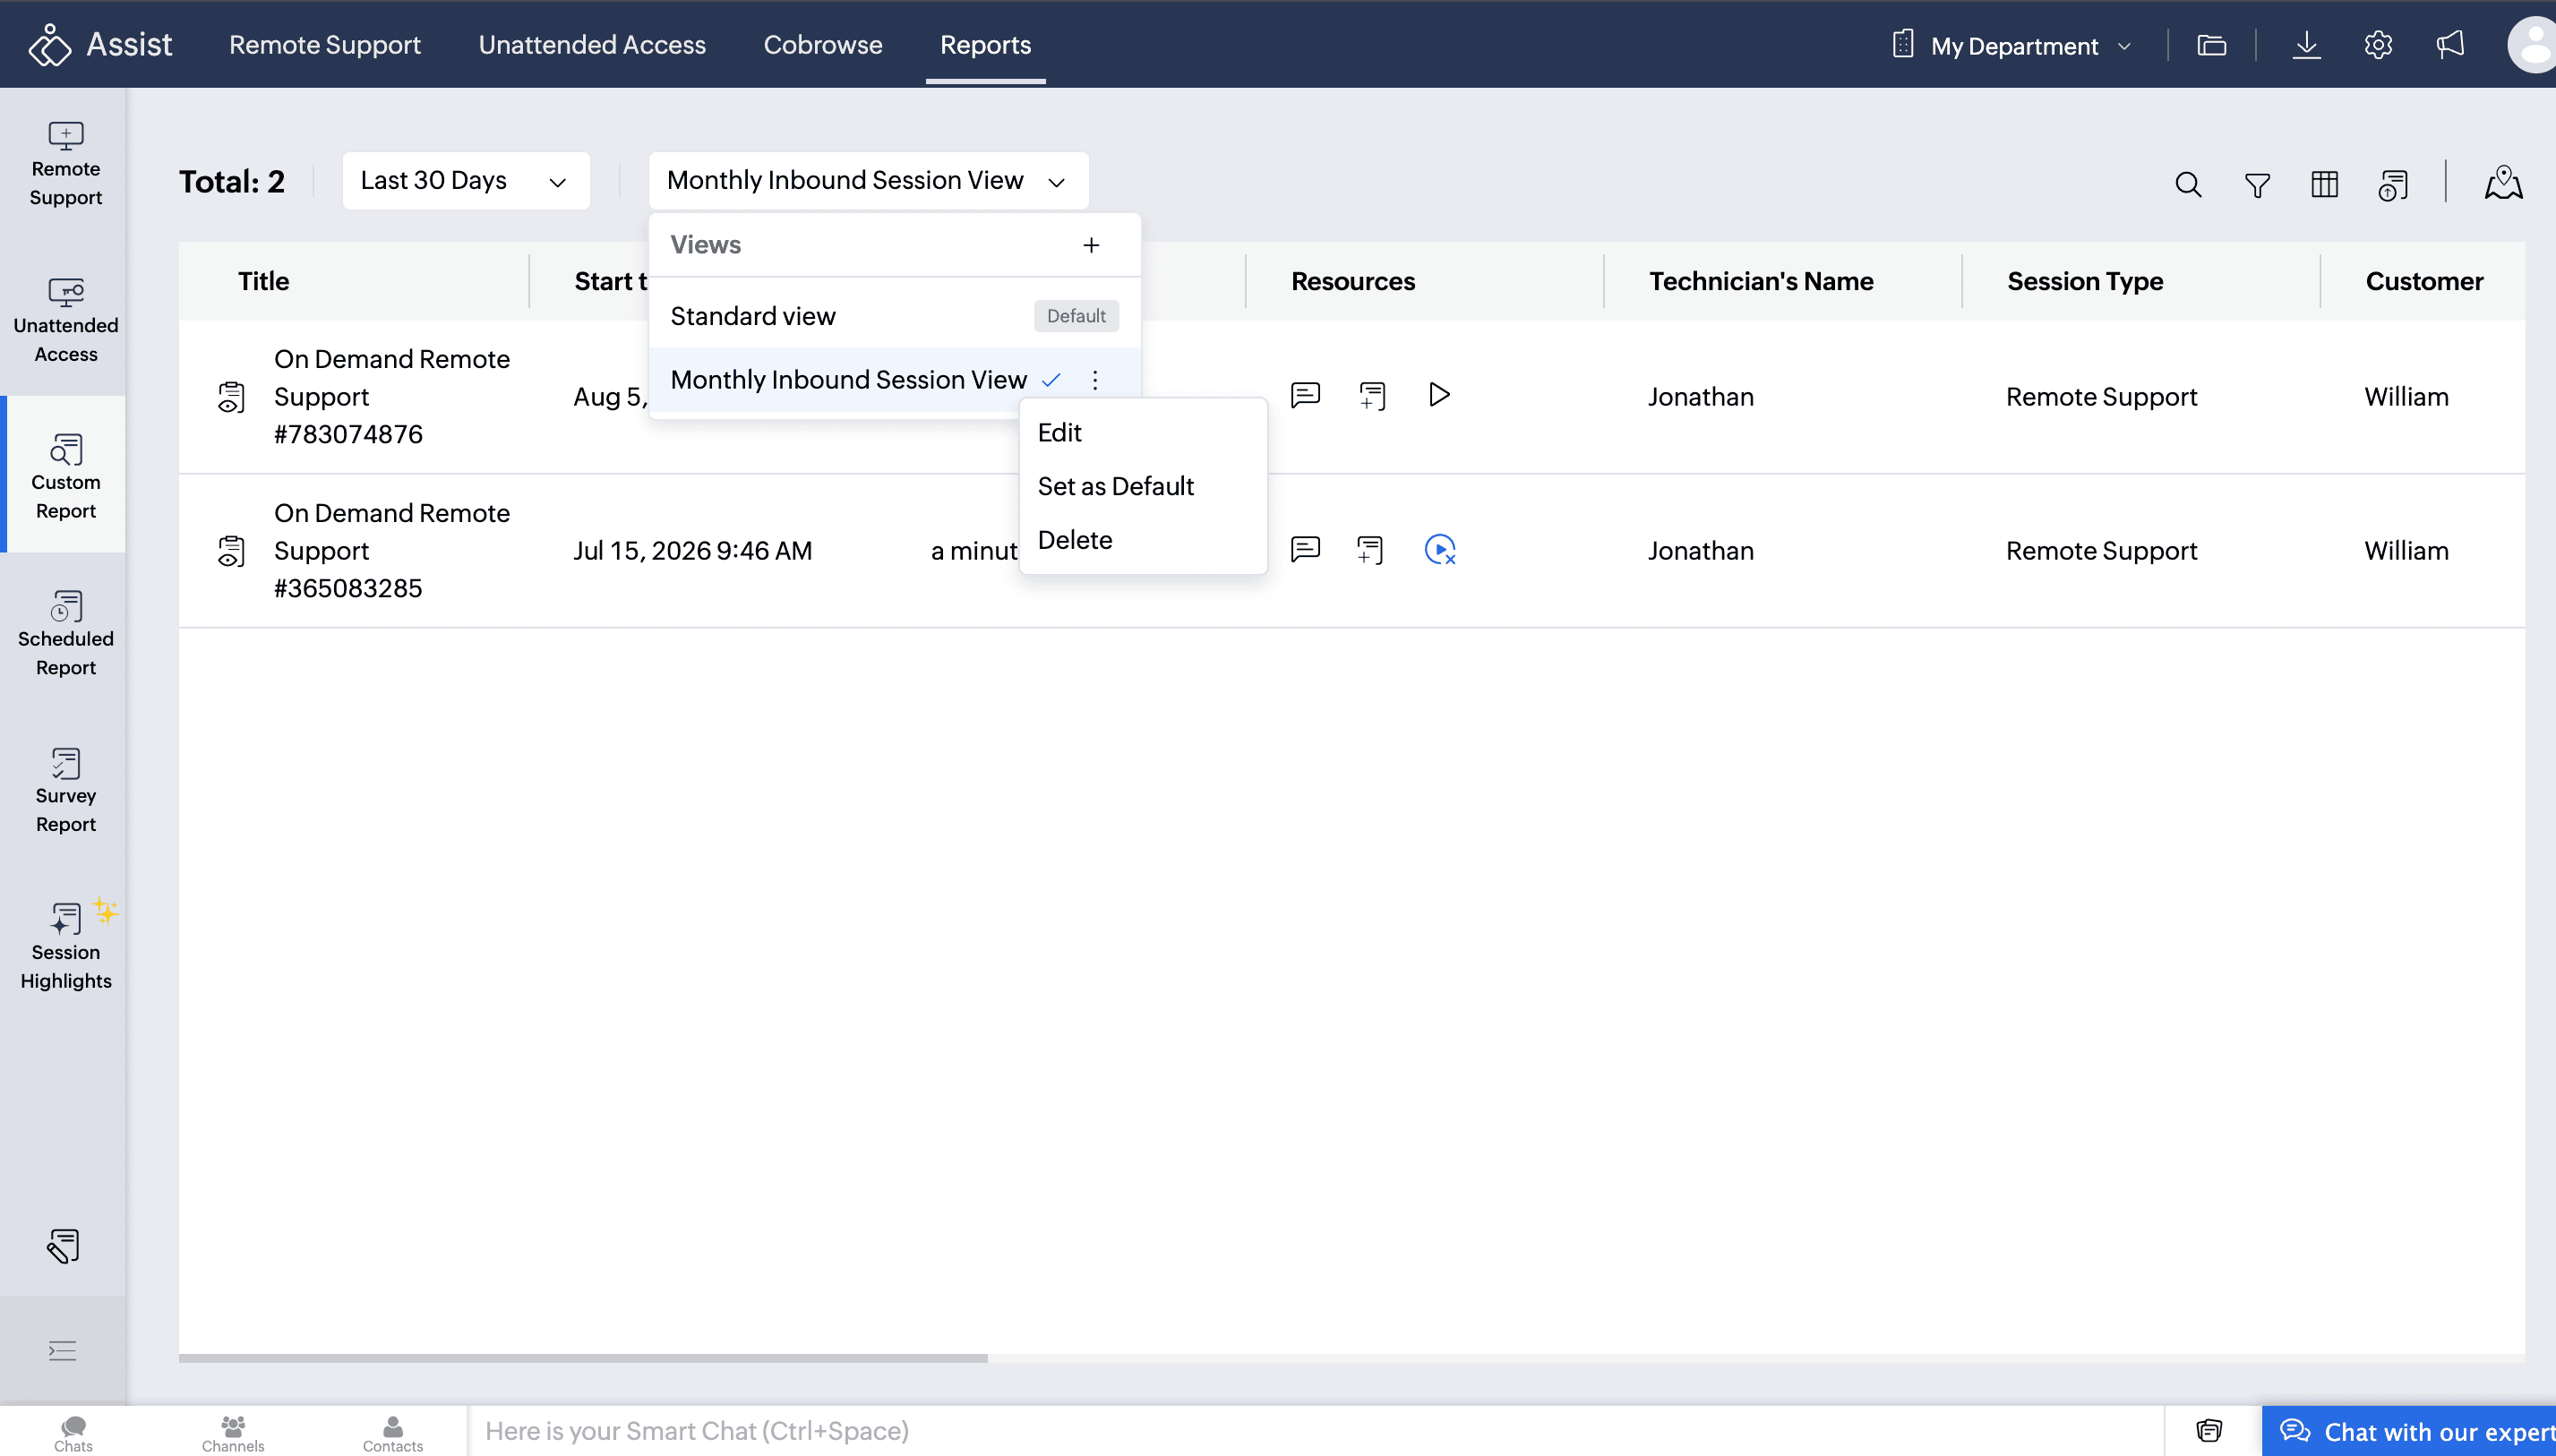
Note: The Standard View is the default view and cannot be edited or deleted.
Using Views in Scheduled Reports
Views you create in Custom Report are also available when setting up a Scheduled Report. When scheduling a Custom Report, you can select a saved View to control exactly which filtered data is delivered to recipients in each scheduled email.
To use a View in a scheduled report:
- Navigate to Reports > Scheduled Report and click Add New Report.
- Under Report, select Custom.
- In the View field, select the View you want to apply.
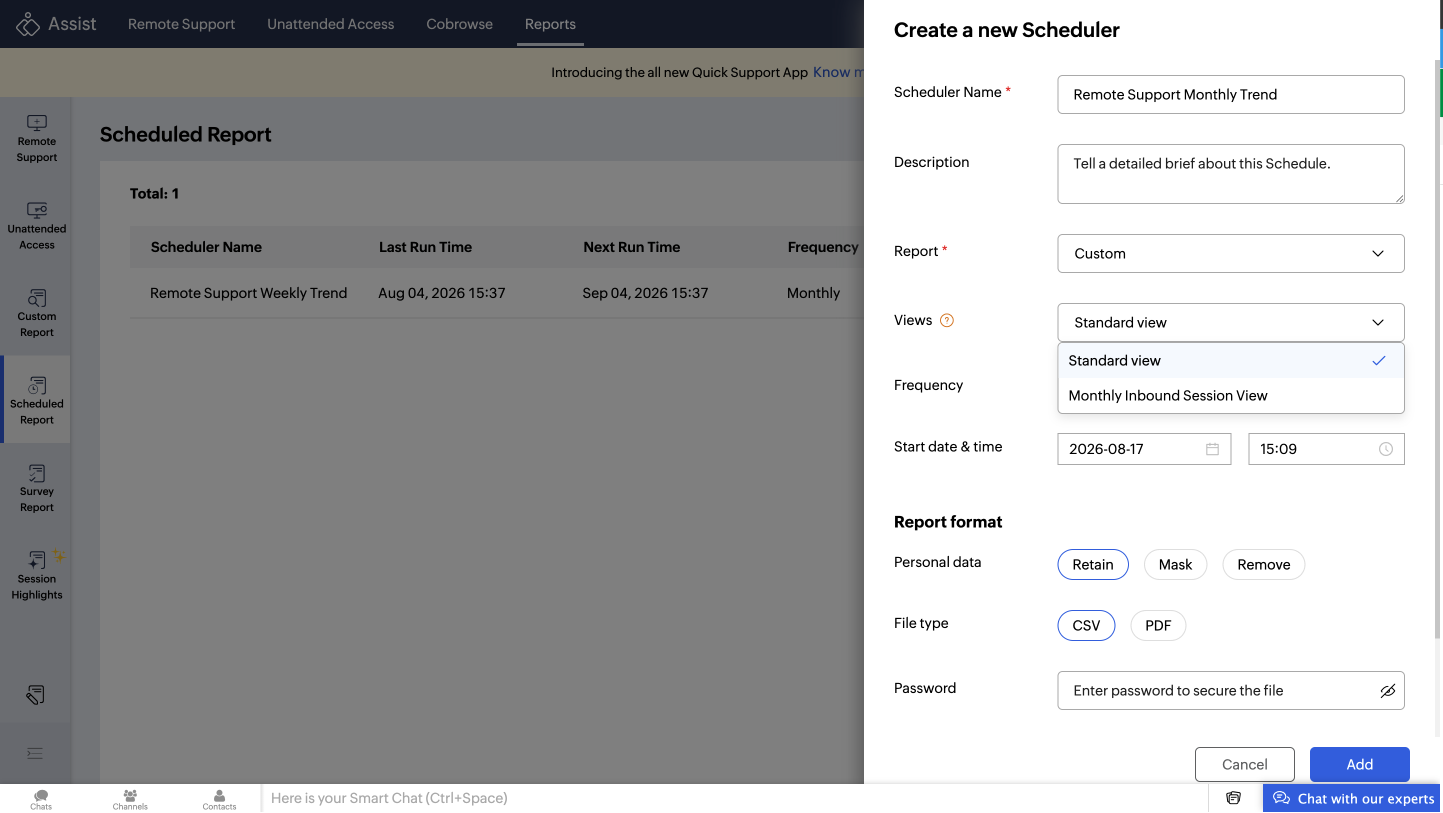
Only data matching the selected View's filter criteria will be included in the scheduled email. If no View is selected, the default unfiltered report data is sent.
Note: A View must be created in Custom Report before it appears as an option when scheduling a report.