Configure Zoho Assist MCP server
- Go to Zoho MCP and click MCP server.
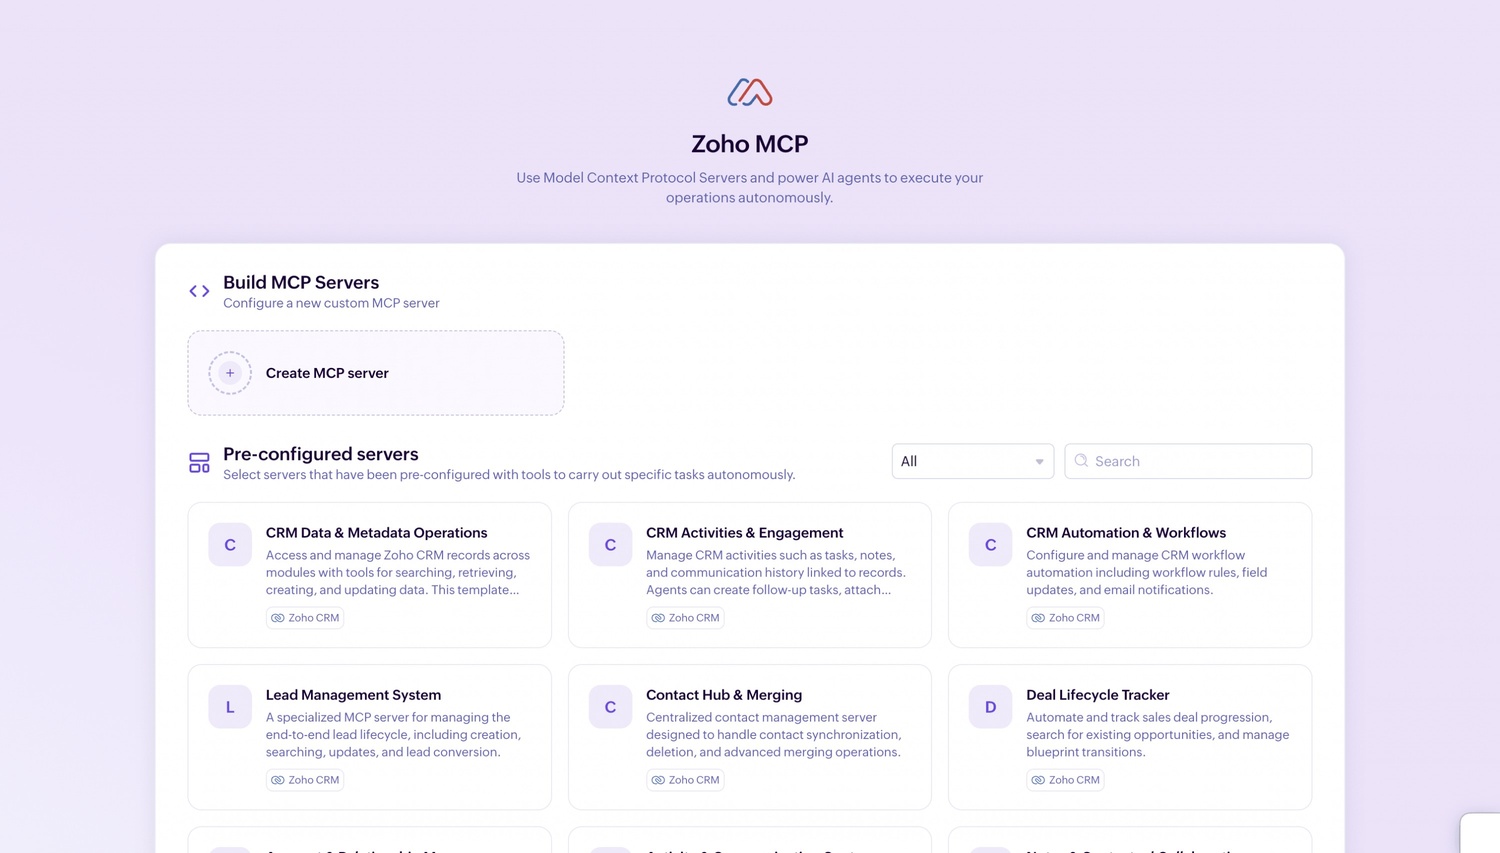
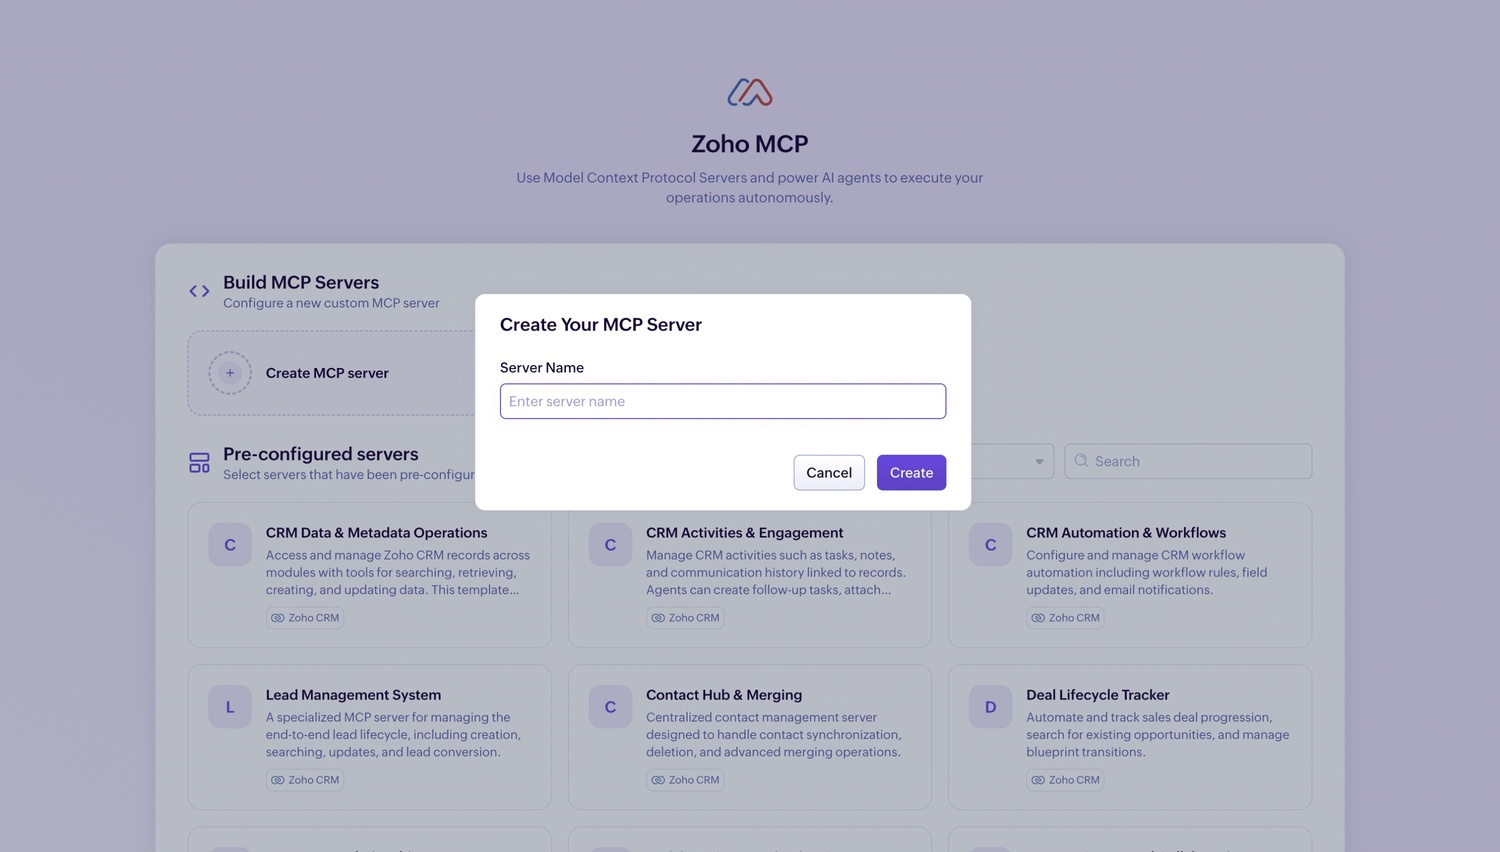
- Provide a name for your Zoho MCP server, then click Create.
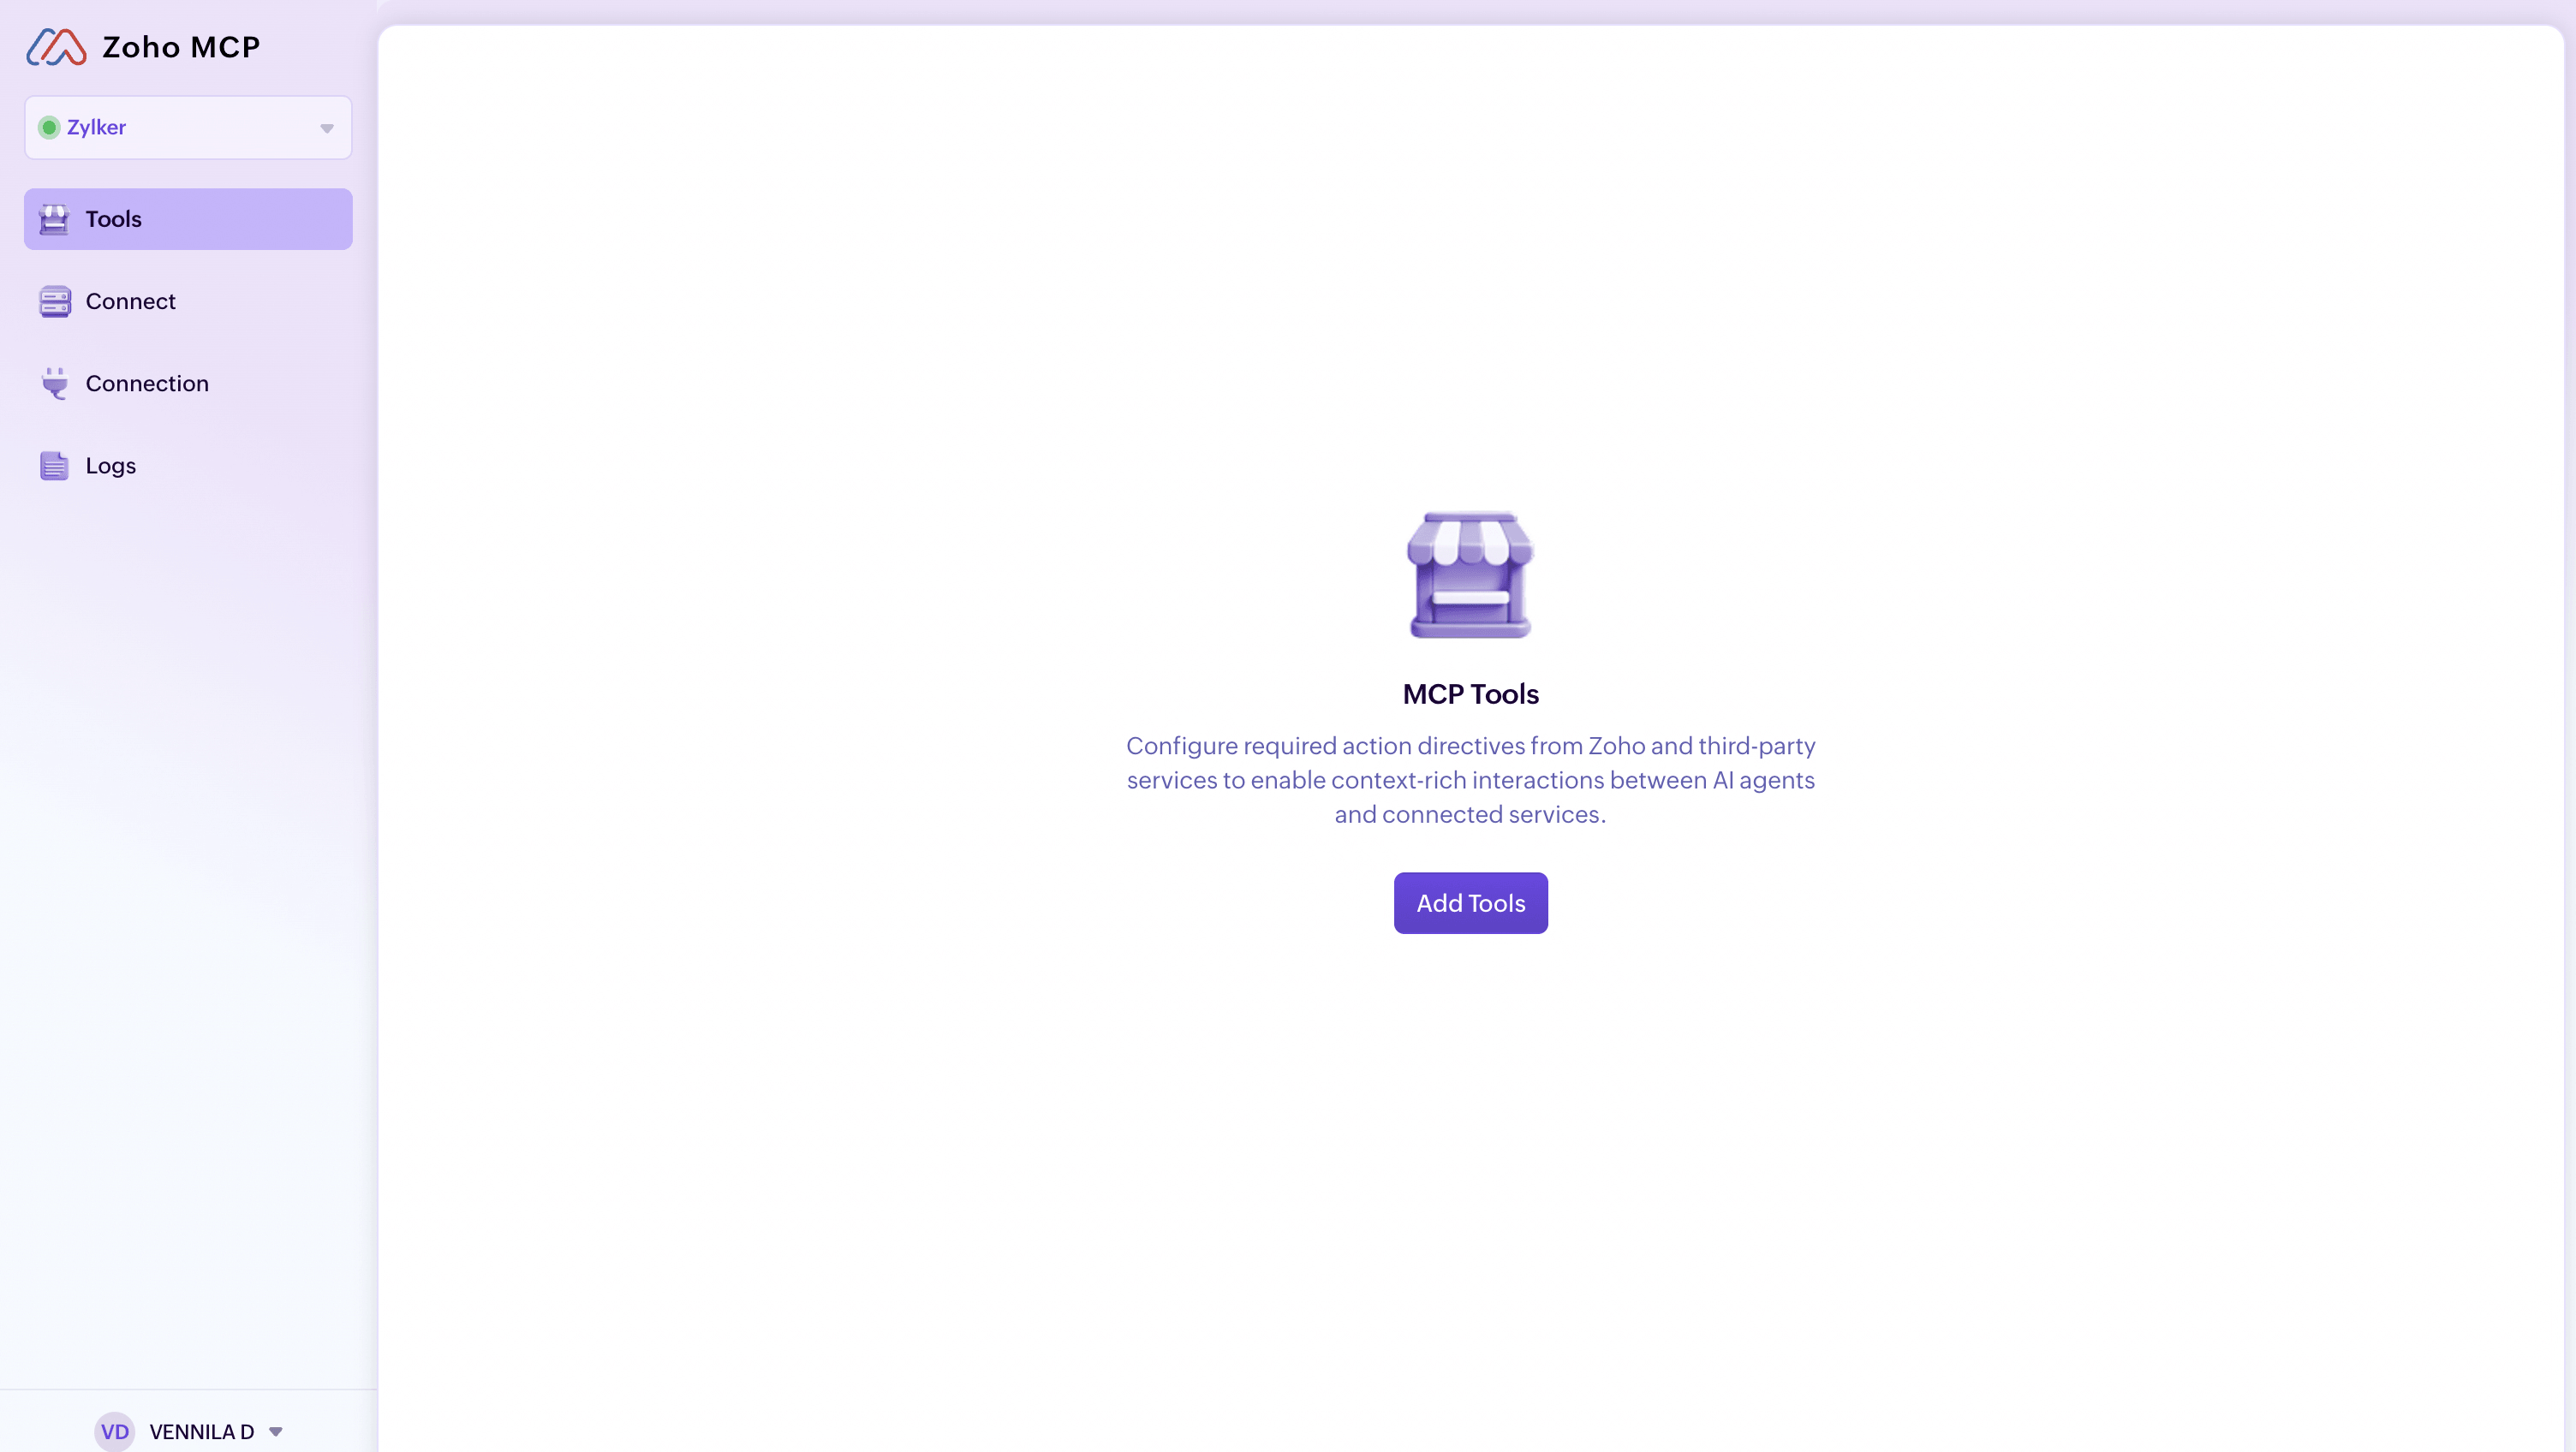
- Go to Tools and click Add Tools.
- Search for Zoho Assist.
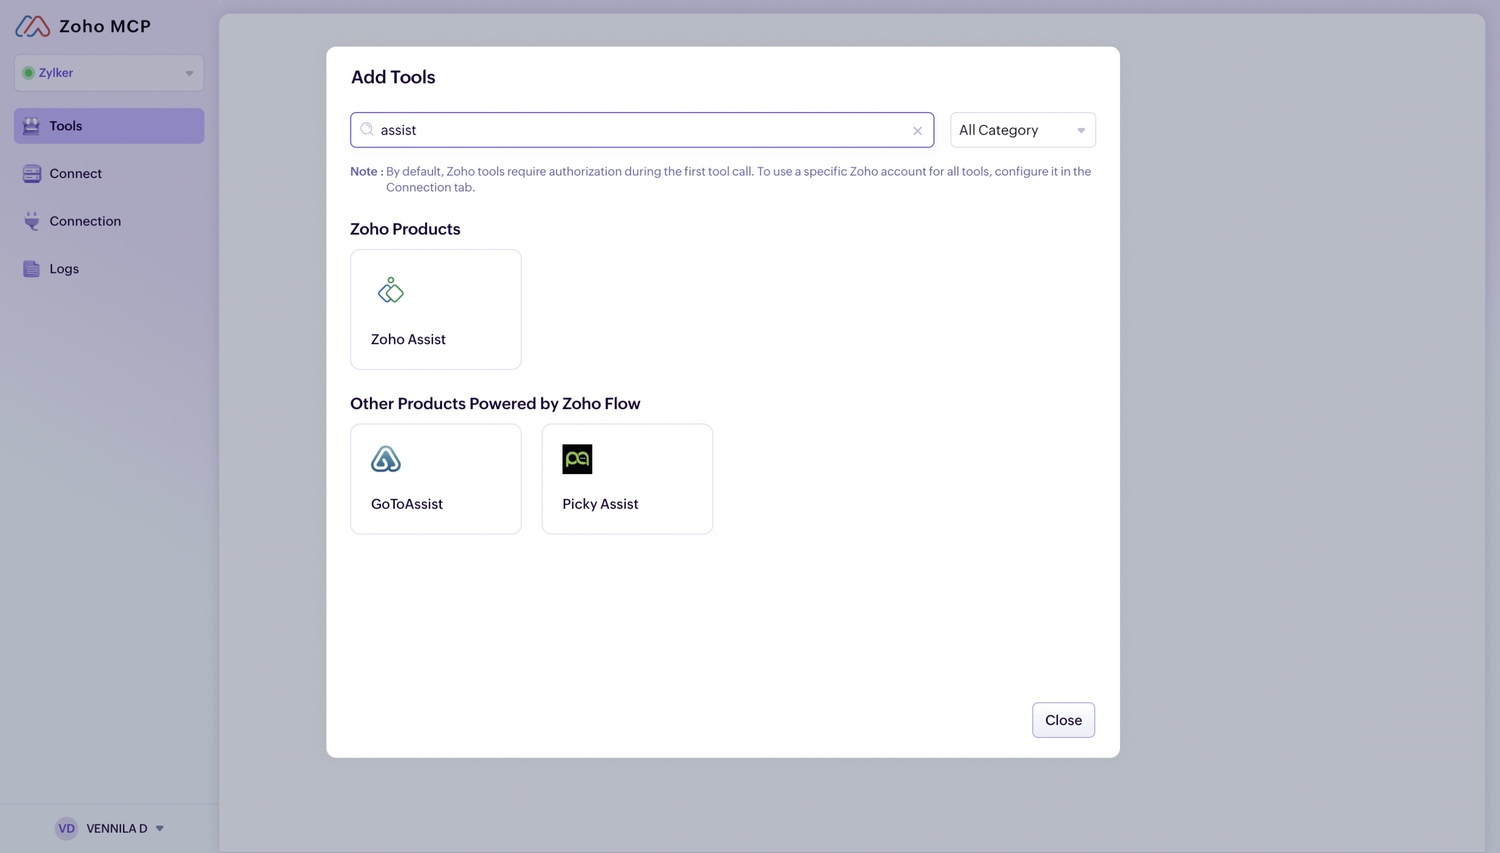
- Choose the required tools and click Add Now to proceed. To select all available tools at once, enable the Tools Name checkbox.
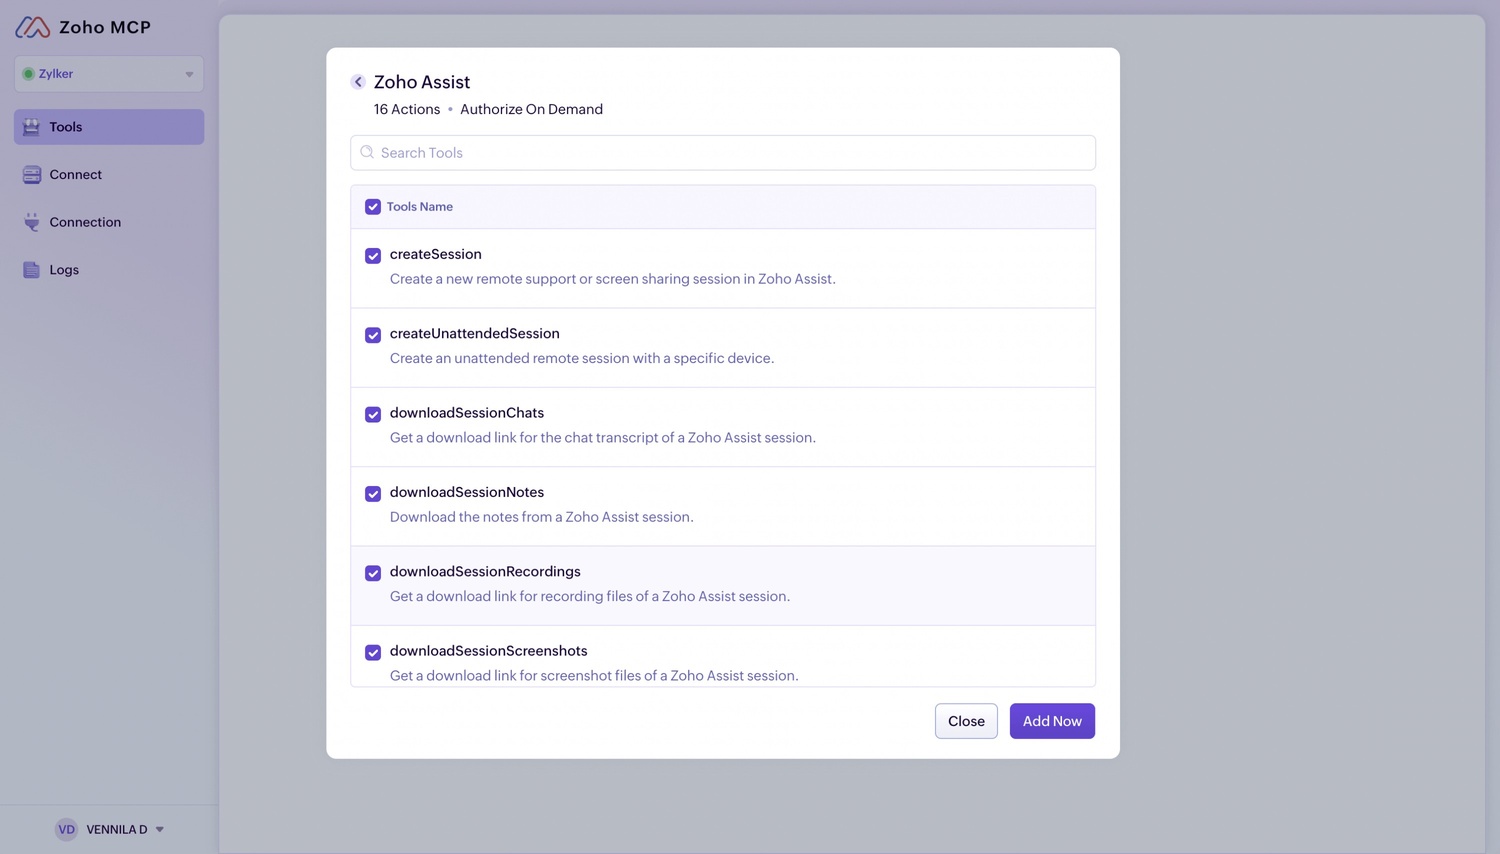
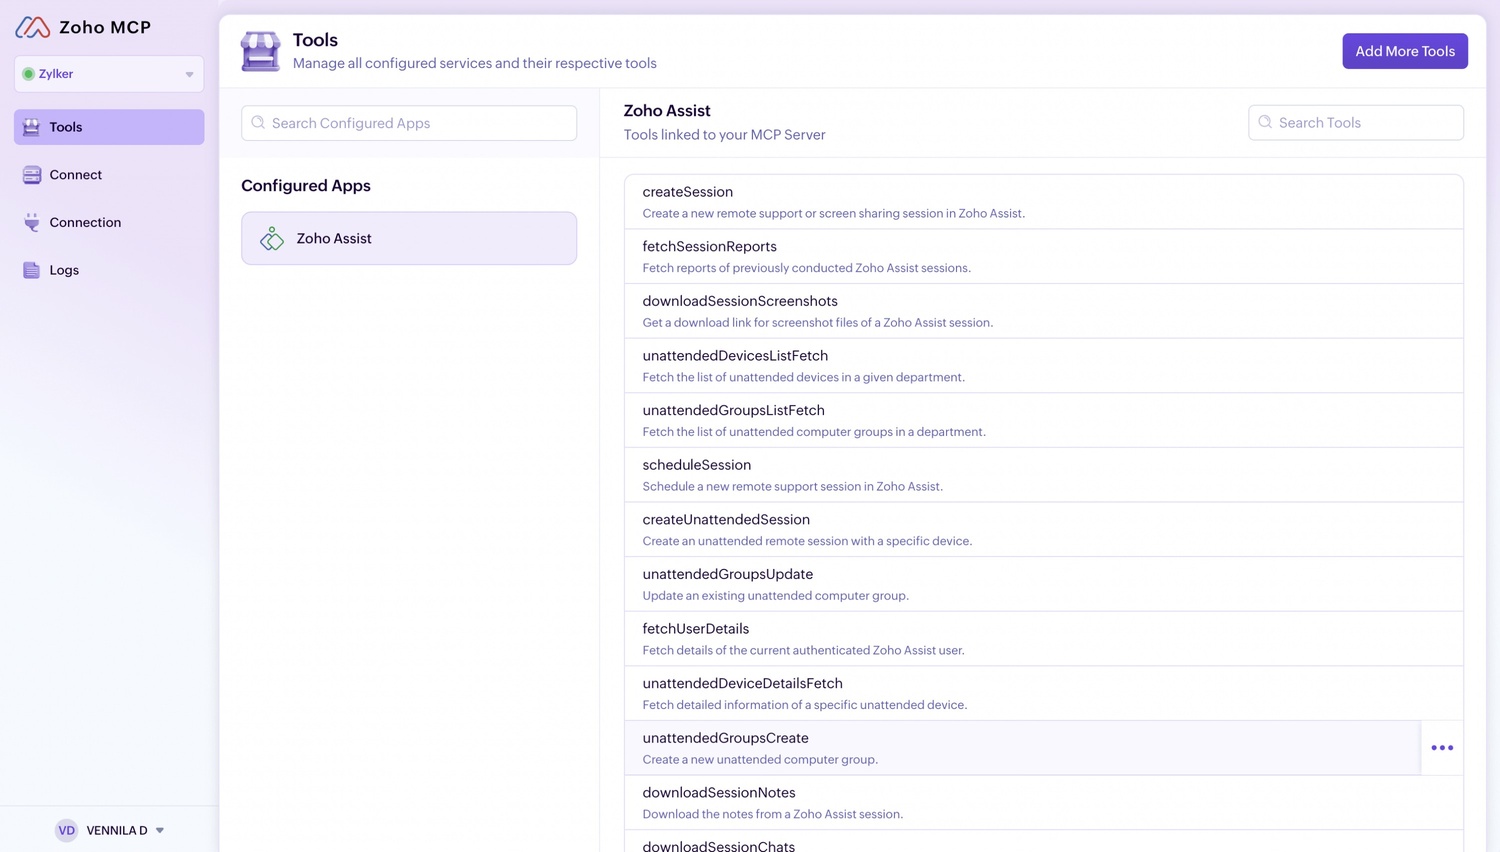
- All the required tools will be added to your Zoho MCP server.
- Go to Connect and copy the MCP URL generated to integrate your Zoho MCP server with your preferred MCP Client (Claude, Cursor, VS Code, or Windsurf).
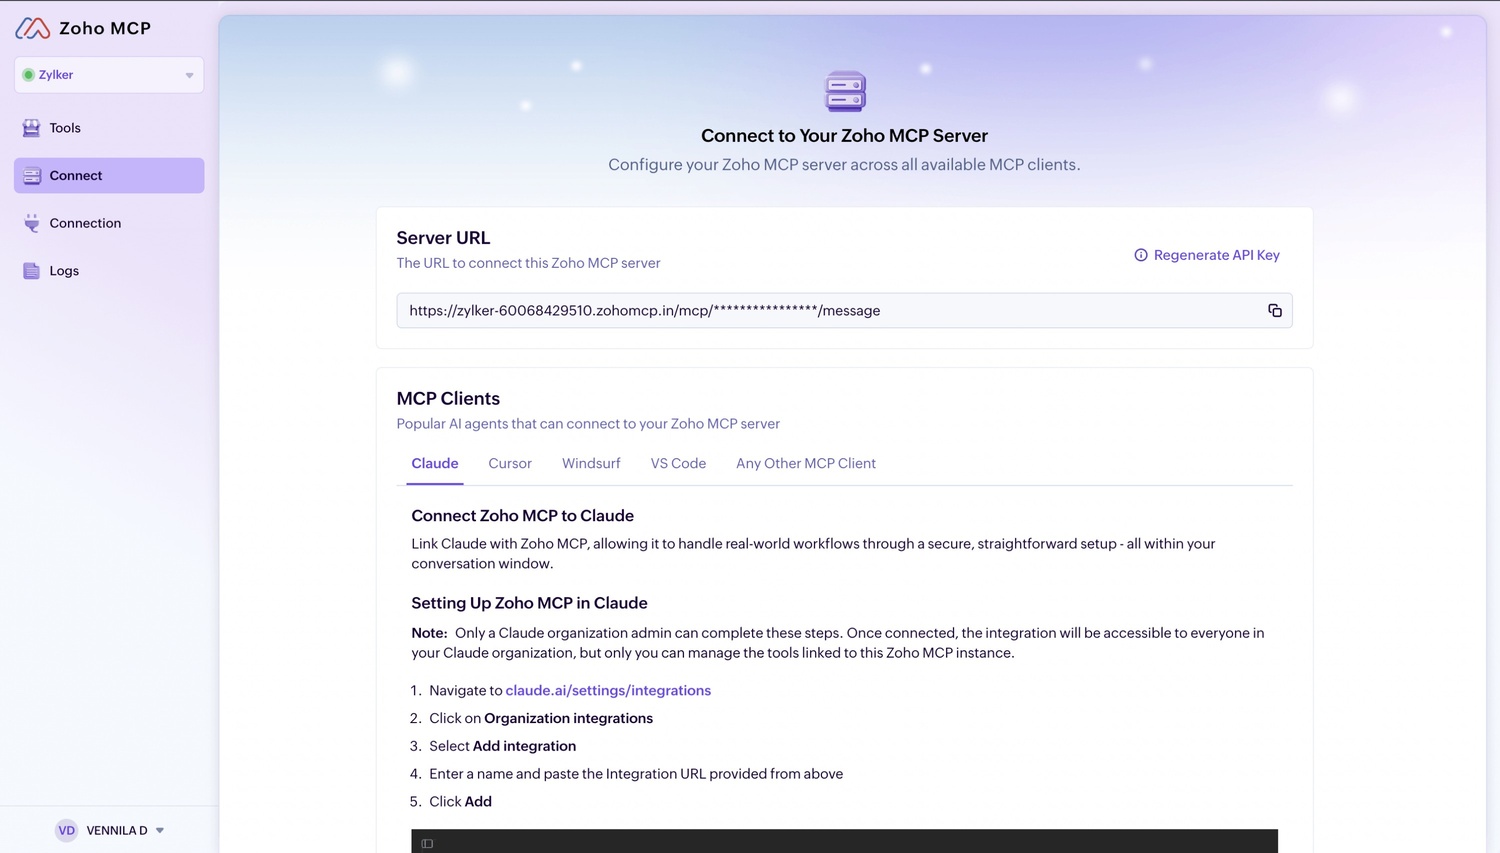
- For detailed instructions on connecting Zoho MCP to your preferred LLM, refer to the respective guides: Claude, Cursor, Windsurf, and Visual Studio Code.


Note
A unique and secure URL will be generated by the Zoho MCP service each time you create a Zoho MCP server. This MCP URL will serve as the endpoint invoked when a prompt is executed from your MCP Client.
- Complete the authorization process by selecting the Service and the Org.
- Once authorized, go back to your LLM to start asking your queries.
To learn more about implementing Zoho MCP with Claude, Cursor, Windsurf, or Visual Studio Code, refer to the respective implementation guides below.