Workspace Migration
Zoho Analytics enables you to migrate the blueprint of your workspaces between different Zoho Analytics accounts. This blueprint will include metadata from tables, reports, dashboards and data source configurations in the form of a migration file. This migration is also useful for Managed Service Providers who offer a unique set of reports and dashboards for various customers and don't wish to recreate reports every time a new customer is onboarded.
The following are the steps involved in migration:
Export the workspaces
To migrate the workspaces to other Zoho Analytics accounts, you need to export the required workspaces from the source. To do this, follow the steps below.
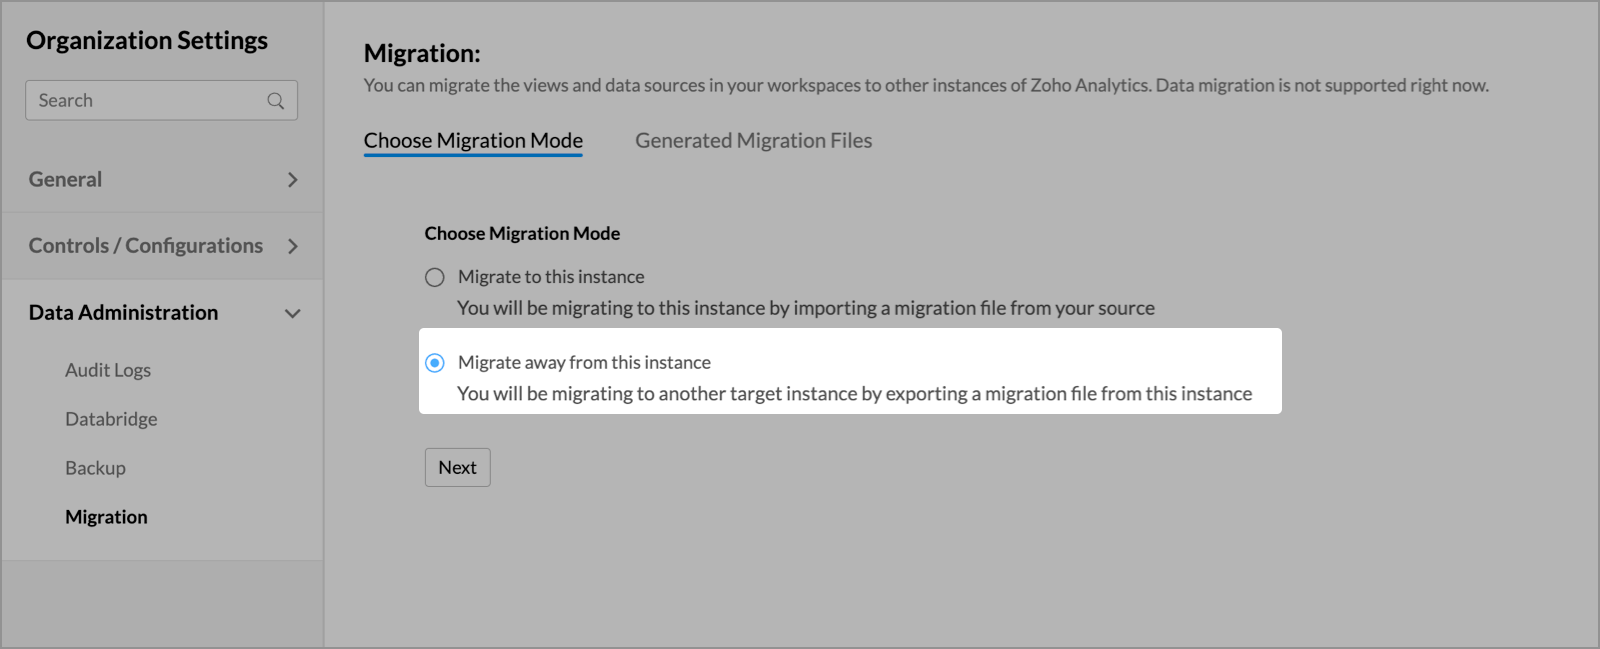
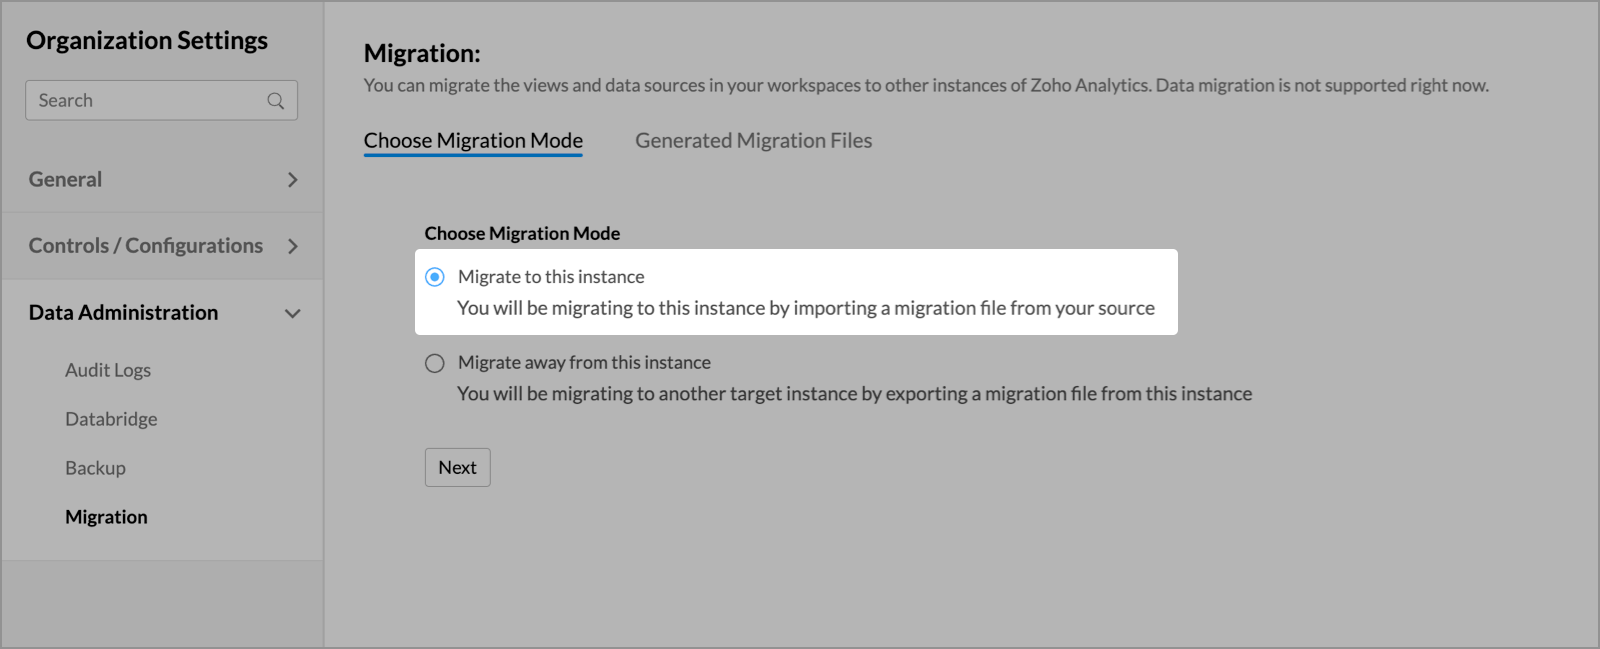
Click the Settings icon, and head to the Data Administration > Migration tab from the left pane.
- In the page that appears, choose the Migrate away from this instance radio button, and click Next.
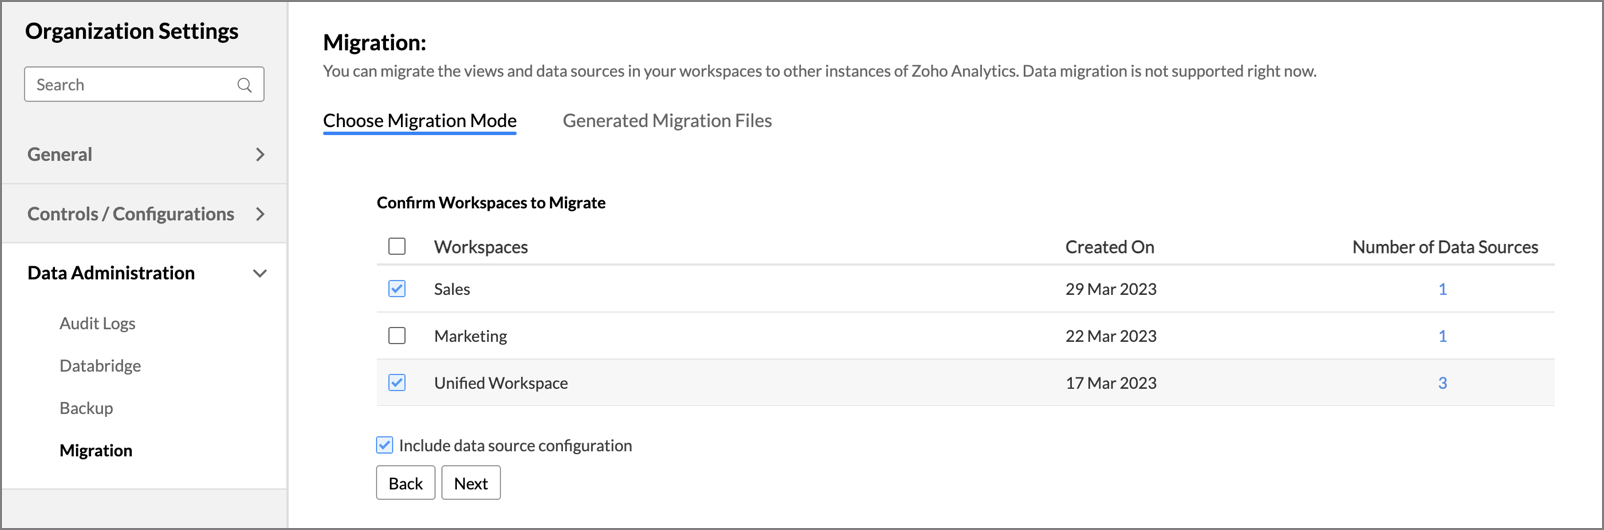
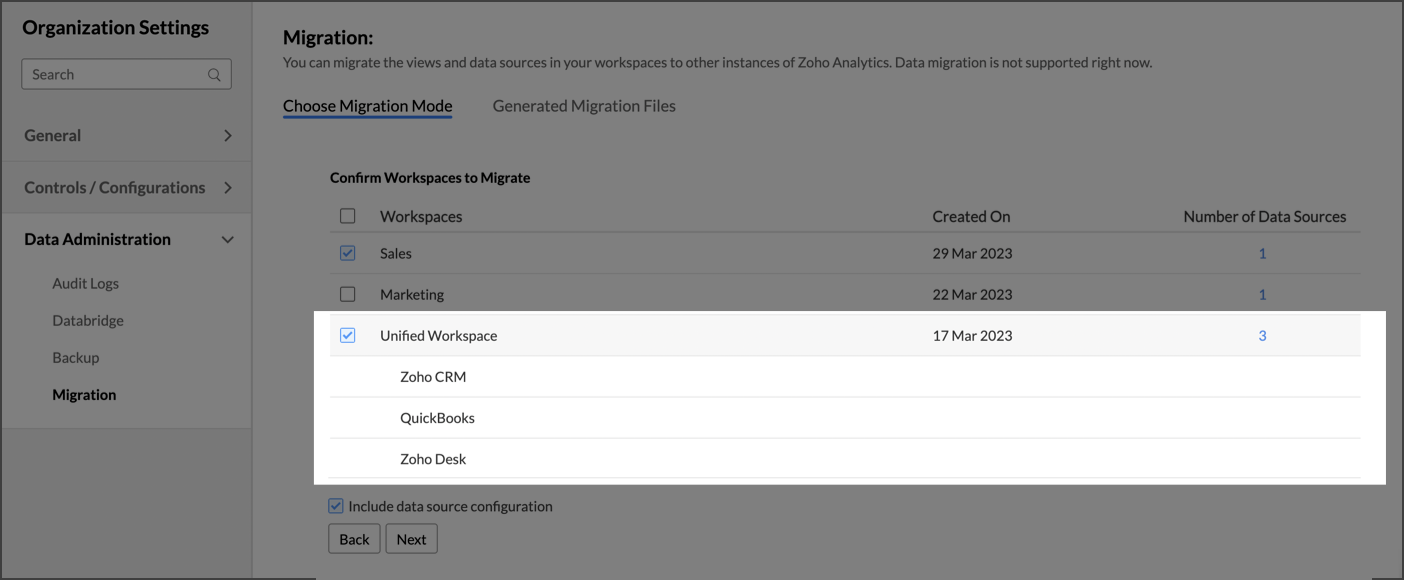
- Choose the required workspaces from the list of available workspaces in the source account.
From the list of available workspaces, click the workspace name to view the list of its data sources.
Select the Include data source configuration checkbox to migrate all the data source information configured in the workspaces.
Click Next.
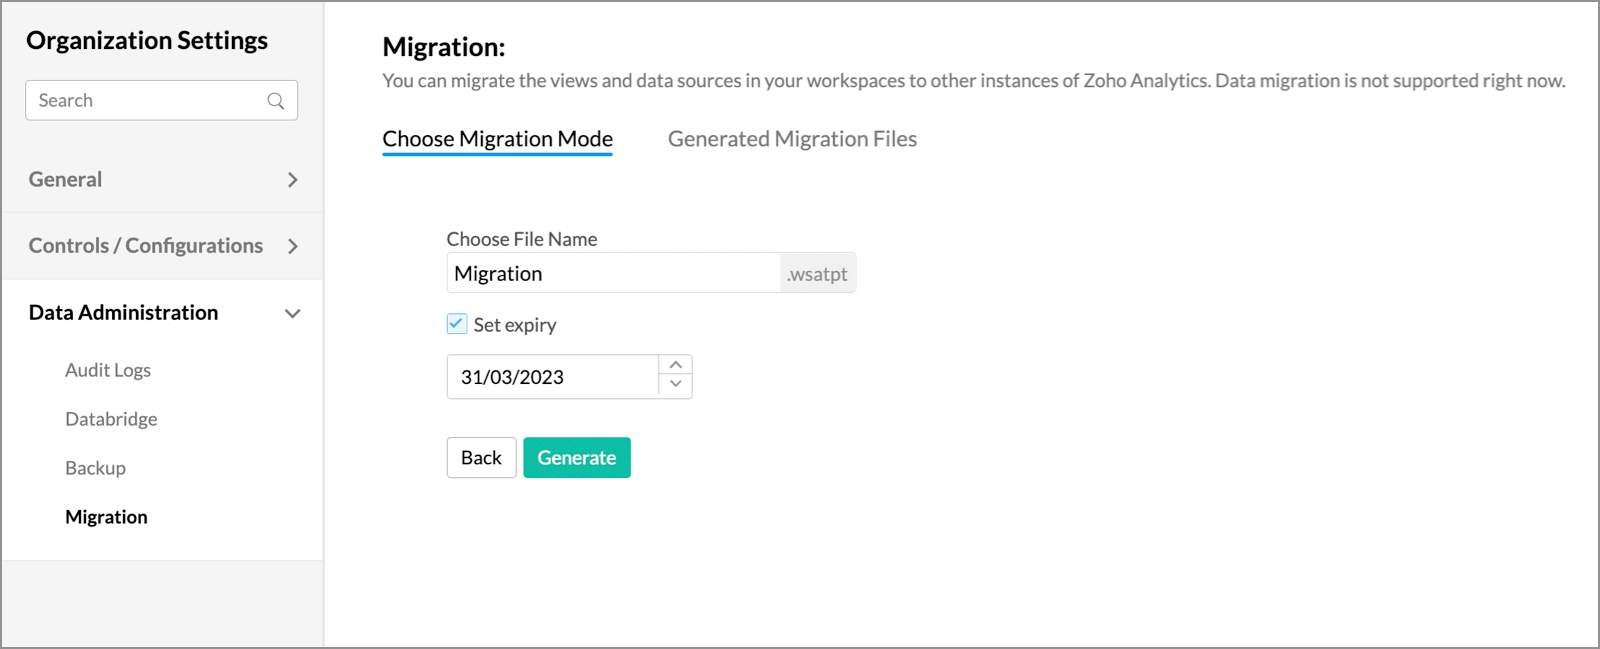
Modify the name of the migration file if required.
Select the Set expiry checkbox, and choose an expiry date for the migration file. Post the configured date the file becomes invalid. This is an optional setting.
- Click Generate.


You may have to wait for some time for the file to be generated. On successful completion, you will be notified through email and in-app notifications with the link to download the migration file. You can also get the file from the Generated Migration Files tab (Refer to the following section to learn more).
Download the migration file
On successful generation of the migration file, you can download it by navigating to the Settings page > Data Administration > Migration from the left pane. In the page that appears, head to the Generated Migration Files tab.

Import to the target Zoho Analytics account
Follow the steps below to import the generated migration file and migrate the workspace from another Zoho Analytics account.
Click the Settings icon, and head to the Data Administration > Migration tab from the left pane.
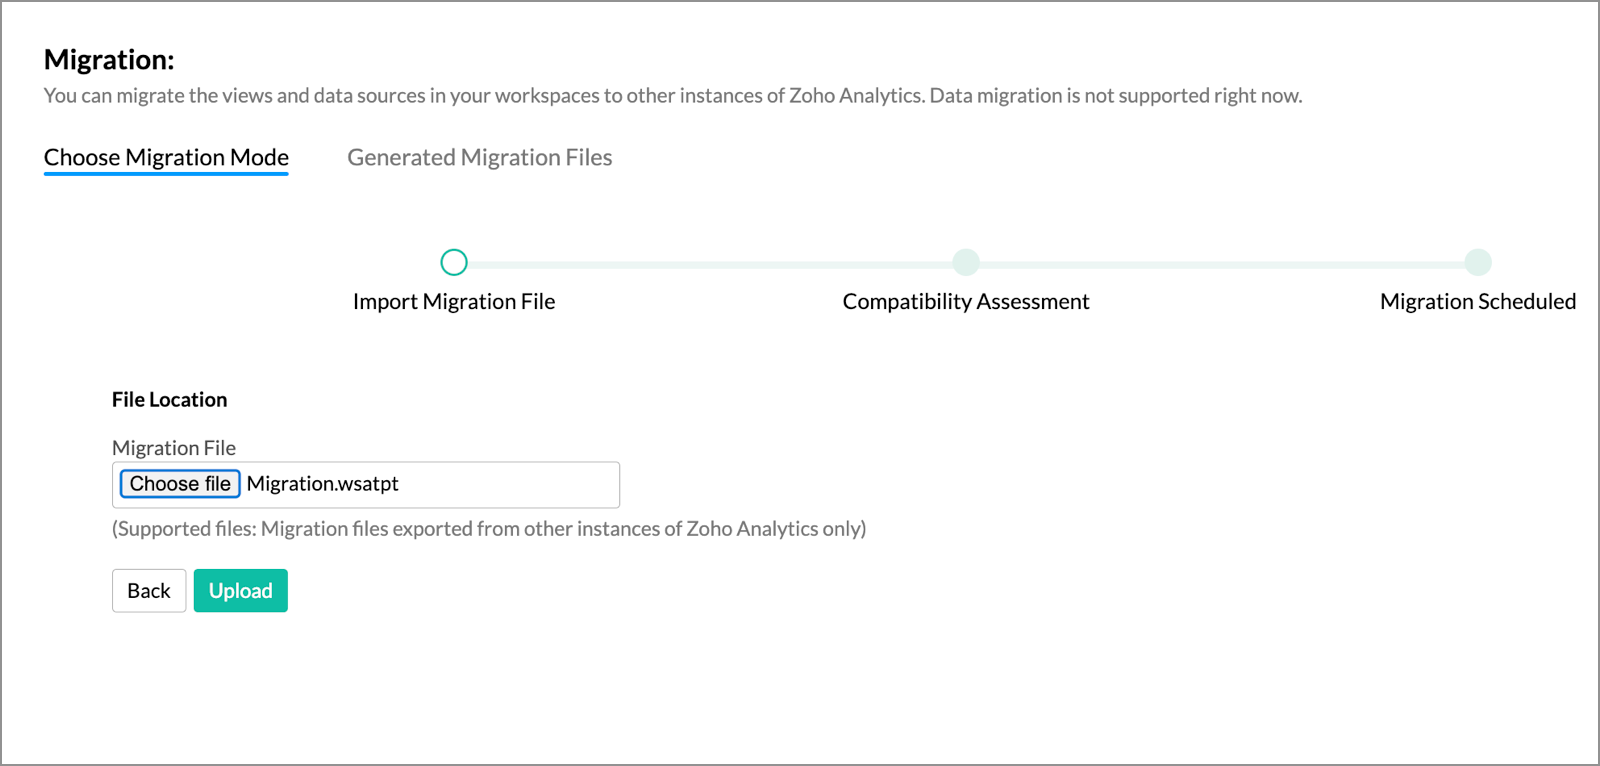
In the page that appears, choose the Migrate to this instance radio button, and click Next.
Browse and select the downloaded migration file, and click Upload.
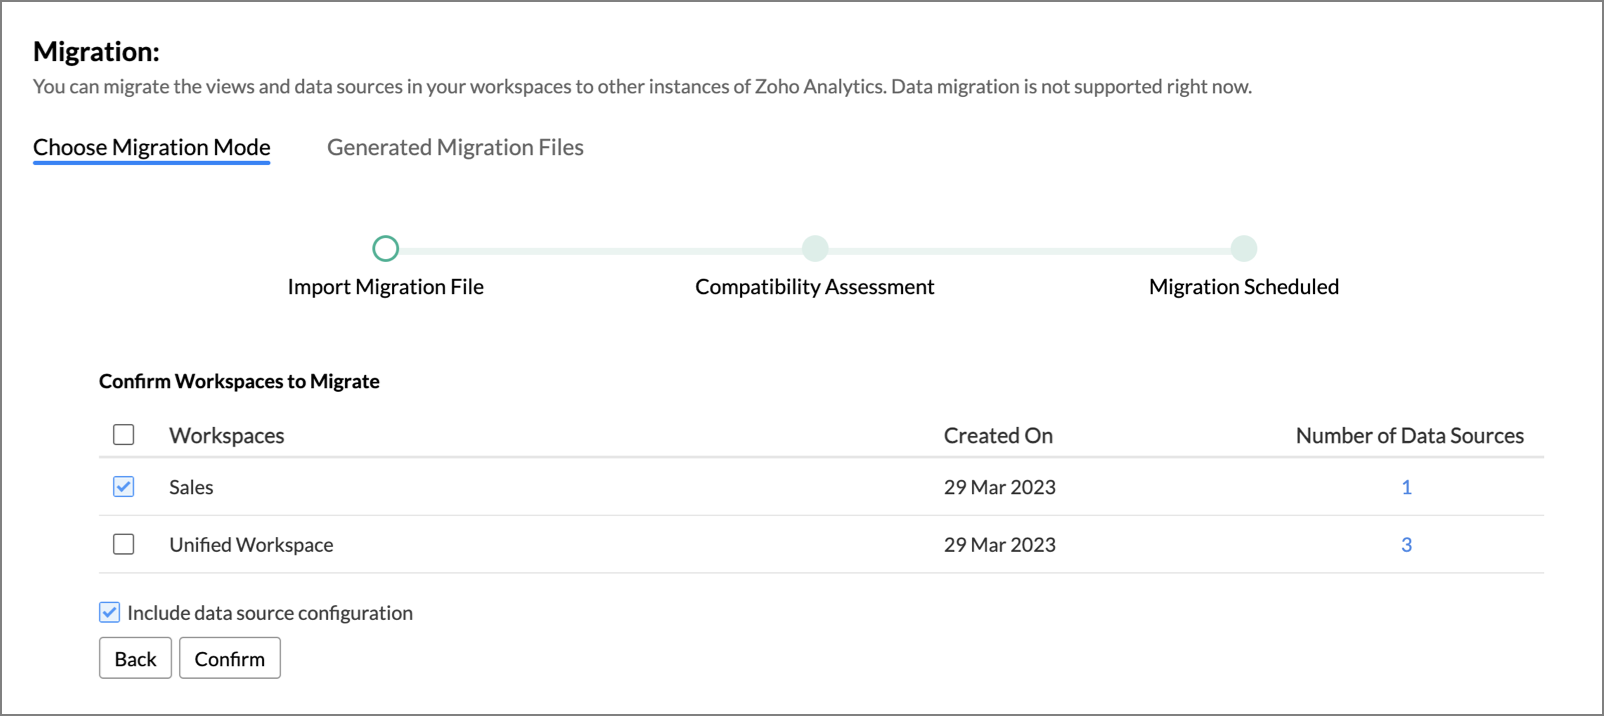
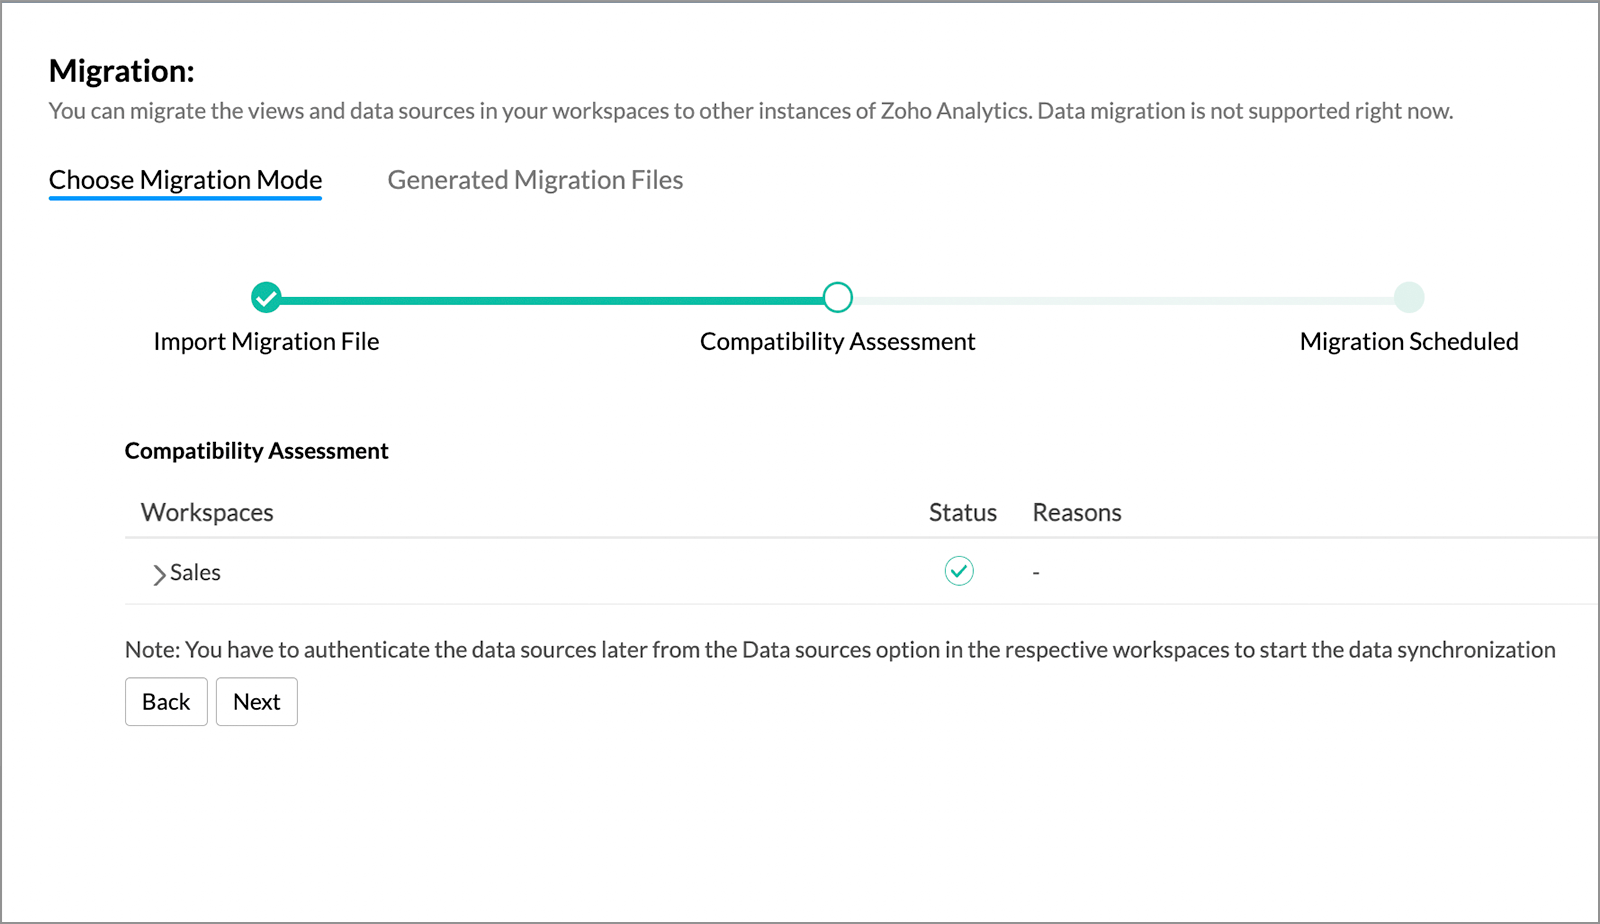
Choose the required workspaces from the list of migrated workspaces.
Select the Include data source configuration checkbox to import all the data source information from the migration file. Please note that you have to re-authenticate the required data sources to synchronize data.
- Click Confirm.
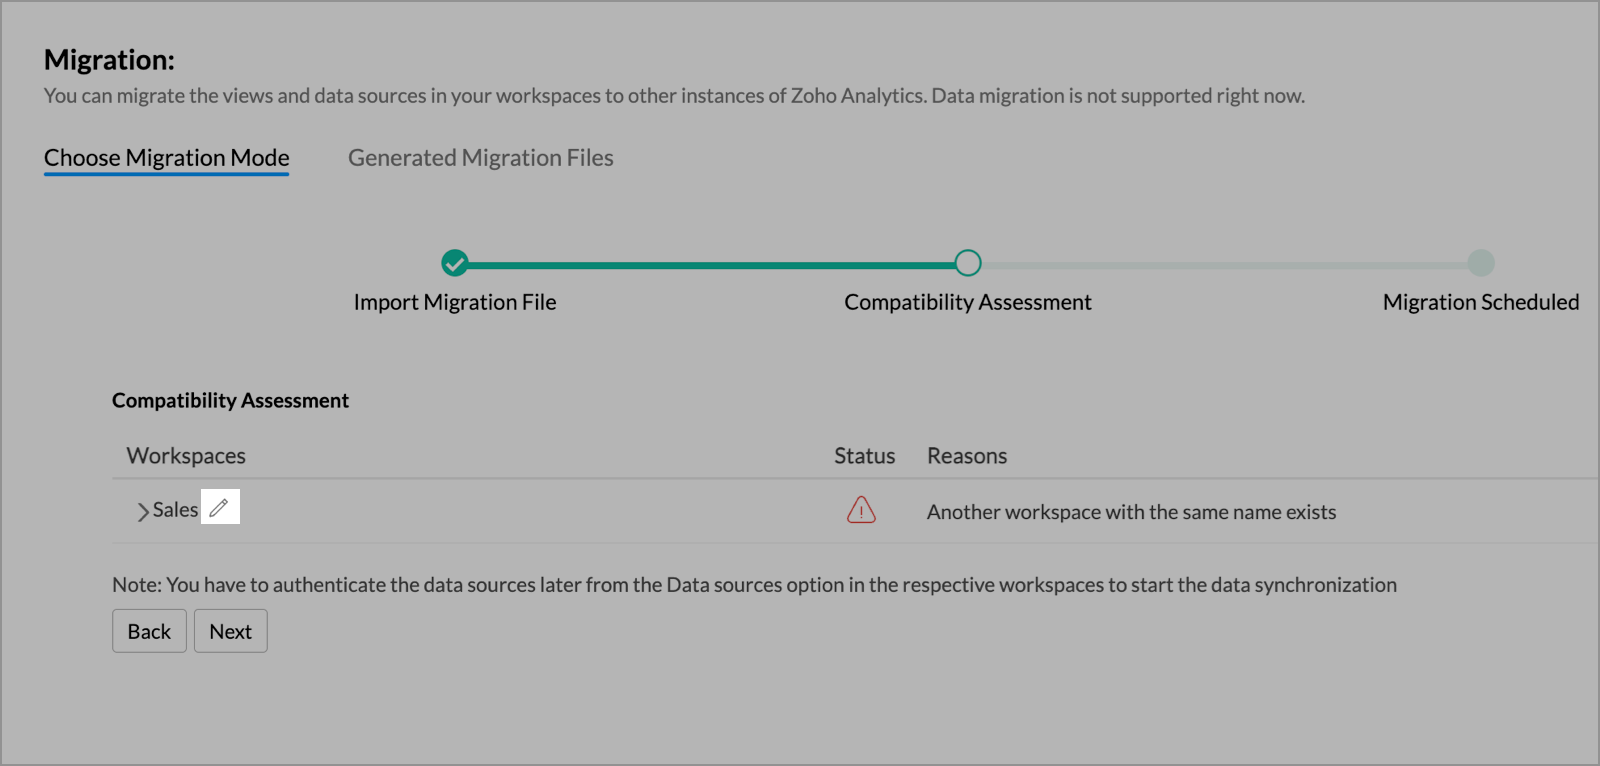
- If your Zoho Analytics account already has a workspace with the same name as those being migrated, then you should rename the new workspace. Click the Edit icon next to the workspace name and provide an alternative name in the pop-up that appears.
Click Next.
You may have to wait for some time for the migration completion. Once successful, you will be notified through email and in-app notifications.


