Workspace & Homepage Controls
Zoho Analytics lets you customize your white labeled instance, including workspace visibility, user access, and homepage layout. Configure which workspaces are active in the portal and define how users experience the homepage after login.
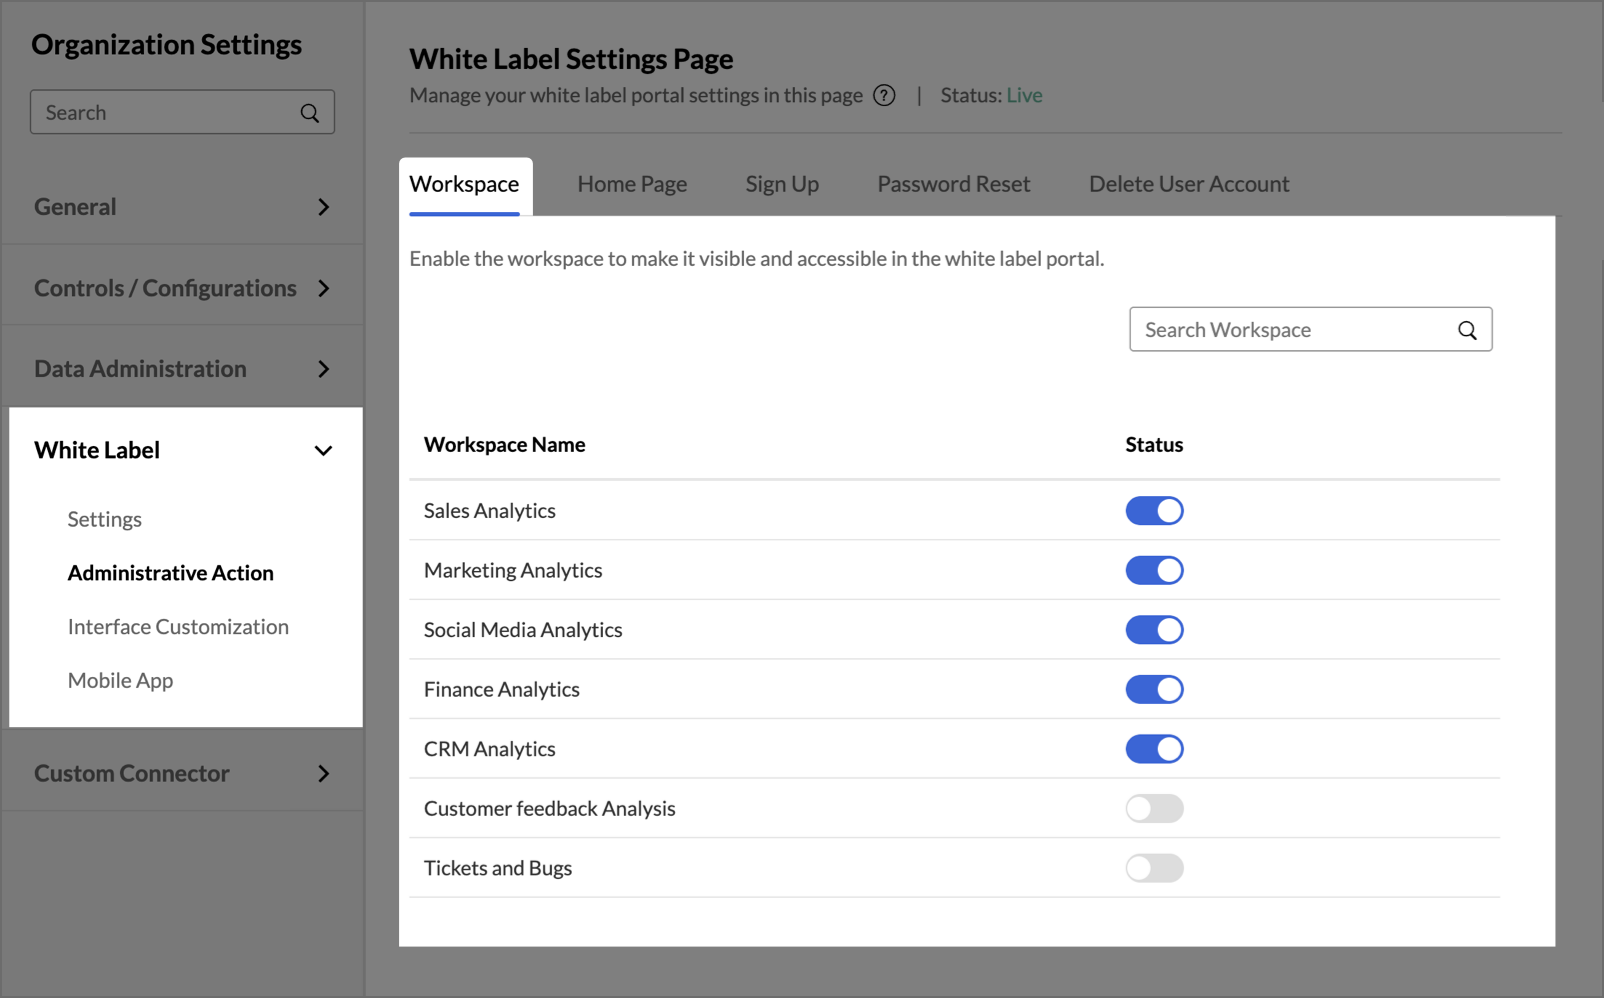
Managing Workspace Visibility
To make a workspace accessible in your white-label account:
- Navigate to Administrative Actions under the White Label section.
- In the Workspace tab, you can find the list of all the workspaces in your Zoho Analytics account.
- Locate the desired workspace in the list and toggle its status to Enabled to make it available and accessible in your White labeled Instance.

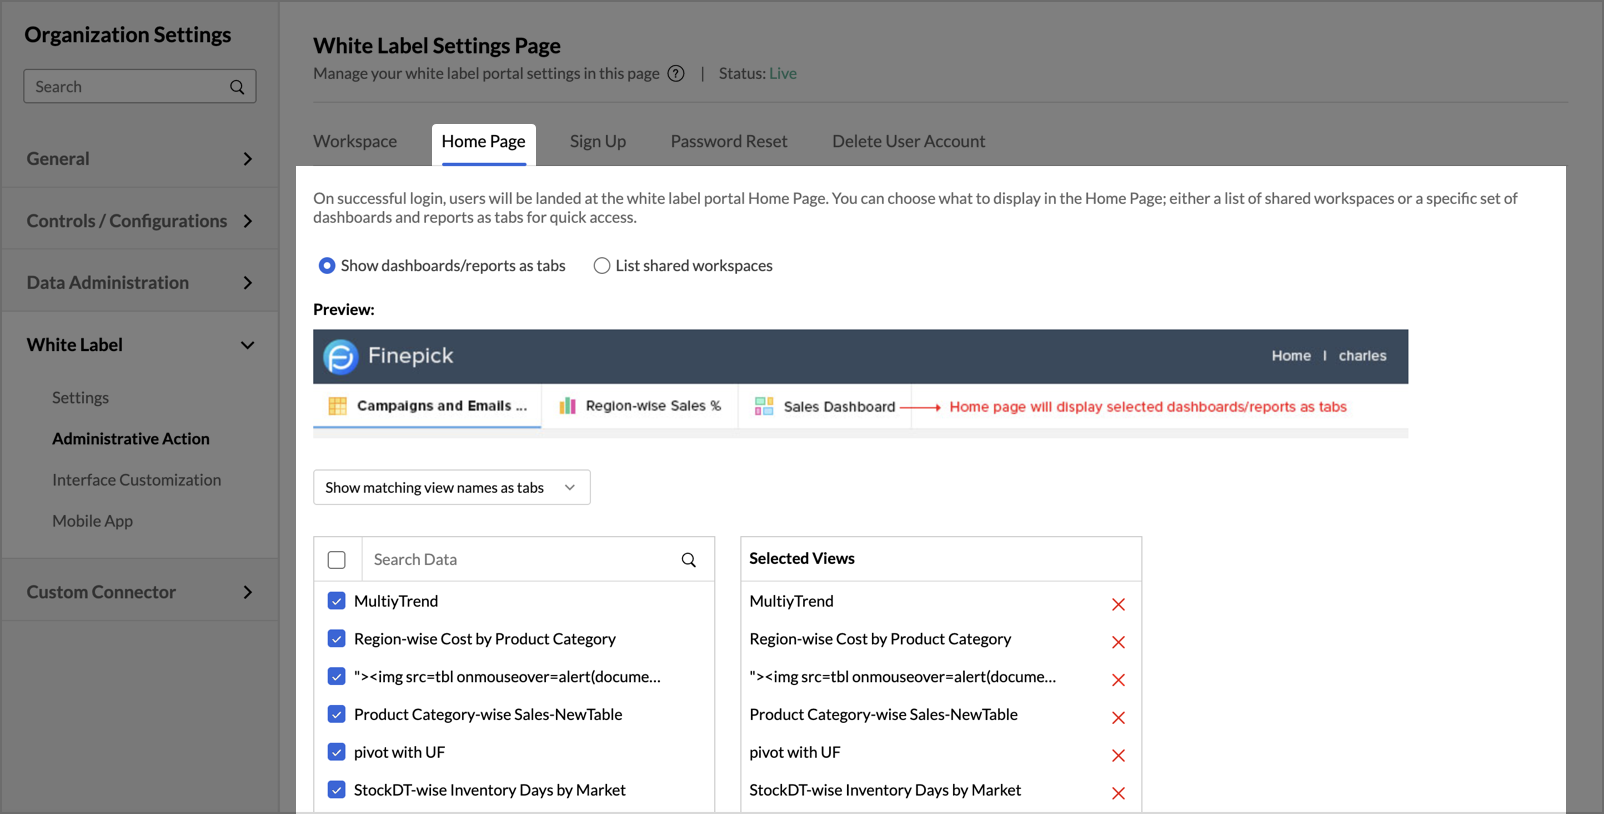
Customizing the Home Page
Zoho Analytics allows you to set how you present the workspaces from your organization in the white label instance.
To configure the white label portal home page:
- Open the Home Page tab. The following options to present the workspace will be displayed.
- Show dashboards/reports as tabs - Home page is built using all the share views from the selected views as tabs.
- List shared workspaces - Home page is built by listing all shared workspaces as tiles.
- If you set the Show dashboards/reports as tabs option, set the following options.
- Select the views to add as tabs in the home page. Please note that only shared views from these selected views will be visible for each user.
- Select the Show "View All Reports" link in the tabs panel checkbox to add a link as All Reports. This link will navigate the users to the page listing all shared workspaces. If only one workspace is shared, then users will be navigated to Workspace Explorer.
- Select the Show "Toolbar" for reports/dashboards checkbox to add the view mode toolbar for the reports and dashboards.
- Click Save.

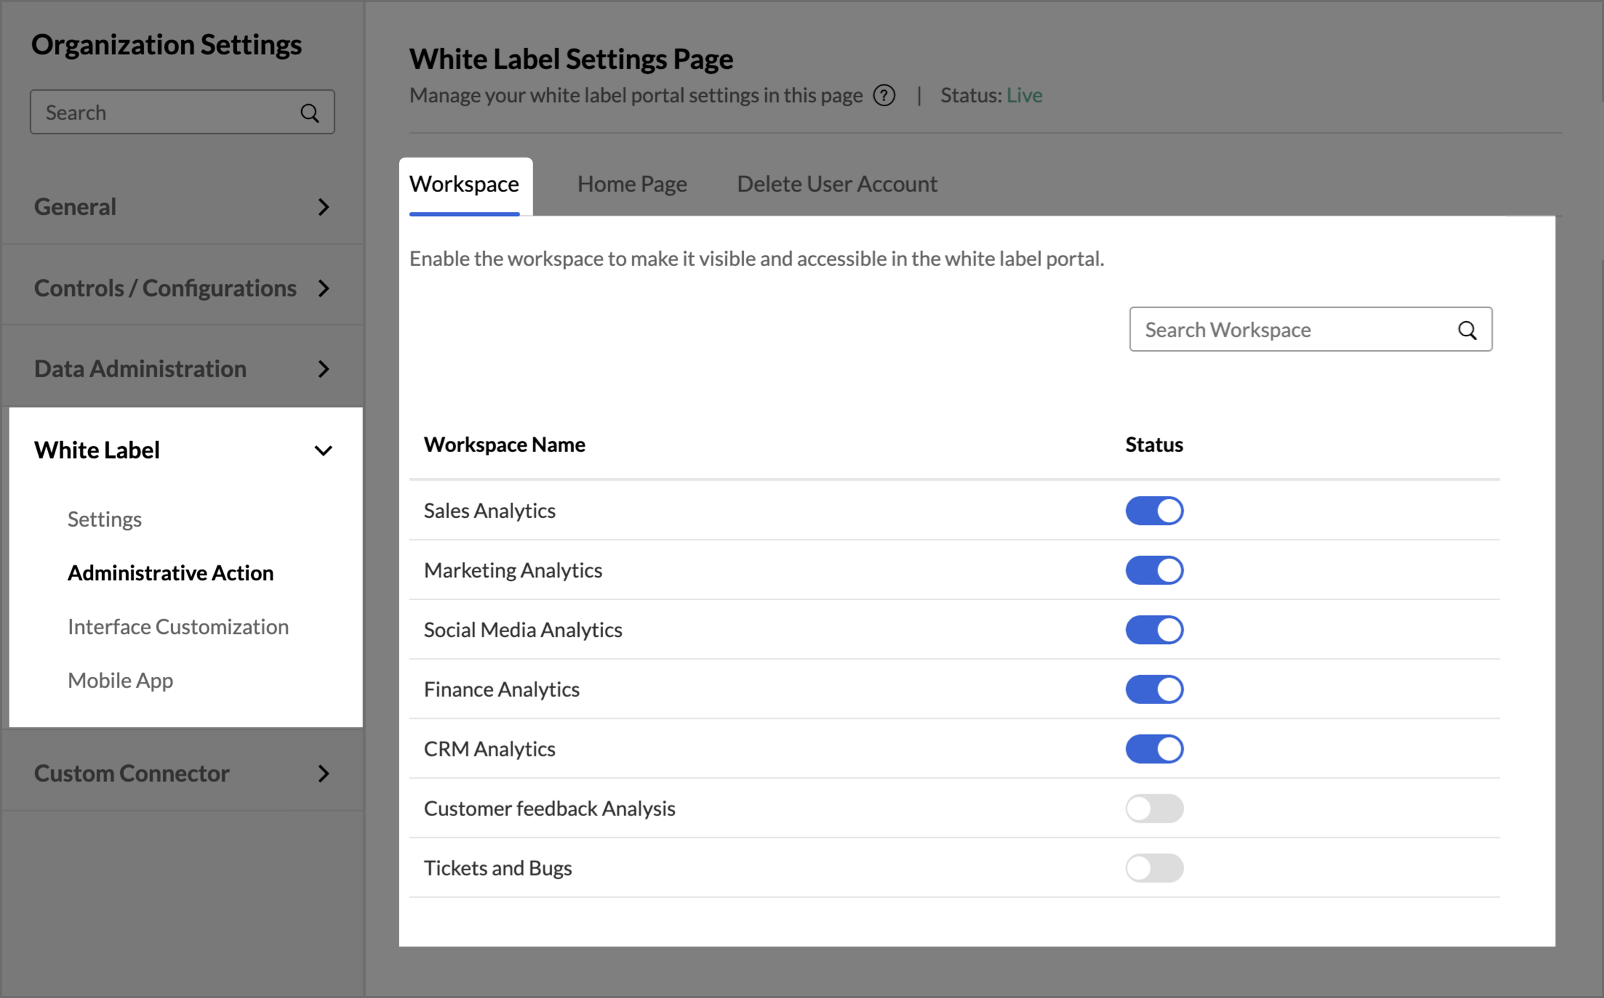
Managing Workspace Visibility
To make a workspace accessible in your white-label account:
- Navigate to Administrative Actions under the White Label section.
- In the Workspace tab, you can find the list of all the workspaces in your Zoho Analytics account.
- Locate the desired workspace in the list and toggle its status to Enabled to make it available and accessible in your White labeled Instance.
Customizing the Home Page
Zoho Analytics allows you to set how you present the workspaces from your organization in the white label instance.
To configure the white label portal home page:
- Open the Home Page tab. The following options to present the workspace will be displayed.
- Show dashboards/reports as tabs - Home page is built using all the share views from the selected views as tabs.
- List shared workspaces - Home page is built by listing all shared workspaces as tiles.
- If you set the Show dashboards/reports as tabs option, set the following options.
- Select the views to add as tabs in the home page. Please note that only shared views from these selected views will be visible for each user.
- Select the Show "View All Reports" link in the tabs panel checkbox to add a link as All Reports. This link will navigate the users to the page listing all shared workspaces. If only one workspace is shared, then users will be navigated to Workspace Explorer.
- Select the Show "Toolbar" for reports/dashboards checkbox to add the view mode toolbar for the reports and dashboards.
- Click Save.