Managing Portal
You can manage the Portals from the Portal tab of the Organization Settings.
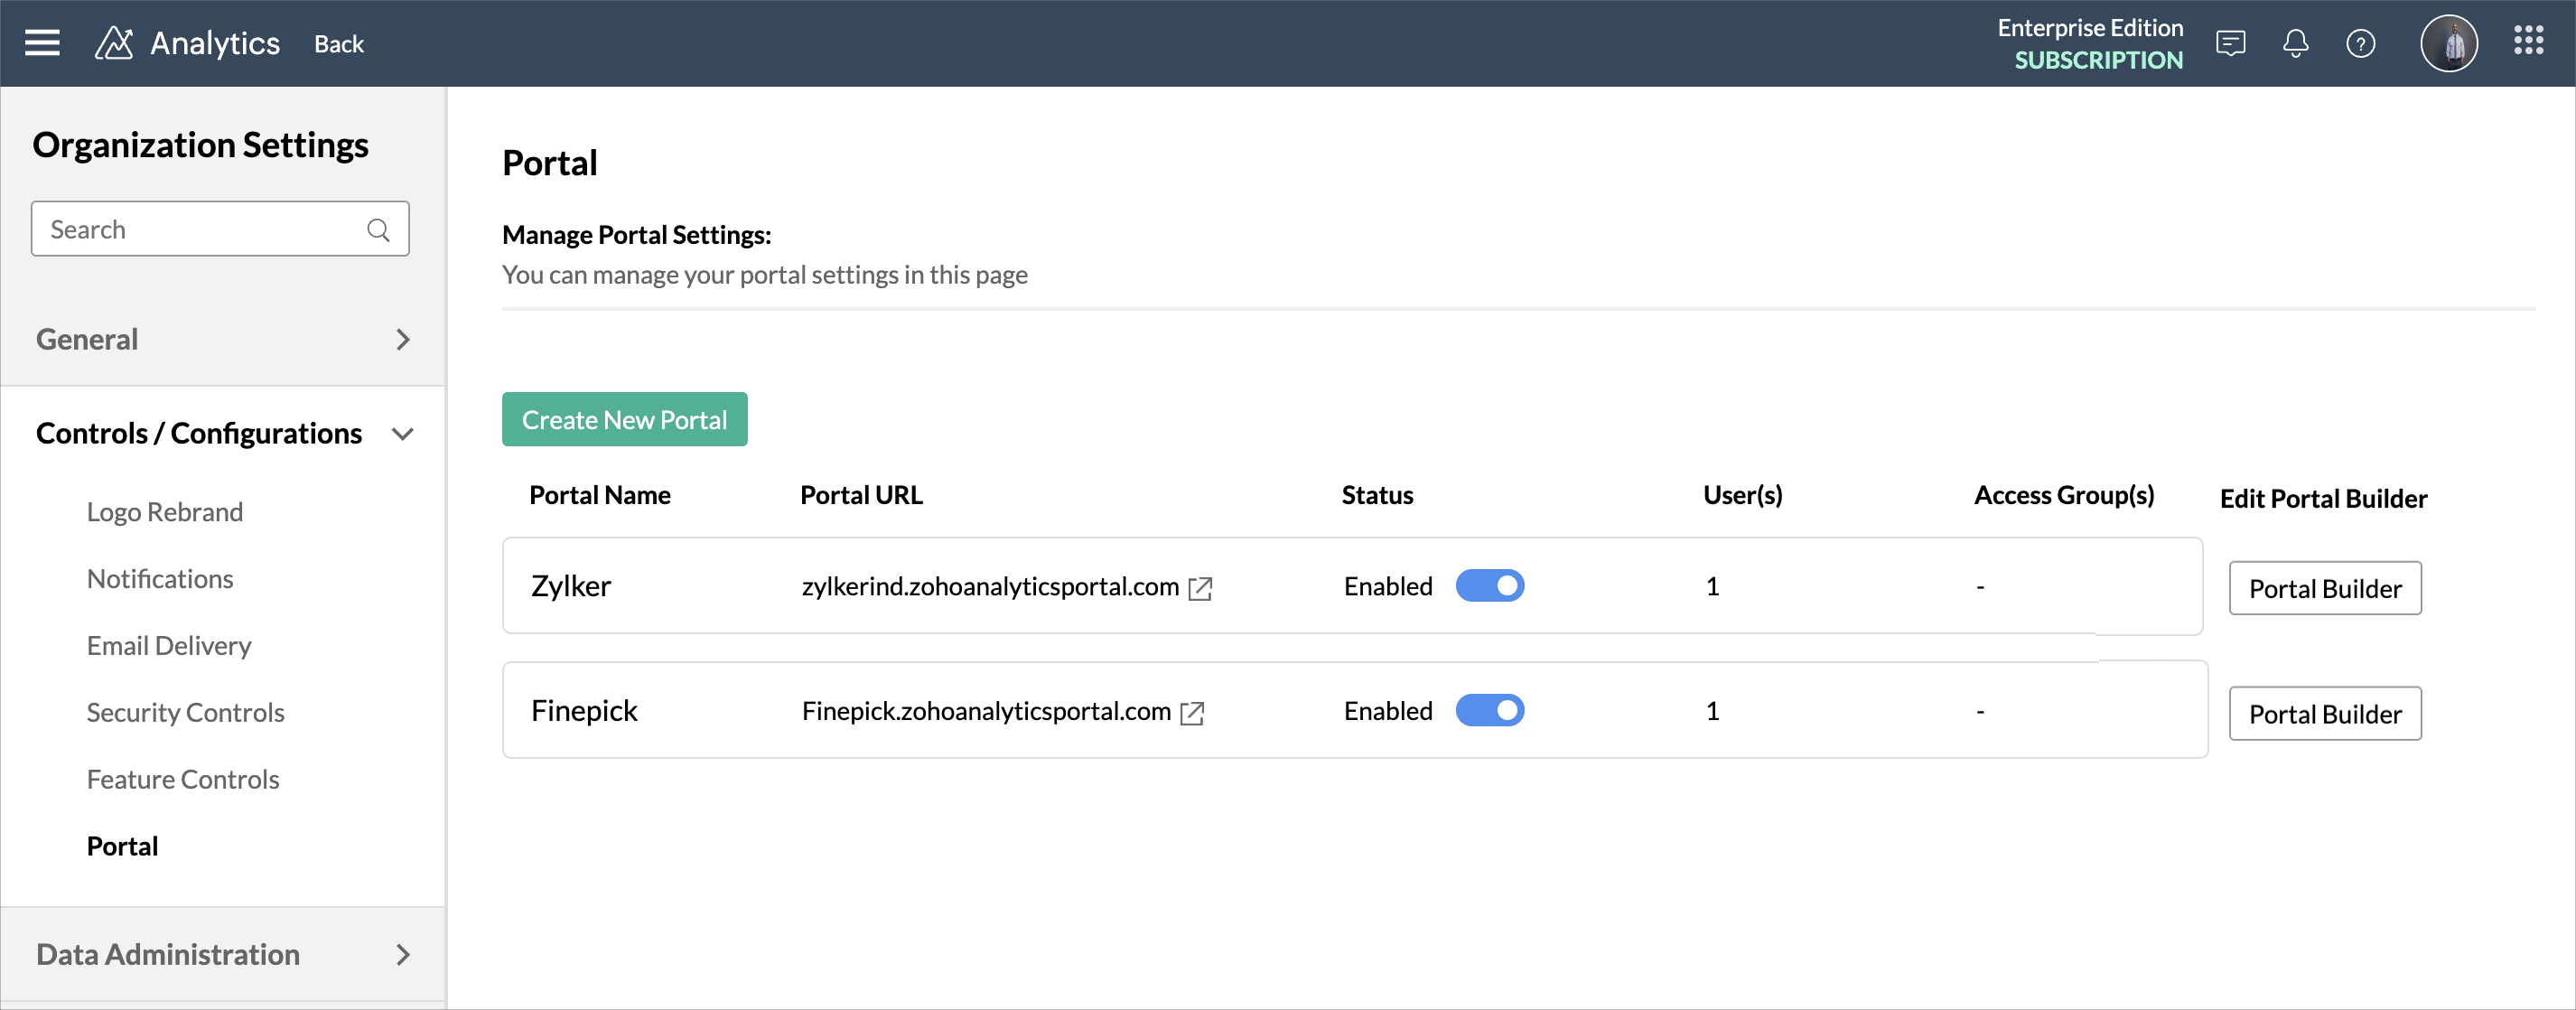
All the Portals in your organization will be listed here with the following details.
- Portal Name - Displays the name of the Portal
- Portal URL - Displays the URL of the Portal
- Status - Displays whether the portal is enabled or disabled. Your user will be able to access the portal only when it is enabled. You can enable/disable the portal using the toggle button.
- User(s) - Displays the number of users in the Portal.
- Access Group(s) - Displays the number of groups in the Portal.
- Edit Portal Builder - The Portal Builder button allows you to open the Portal Builder and edit the same.
Click any Portal to edit the following Portal Settings.
General Settings
The General Settings section allows you to customize the basic settings. This section has three tabs.
General
The General tab displays the Portal Name, Portal URL and, Portal Status. You can enable/disable the Portal Status using the toggle button.
Click the Edit Portal Builder to open the portal builder.
Default Preference
The Default Preference tab allows you to set the default preferred permission for new pages added to your portal.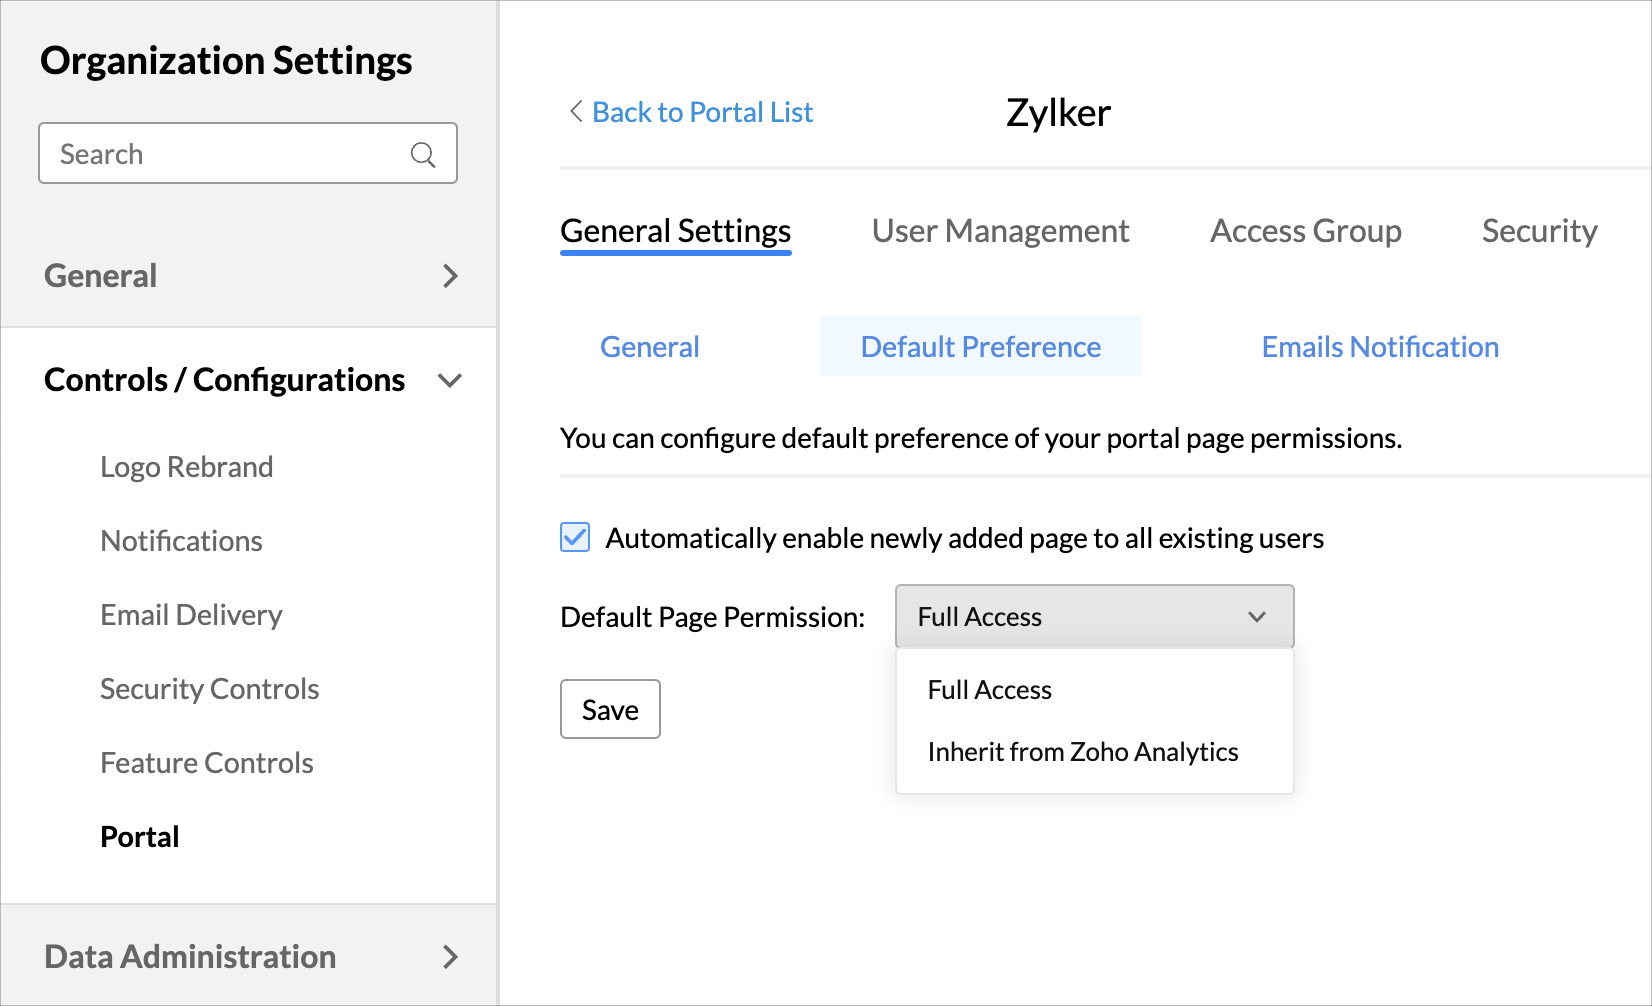
- Select the Automatically enable newly added page to all existing users checkbox to grant access permission for all the existing users in your portal for the newly added page.
- In the Default Page Permission, select the permission you want to grant for the users.
- Full Access - This gives full access to the page.
- Inherit from Zoho Analytics - This inherits the sharing permission for each view from the Zoho Analytics workspace.
Emails Notification
The Emails Notification tab allows you to edit the content of the invitation mail sent when users are added to the portal.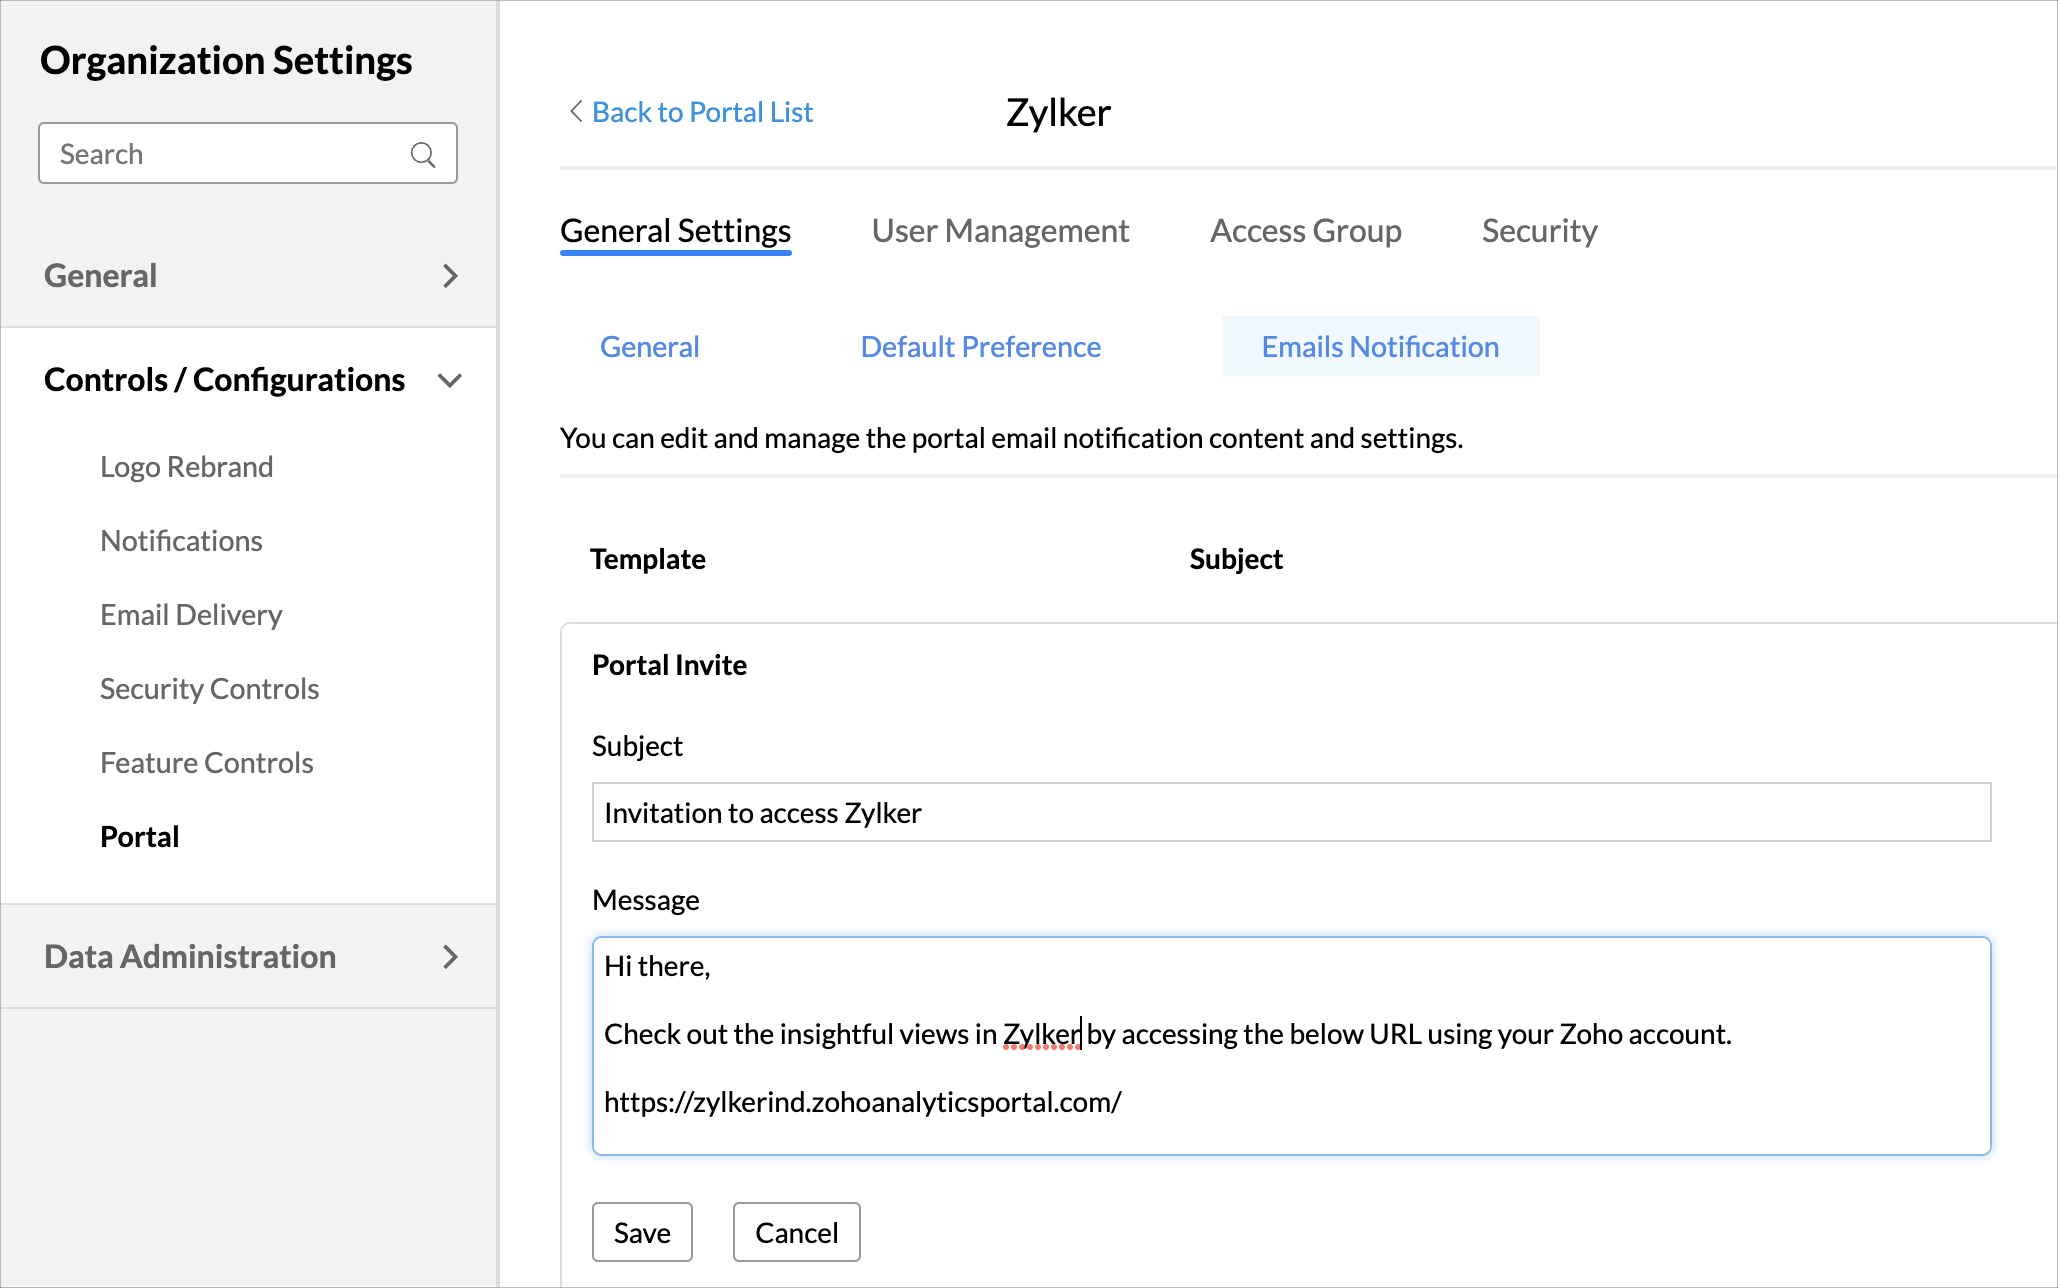
User Management
The User Management tab allows you to manage the users in the portal. All users will be listed here. Click a user's name to view and edit permissions. 
Add Users
Follow the below steps to add users to the portal.
- Open the User Management tab.
- Click the Add User button. The Add Users dialog will open.
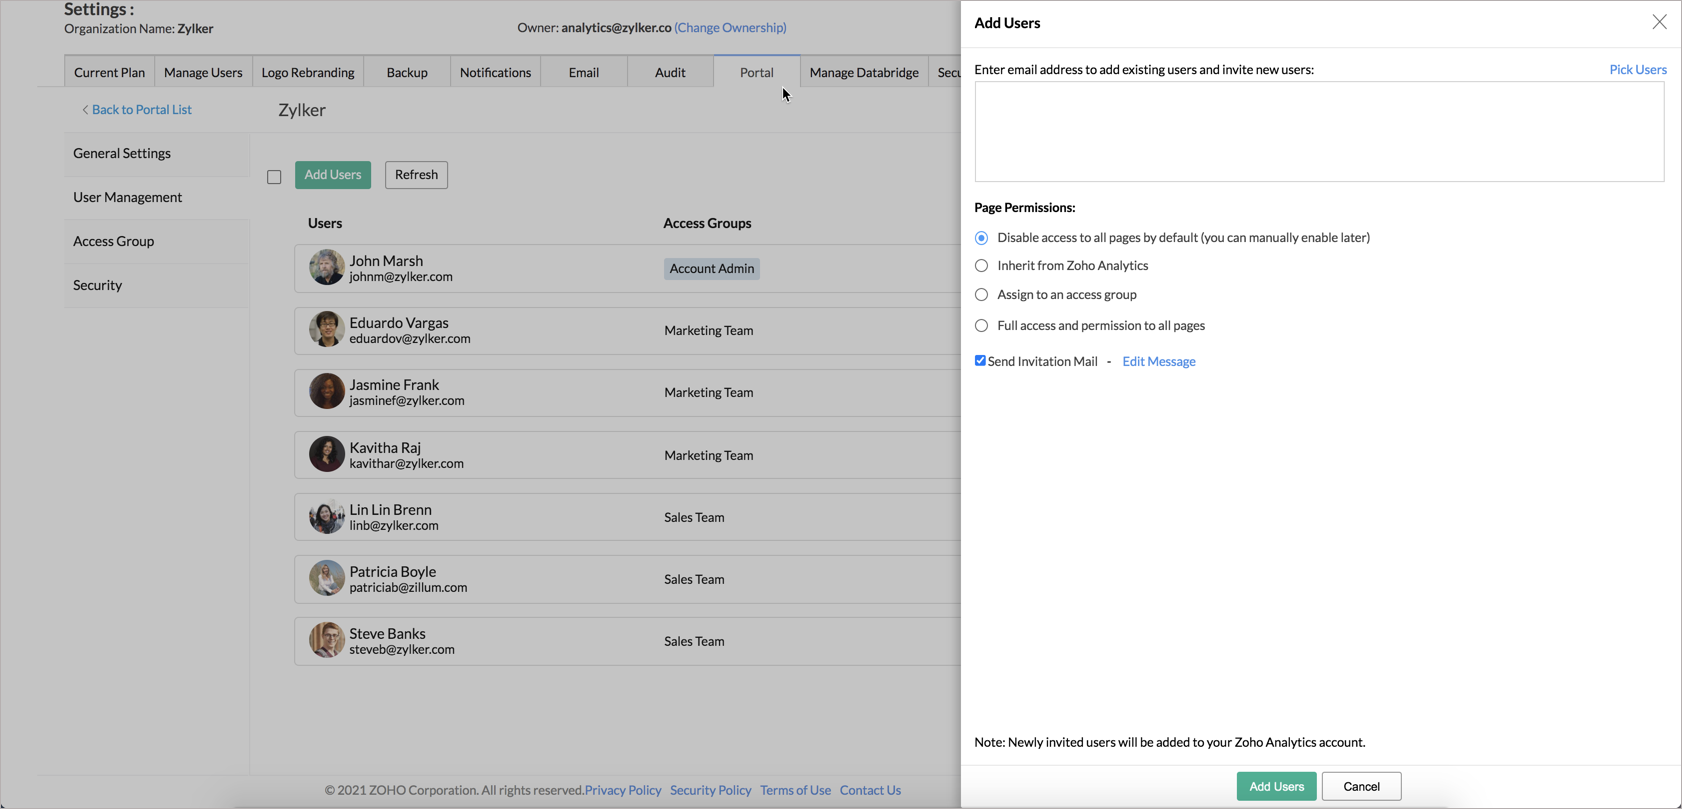
- Enter the email address of the users you want to add in the given field.
- Select the Permission level for the users. Available options are,
- Disable access to all pages by default (you can manually enable later)
- Inherit from Zoho Analytics
- Assign to an access group
- Full access and permission to all pages
- Click Add Users. The users will be added to the portal.

Note: To add a user in the portal, the users should possess one of the user roles in Zoho Analytics. Users added from inside the portal will be added as a Viewer in Zoho Analytics. In case you do not have a Viewer subscription, then they will be added as shared users.
Permission
Zoho Analytics allows you as an Admin, to provide fine-grained permission for the pages in your portal. Your users will be able to see the pages and the views embedded based on the permission granted by the Admin.
Follow the below steps to specify permission for the user.
- Open the User Management tab.
- Click the user you want to specify permission for. The Edit/View Page Permission dialog will open.
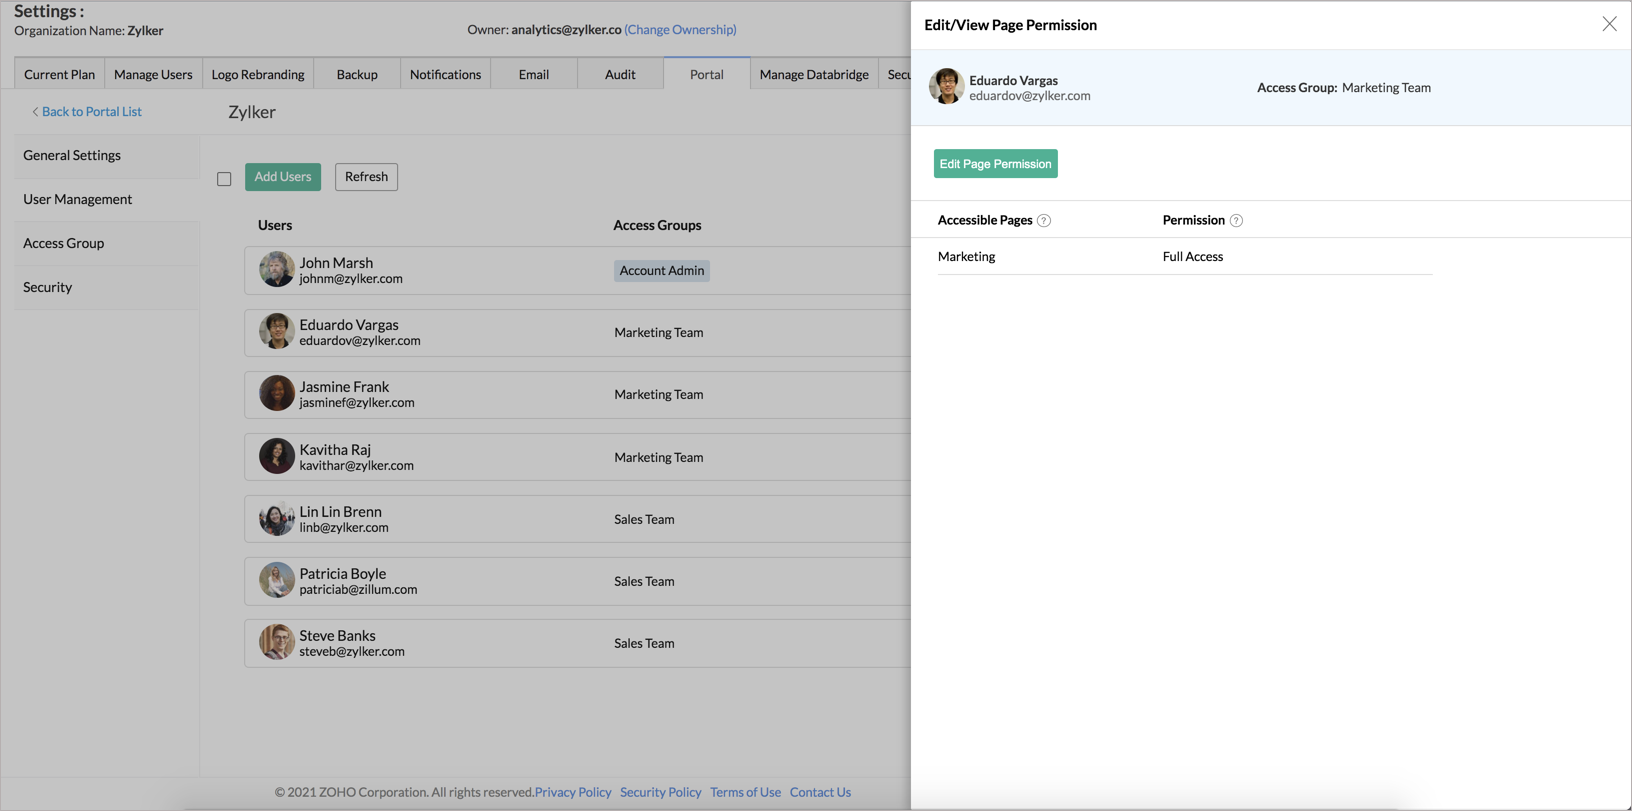
- Click the Edit Page Permission button. The Edit/View Page Permission dialog will open.

- Selecting the Assign to an access group will add the user to the selected access group and grant permission as specified in the group.
- Select the Manually control the page permissions to specify the permissions manually.
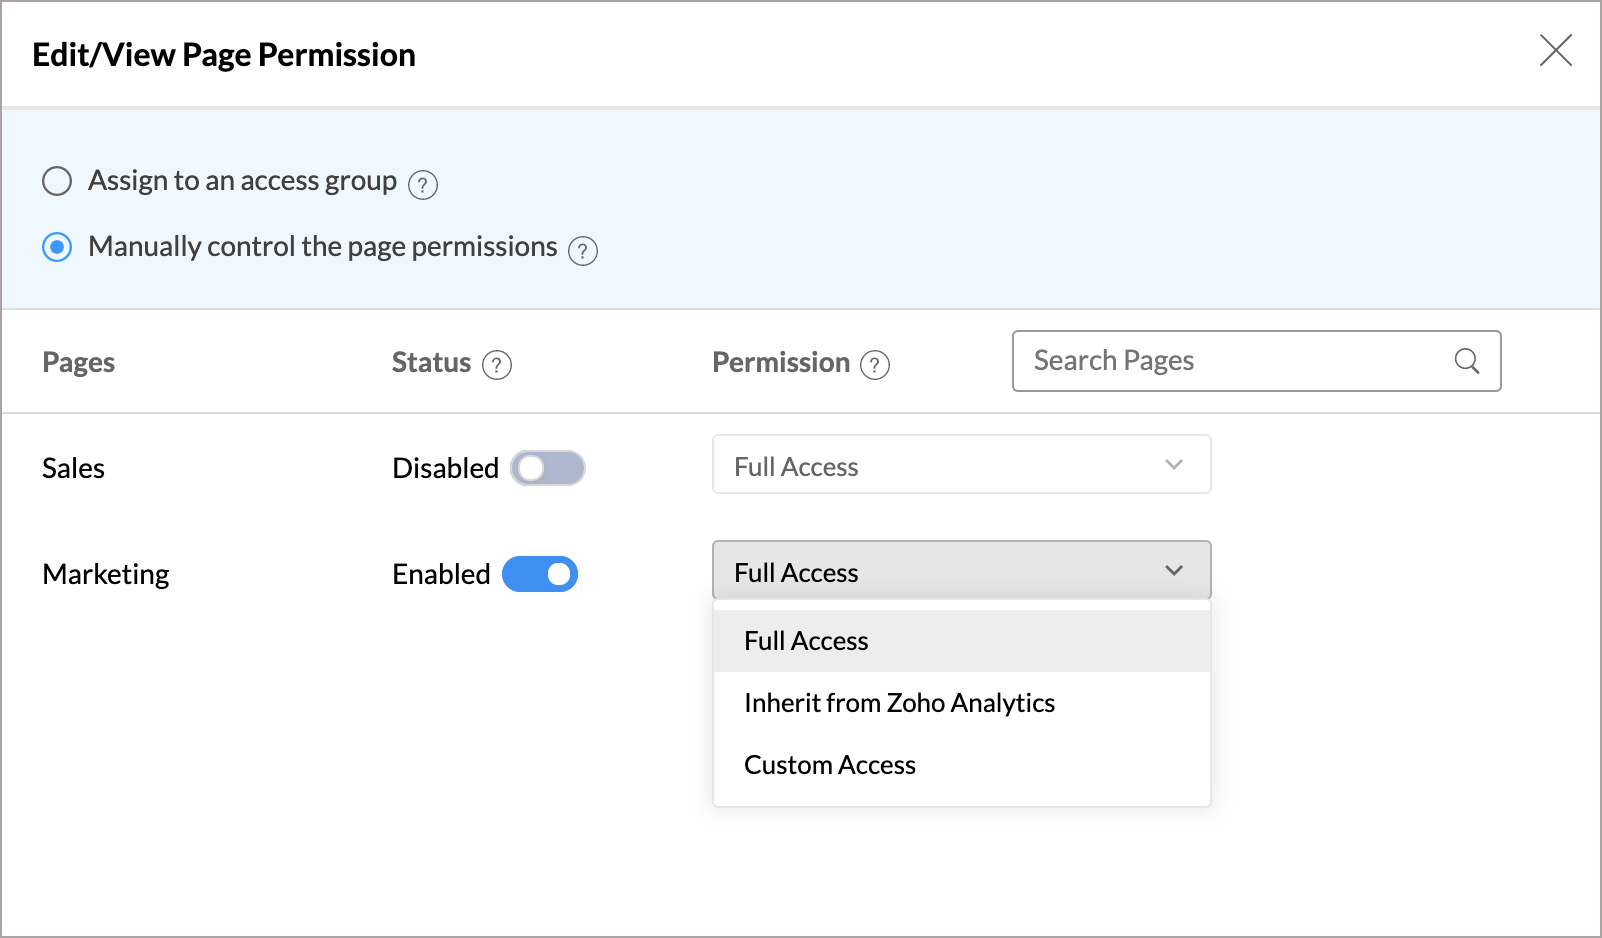
- Enable the Status toggle button to grant access permission to the users.
- Full Access - Grants access to all views in the page.
- Inherit from Zoho Analytics - Grants access to the views that are shared to them in Zoho Analytics.
- Custom Access - Grants custom access as defined here by clicking the Edit link.
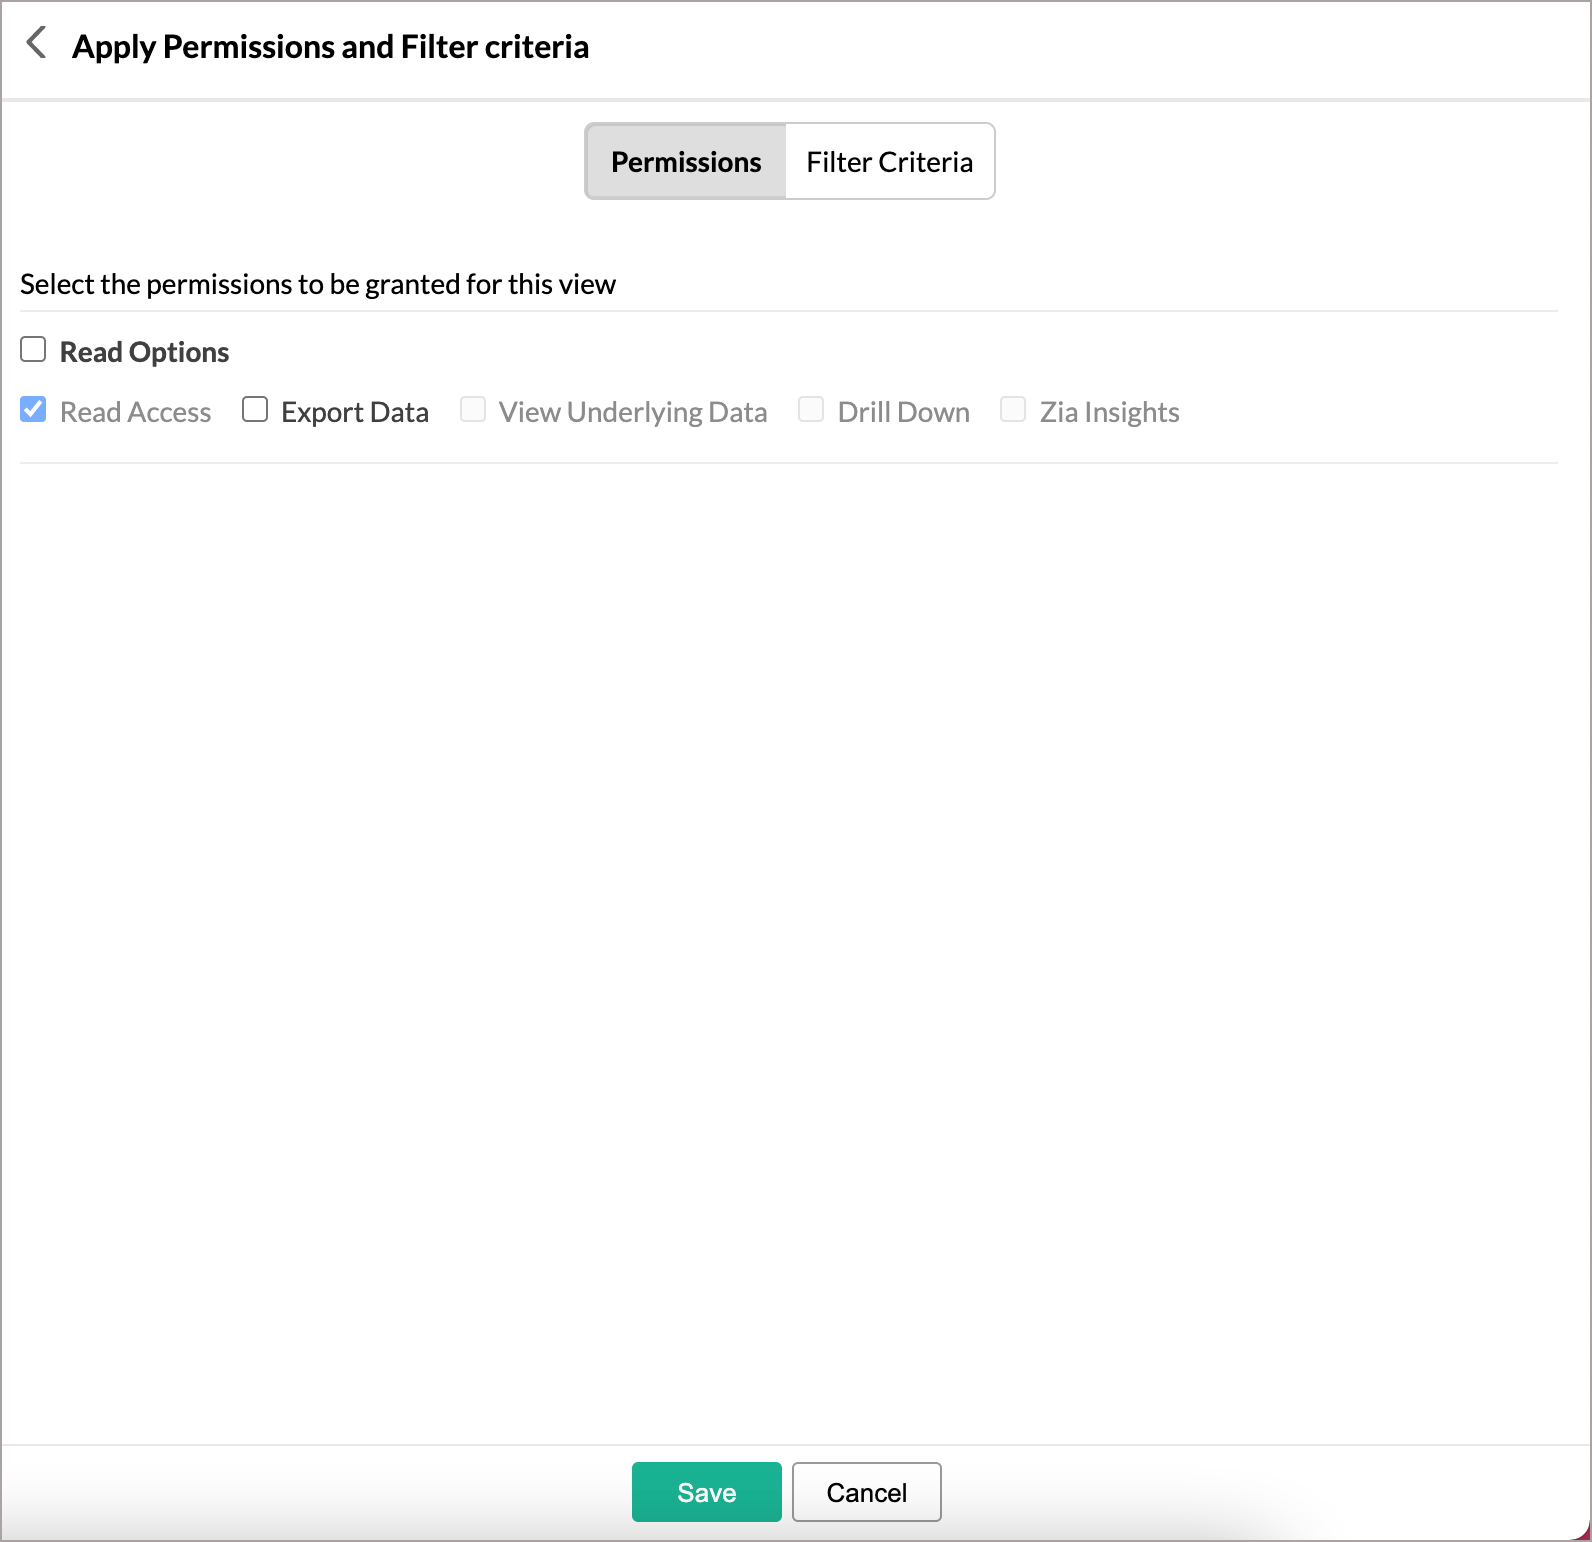
From the Permissions tab, you can grant specific read access to the views in the page.
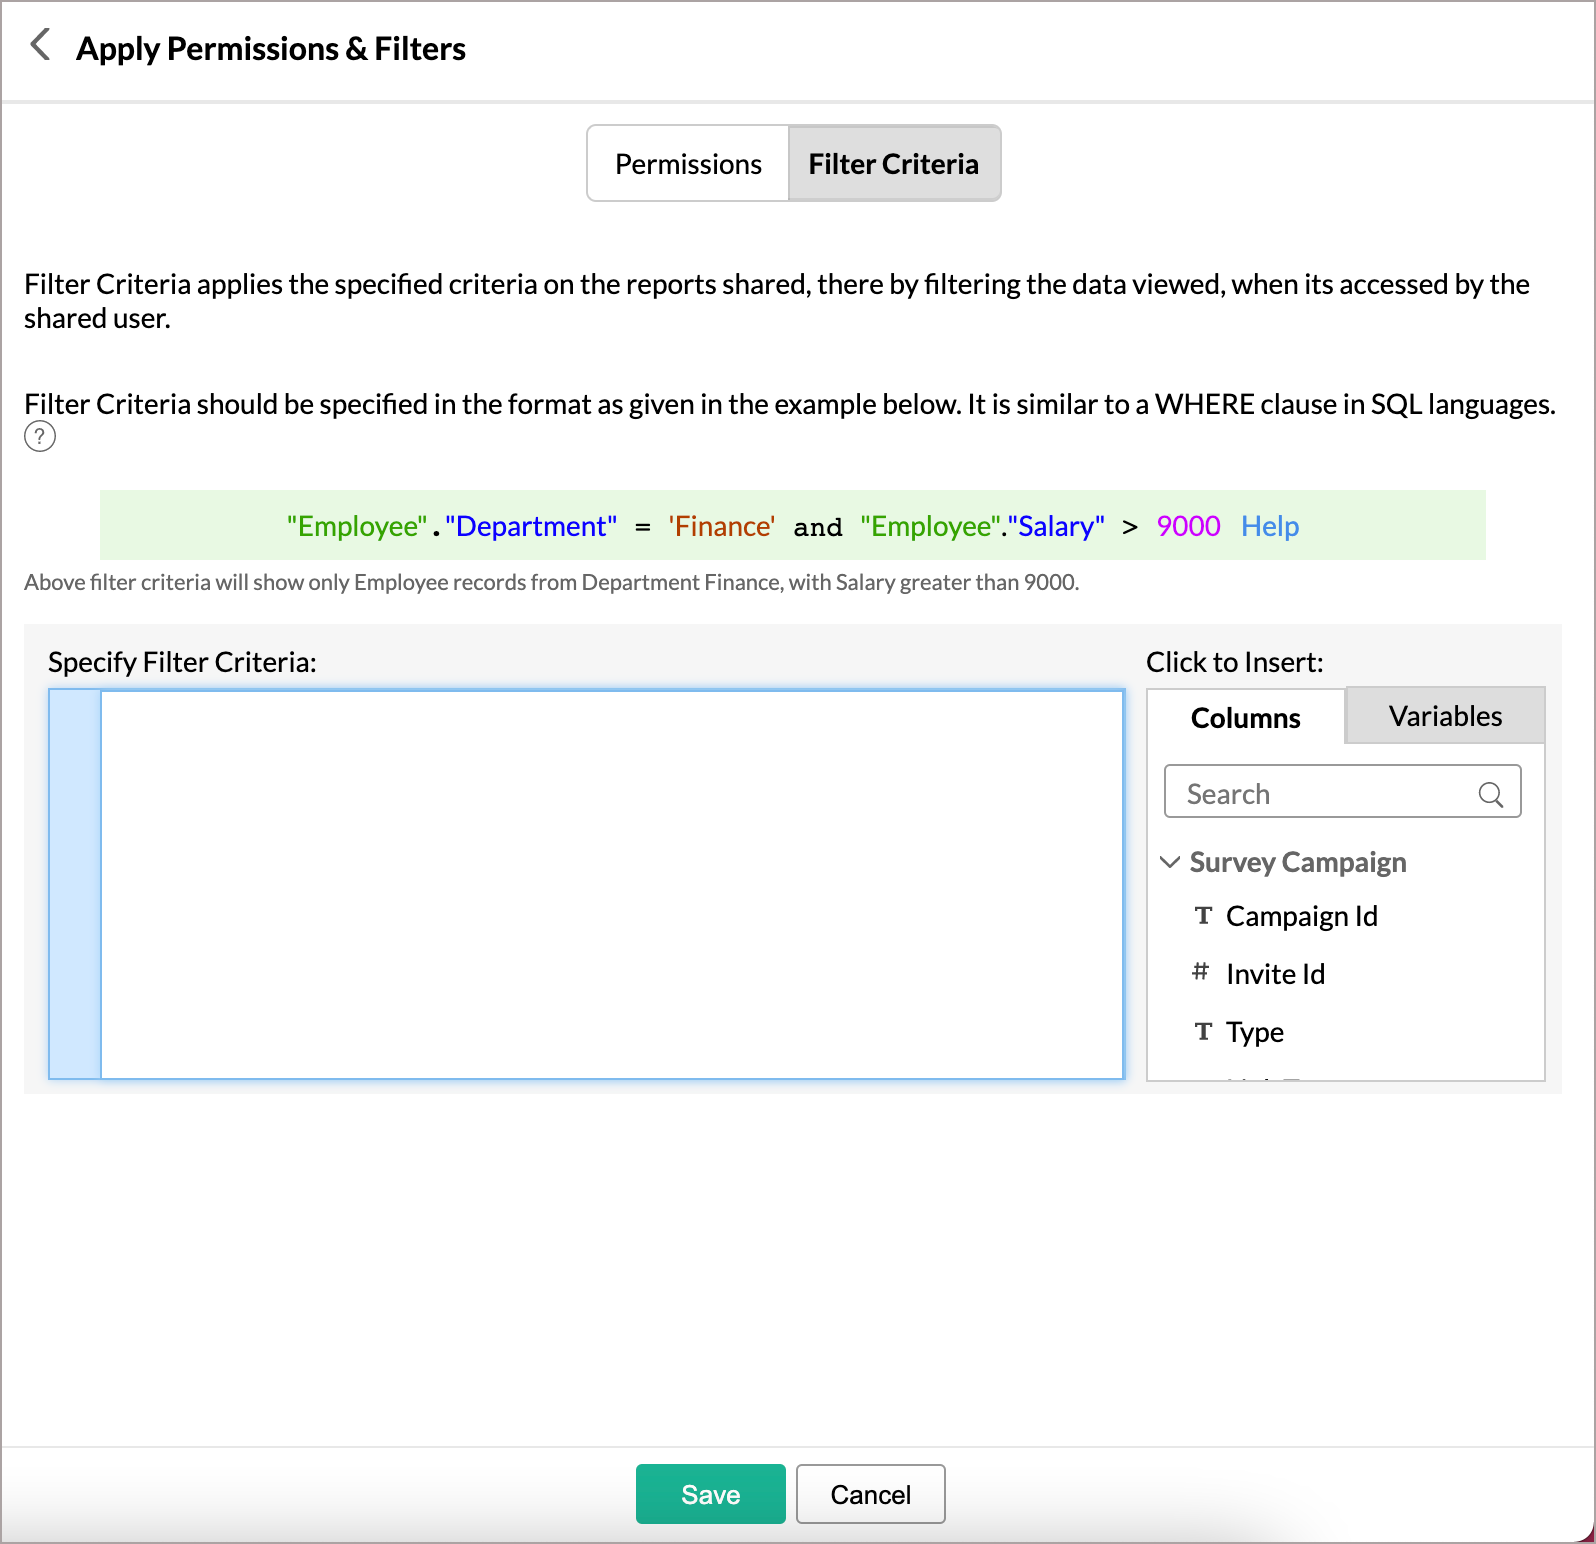
From the Filter Criteria tab, you can also apply filter criteria to grant access to specific data.
- Click Save. Permission will be granted as specified.


Access Group
Access Group allows you to control the permission for a group of users instead of assigning them individually.
The permissions set here will override the permission specified to individual users. 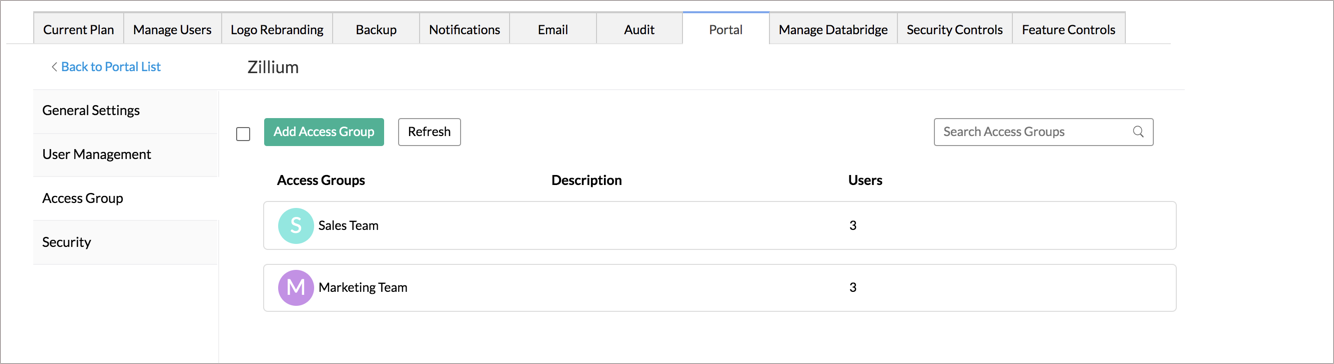
Create Group
Follow the below steps to create a group.
- Open the Access Group tab.
- Click the Add Access Group button. The Add Access Group dialog will open.
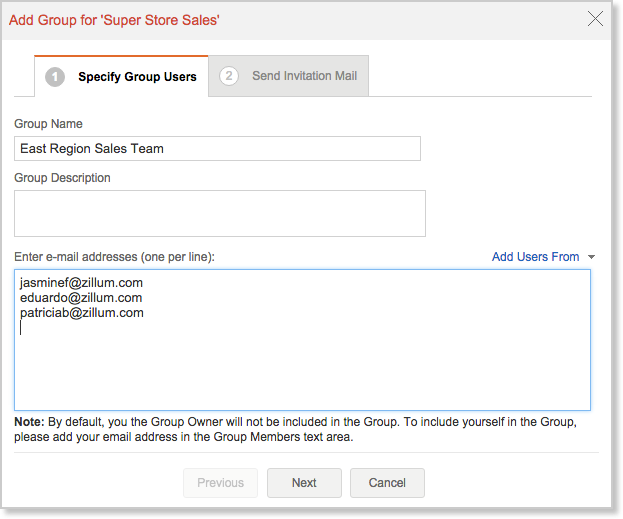
- Enter the email address of the users you want to add to the group in the given field.
- Click Next. The Page Permission section will open.
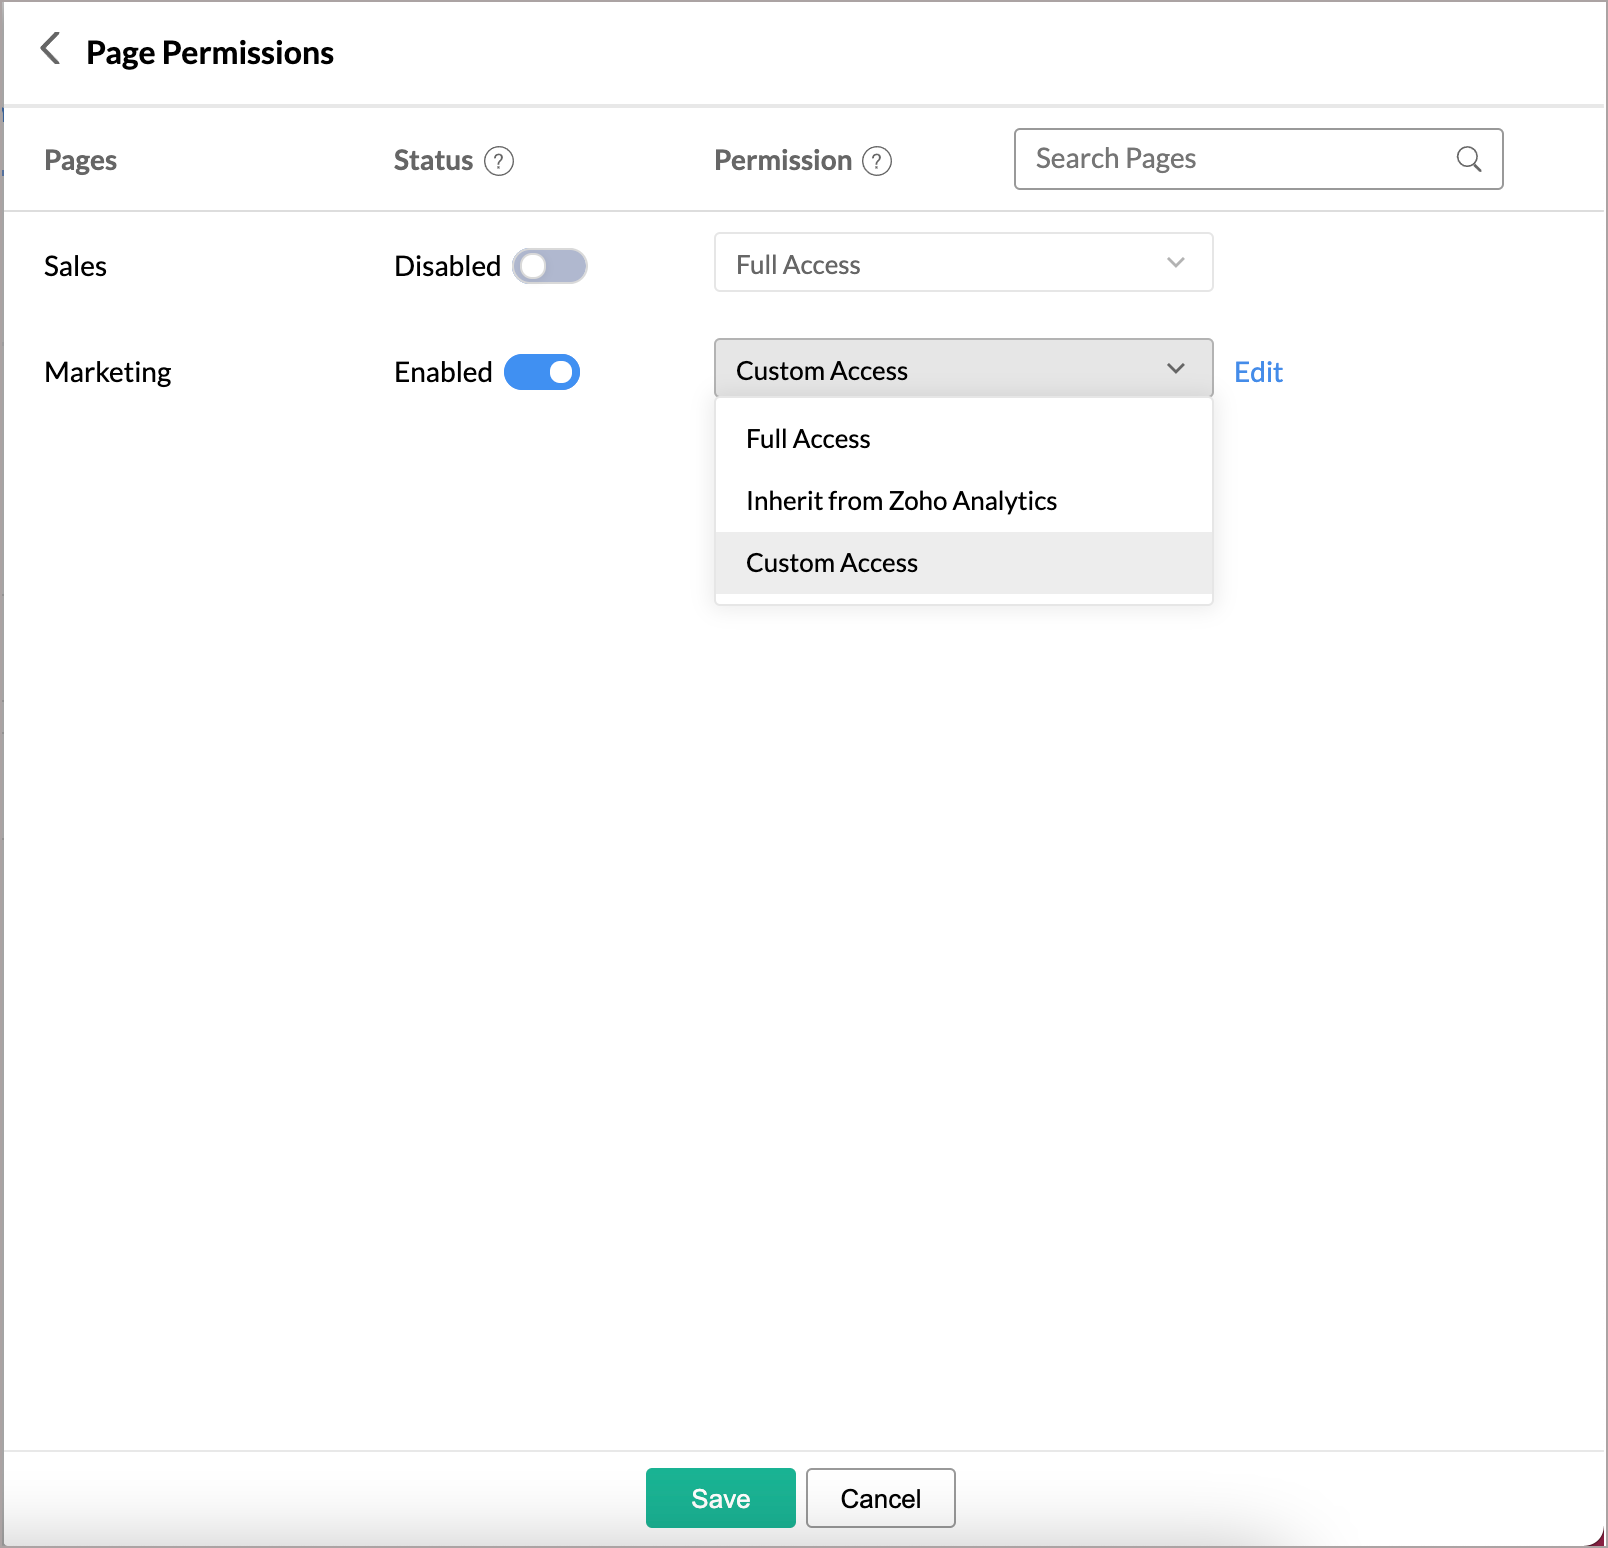
- Enable the Status toggle button for the corresponding page to grant access permission to the users.
- In the Permission section, specify permission for the views in the page.
- Full Access - Grants access to all views in the page.
- Inherit from Zoho Analytics - Grants access to the views that are shared to them in Zoho Analytics.
- Custom Access - Grants custom access as defined here by clicking the Edit link.
From the Permissions tab, you can grant specific read access to the views in the page.
From the Filter Criteria tab, you can also apply filter criteria to grant access to specific data.
- Click Save. The group will be created with the specified permission.


Permission
You can edit the permission for a group anytime you want by following the below steps.
- Open the Access Group tab.
- Click the group you want to edit the permission. The Manage Users dialog will open.
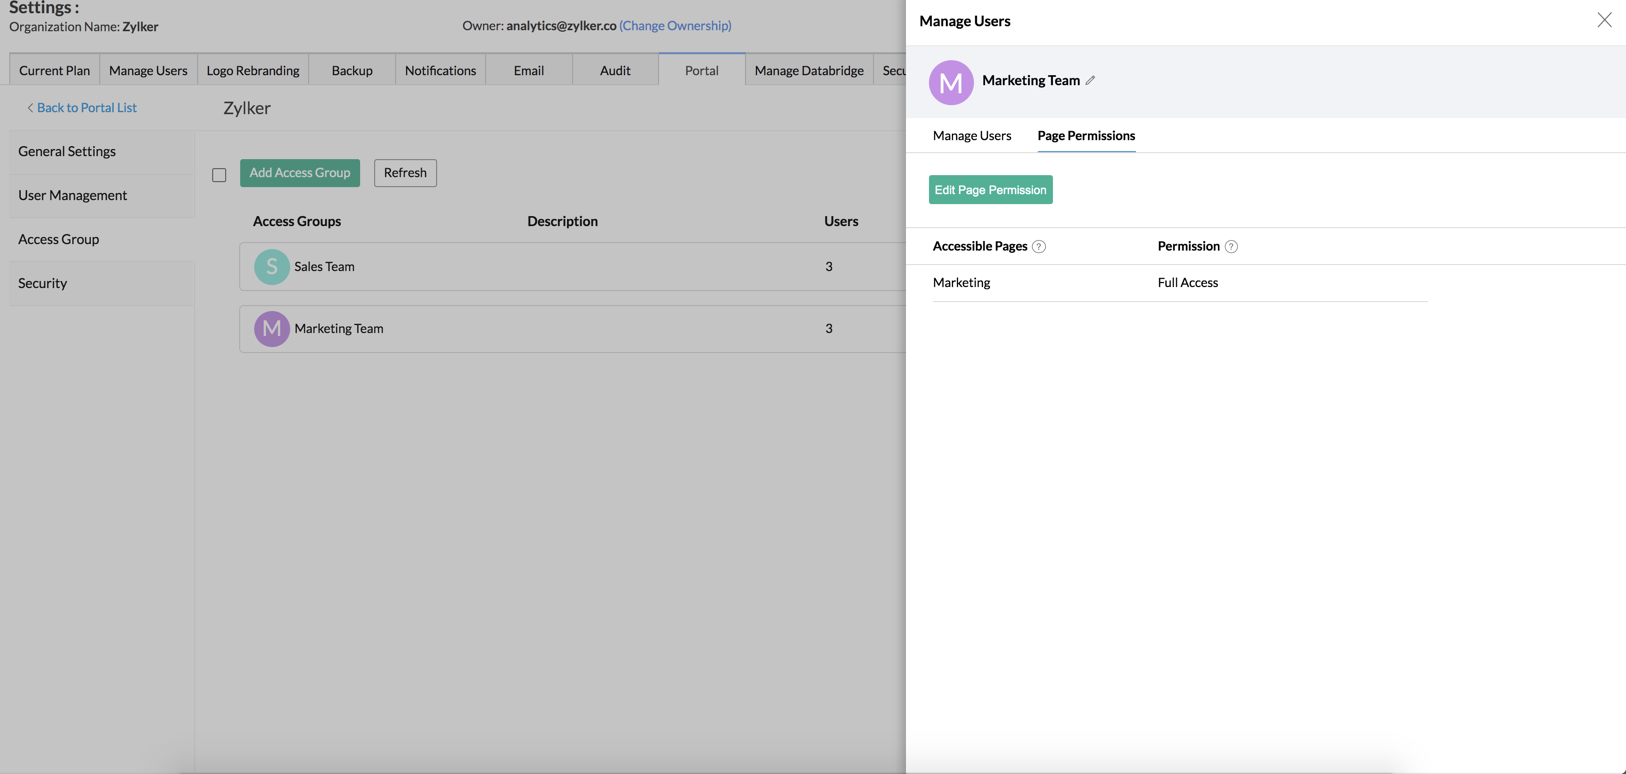
- Click the Edit Page Permission button.
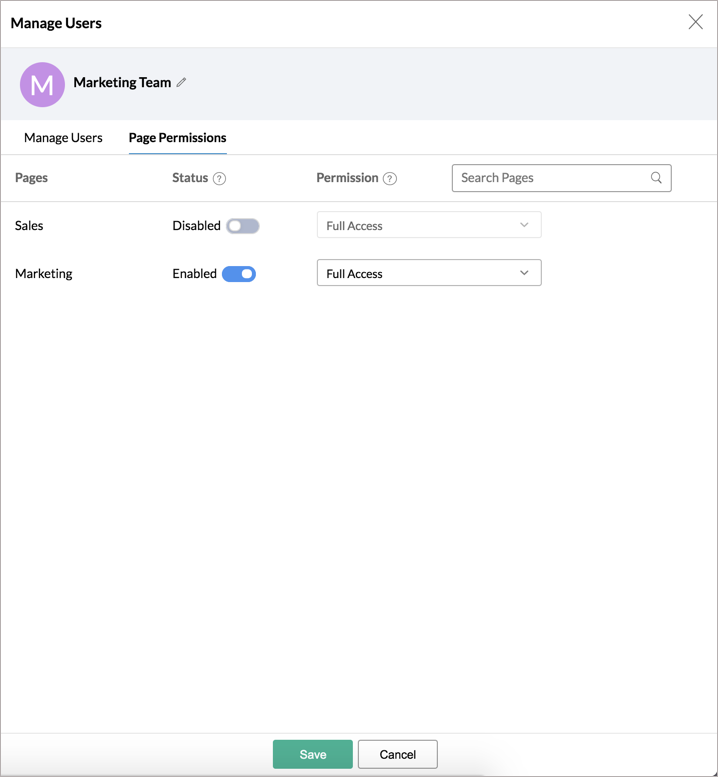
- Enable the Status toggle button for the corresponding page to grant access permission to the users.
- In the Permission section, specify permission for the views in the page.
- Full Access - Grants access to all views in the page.
- Inherit from Zoho Analytics - Grants access to the views that are shared to them in Zoho Analytics.
- Custom Access - Grants custom access as defined here by clicking the Edit link.
From the Permissions tab, you can grant specific read access to the views in the page.
From the Filter Criteria tab, you can also apply filter criteria to grant access to specific data.
- Click Save. Permission will be granted as specified.


Security
The Security tab allows you to control access to your portal by applying appropriate security restrictions.
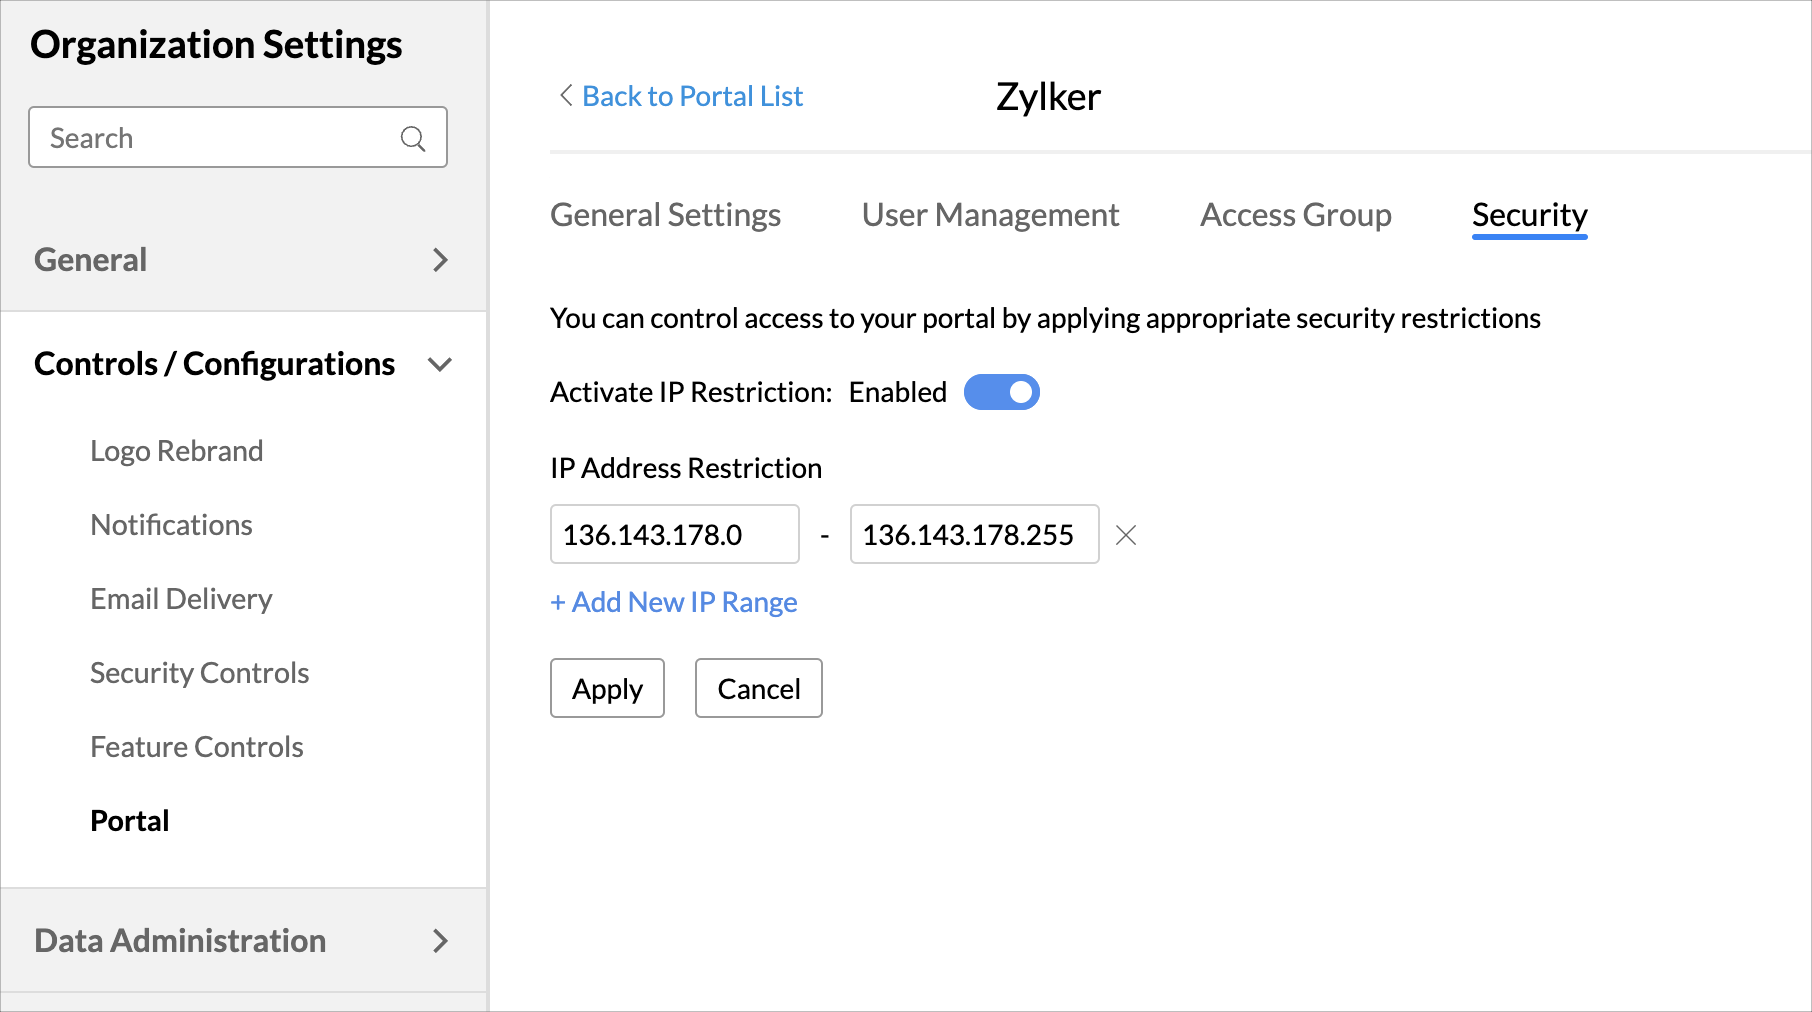
- The Activate IP Restriction: Enabled allows you to enable and disable the IP Address Restriction for the portal.
- Specify the IP address range from which the portal can be accessed in the IP Address Restriction. Now the portal can be accessed only from the specified IP range.