Mail Configuration
Trigger emails from Zoho Analytics whenever a certain action is performed by configuring any one of the supported mail servers.
Simple Mail Transfer Protocol (SMTP)
Basic Authentication
Follow the steps below to configure the basic SMTP mail server:
- Open the Zoho Analytics application and head to Settings > Configuration > Mail Server Configuration tab.
- Choose the SMTP radio button and select Basic from the Authentication Type dropdown.
- Provide the SMTP server name and port number through which the emails are sent.
- Enter the email address to be used as the FROM address in the Email section.
- Enable the Requires authentication checkbox if the SMTP server requires authentication details. Provide the required username and password.
- Select the TLS Enabled checkbox to allow TLS support in the mail server configuration.
- Enable the SSL Enabled checkbox to have a secure SSL connection while delivering emails.
- Click Save to save the configuration.
- Click the Send Test Mail button to test whether the configured settings are functioning properly. If yes, an email will be triggered to the administrator's email address.

OAuth Authentication
For OAuth based SMTP mail server configuration, Zoho Analytics supports the following authentication servers: G Suite and Azure. Click the corresponding links to know the steps to get the required server details.
G Suite as authentication server
- Login to console.developers.google.com.
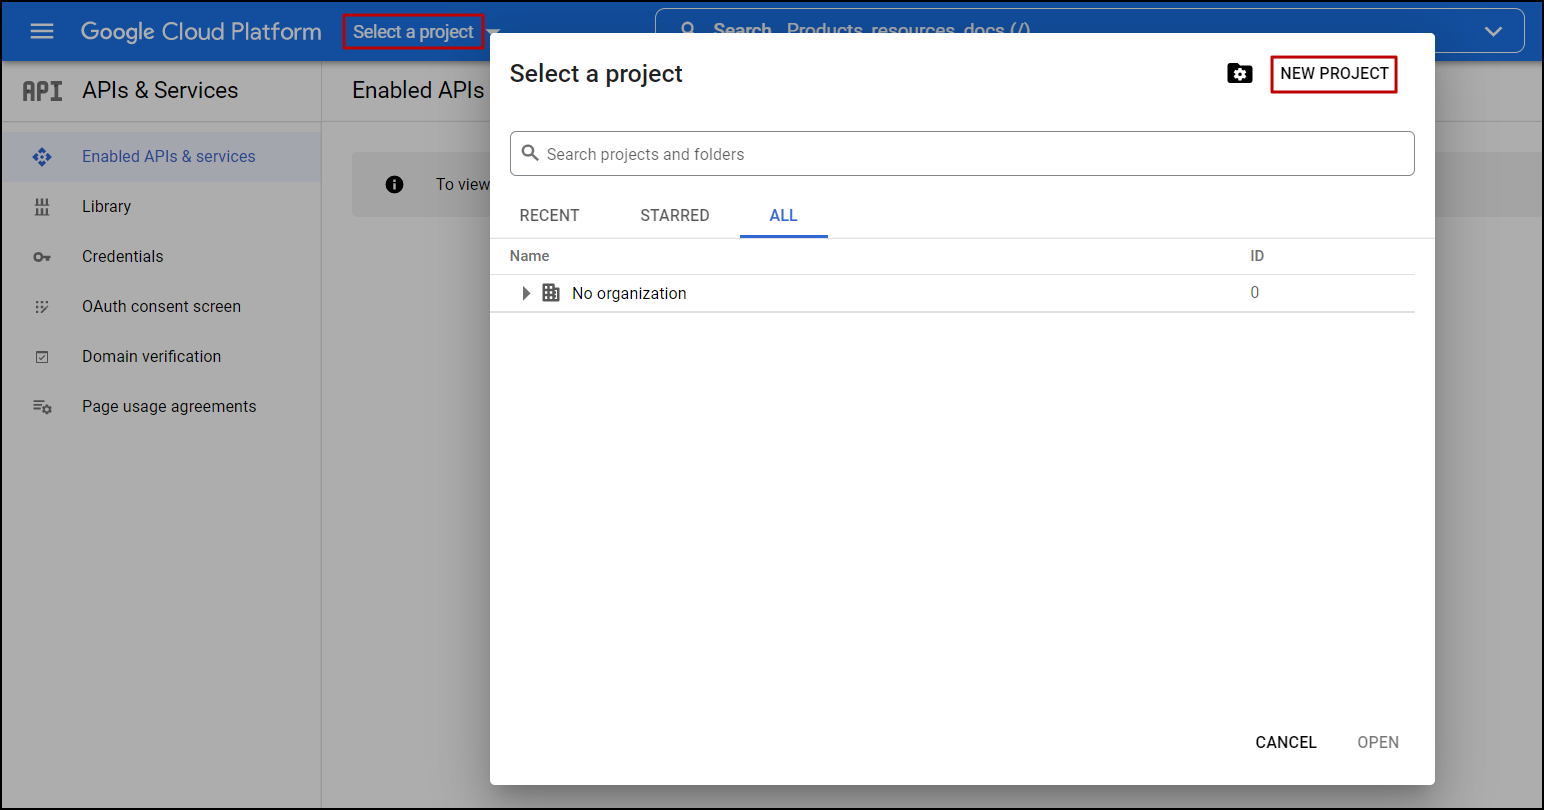
- Click Select a project.
In the pop-up that appears, select an existing project, or create a new one using the New Project option.
Provide a name for the project, select the appropriate organization and click Create.

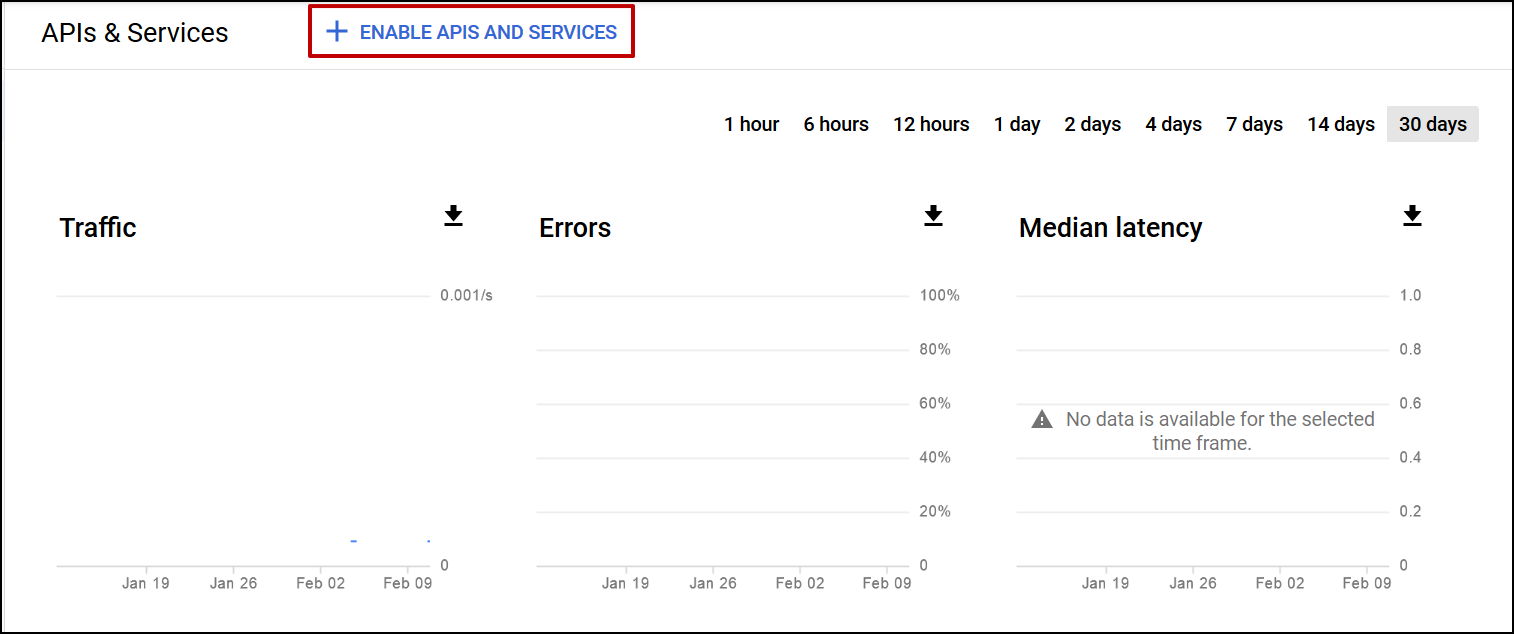
In the page that appears, click + ENABLE APIS AND SERVICES.
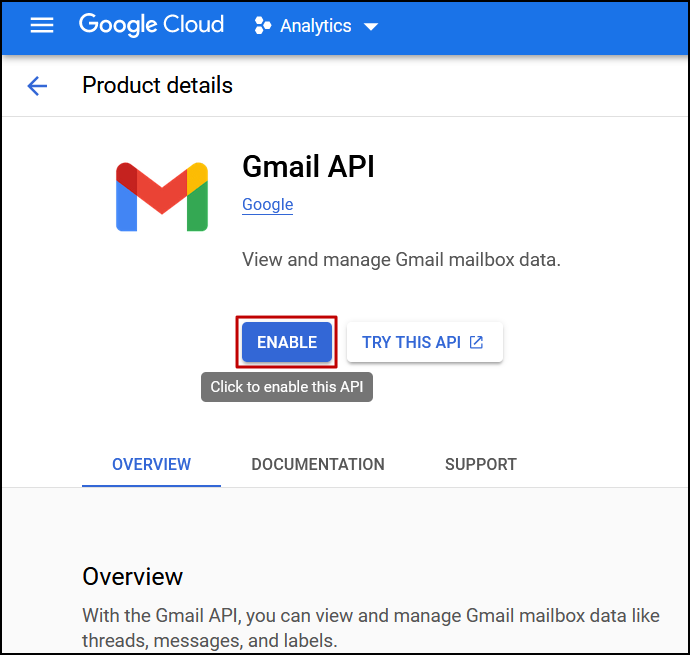
Search for Gmail API and enable it.
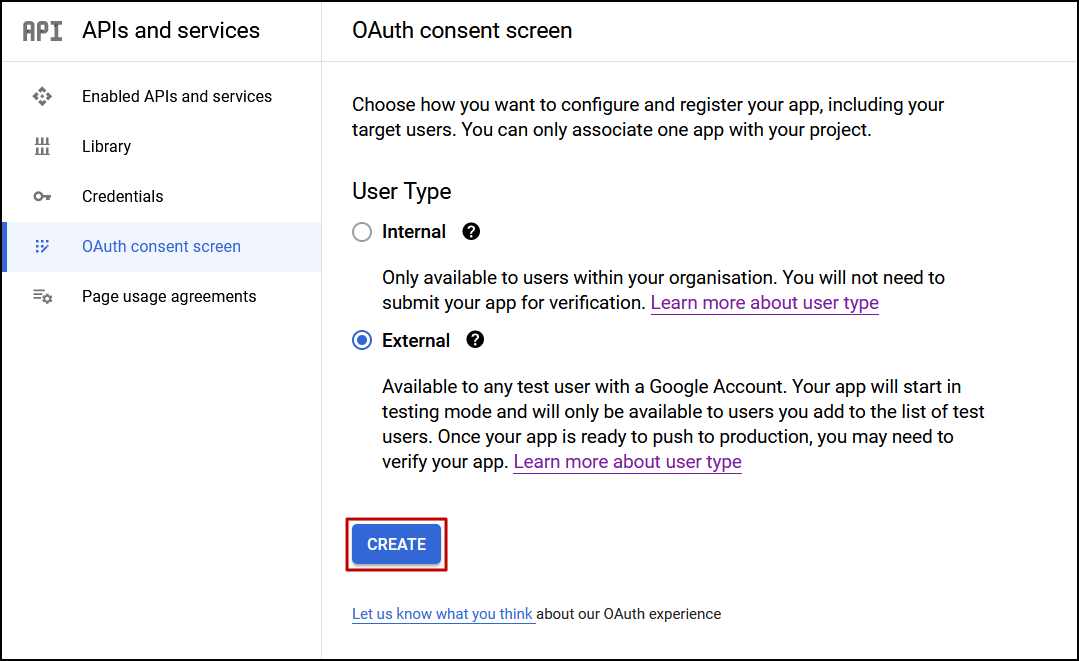
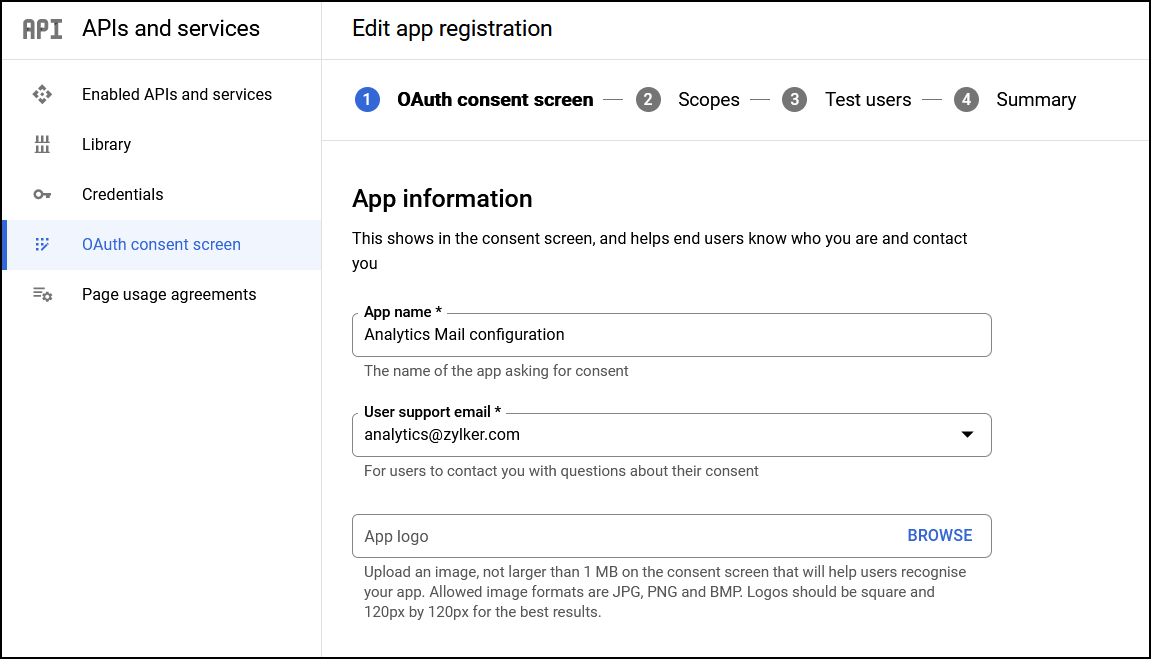
- Click the OAuth consent screen option from the side pane.
Choose the required User Type and click Create.
In the page that appears, provide a name for the app and choose the support email address.
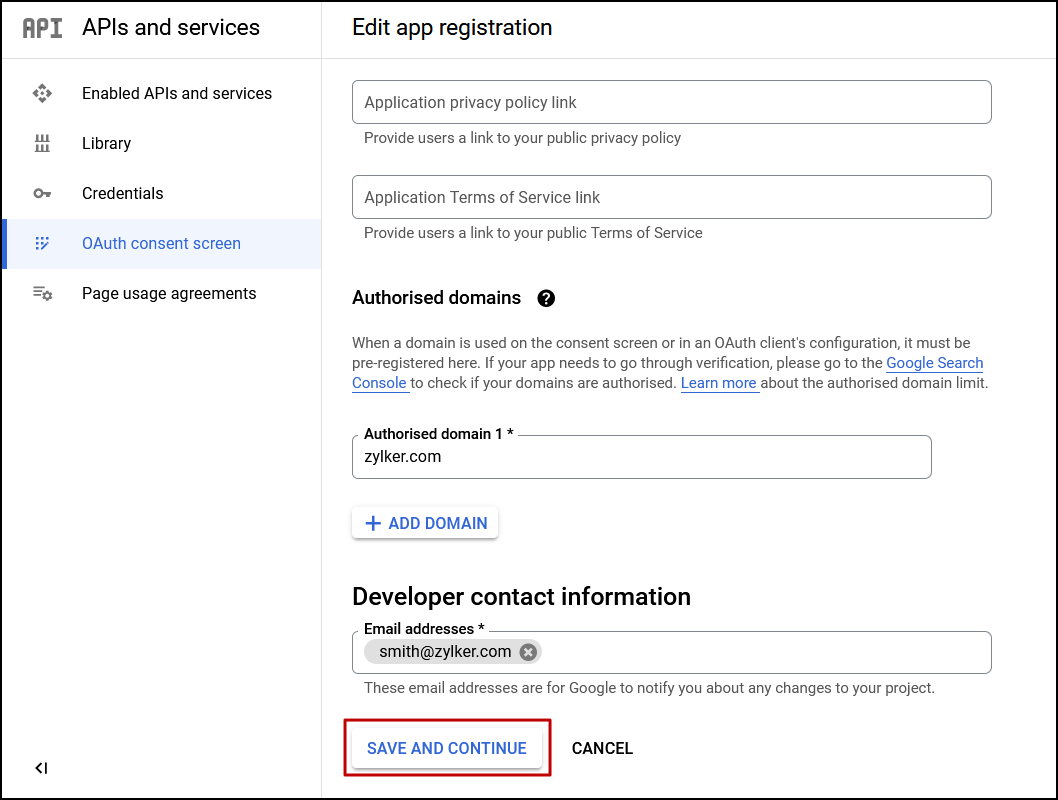
- Head to the Authorized domains section, click + ADD DOMAIN, and enter the server domain where the Zoho Analytics application is hosted.
- In the Developer contact information section, provide an email address to which you need to receive notifications about the changes to your project.
Click Save and Continue.
- In the page that appears, click Add or Remove Scopes.
Choose the Gmail API (https://mail.google.com) checkbox and click Update.
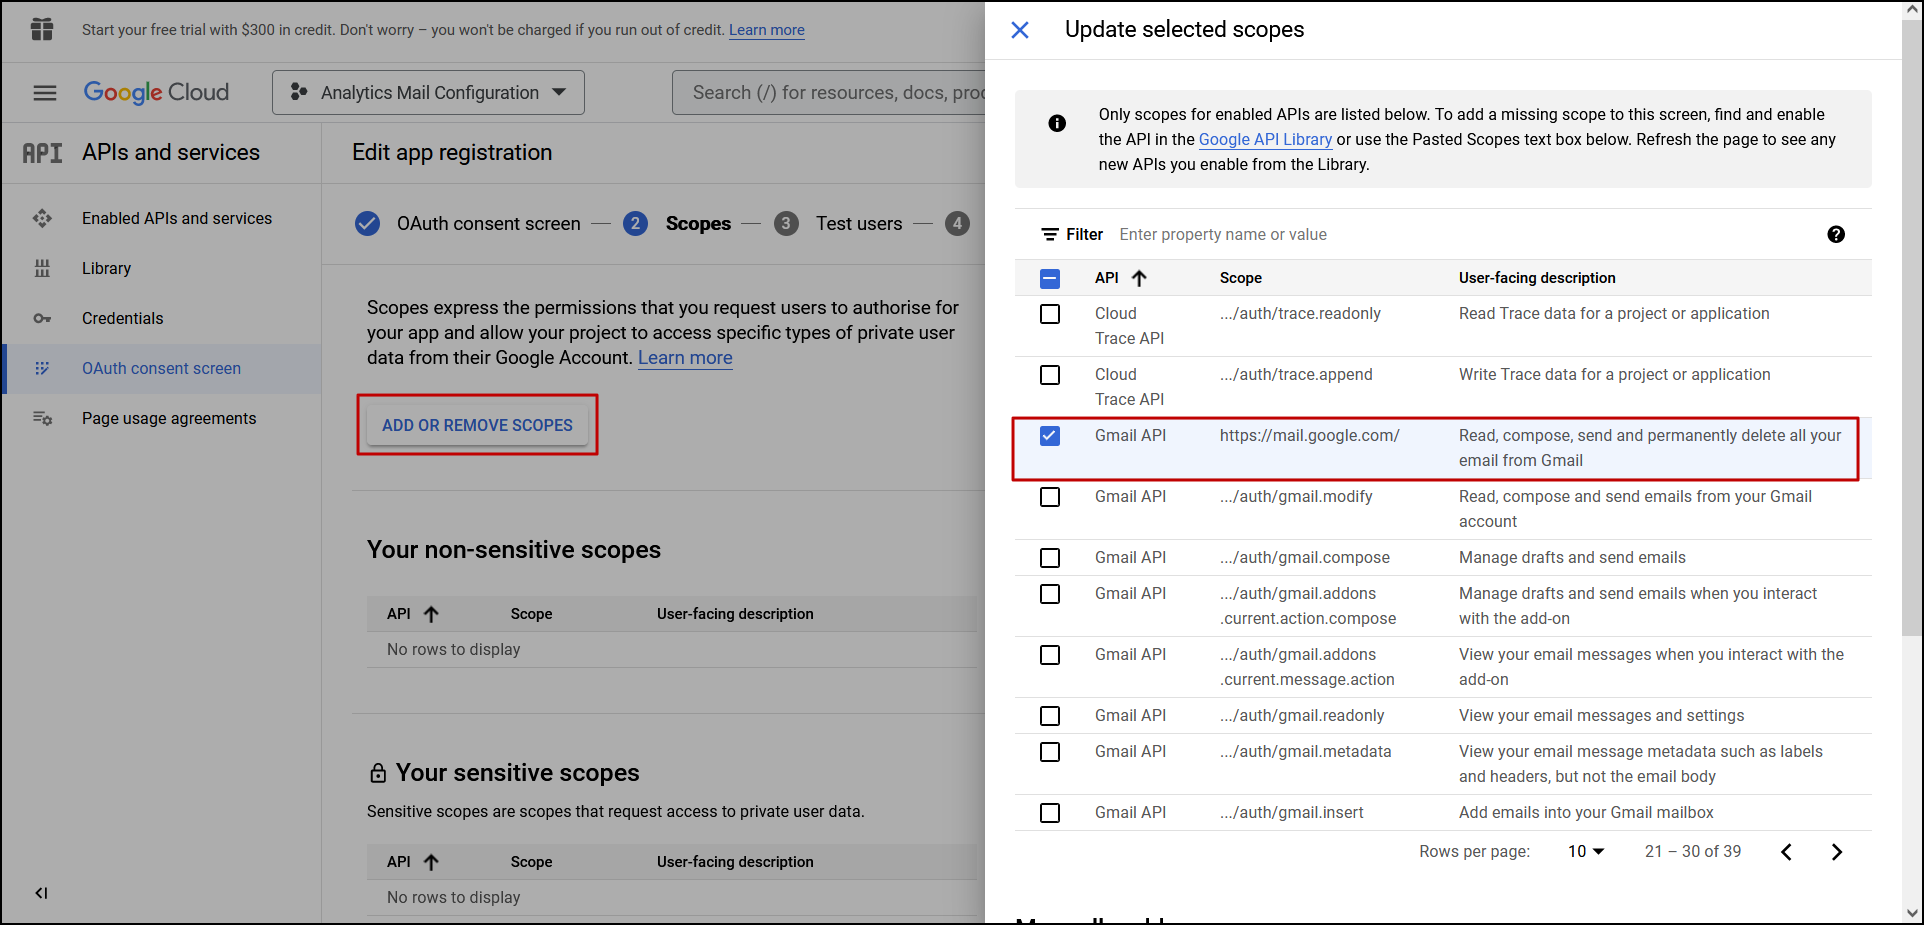
- Click Save and Continue.
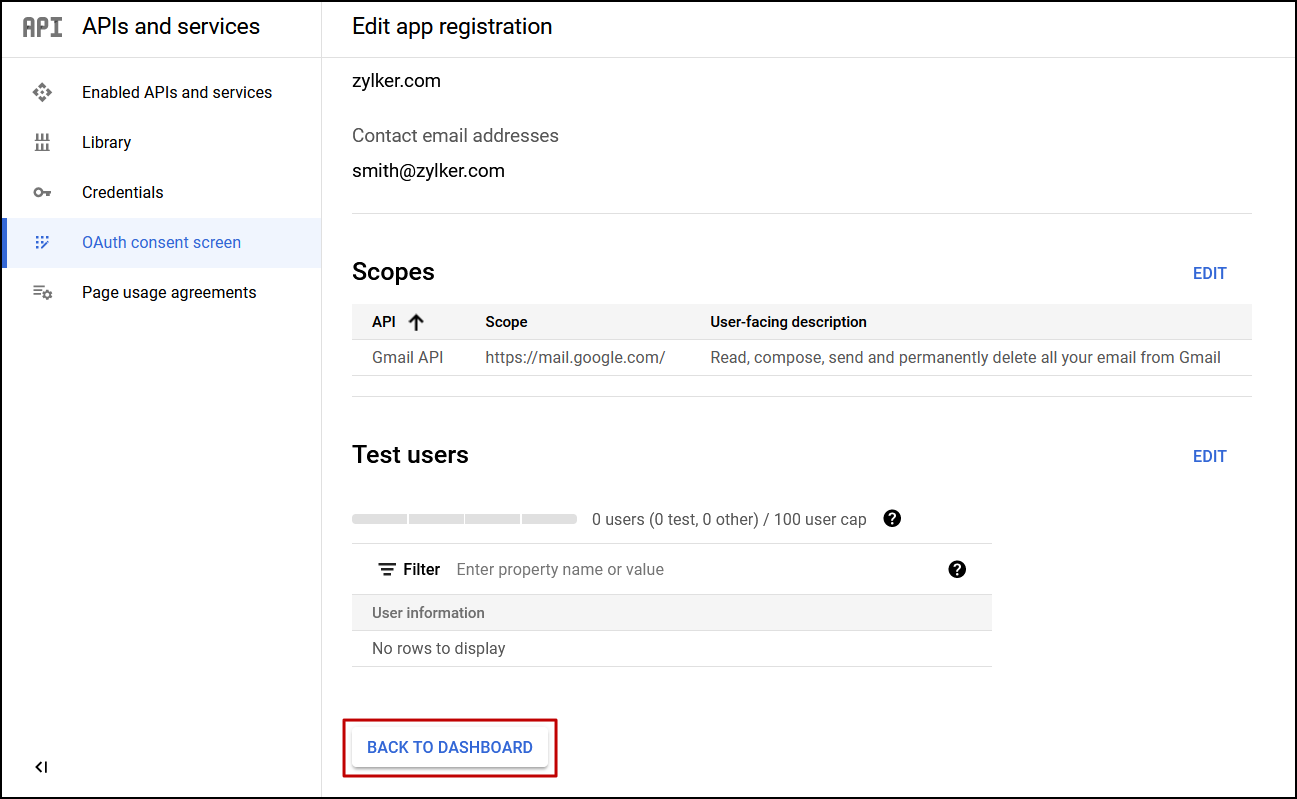
In the Test users page that appears, click Save and Continue.
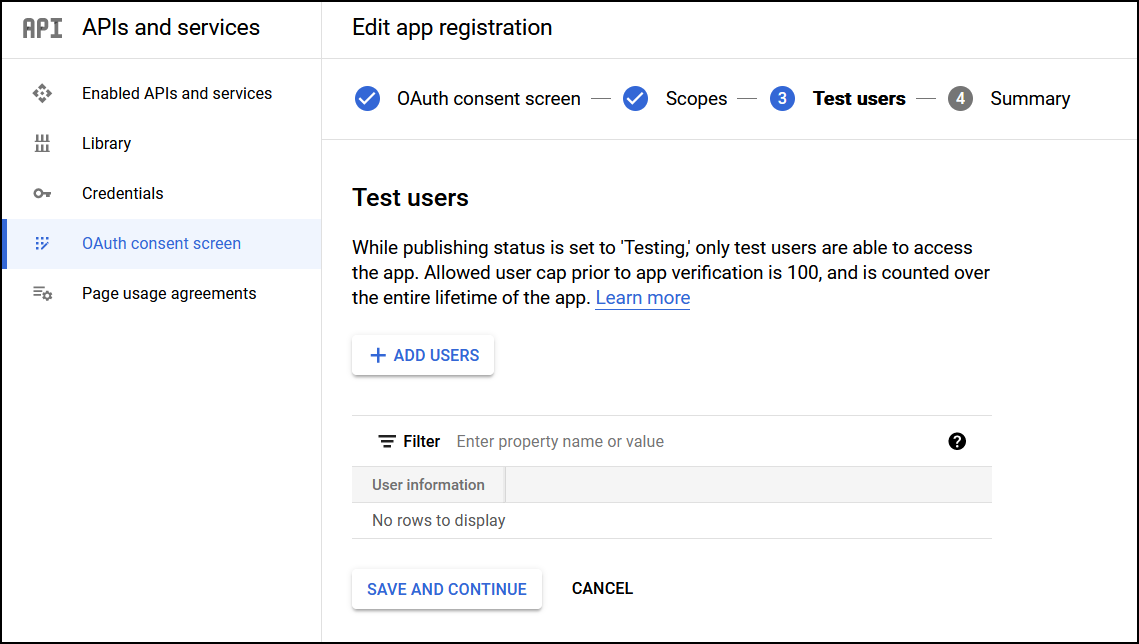
Verify the configured information and click Back to Dashboard.
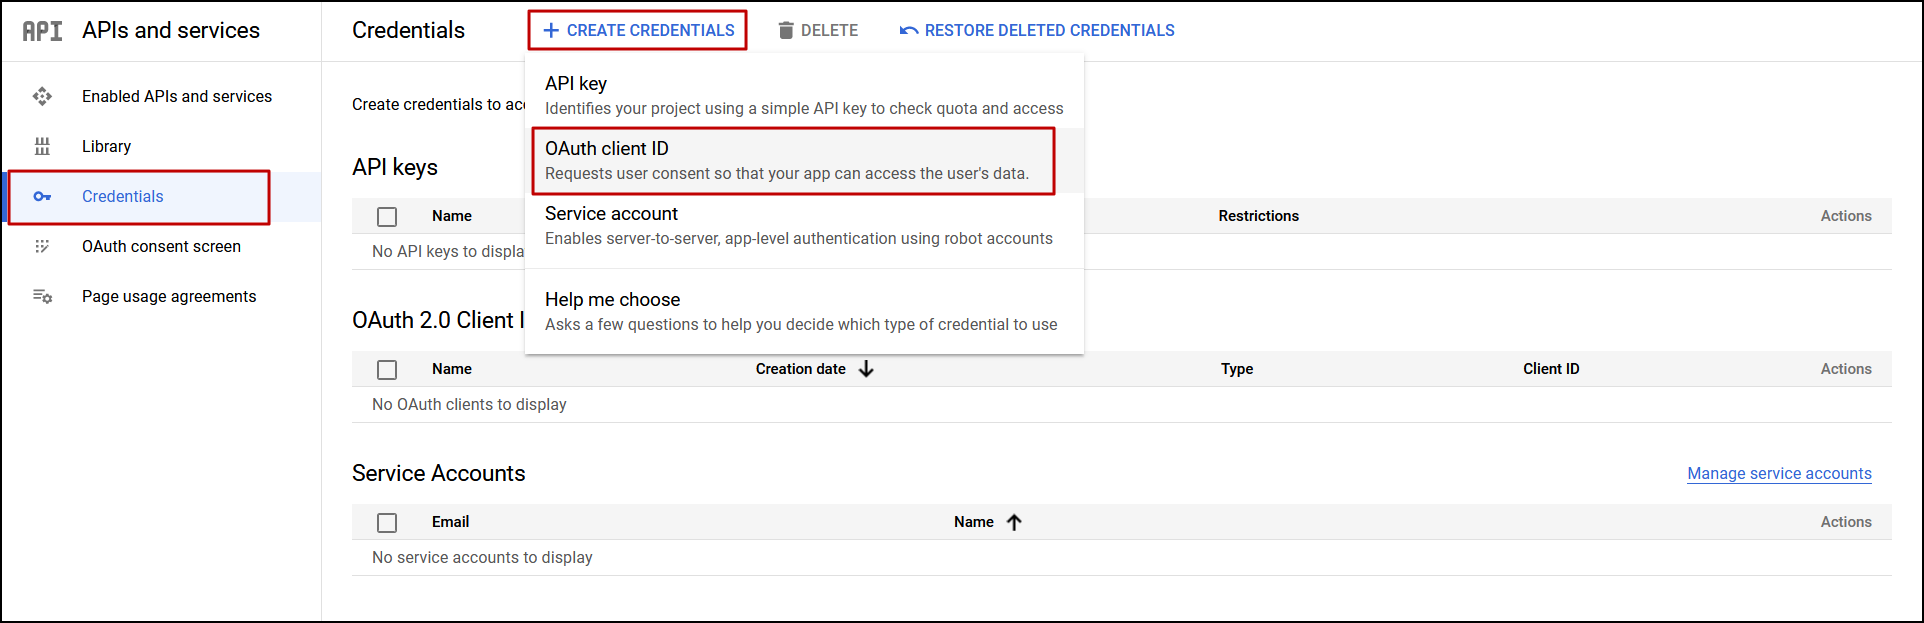
- Click Credentials from the left pane.
Click + Create Credentials and select OAuth client ID from the drop-down menu.
Set the Application type as Web Application and provide a name for the application.
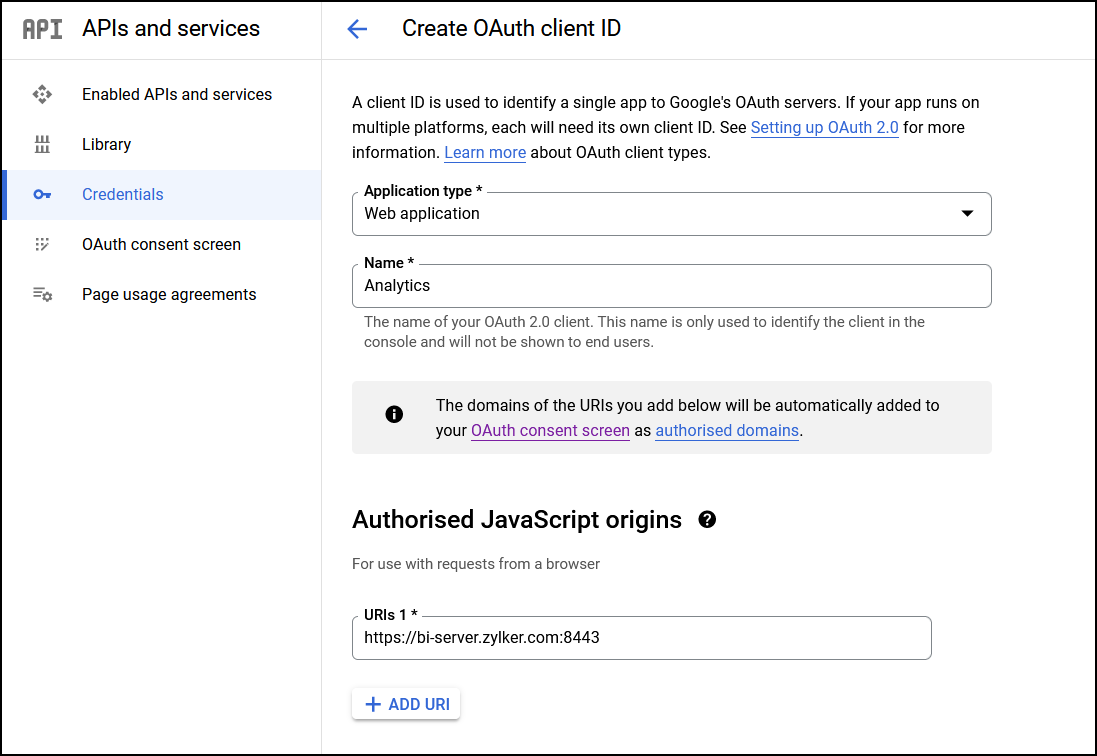
- In the Authorized JavaScript origins section, click the + ADD URI button and enter the web client URL used to access the Zoho Analytics application.
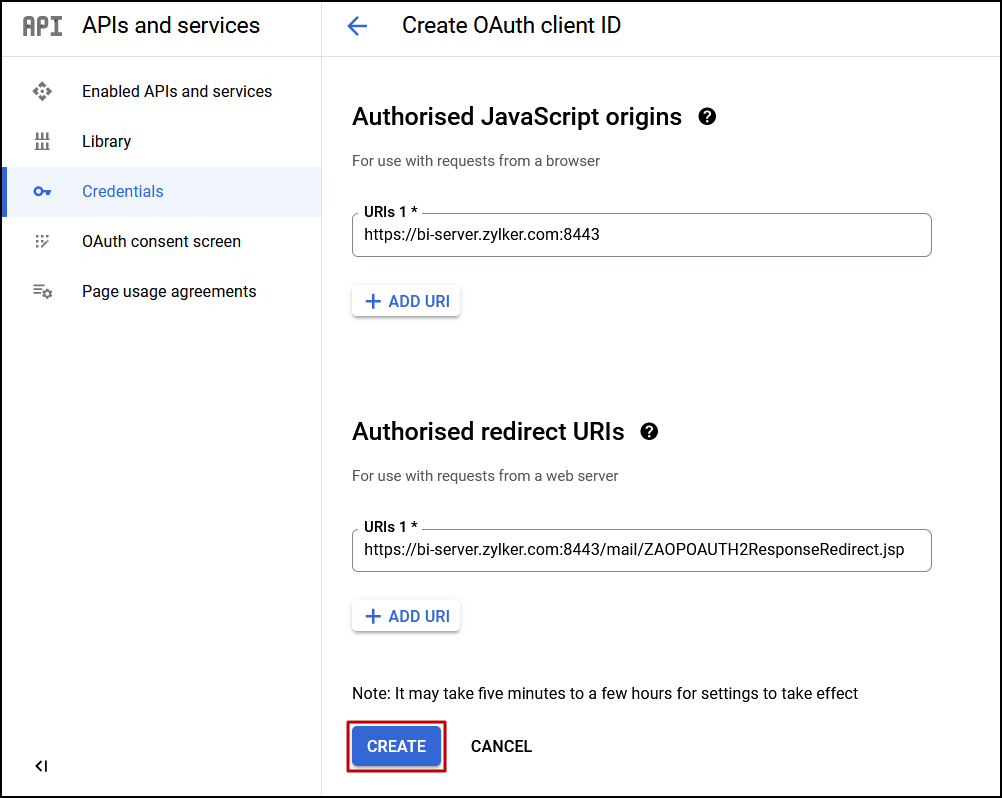
- Enter the redirect URL copied from Zoho Analytics in the Authorized redirect URIs section. Please get the redirect URL from the Zoho Analytics application's Mail configuration page.
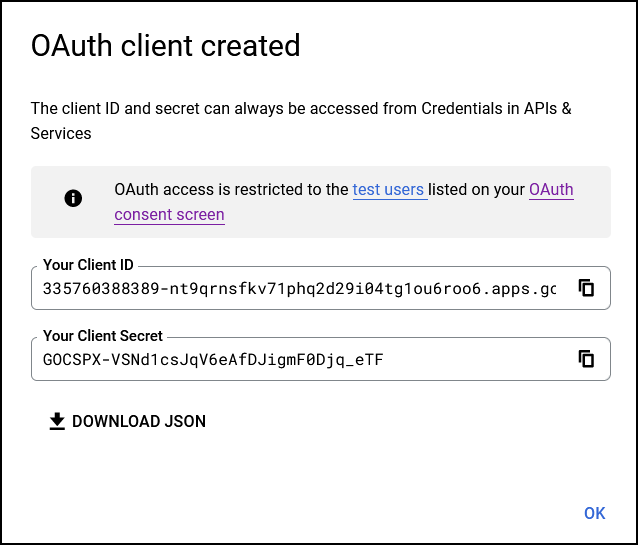
Click Create.
Copy the Client ID and Client Secret displayed on the screen to a separate text file. You need to configure these values in Zoho Analytics.


Azure as authentication server
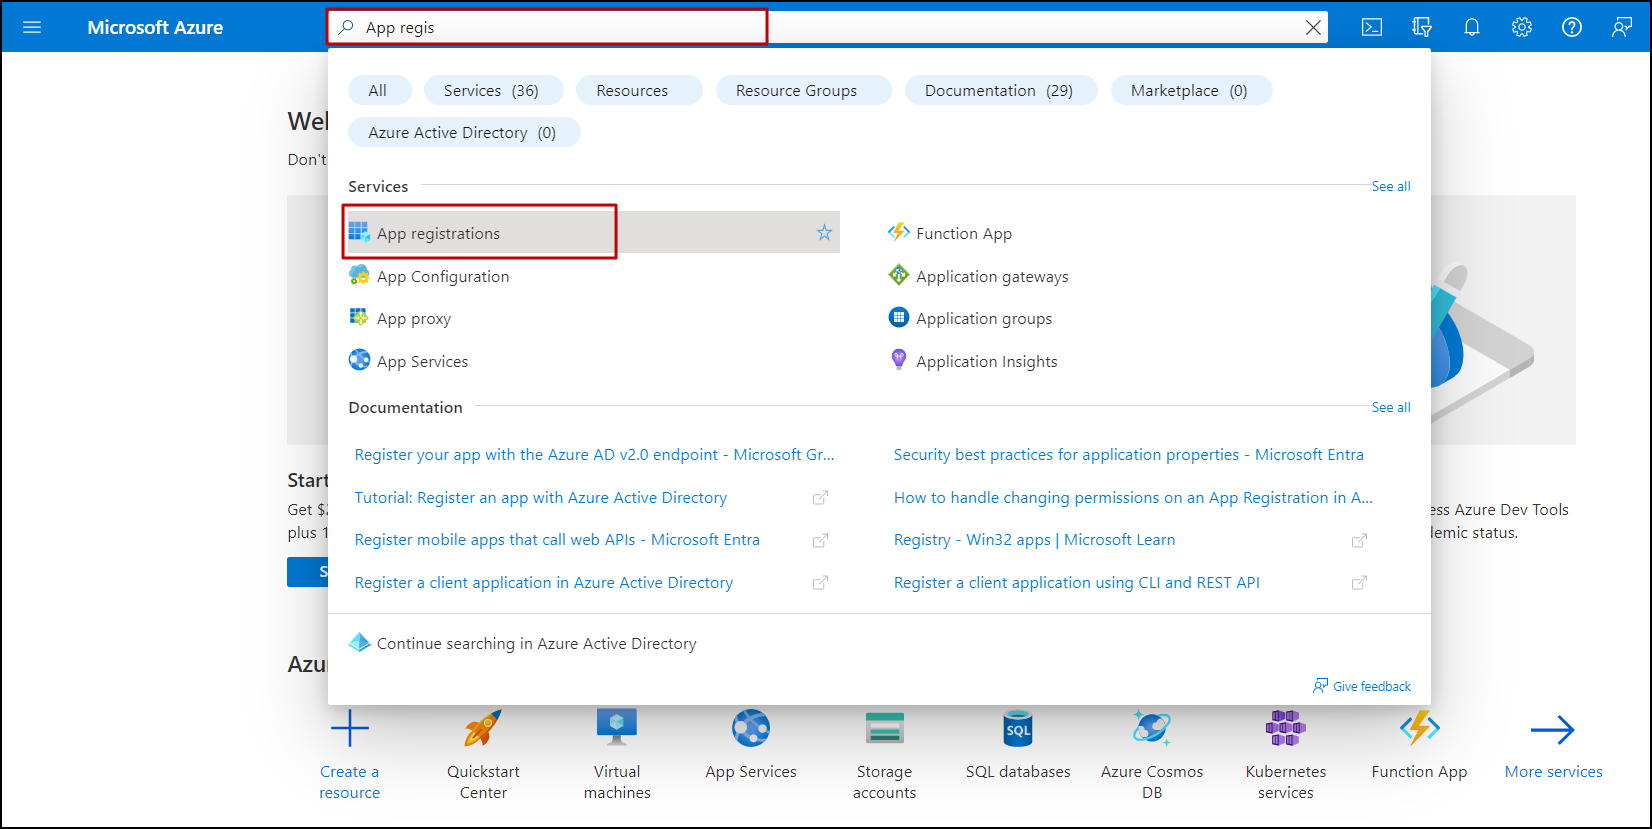
Log in to the Microsoft Azure portal, search and click the App registrations option.
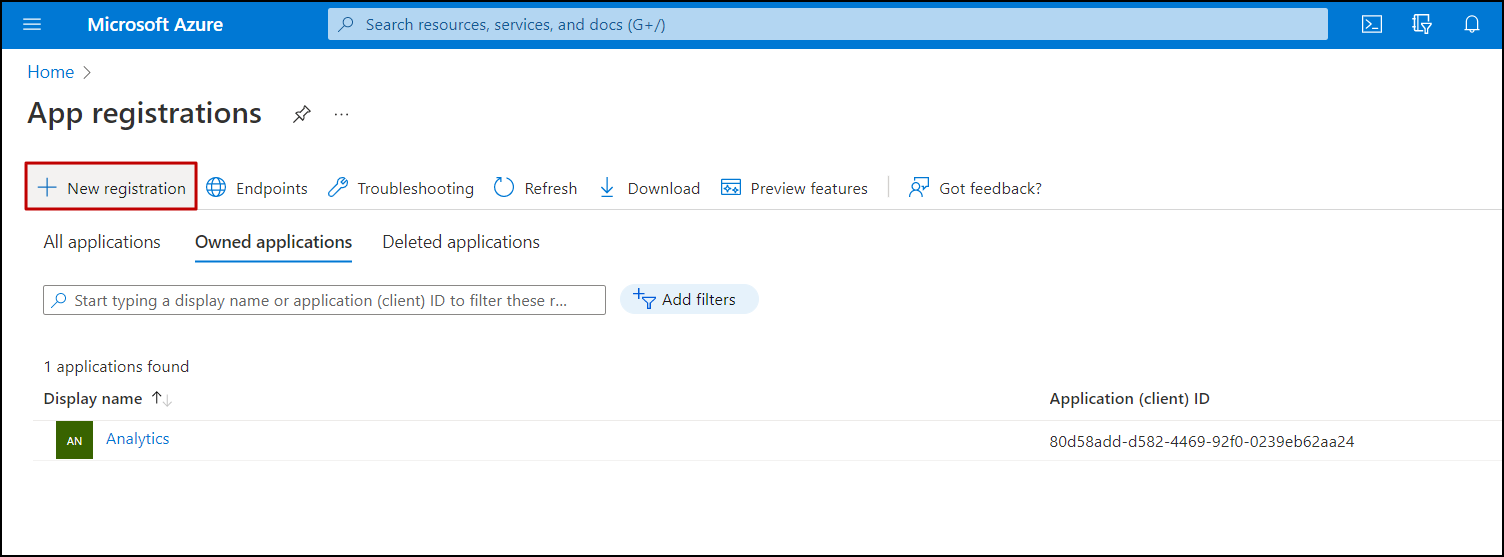
In the page that appears, click + New registration.
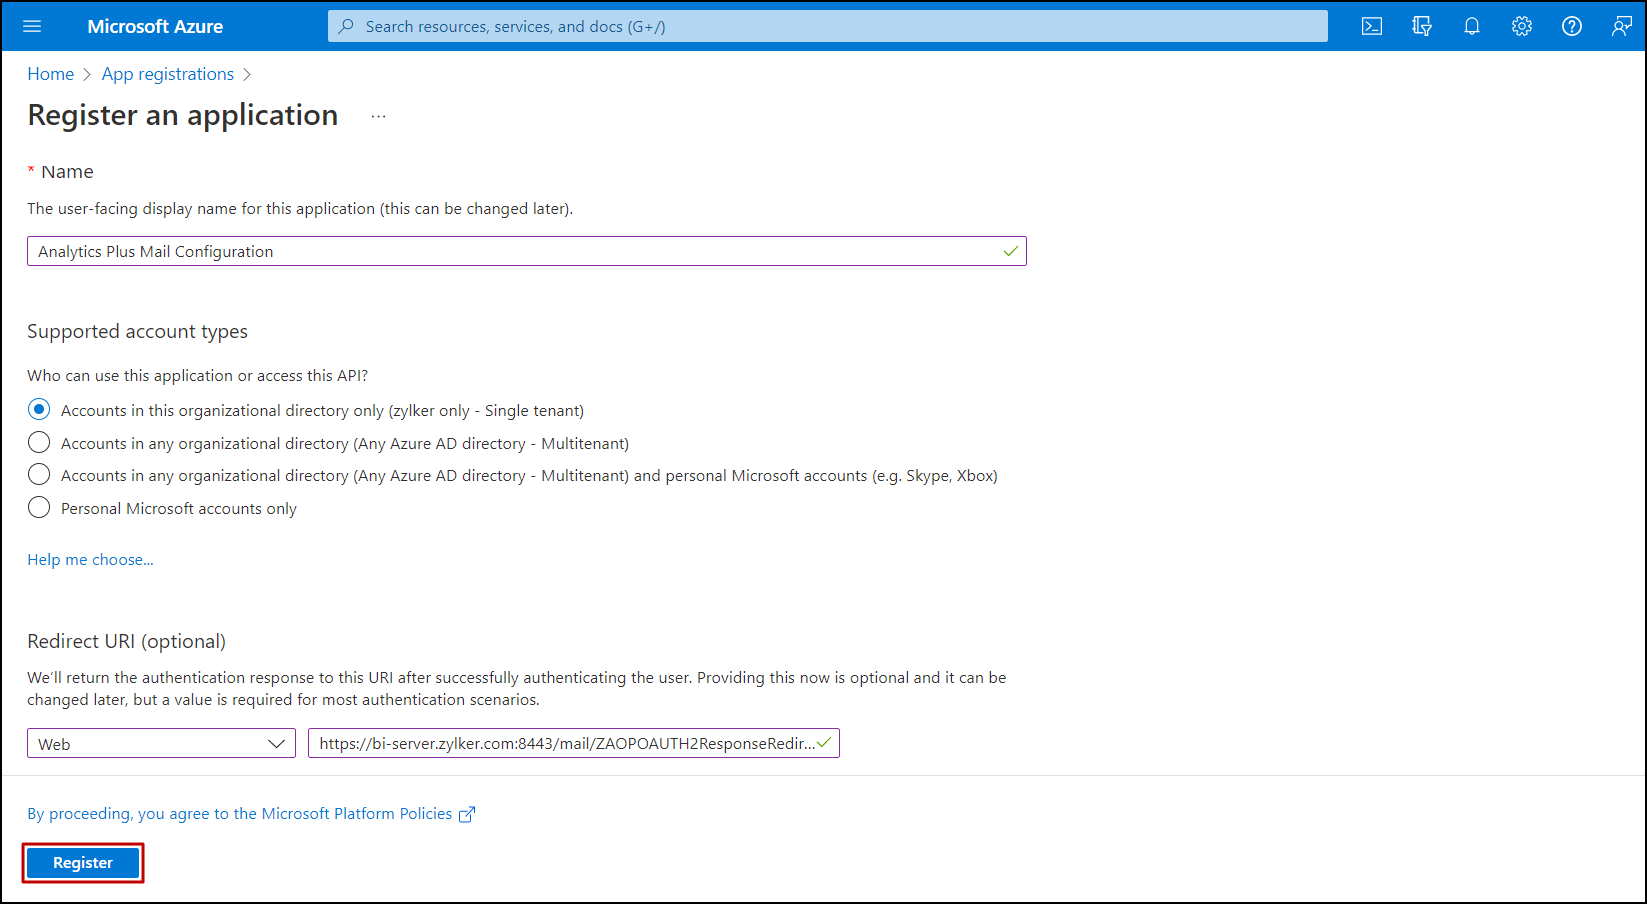
- Provide a name for the app and choose the required account type.
- Head to the Redirect URI section, and choose Web from the select platform dropdown.
- Enter the redirect URL of Zoho Analytics. Please get the redirect URL from the Zoho Analytics application's Mail configuration page.
Click Register. Save the following values in a separate file. You need to configure these values in Zoho Analytics.
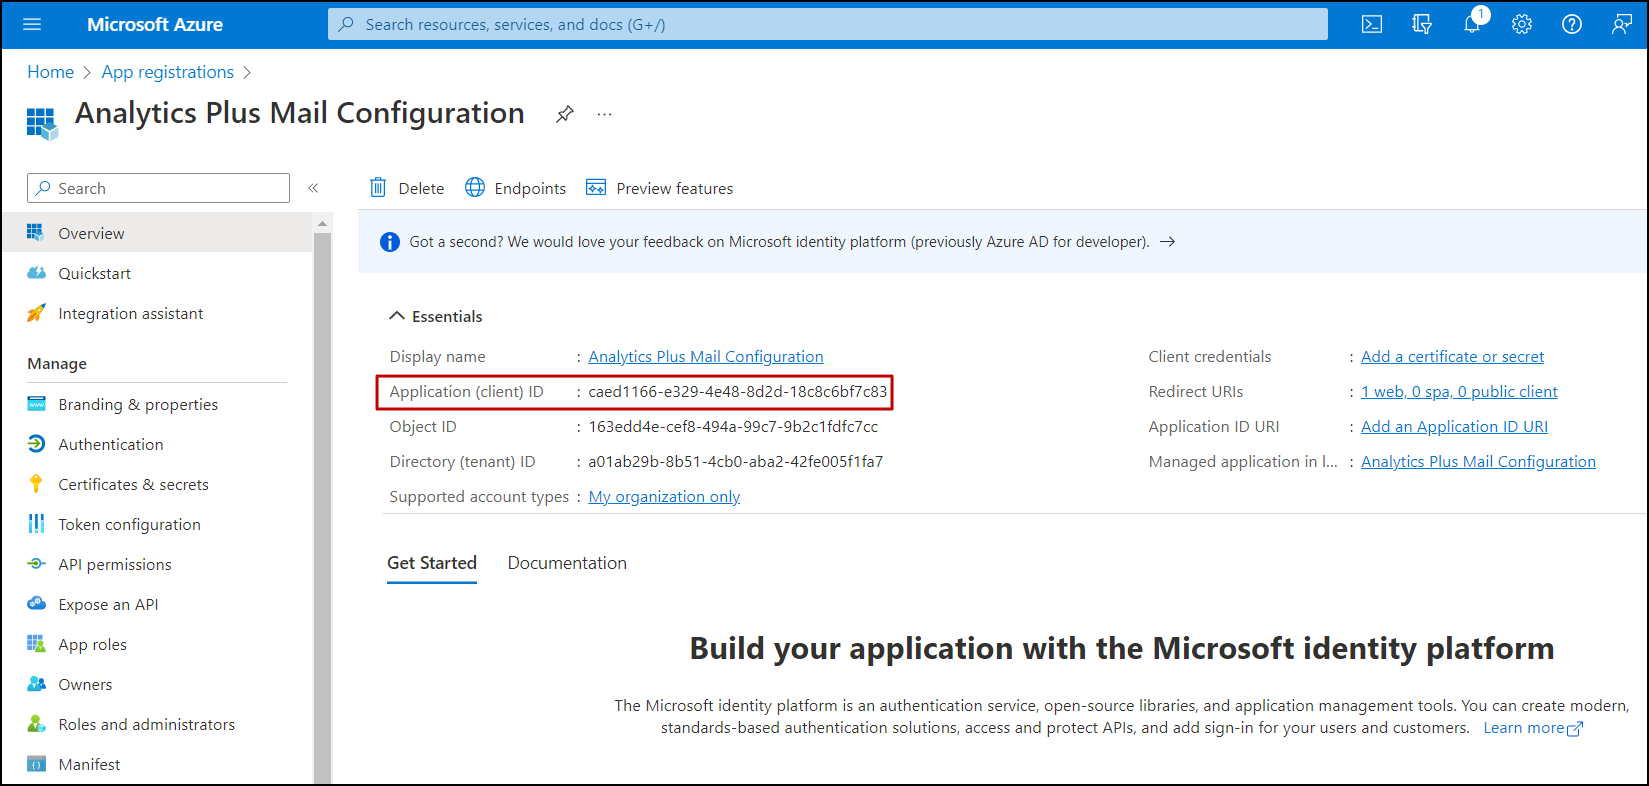
In the page that appears, copy the Application ID (Client ID).
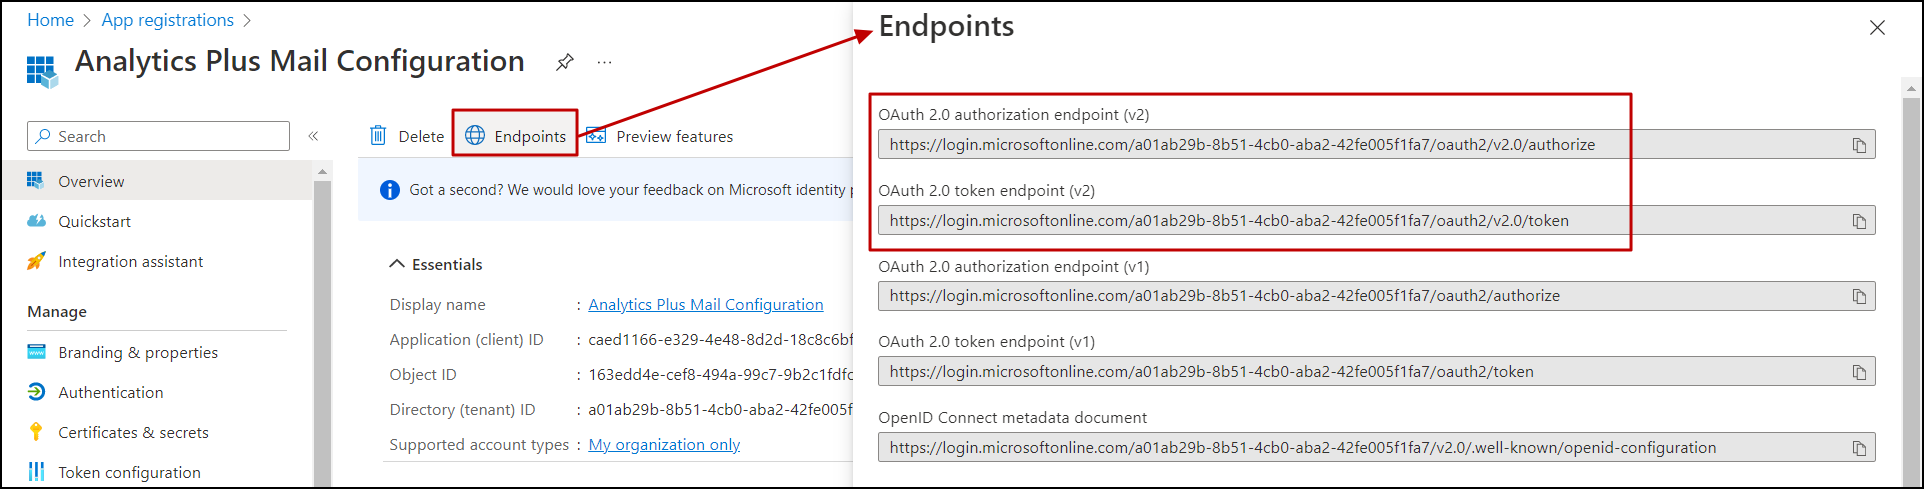
Click the Endpoints link and copy the OAuth 2.0 authorization endpoint (v2) (Authorization URL) and OAuth 2.0 token endpoint (v2) (Token URL).
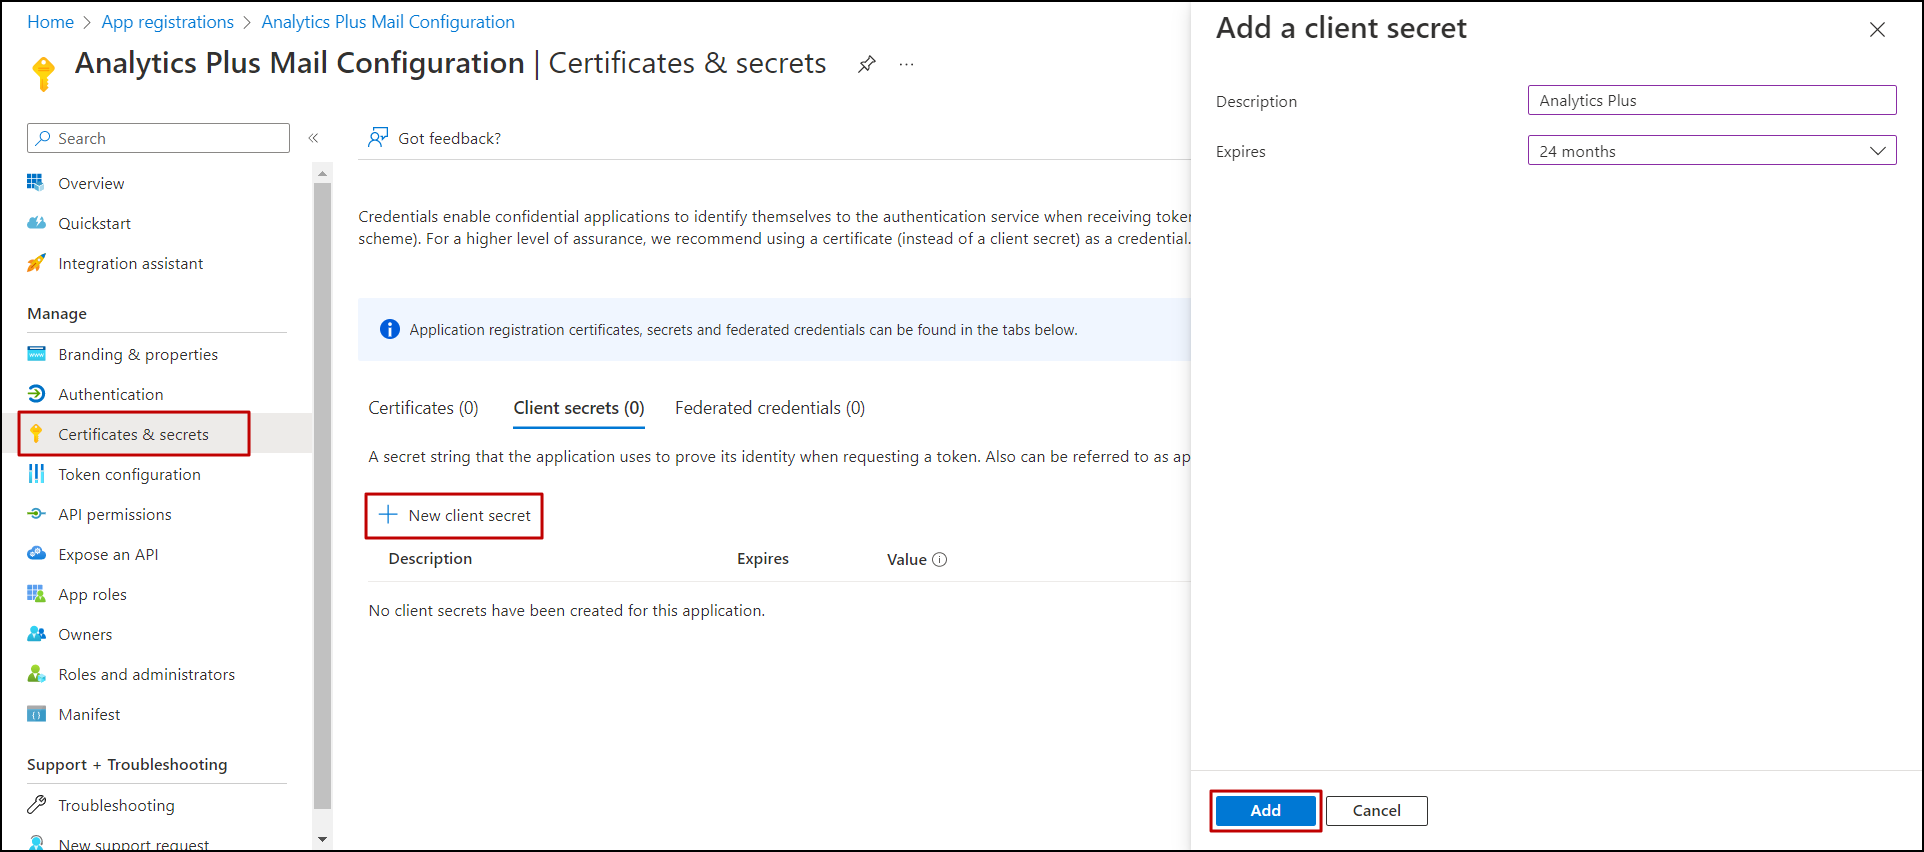
- Click the Certificates & secrets option from the left pane, and click + New client secret.
In the dialog that appears, provide a description and expiry date for the client secret, and click Add.
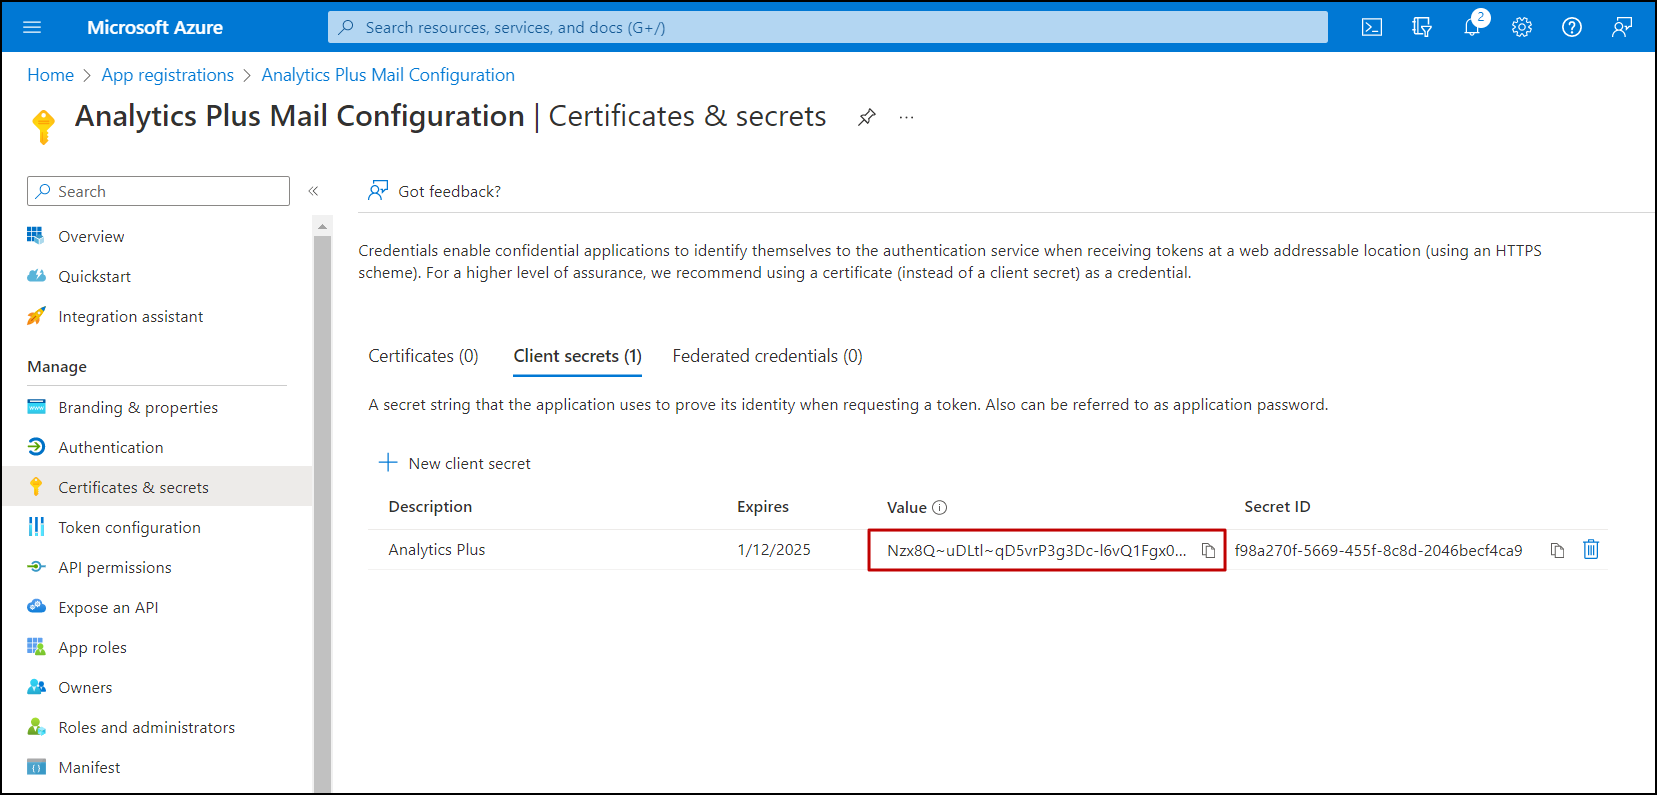
Copy the Client Secret.
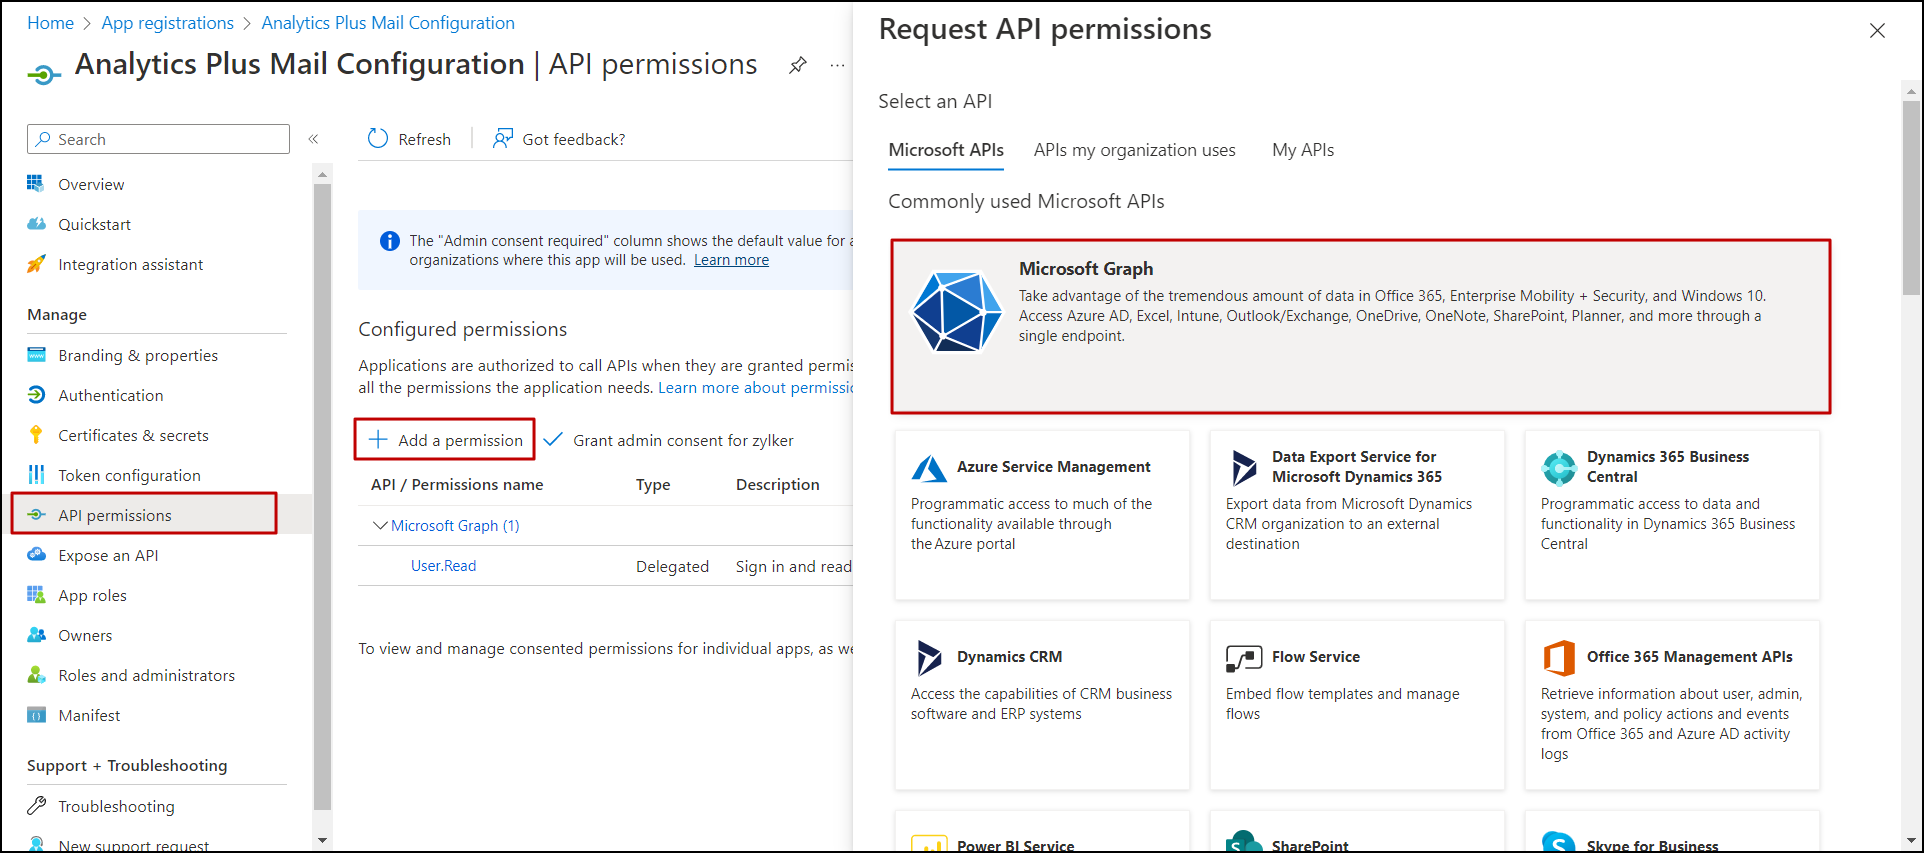
- Click the API permissions option from the left pane and click + Add a permission.
In the pop-up that appears, click Microsoft Graph.
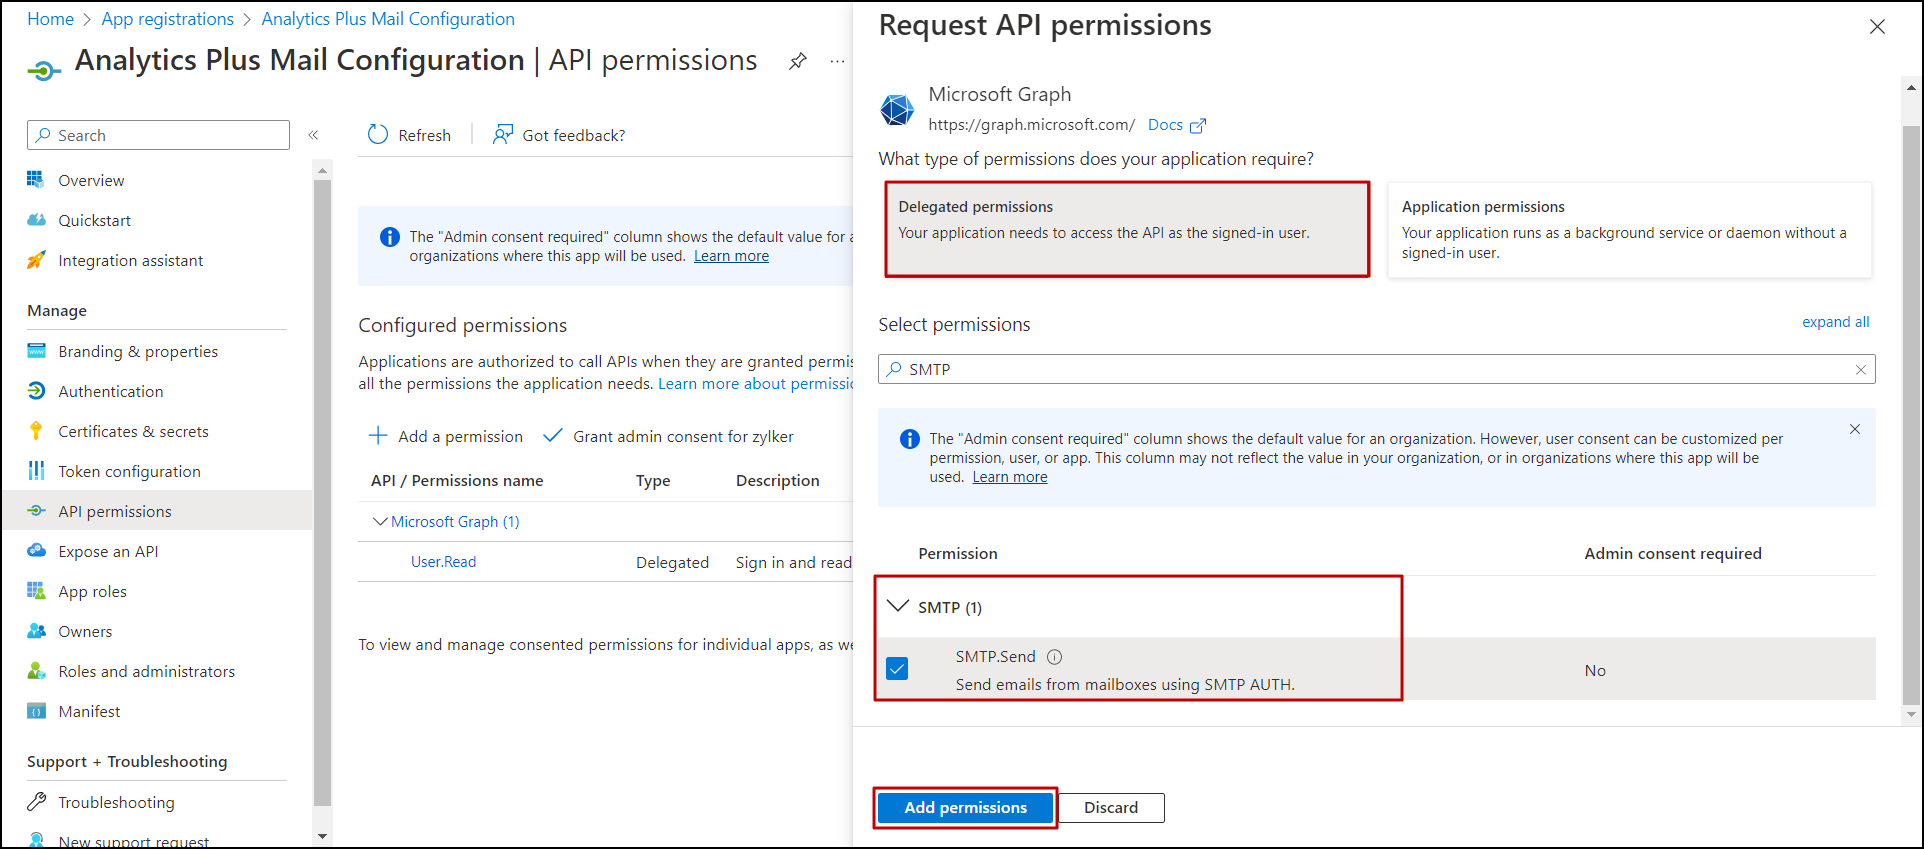
- Choose Delegated permissions, search and enable SMTP permission.
Click Add permissions.
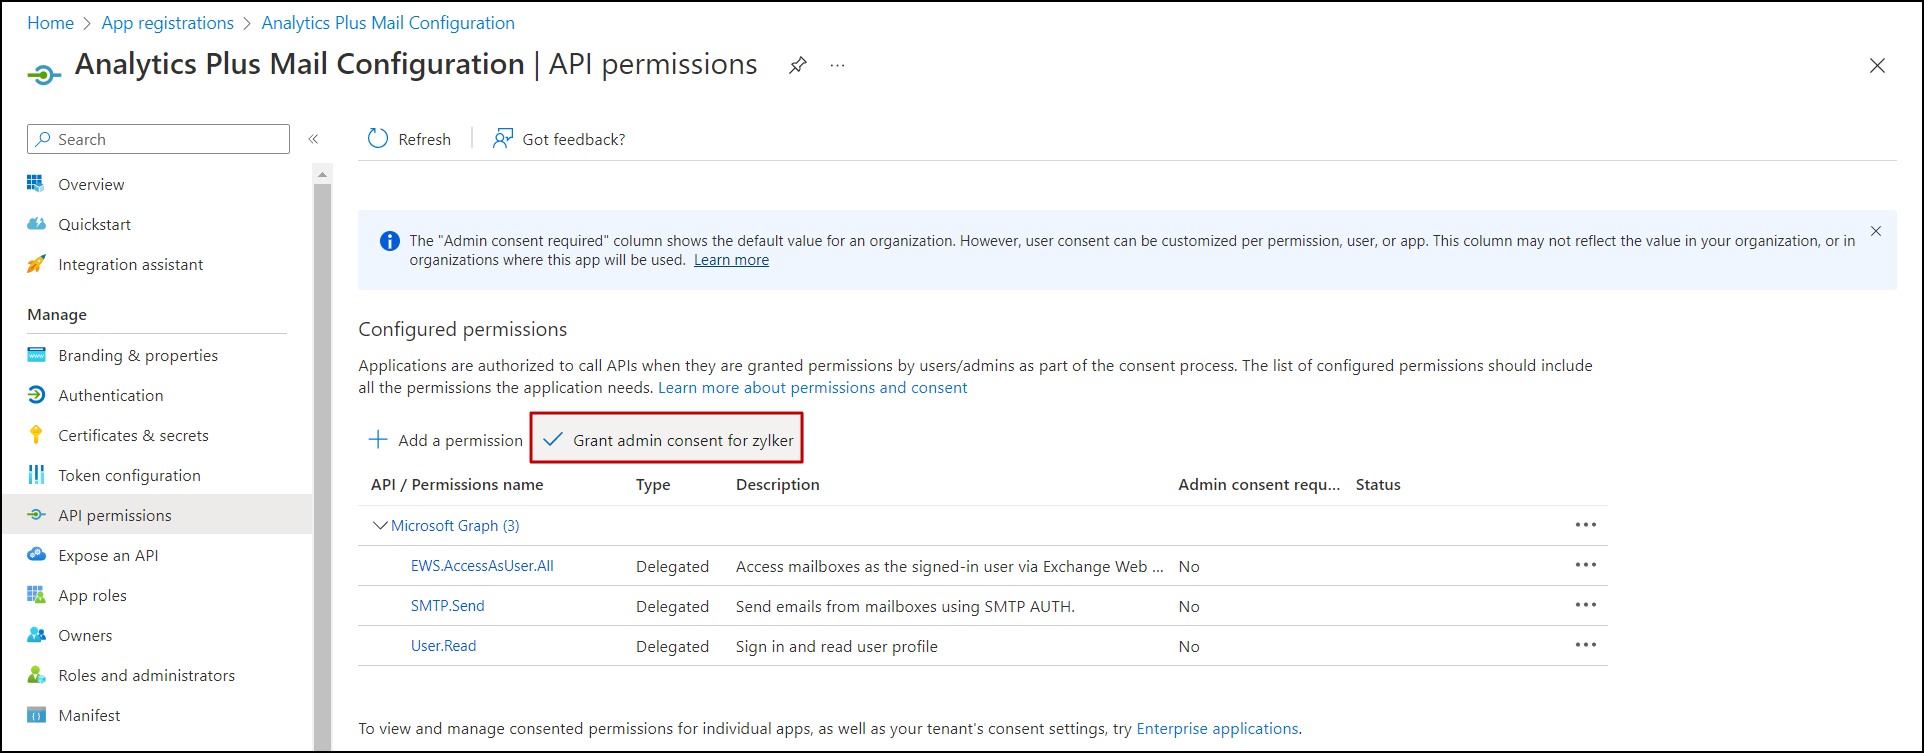
In the page that appears, click Grant admin consent to grant admin consent for the configured application only if the user consent for the application is configured as Do not allow user consent in the User Consent Settings page.


Configure the required information in Zoho Analytics
- Open the Zoho Analytics application and head to the Settings > Configuration > Mail Server Configuration tab.
- Choose the SMTP radio button and OAuth from the Authentication Type dropdown.
- Provide the server name and port number based on the selected authentication server.
- For G Suite: smtp.gmail.com and 587.
- For Azure: smtp.office365.com and 587.
- Enter the email address to be used as the FROM address.
- Provide the username of the chosen authentication server.
- Provide the required Authentication Server Details of G Suite or Azure.
- Enter the Scope based on the selected authentication server.
- For G Suite: https://mail.google.com.
- For Azure: https://outlook.office365.com/SMTP.Send offline_access.
- Select the TLS Enabled checkbox to allow TLS support in the mail server configuration.
- Enable the SSL Enabled checkbox to have a secure SSL connection while delivering emails.
- Click Save to save the configuration.


Exchange Web Services (EWS)
Follow the steps below to configure the EWS mail server:
- Open the Zoho Analytics application and head to the Settings > Configuration > Mail Server Configuration tab.
- Choose the EWS radio button.
- Copy the Redirect URL and paste it in a separate file. You will need this in the following step.
Log in to the Microsoft Azure portal, search and click the App registrations option.
In the page that appears, click + New registration.
- Provide a name for the app and choose the required account type.
- Head to the Redirect URI section, and choose Web from the select platform dropdown.
- Enter the redirect URL copied from Zoho Analytics earlier.
Click Register. Save the following values in a separate file. You need to configure these values in Zoho Analytics.
In the page that appears, copy the Application ID (Client ID).
Click the Endpoints link and copy the OAuth 2.0 authorization endpoint (v2) (Authorization URL) and OAuth 2.0 token endpoint (v2) (Token URL).
- Click the Certificates & secrets option from the left pane, and click + New client secret.
In the dialog that appears, provide a description and expiry date for the client secret, and click Add.
Copy the Client Secret.
- Click the API permissions option from the left pane and click + Add a permission.
In the pop-up that appears, click Microsoft Graph.
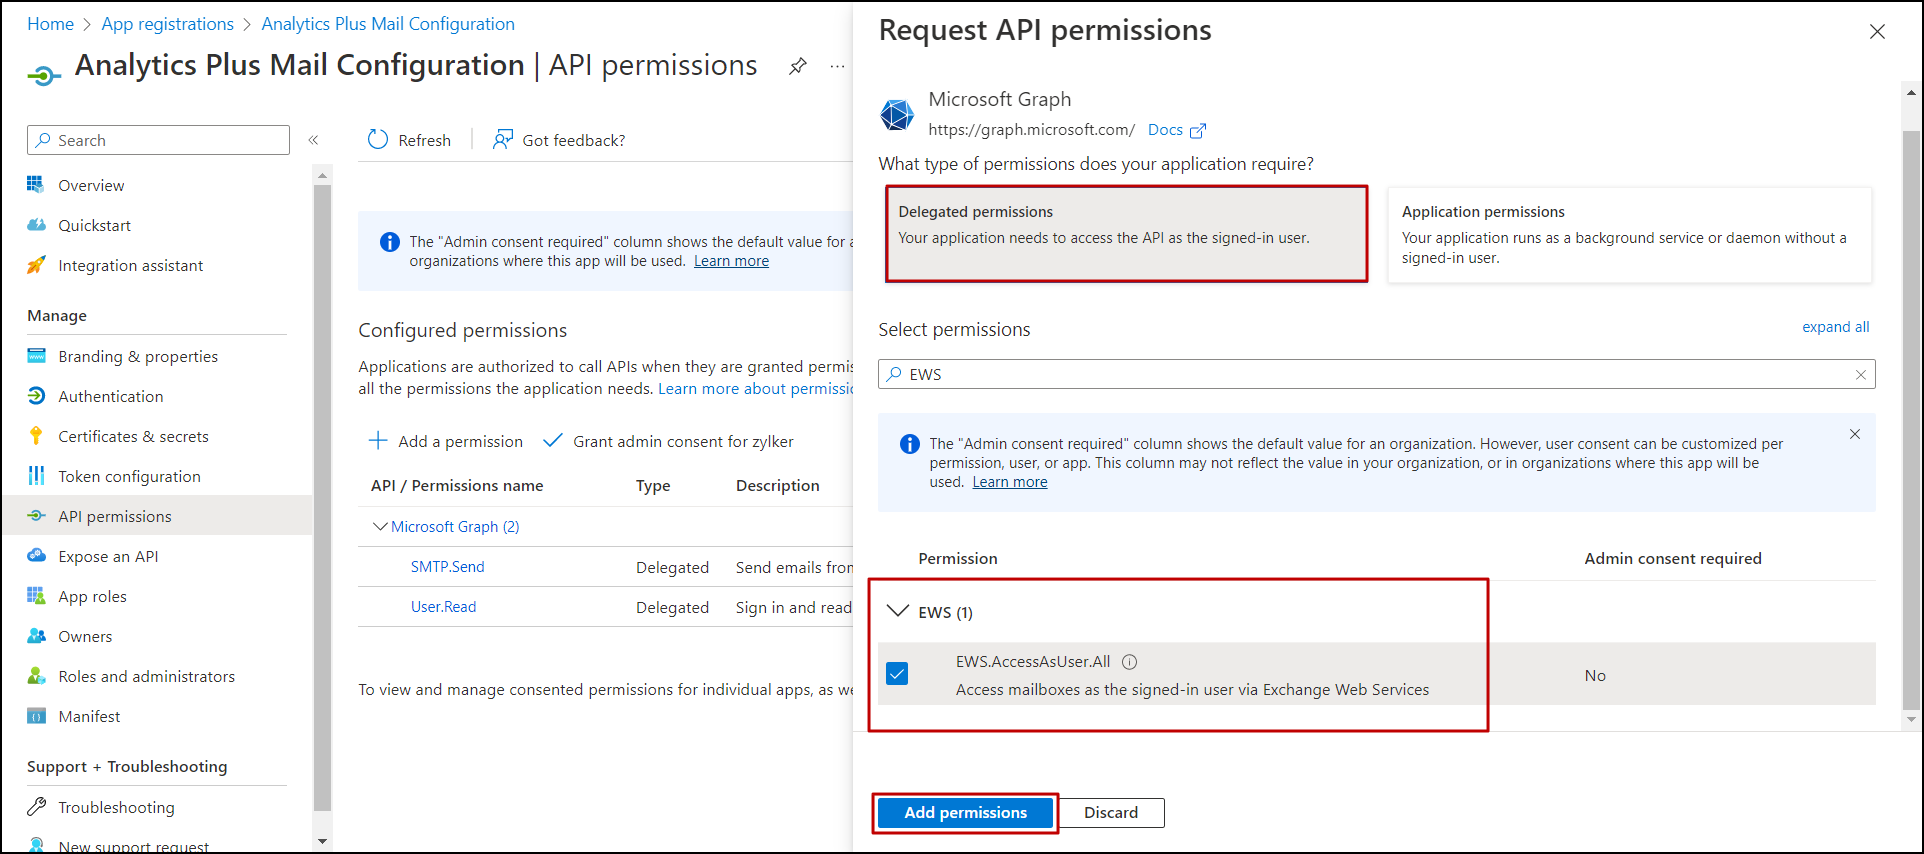
- Choose Delegated permissions, search and enable EWS permission.
Click Add permissions.
In the page that appears, click Grant admin consent to grant admin consent for the configured application only if the user consent for the application is configured as Do not allow user consent in the User Consent Settings page.
- Return to the Zoho Analytics console, and enter the following Exchange server URL: https://outlook.office365.com/EWS/Exchange.asmx.
- Provide the username of the EWS authentication server.
- Enter the email address to be used as the FROM address.
- Provide the required Authentication Server Details copied from the Microsoft Azure portal.
- Enter the following Scope: https://outlook.office365.com/EWS.AccessAsUser.All offline_access.
- Select the TLS Enabled checkbox to allow TLS support in the mail server configuration.
- Enable the SSL Enabled checkbox to have a secure SSL connection while delivering emails.
- Click Save to save the configuration.


Microsoft Graph
Microsoft Graph helps Zoho Analytics connect with Microsoft services using OAuth 2.0 and enables mailbox access and email delivery, based on the permissions granted in Azure. Follow the steps below to configure the Microsoft Graph:
- Open the Zoho Analytics application and head to the Settings > Mail Server Configuration tab.
- Choose the EWS radio button.
- Copy the Redirect URL and paste it in a separate file. You will need this in the following step.
- Log in to the Microsoft Azure portal, search and click the App registrations option.

- On the page that appears, click + New registration.

- Provide a name for the app and choose the required account type.
- Head to the Redirect URI section, and choose Web from the select platform dropdown.
- Enter the redirect URL copied from Zoho Analytics earlier.
- Click Register. Save the following values in a separate file. You need to configure these values in Zoho Analytics.

- In the page that appears, copy the Application ID (Client ID).

- Click the Endpoints link and copy the OAuth 2.0 authorization endpoint (v2) (Authorization URL) and OAuth 2.0 token endpoint (v2) (Token URL).

- Click the Certificates & secrets option from the left pane, and click + New client secret.
- In the dialog that appears, provide a description and expiry date for the client secret, and click Add.

- Copy the Client Secret.

- Click the API permissions option from the left pane and click + Add a permission.
- In the pop-up that appears, click Microsoft Graph.

- Choose Delegated permissions and from the permissions list, select the following Microsoft Graph permissions :
- Mail.ReadWrite
- Mail.Send.Shared
- offline_access
Mail.ReadWrite

Mail.Send.Shared

offline_access

- Click Add permissions and continue with the configuration.

- On the page that appears, click Grant admin consent to provide admin consent for the configured application. To know more about the User Consent, please click on this link.

- Return to the Zoho Analytics console and navigate to Settings>>Configuration>>Mail Server Configuration.

- For Microsoft Graph, the Graph Endpoint and Scopes are predefined and recommended for use.
- Provide the Username of the Azure account in the Username field.
- In the Email Address field, enter the email address used to sign in to Azure or any email address listed in the Users section of the Azure account. To access the Users page in Azure, search for Users in the search box to view the list of available users.
- Provide the required Authentication Server Details copied from the Microsoft Azure portal as explained above.
- Click Save to save the configuration.