Import Data from Intranet URL
Most mid to large organizations have private networks, and lots of data keeps getting collected and transferred within the network. Zoho Analytics provides flexible options to import such data and large files securely for analysis, using Zoho Databridge.
Data Import
Supported Formats
Intranet files of the below formats are supported.
- CSV, TSV
- JSON
- XML
Setup - Import data from an intranet URL
Dynamic File Path
Many applications generate file names based on various naming conventions, and the file paths are determined by the directories, the date, and the time when the file was created. These file paths follow a pattern.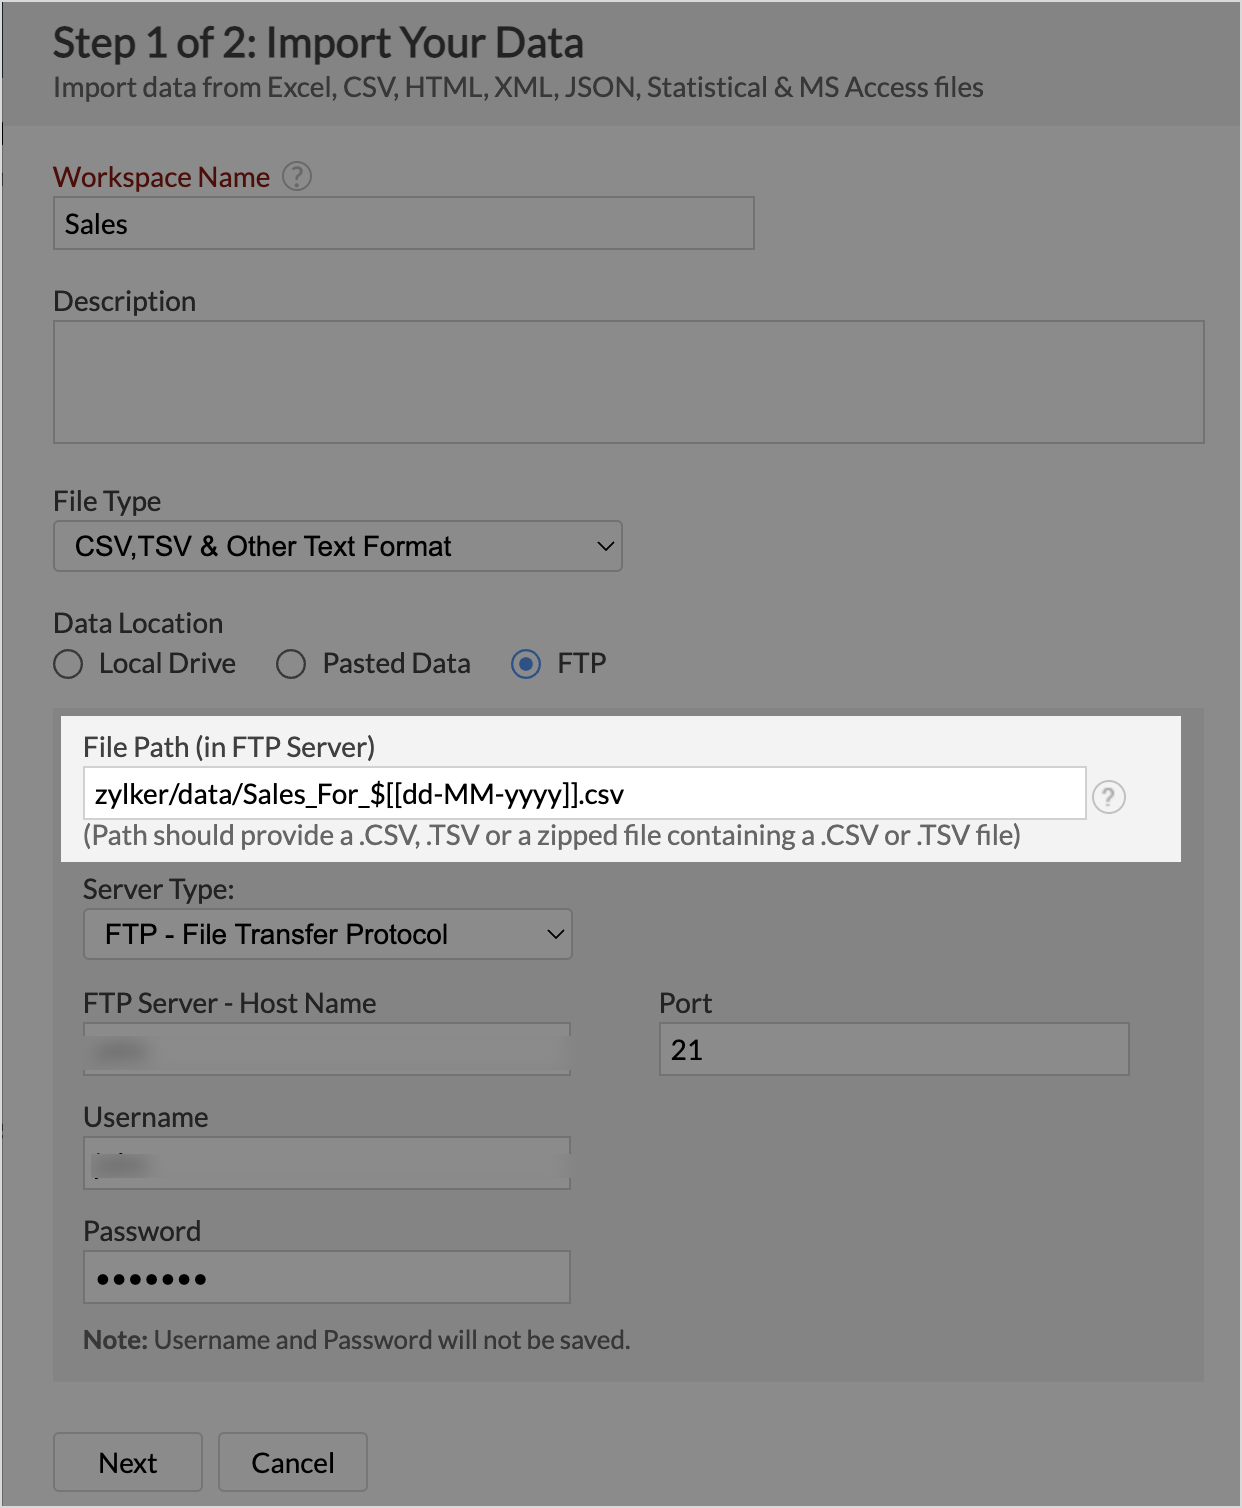
Zoho Analytics allows you to specify the pattern of the file name (like the current date) in the file path to facilitate data import. This will be helpful when there is an import scheduled, as the file path will be replaced based on the current date and fetch records accordingly.
Parameters
Zoho Analytics allows you to specify parameters to import data.
Get Method: In this method, the parameters are appended to the URL and passed as part of the request. Click Add Parameter to use multiple parameters. The parameter values can be dynamic such as Current Date, Current Time, Current Date, and Time.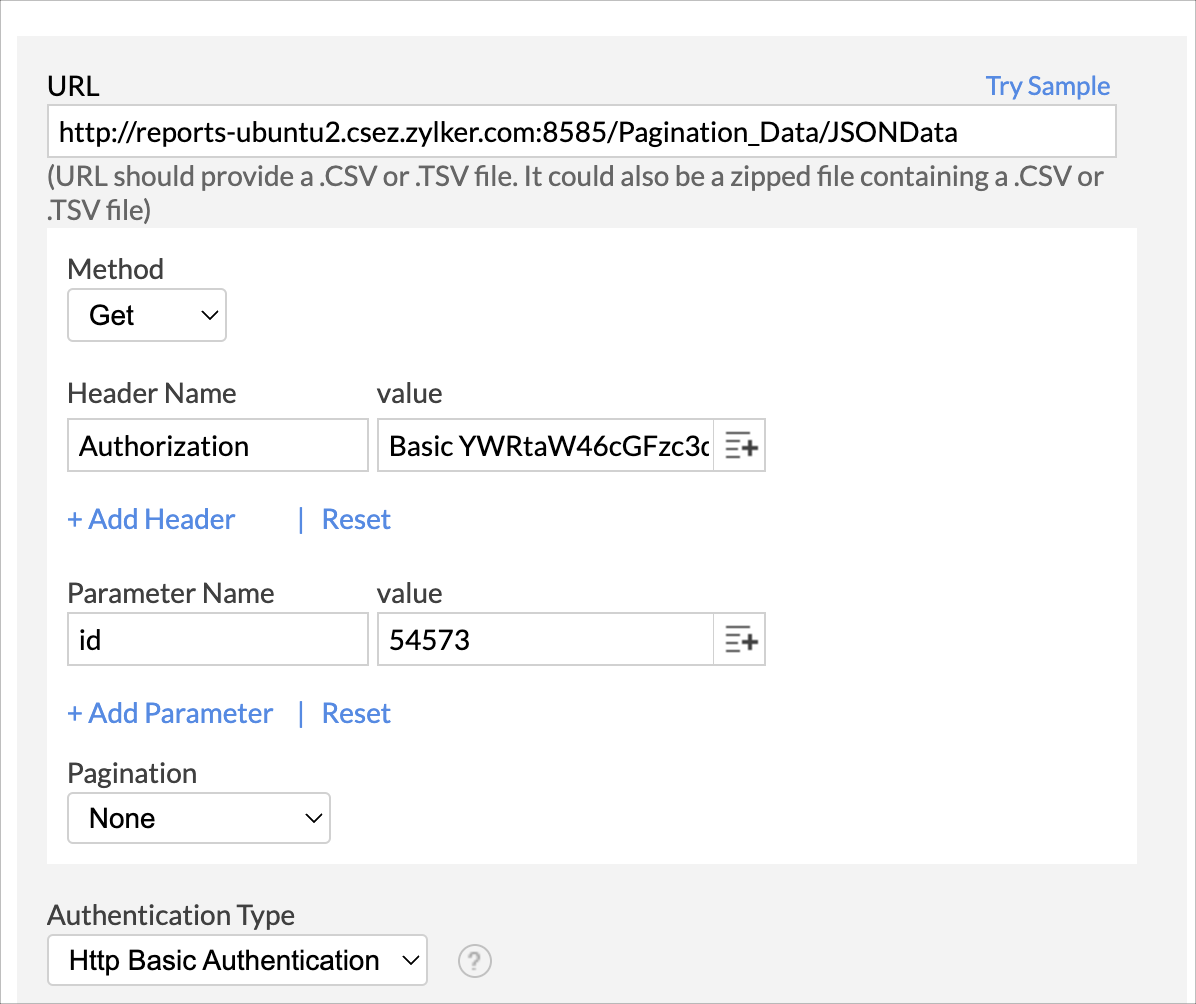
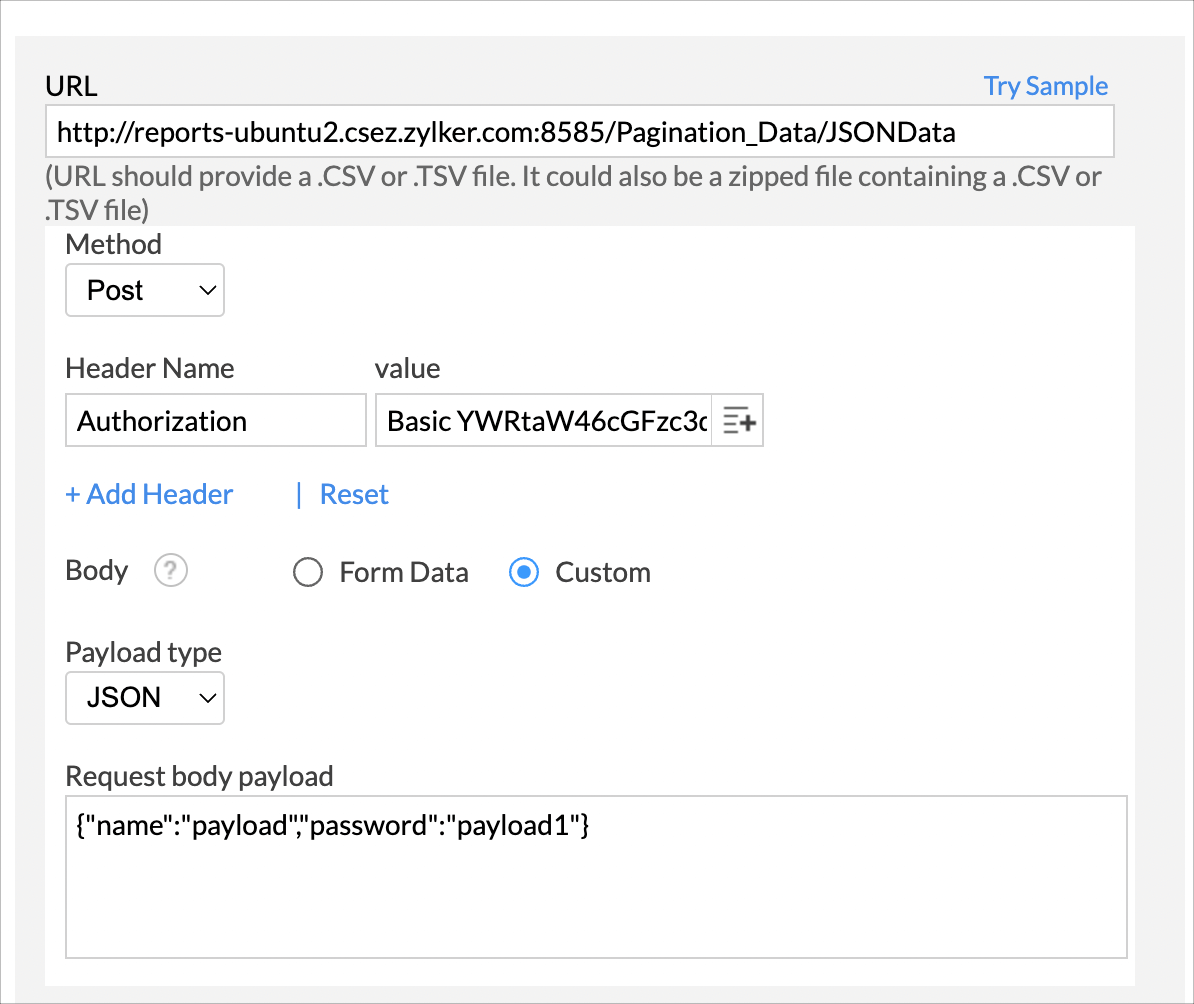
Post Method: In this method, the parameters are passed in the body of the request URLs.
- Form Data: Specify the Parameter Name and Value.
- Payload: You can also import data using payload. You can send the raw payload data (like JSON, XML) in the body of the request.The parameter values can be dynamic such as Current Date, Current Time, Current Date and Time.

Pagination
Zoho Analytics allows you to import data in batches using Pagination. The following are the pagination options available in Zoho Analytics
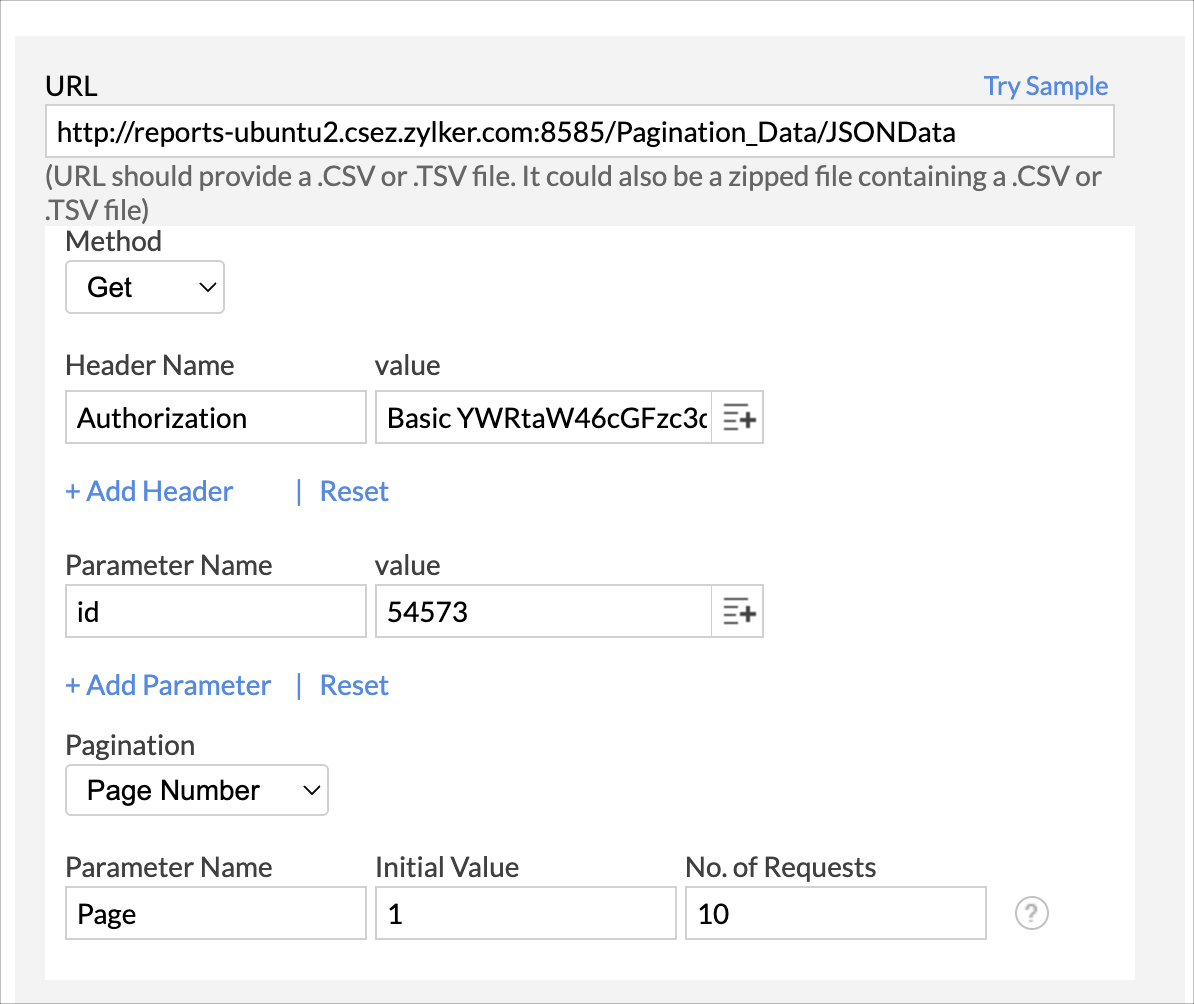
Page Number: This option can be used when the data is stored in multiple pages and you want to import them in the same sequence into Zoho Analytics.
Provide the following details in the Pagination section when using this option:
- Parameter Name: Enter the Parameter Name.
- Initial Value: Enter the Page Number from which you wish to import the data.
- No. of requests: Enter the number of requests you want to execute in sequence.

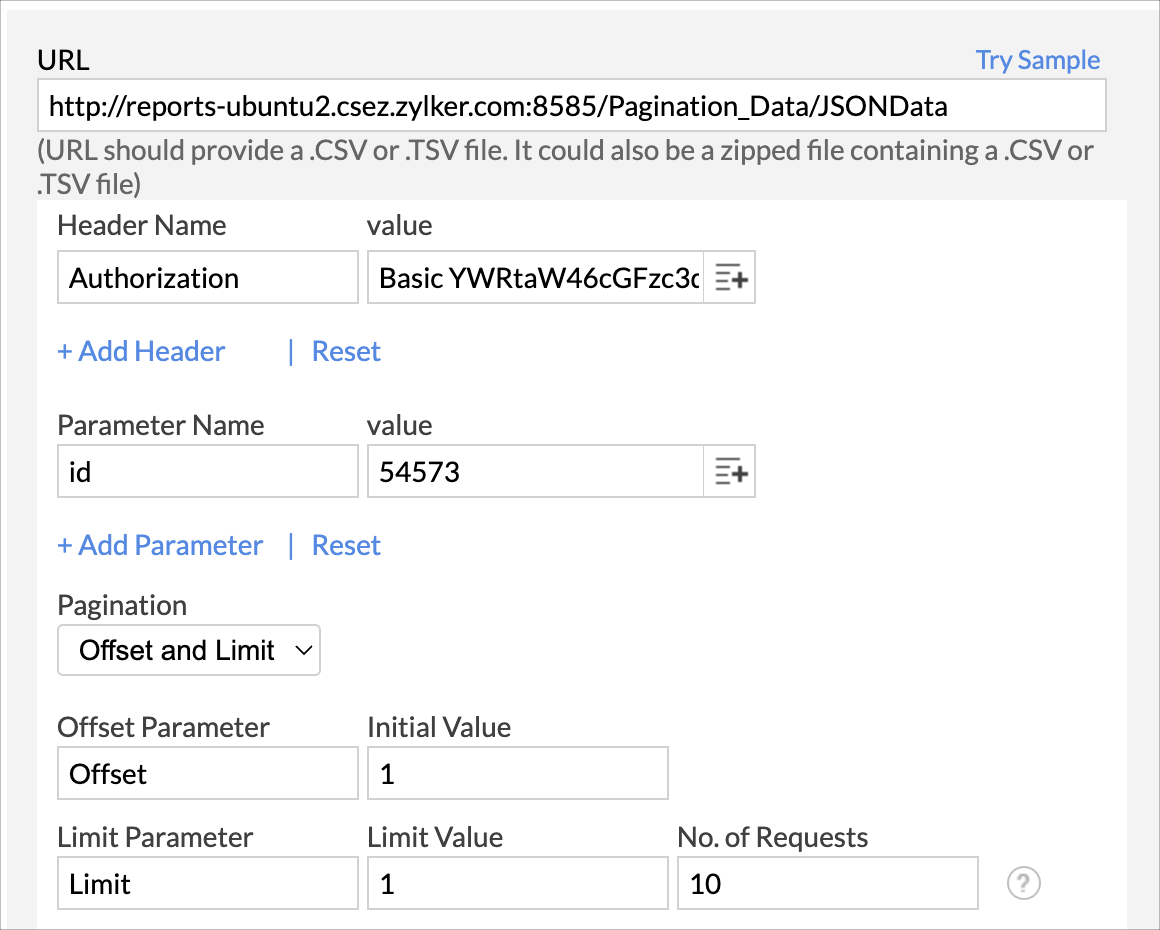
Offset and Limit: This option can be used when you have a huge dataset and want to import them in batches.
Provide the following details in the Pagination section when using this option:
- Offset Parameter: Enter the Offset Parameter Name
- Initial Value: Enter the initial value of offset.
- Limit Parameter: Enter the Limit Parameter Name.
- Limit Value: Enter the total number of records to be fetched from the offset.
- No. of Requests: Enter the number of sequential requests to be made.

Next Page URL
This option can be used when the date in each page provides the URL for the next page. Provide the following details in the Pagination section when using this option:
URL Property Path: Enter the URL Property Path that will fetch the URL of the next page.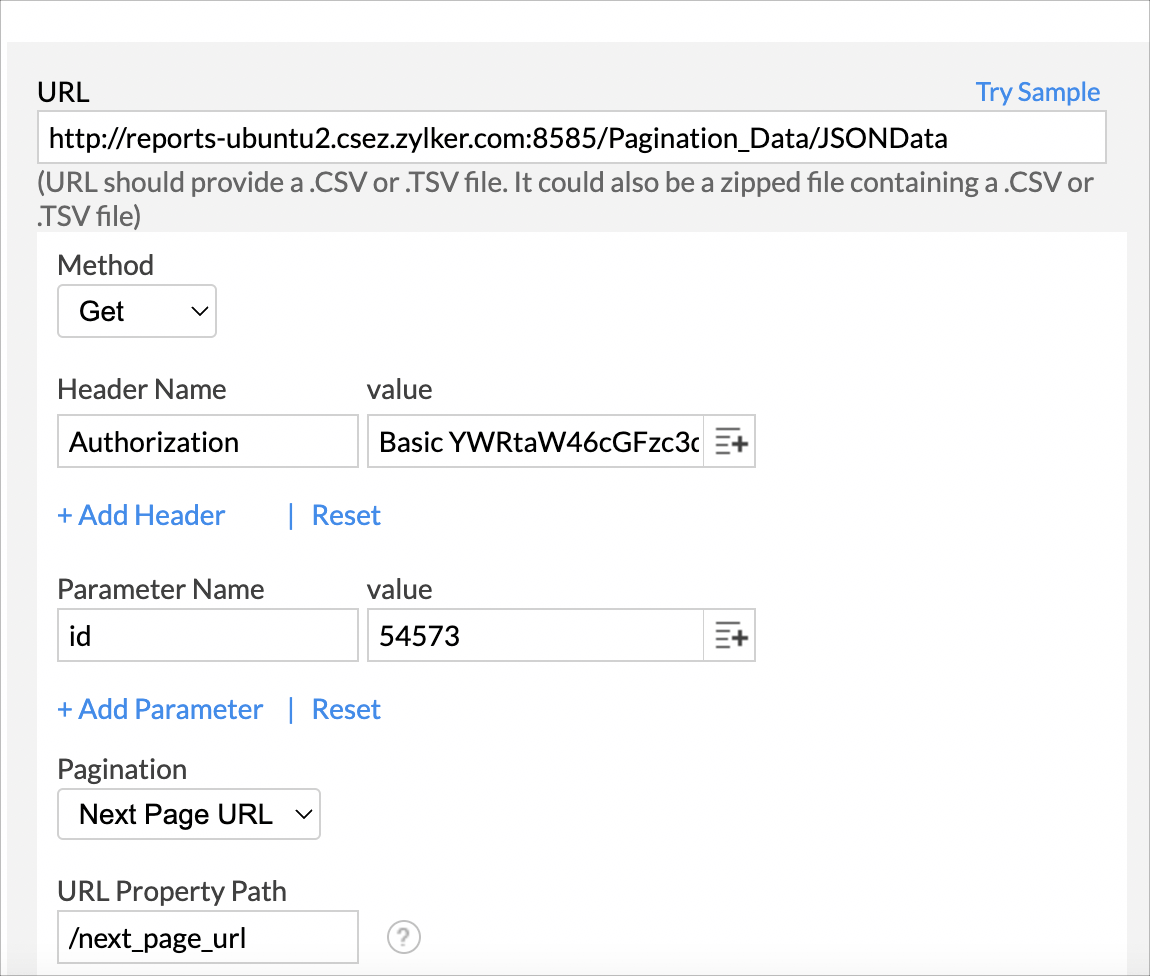
Data Blending
Zoho Analytics allows you to import data from diverse sources for faster and deep analysis.
Import data into an existing Workspace
Zoho Analytics allows you to define lookup for tables while importing the data. Click here to learn more about joining tables.
To import data into an existing workspace,
- Open the workspace into which you intend to import the data.
- Click Create > New Table/Import Data.
- Choose Import from Intranet URL from the listed sources.
- Paste the URL of the file you want to import. Refer to this presentation to know more.
- Select the file to import and click Next.
- The Create Table (Import) page will open. Click Join Tables to define lookups.
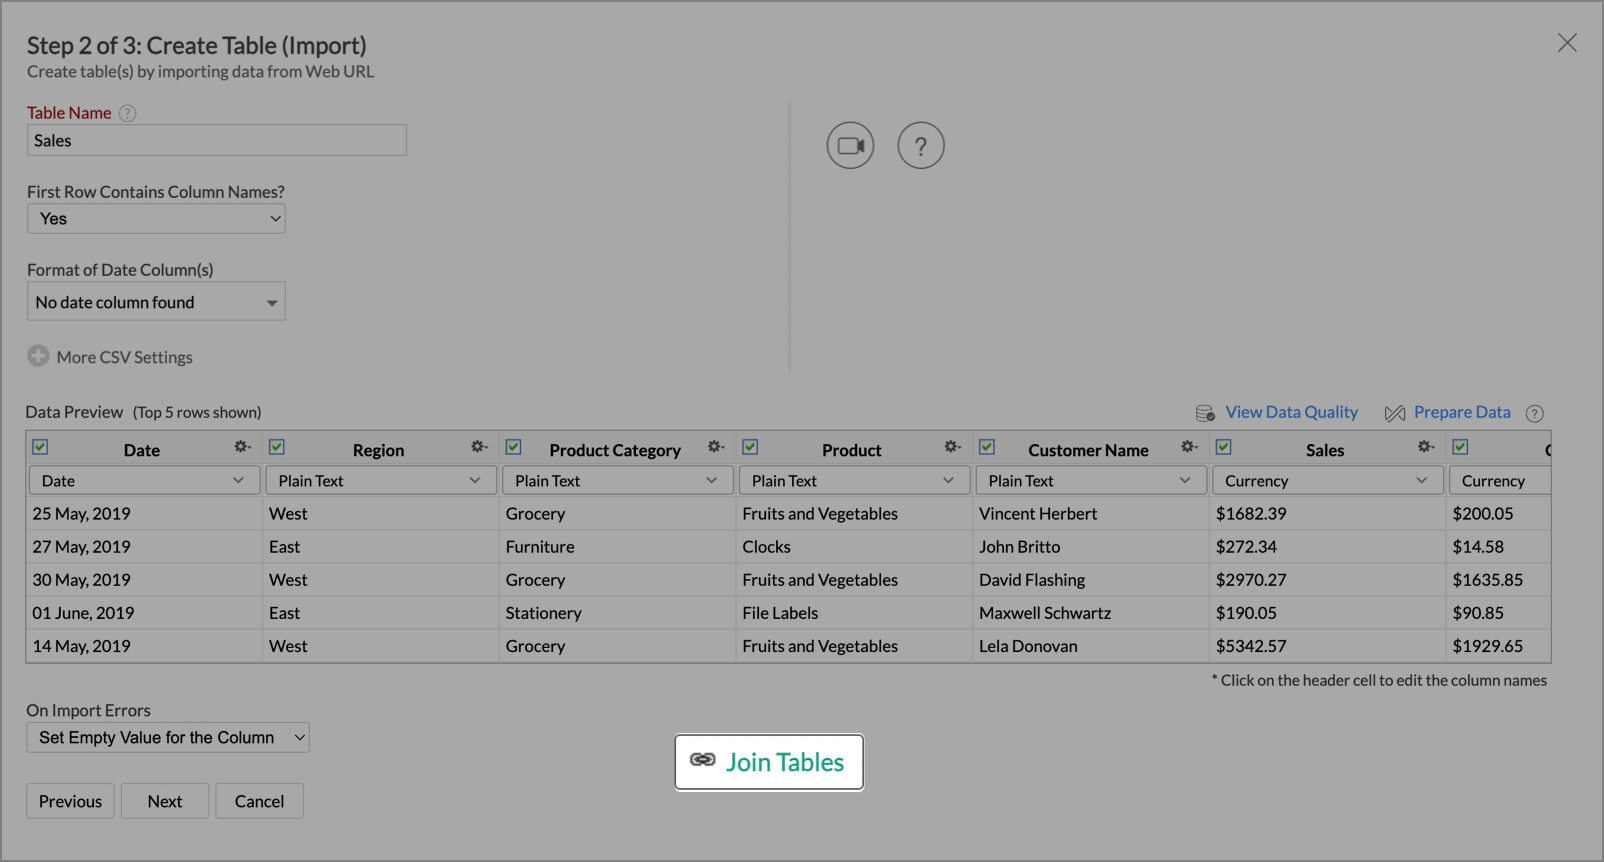
- The Join Tables - Combine the new tables with existing tables dialog will open.
- Select the columns and specify the relation to be defined.
- Click Save & Close.

Import Data into an Existing Table
Zoho Analytics allows you to import data into an existing table. You can import data from the same source or from a different source.
To import data into an existing table,
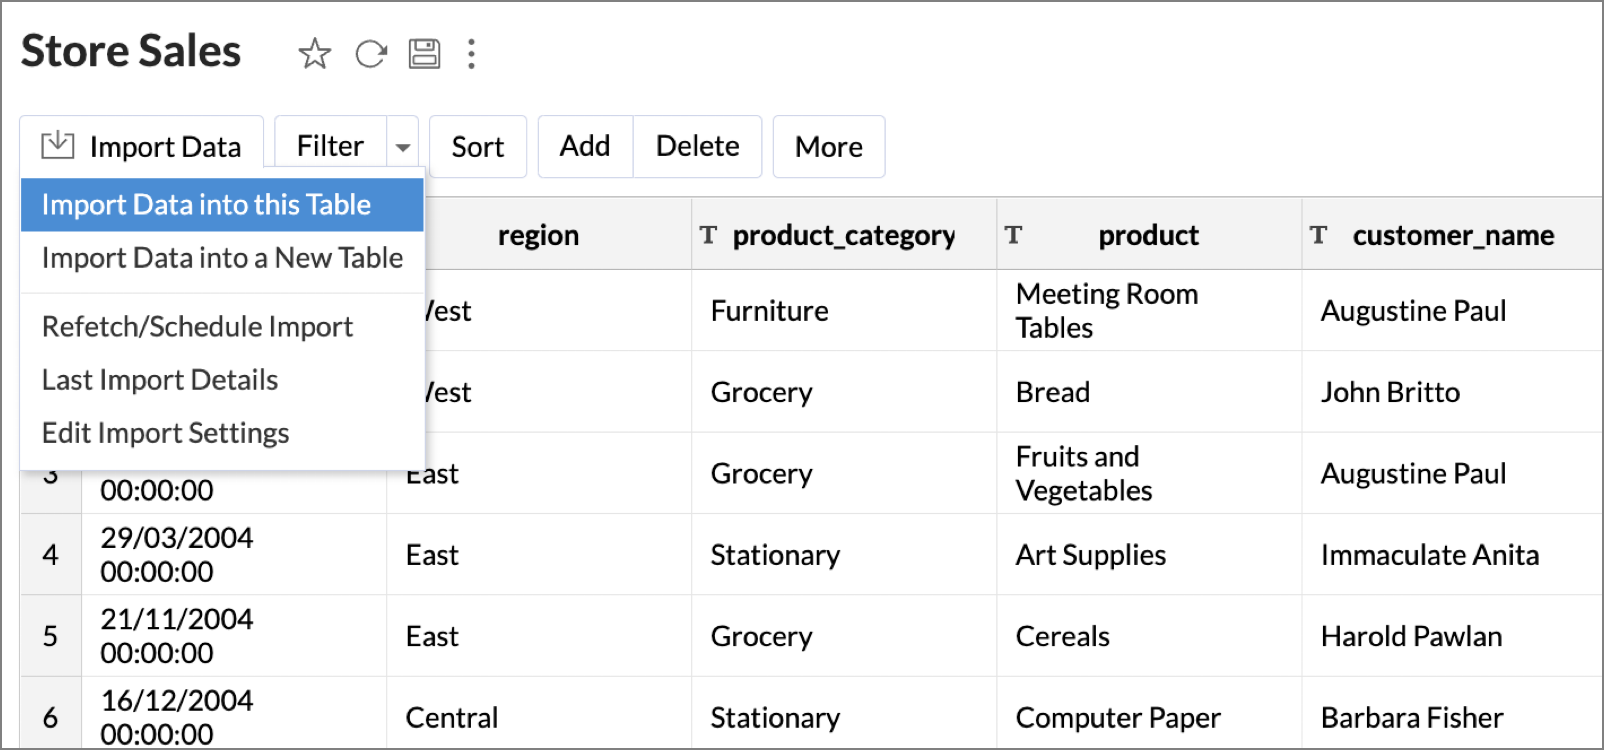
- From the required table, click Import Data > Import Data into this Table.
- The Import Your Data tab will open, listing the relevant data sources.
- Choose Import from Intranet URL from the listed data sources.
- Paste the URL of the file you wish to import
- Select How do you want to import the data and click Next.

- The Import settings tab will open. By default, Zoho Analytics will map the corresponding column headers of the existing table with the table that is set for import. It also allows you to import data as a new column.
- Click Import.

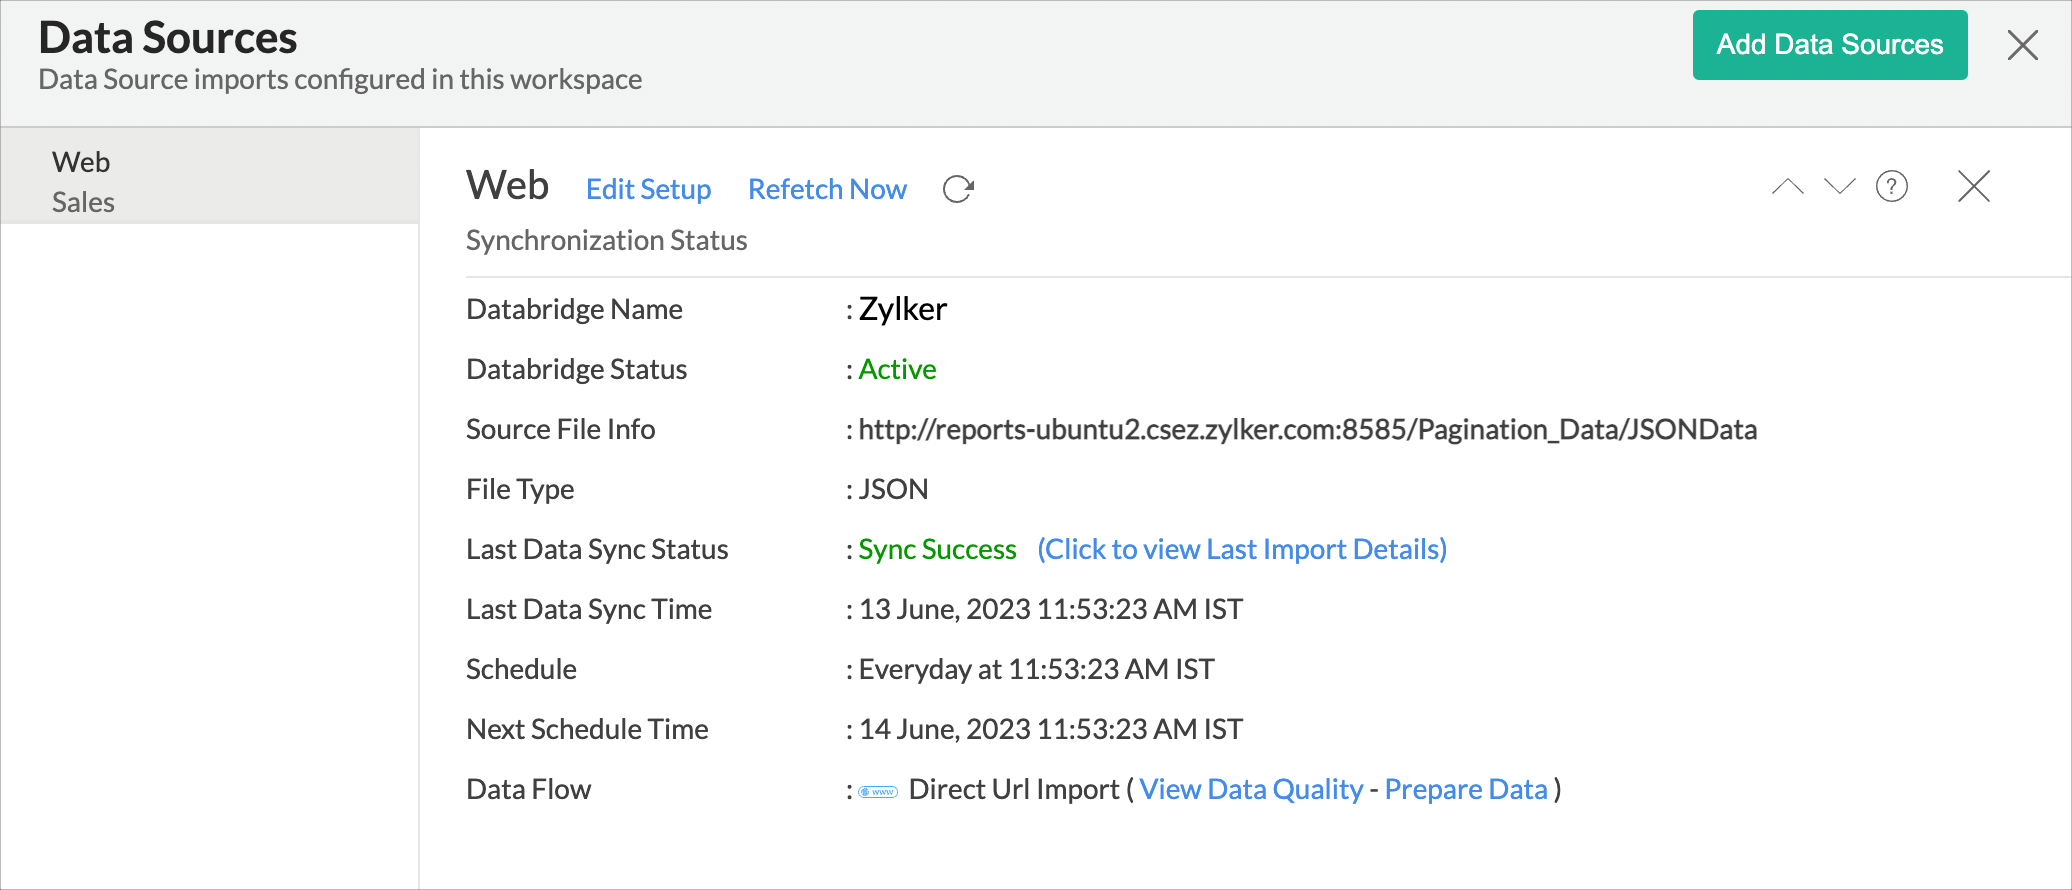
Manage Data Sources
You can view the details of the imported data, such as the Last Sync Status, Next Schedule Time, Databridge Status, and modify the configured settings if needed using the Data Sources tab.
To access the Data Sources tab,
- Open the required workspace.
- Click the Data Sources tab from the navigation bar.
- All the data sources for this workspace will be listed. Click the data source that you want to make changes.
- Edit: Click Edit Setup to change the Schedule Settings.
- Refetch Now: Click Refetch Now to synchronize data immediately without waiting till the next schedule interval.