Collaborate with users via Zoho Cliq
Zoho Analytics integrates with Zoho Cliq to enable easy collaboration amongst the members of an organization. This integration allows you to engage in organized conversations and track communication easily.
- Benefits
- Enabling Cliq Integration
- Creating Workspace specific Cliq groups
- Share reports to Cliq users/channel
Benefits
- Collaborate within a single app: Use Zoho Cliq within Zoho Analytics without switching between applications.
- Dedicated Channels: Have a Cliq group for each Zoho Analytics workspace, so that its members can have discussions about that particular workspace.
- Easy sharing: Share reports with other users or channels in the organization.
Enabling Cliq Integration
A user with administrator privileges (Account and Org admins) can enable the Zoho Cliq integration. Follow the below steps to enable Zoho Cliq integration:
- Click the Organization Settings icon on the top right.
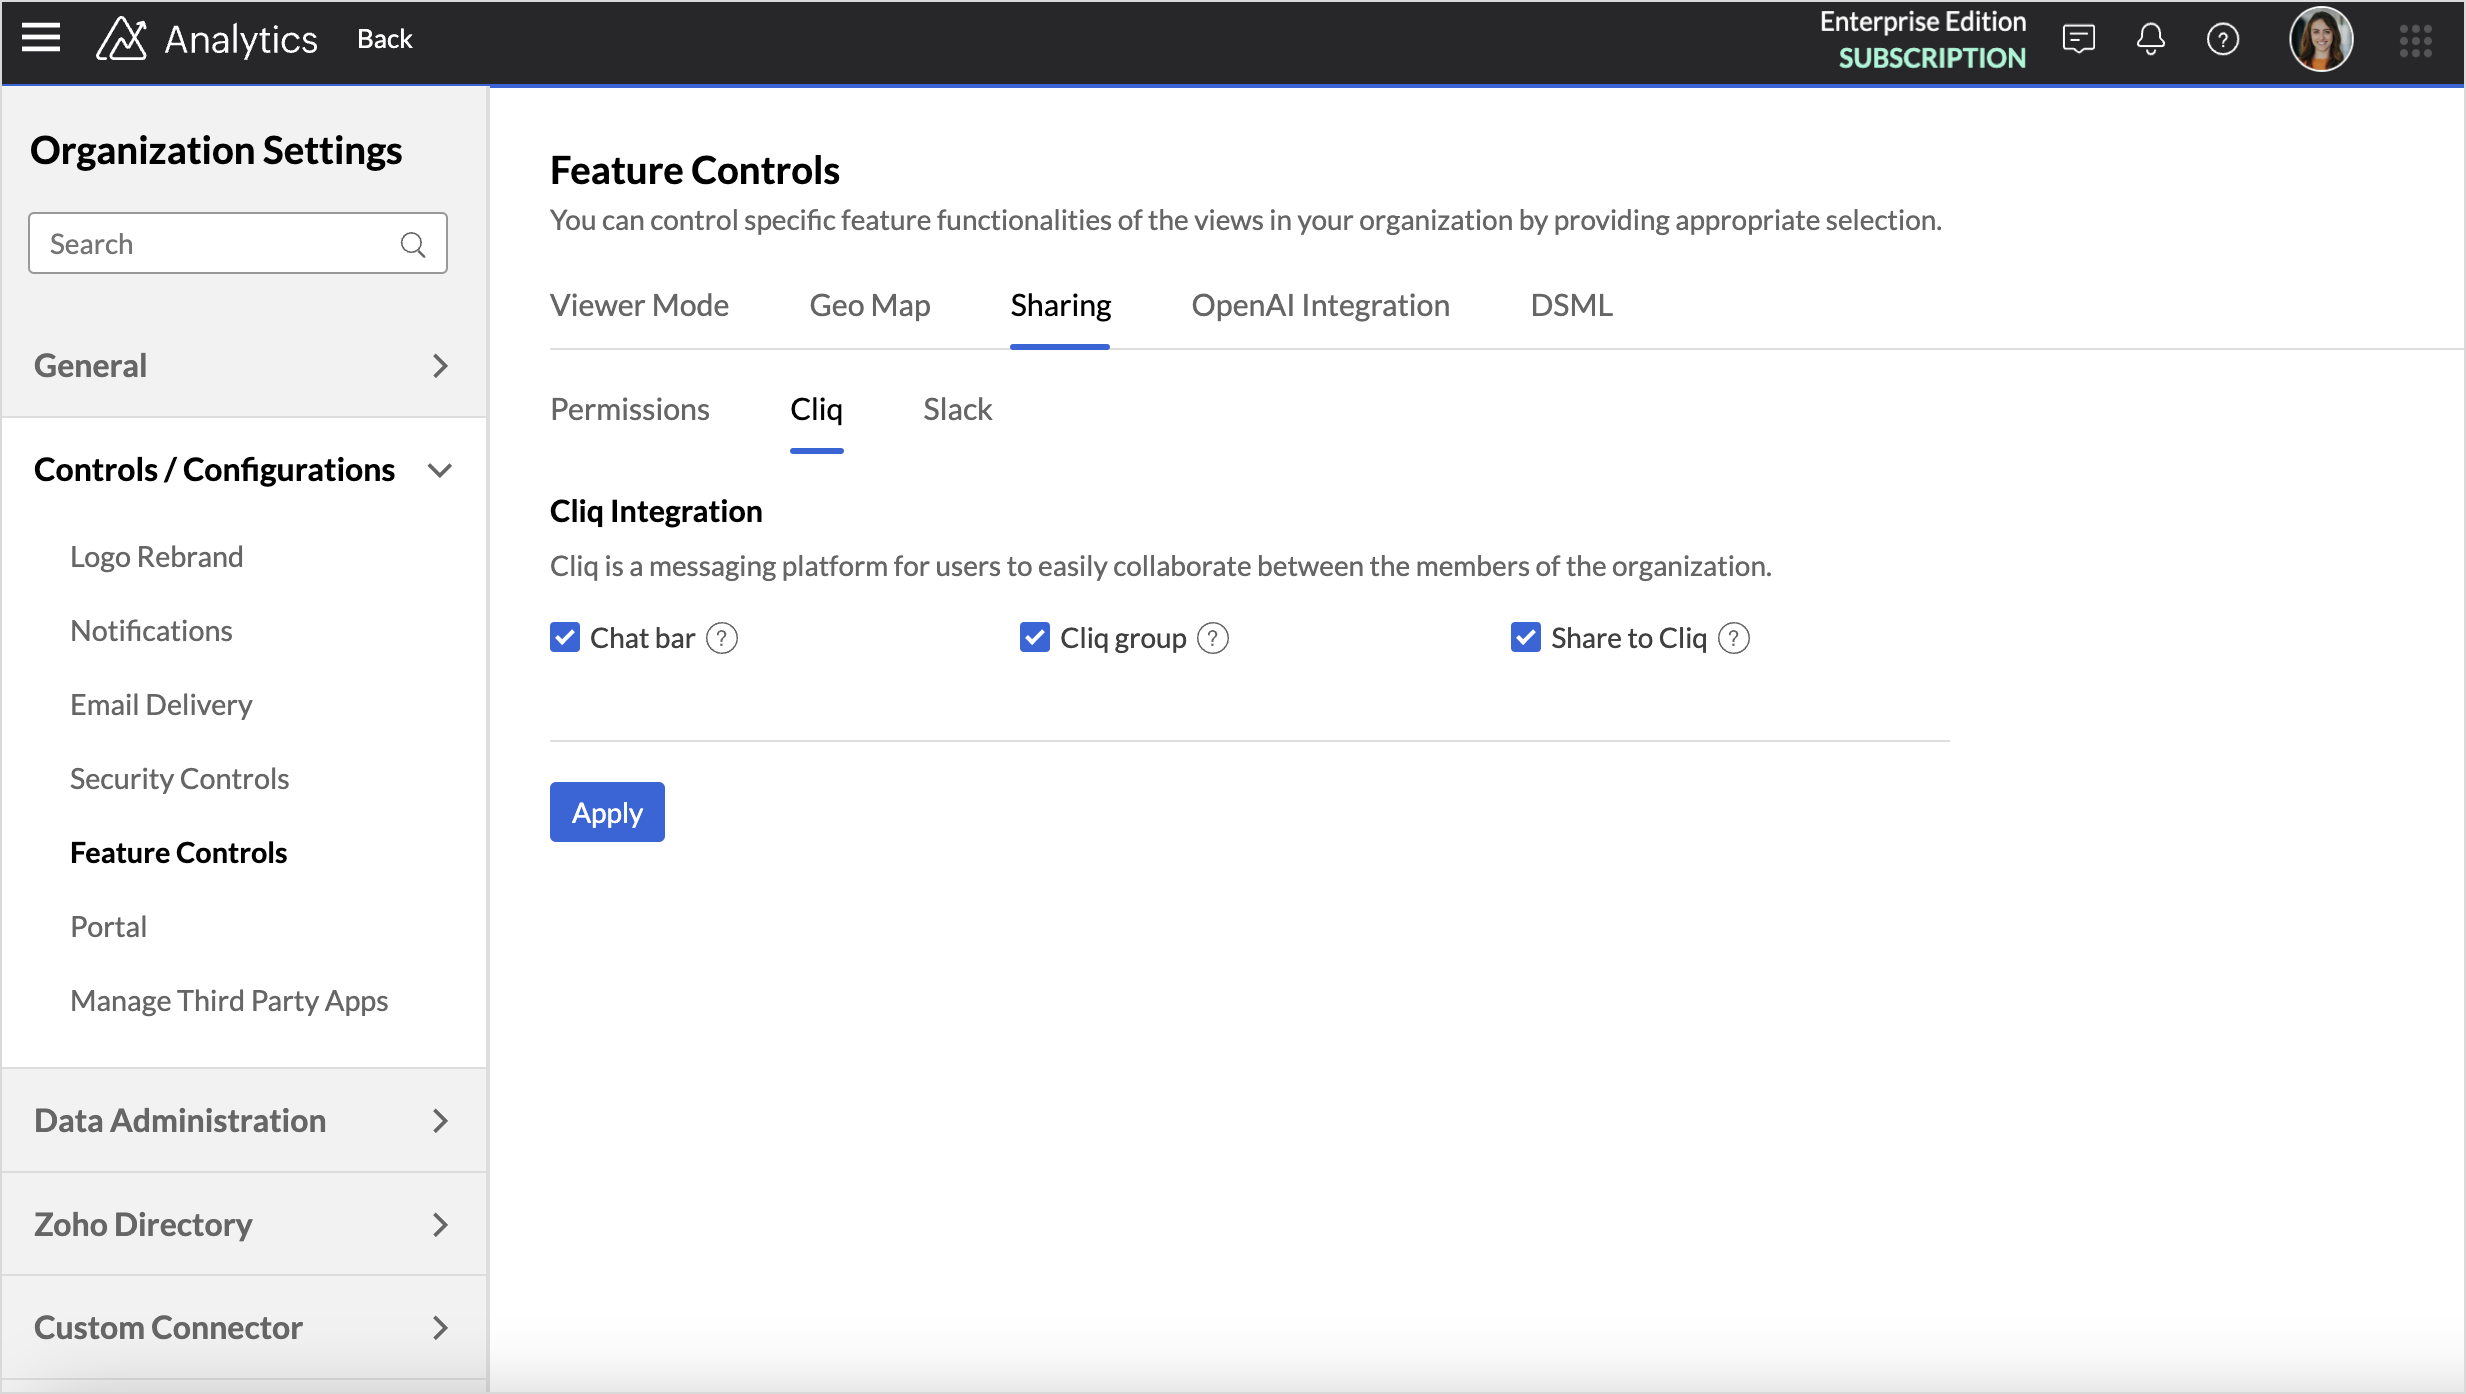
- Click Controls/Configurations > Feature Controls > Sharing > Cliq
- In the Cliq Integrations section,
- The Chat bar option enables you to use Zoho Cliq within the Zoho Analytics application. This helps to collaborate with other users in your organization, from within Zoho Analytics itself.
- The Cliq group option allows you to create workspace specific groups to discuss key points.
- The Share to Cliq option helps you to send reports to a non Zoho Analytics user in various formats like CSV, excel, images and PDF.

Creating Workspace specific Cliq groups
Enabling the Cliq group creates a channel exclusive for the workspace members to communicate and share updates.
To activate the workspace specific Cliq group,
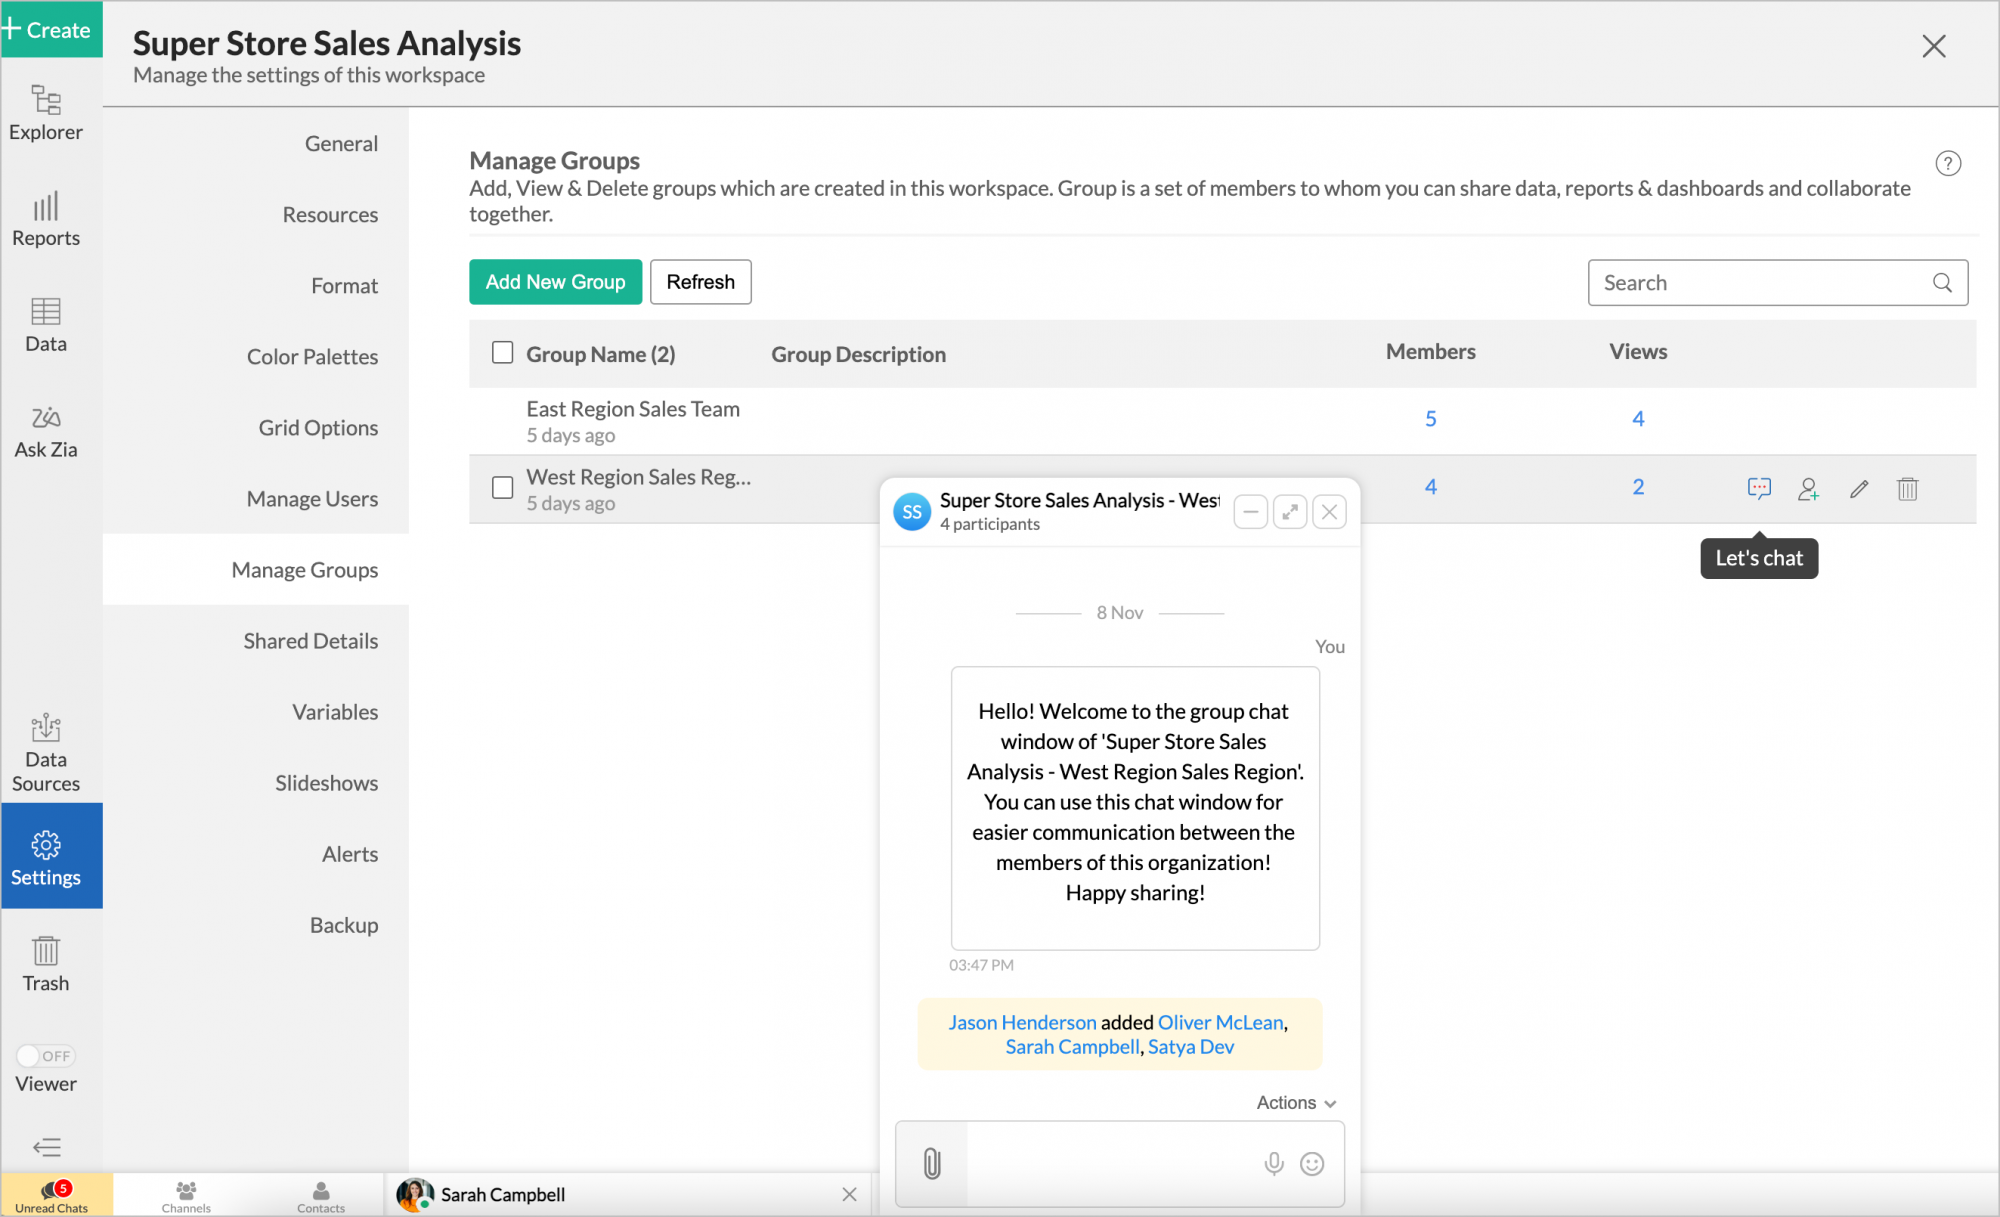
- From Explorer, click the Settings tab.
- Click the Manage Groups tab.
- Hover the mouse over the group for which you want to create a Cliq (chat) group.
- Click the Cliq icon that appears.
- A Cliq group will then be created. Now, you can start conversing with your group's members. Refer to Manage workspace groups for more information.
Share Reports to Cliq
Follow the below steps to share reports to any person in the organization or channels,
- Open the report in view mode and click Share.
- Choose Cliq from the drop-down menu.
- Select the format in which you wish to share the report.
- In the Notify To field, choose Users or Channels.
- Click Pick users to choose the members with whom the report should be shared.
- All the ID's of the members of the organization will be listed. Click the Add icon to select users.
- Click Pick Channels to choose the channels with whom the report should be shared.
- All the channels in the organization will be listed. Click the Add icon to select channels.
Click the Report Options tab to customize the settings of the file. The options displayed will be based on the selected file format.
Click Send.

