Data Alerts
To keep ahead in business you need to know every vital change in your key business metrics. Whether a goal is met, or an unexpected event happened, Data Alert brings this to your immediate attention. This helps you quickly take the right action to address the changes in the key business metrics.
Data Alert - Basic
Create a Data Alert
- How do I create a Data Alert over Charts?
- How do I create a Data Alert over Pivot Views?
- How do I create a Data Alert over Summary Views?
Data Alert Notification
Manage Data Alert
- How do I manage all the alerts available in Zoho Advanced Analytics?
- How can I edit the Data Alert?
- On what frequency the data alert will be verified?
- Can I see when the alerts that were triggered?
- Can I run the data alert instantly?
- Can I delete the Data Alert?
Data Alert - Basic
1. What are Data Alerts?
For informed business decisions, you need to know changes in your business data. When manually monitoring huge data which continues to grow everyday, you may miss vital information that needs your attention. Data alert helps you in this. This alerts you on important business changes, which you have set up as conditions, through E-mail or in-app notification. This enables you to take appropriate timely action to seize opportunities.
2. On what views can I create a Data Alert over?
You can create Data Alerts over the following views.
3. How does the Data Alert work?
The following lists basic Data Alert work flow.
- Select the report you want to track the key metrics of.
- Add alert by specifying the conditions to be verified.
- Specify how often the conditions need to be verified.
- Specify the email details
- Zoho Advanced Analytics will alert you and the receivers as and when the set conditions are met.
Create a Data Alert
1. How do I create a Data Alert over Charts?
2. How do I create a Data Alert over Pivot Views?
3. How do I create a Data Alert over Summary Views?
Creating Data Alert over a summary view will be similar to that of a chart. The applied conditions will be matched over the data cell of the Summary View.
Data Alert Notification
1. Who can be notified when alert conditions are met?
You send email notifications to any user by specifying their email address.
2. Can I mail reports as data alerts?
Yes, you can choose to add the report by selecting Include Reports. The report can be added either As Inline Message or As Attachment.
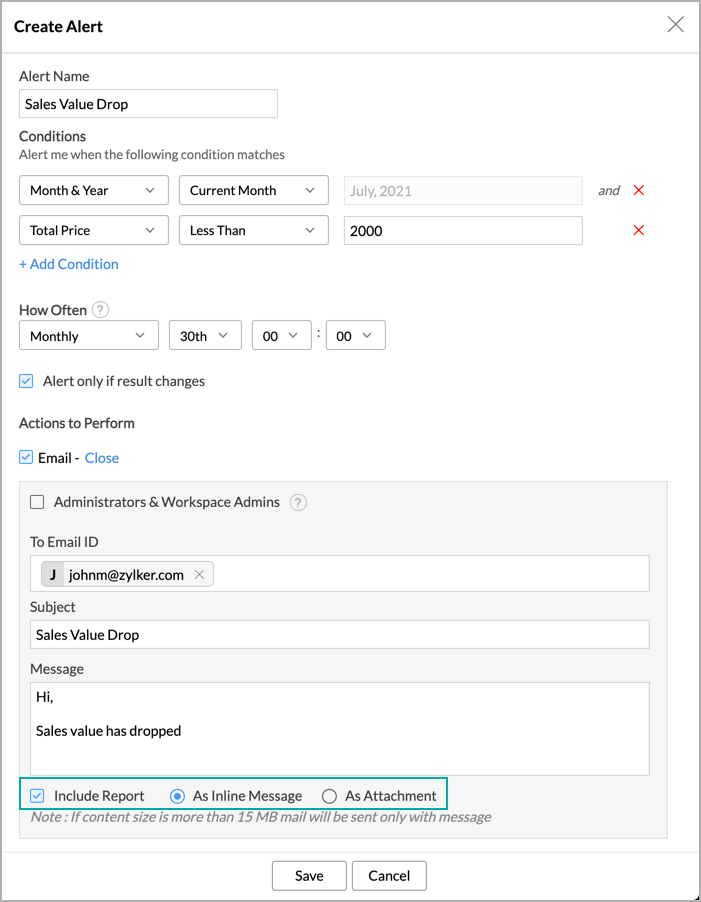
Note: The size of the attached report varies depending on the data in your current view. In case the size exceeds 15MB, the report cannot be sent. Only the notification mail will be triggered without the report.
Manage Data Alert
1. How do I manage all the alerts available in Zoho Advanced Analytics?
Zoho Advanced Analytics allows you to manage all Data Alert created in a home page on a single page for easy access.
Follow the steps to view and manage all the Alerts:
- Open the Settings page.
- Click the Alerts tab. This will list all alerts created.
- When you mouse over an alert, a list of contextual options will appear. You can perform the below operations with these options.


- Run - Click this to instantly run the alert verification.
- Edit - Click this to edit the Data Alert.
- Delete - Click this to delete the Data Alert.
- View History - Click this to view the alert triggered history.
- View Alert - Click this to view the Data Alert.
Alternatively, you can also manage all alerts created in a report. Follow the steps to view and manage all alerts in a report.
- Open the report over which the alert is created.
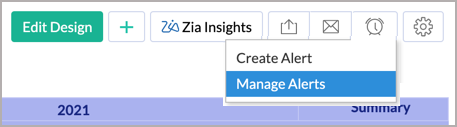
- Click the Alert icon and then choose Manage Alert.
- The Manage Alerts page will open listing all alert created over the report.

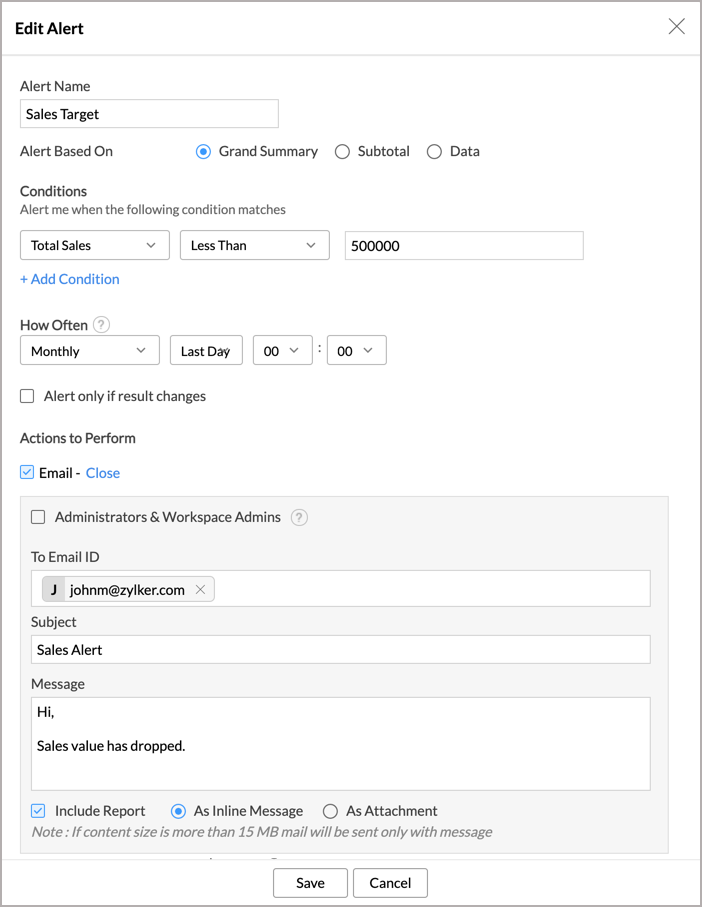
2. How can I edit the Data Alert?
Yes, you can edit the data alert when needed. Follow the below steps to do so.
- Open the report over which the alert is created.
- Click the alert icon and then select Manage Alert.
- The Manage Alert page will open. Mouse over the alert you want to edit. A set of action menu will appear.
- Click the Edit icon.

- The Edit Data alert section will open. You can modify this as needed.


3. On what frequency the data alert will be verified?
The Data alerts are verified in the interval you have set.
Available options are:
- Hourly
- Daily
- Weekly
- Monthly

4. How can I see the Alert triggered History?
Yes, you can see the alert triggered history. Follow the below steps to do so.
- Open the report over which the alert is created.
- Click the alert
 icon and then select Manage Alert.
 - The Manage Alert page will open. Mouse over the alert you want to edit. A set of action menu will appear.
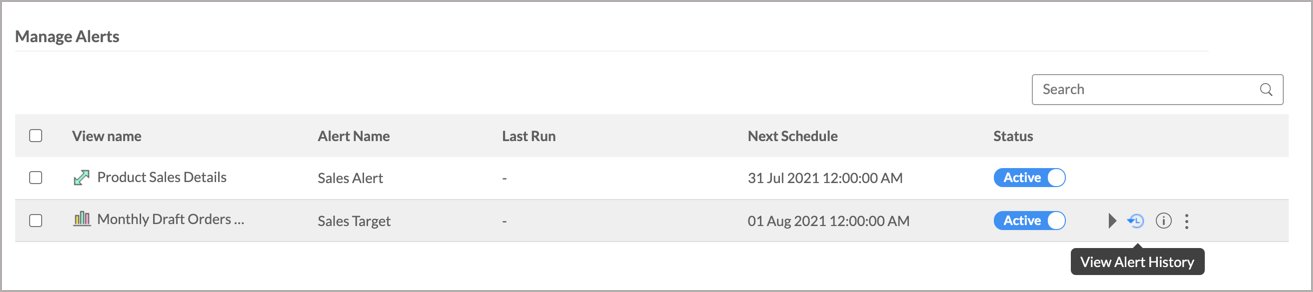
- Click the Alert History icon.
- A calendar view will open highlighting the days that the alerts were triggered in red. Clicking this will list the alert runtime, triggered time and the copy of the report when it is triggered.

5. Can I execute the data alert instantly?
Yes, you can run the data alert instantly. Follow the below steps to do so.
- Open the report over which the alert is created.
- Click the alert icon and then select Manage Alert.
- The Manage Alert page will open. Mouse over the alert you want to edit. A set of action menu will appear.
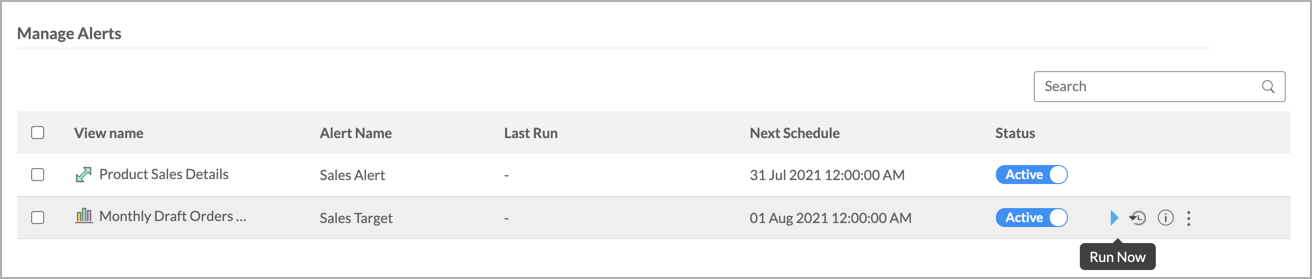
- Click the Run icon. The alert conditions will be verified instantly.

6. Can I delete the Data Alert?
Yes, you can delete the data alert instantly. Follow the below steps to do so.
- Open the report over which the alert is created.
- Click the alert icon and then select Manage Alert.
- The Manage Alert page will open. Mouse over the alert you want to edit. A set of action menu will appear.
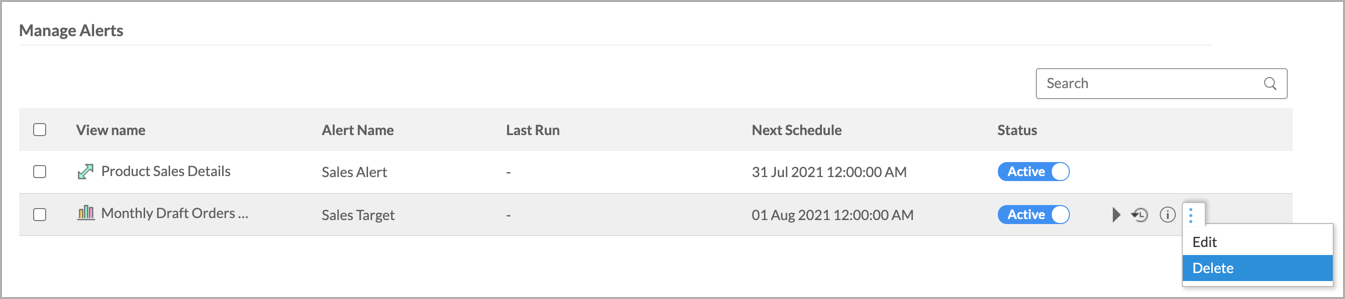
- Click more actions icon and then select the Delete.
- You will be prompted to confirm the action. Click Yes to confirm.
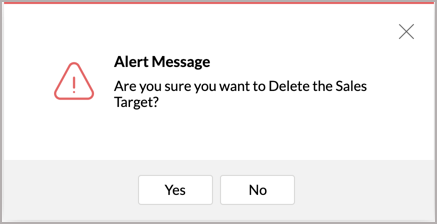
- The Data Alert will be deleted.

