Multi-Agents
Some tasks are too complex for a single agent. A customer writes in about a delayed order and a duplicate charge and wants a refund. That one message touches ticket history, billing data, refund policy, and an actual refund action. A single agent trying to handle all of that needs access to everything, which makes it harder to control and harder to debug when something goes wrong.
Multi-agent workflows solve this by splitting the work across multiple specialized agents, each with a clear, narrow responsibility, coordinated by one orchestrator that owns the conversation.

How multi-agents work
The architecture is straightforward. There's a Master Agent and one or more Sub-Agents.
The Master Agent is the orchestrator. It's the only one that talks to the user. It receives the request, figures out what needs to happen, decides which sub-agents to call, and assembles the final response. The master agent typically doesn't have tools or a knowledge base of its own. Its job is coordination, not execution.
The Sub-Agents are the specialists. Each one is a regular Zia Agent you've already built and tested. They have their own tools, knowledge base, instructions, and guardrails. They do one thing well: fetch billing data, check policy, classify a ticket, search inventory, whatever their role is.

A few important rules about how this works:
- Sub-agents never talk to the user directly. Everything goes through the master agent. From the user's perspective, they're chatting with one assistant, not a team.
- Sub-agents don't talk to each other. There's no lateral communication. The master agent calls them individually and decides what to do with the results.
- Each sub-agent has its own permissions and guardrails. This means you can keep permission scopes tight. A policy lookup agent doesn't need write access to your CRM. A billing agent doesn't need access to your knowledge base. This is safer and easier to audit than one agent with broad access to everything.
When to use multi-agent vs single agent
Not everything needs a multi-agent setup. Here's a simple way to think about it.
| Single Agent | Multi-Agent | |
|---|---|---|
Systems involved | One | Multiple |
Reasoning type | One focus area | Different specialties |
Permission scope | Broad | Narrow per sub-agent |
Debugging | One instruction set | Isolated per agent |
Updates | Change affects everything | Change one sub-agent independently |
Best for | Contained tasks | Cross-boundary workflows |
Use a single agent when the task is contained: one system, one type of reasoning, one set of tools. A deal insights agent that reads CRM data and summarizes it. A support bot that answers questions from a knowledge base.
Use multi-agent when the task crosses boundaries: multiple systems, different types of decisions, or steps that benefit from separate permissions and guardrails. If you find yourself writing a single agent instruction that tries to cover five different responsibilities, that's usually a sign to split it into a multi-agent workflow.
Scenarios
Multi-agent works best when a task involves multiple systems, multiple types of reasoning, or multiple steps that benefit from separation. Here are some scenarios where it's best used.
Customer support resolution
A customer reaches out with a complex issue that spans order data, support history, refund policies, and follow-up actions. Instead of one overloaded agent, you split the work: one sub-agent pulls ticket context from Desk, another checks billing in CRM, a third looks up refund eligibility from the knowledge base, and a fourth triggers the actual refund. The master agent stitches the results into a single, coherent response.
Sales qualification
A lead comes in through chat. One sub-agent enriches the lead with company data and checks for existing CRM records. Another applies your qualification criteria. A third pulls relevant pricing information. A fourth creates the CRM task and assigns the lead to a rep. Each piece of logic can be updated independently without touching the others.
Travel booking
A user wants to book a flight. The master agent guides the conversation while sub-agents handle search and availability, fare rules and cancellation policies, traveler profiles and preferences, validation (passport, visa, baggage limits), checkout and payment, and post-booking changes. Each sub-agent has access to only the APIs and data it needs for its specific job.
Account health monitoring
An internal team member asks which accounts are at risk this week. Sub-agents pull usage data, open support tickets and SLA breaches, revenue and renewal dates, and then a summary agent generates a risk explanation. The master agent presents a clean, consolidated view.
Creating a multi-agent workflow
Before you start, make sure the agents you want to use as sub-agents already exist. Multi-agent workflows are built from agents you've already created individually.
Take a look at this quick walkthrough for creating a multi-agents setup.
Setting up the master agent
- Navigate to Multi Agent from the left sidebar and click Create Multi Agent.
- The canvas opens with a Master Agent node already in place. Click it to open the configuration panel on the right.
- Fill in the master agent details:
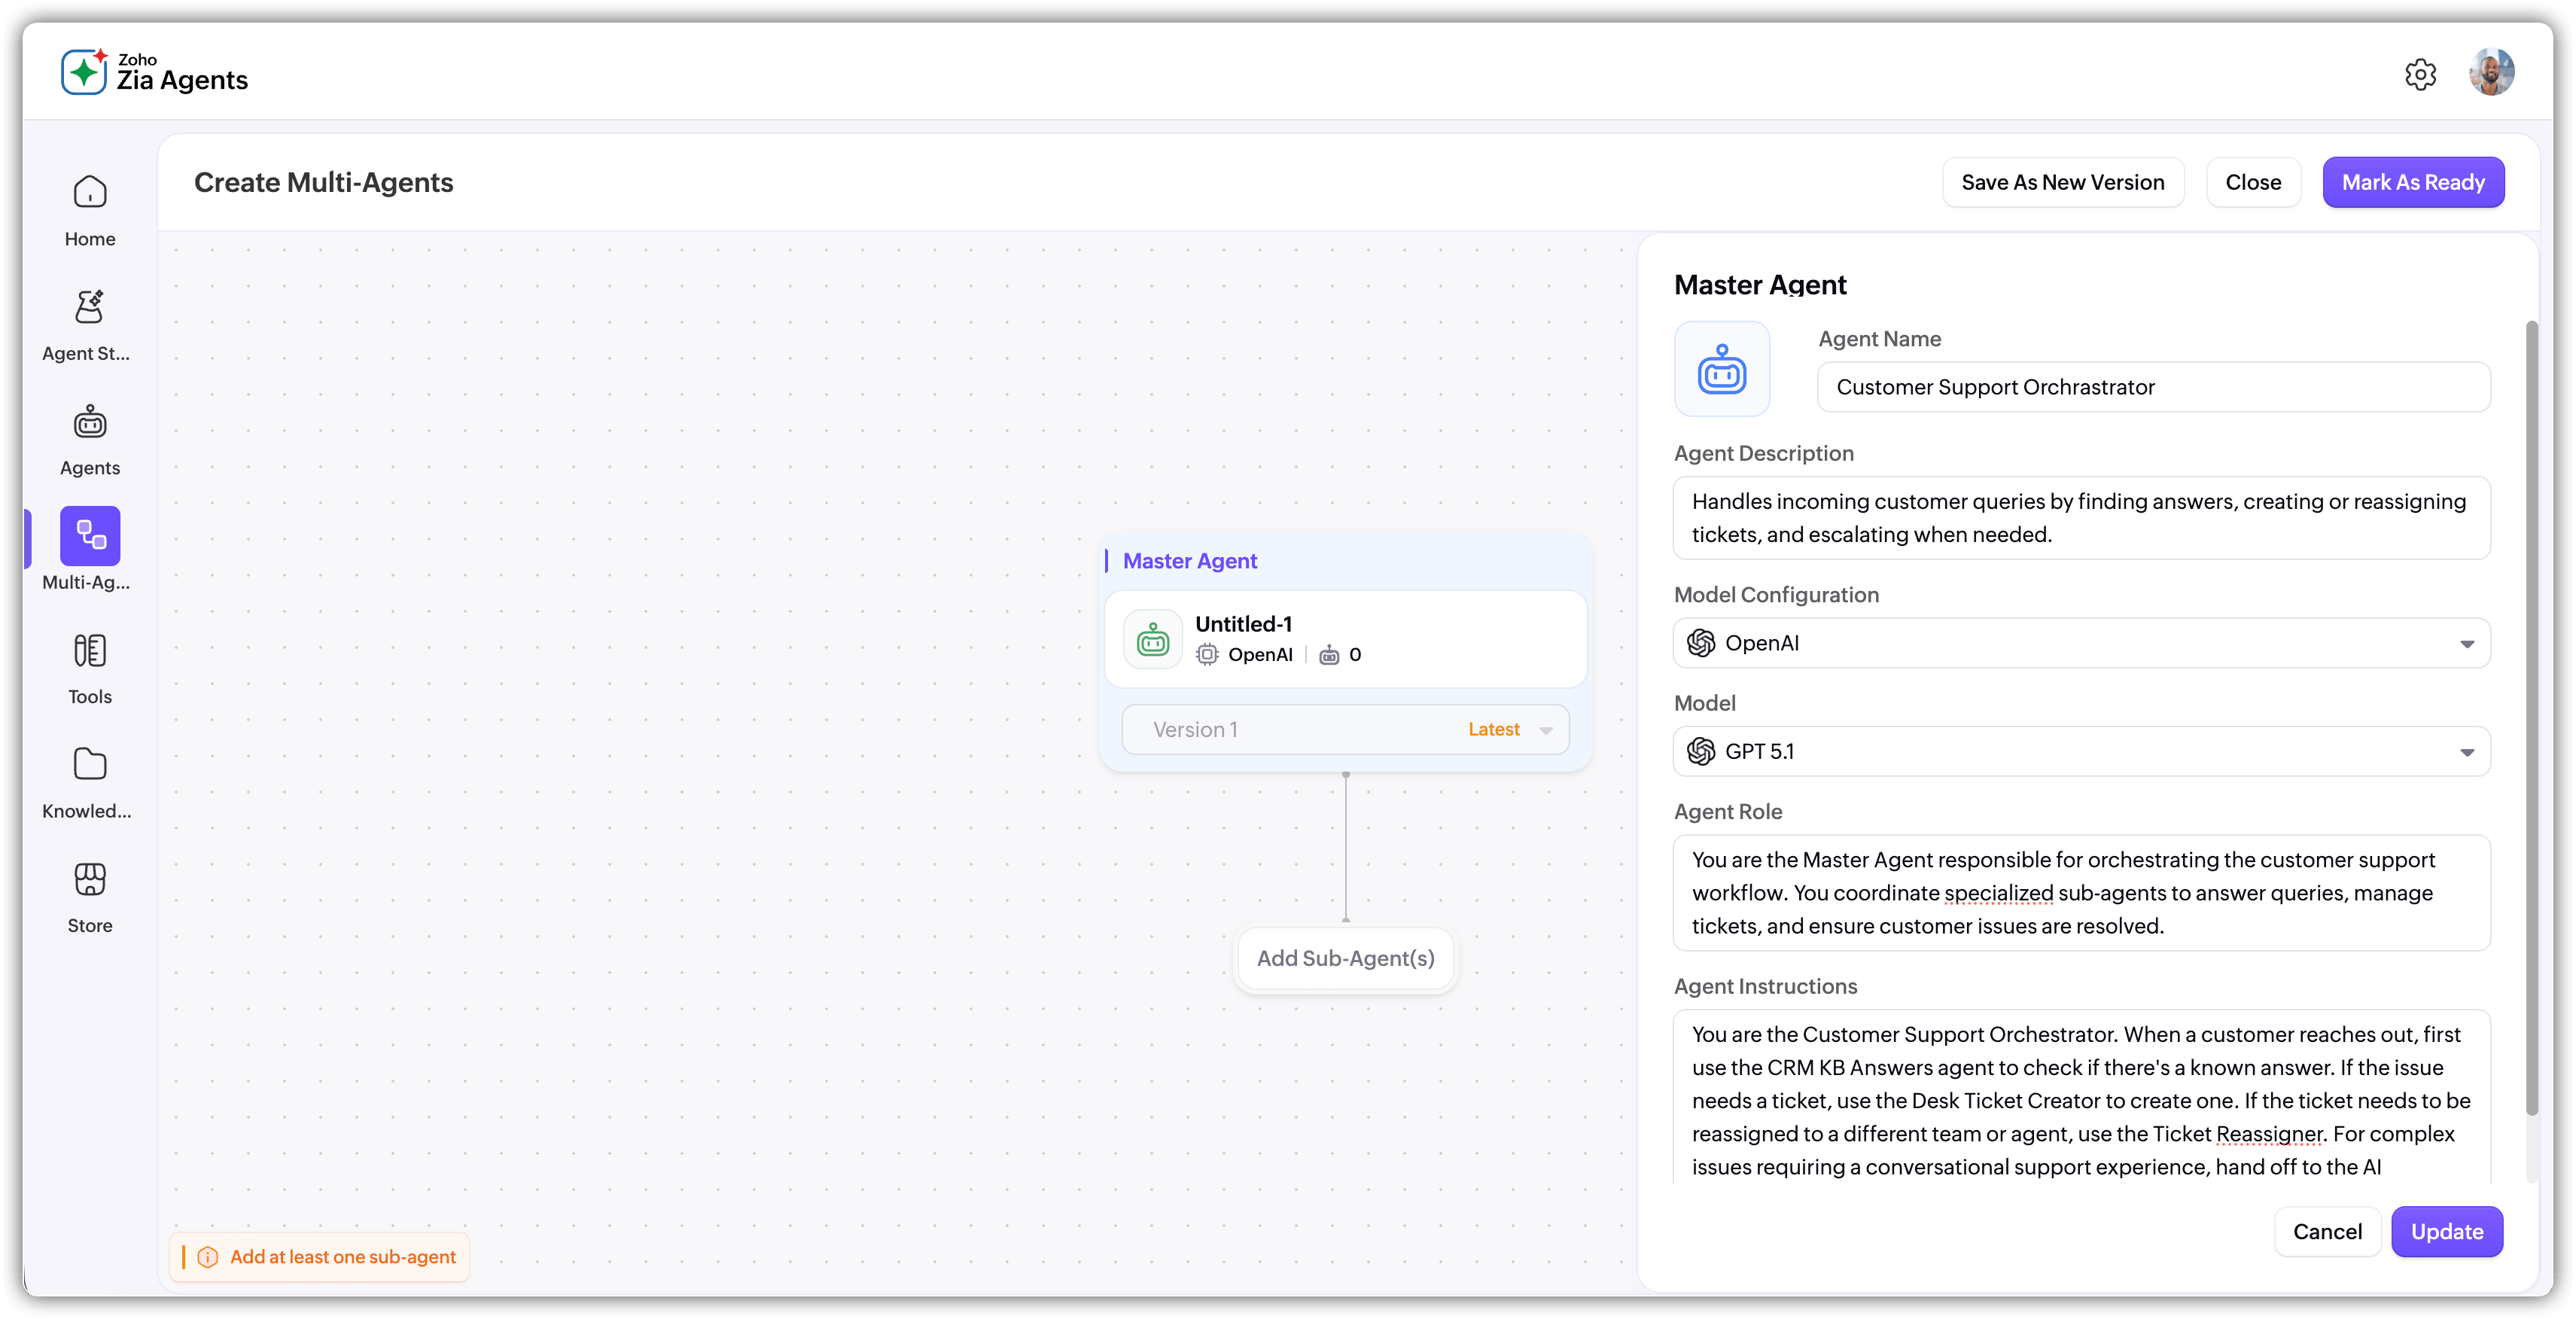
- Agent Name: Give it a name that reflects the workflow (e.g., "Support Resolution Orchestrator").
- Description: Describe what this workflow does.
- Vendor Configuration: Choose the AI vendor for the master agent.
- Model: Pick the model. The master agent handles reasoning and delegation, so choose a model strong at instruction following.
- Role: Defines what the master agent does. A default is provided ("You are the Master Agent of the workflow responsible for orchestrating the sub-agents") which you can customize.
- Instructions: Detailed guidelines on how the master agent should coordinate, what it should prioritize, and how it should combine sub-agent outputs. A default is provided but you should tailor it to your workflow.
- Click Update.

Adding sub-agents
- Below the Master Agent node on the canvas, click Add Sub Agents.
- The sub-agent selection panel opens on the right, showing all available agents in your account. Each shows the agent name and description.
- Search or browse, then select the agents you want. You can pick multiple.
- Click Add.
- The canvas now shows the full hierarchy: Master Agent at the top, a "Sub Agents" connector, and each sub-agent below with its vendor, version, and tool/knowledge base counts visible.
Finalizing
Once your master agent is configured and sub-agents are added, click Mark as Ready in the top right.
The platform runs a validation check at this point. It verifies that all sub-agents have the required connections and configurations in place. If anything is missing, you'll need to go to the sub-agent's individual details page and set it up before you can proceed.
Once validation passes, the workflow is created and you land on its details page.
The multi-agent details page
The layout is similar to a single agent's details page but with a few differences.
- The top shows the workflow name, ID, version, creator, date, and deployment status. Action buttons are Execute (opens the test window) and Deploy.
- The Overview tab has two sections. On the left, Agent Info shows the vendor/model configuration, description, role, and instructions for the master agent. On the right, Agents Preview shows the visual canvas of your master-to-sub-agent hierarchy.
- The remaining tabs work the same as single agents: Integrate for API details, Observability for performance monitoring, and Versions for tracking changes.

Testing a multi-agent workflow
Since the sub-agents manage their own tool connections and parameter mappings, you don't configure those at the multi-agent level. What you're testing here is whether the master agent coordinates everything correctly and produces the right end result.
Testing steps
- From the details page, click Execute. This opens the test window.
- If needed, click Edit Parameters to provide any test values.
- Type a prompt and submit. Use realistic, complex prompts that actually require multiple sub-agents to work together. That's the whole point of multi-agent.
- Review the response. Check that the master agent called the right sub-agents in the right order and produced a coherent result.
- Use Clear Chat to reset and test different scenarios.
Tip: If something goes wrong, check the Observability tab to see which sub-agent was called and what happened at each step. See Observability for details.
Deploying
The deployment flow is more streamlined than single agents because all tool connections and parameter mappings live at the sub-agent level. The platform validates everything before allowing deployment.
Deployment steps
- From the details page, click Deploy.
- The platform validates all sub-agents, checking that each one has the required connections and tool parameter mappings properly configured.
- If validation passes, the workflow deploys. If anything is missing, you'll be told which sub-agent needs attention. Go to that agent's individual details page, fix the issue, and retry.
- Make sure each sub-agent is fully configured before attempting to deploy the multi-agent workflow.