


Create a New Template
While creating a new template, you can choose one of the predefined templates and make the required changes.
Note: You can create PDF templates only for the Reports module.
To create a new template:
- Navigate to Admin View.
- Go to Settings on the left sidebar.
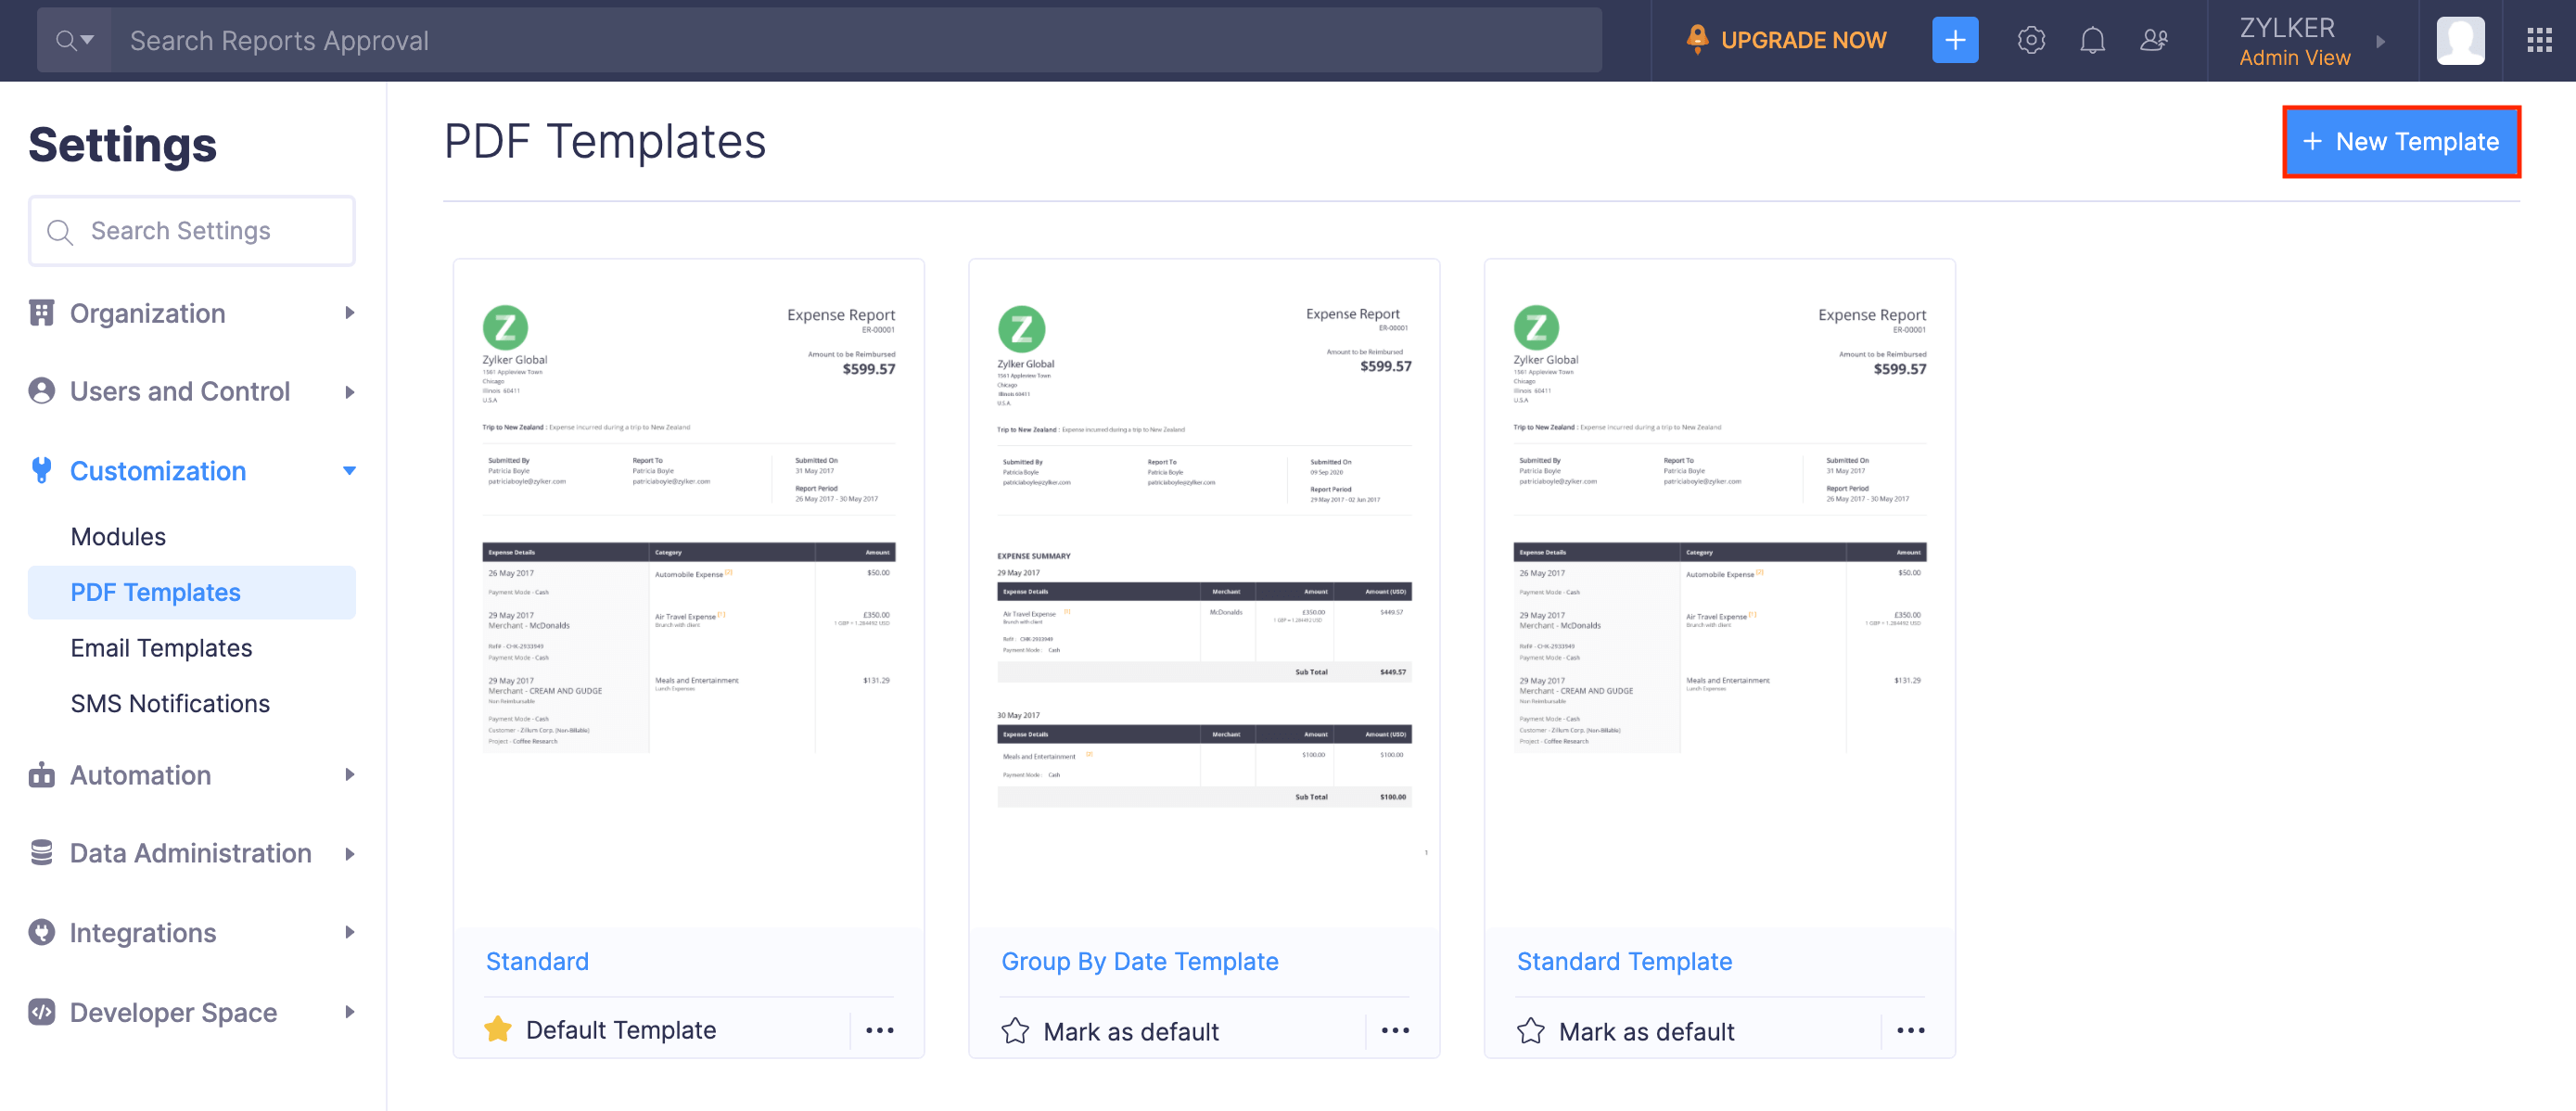
- Go to PDF Templates under Customization.
- Click + New Template.
- Hover over any of the following predefined templates:
- Standard: The standard template is neatly structured, beginning with the associated trip’s details, the report details, the summary of all the expenses in the report, and the amount to be reimbursed.
- Group By Date: This template displays date-wise details of the expenses in the report. Expenses belonging to the same date will be grouped and the details will be displayed, followed by the amount to be reimbursed.
- Group By Category: This template displays category-wise details of the expenses in the report. Expenses belonging to the same category will be grouped and the details will be displayed, followed by the amount to be reimbursed.
- Group By Taxable: This template displays the expenses in reports under taxable and non-taxable categories. Taxable expenses include details of the tax applied, tax amount, and expense details. The non-taxable expenses include only the expense details.
- Group By Customer: This template displays customer-wise details of expenses in reports. Expenses belonging to a customer will be grouped and the details will be displayed, followed by the amount to be reimbursed. Expenses not associated with any customers will be grouped under unassociated expenses.
- Group By Project: This template displays project-wise details of the expenses in reports. Expenses belonging to a project will be grouped and the details will be displayed, followed by the amount to be reimbursed. Expenses not associated with any projects will be grouped under unassociated expenses.
- Click Use This to choose your preferred template. Your Report Template Customization page will open and you can make the necessary changes.
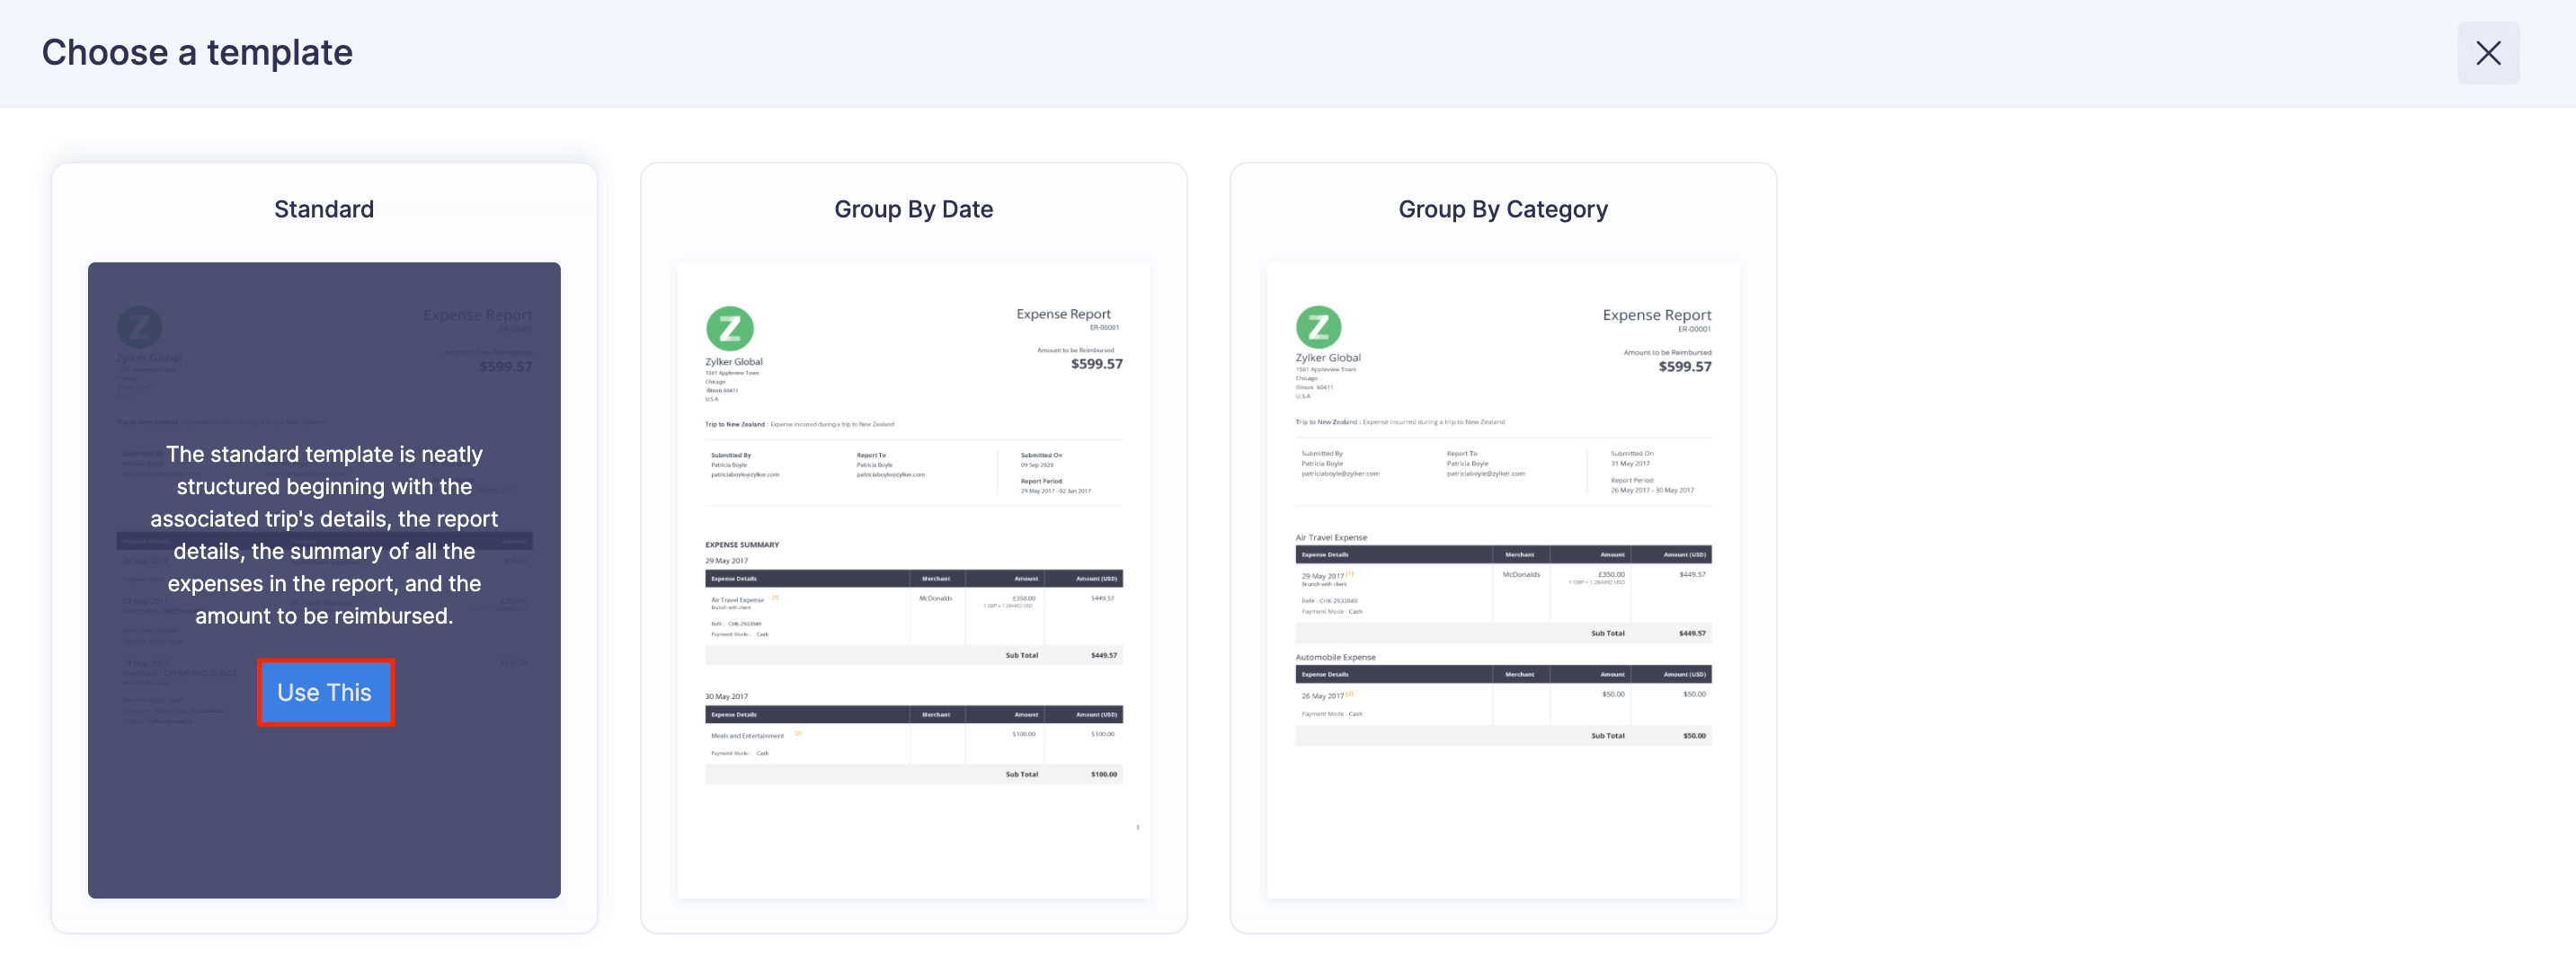
Pro Tip: If you would like to view the design of the predefined templates beforehand, go to the previous page and click the name of the template. A preview of the template will open.
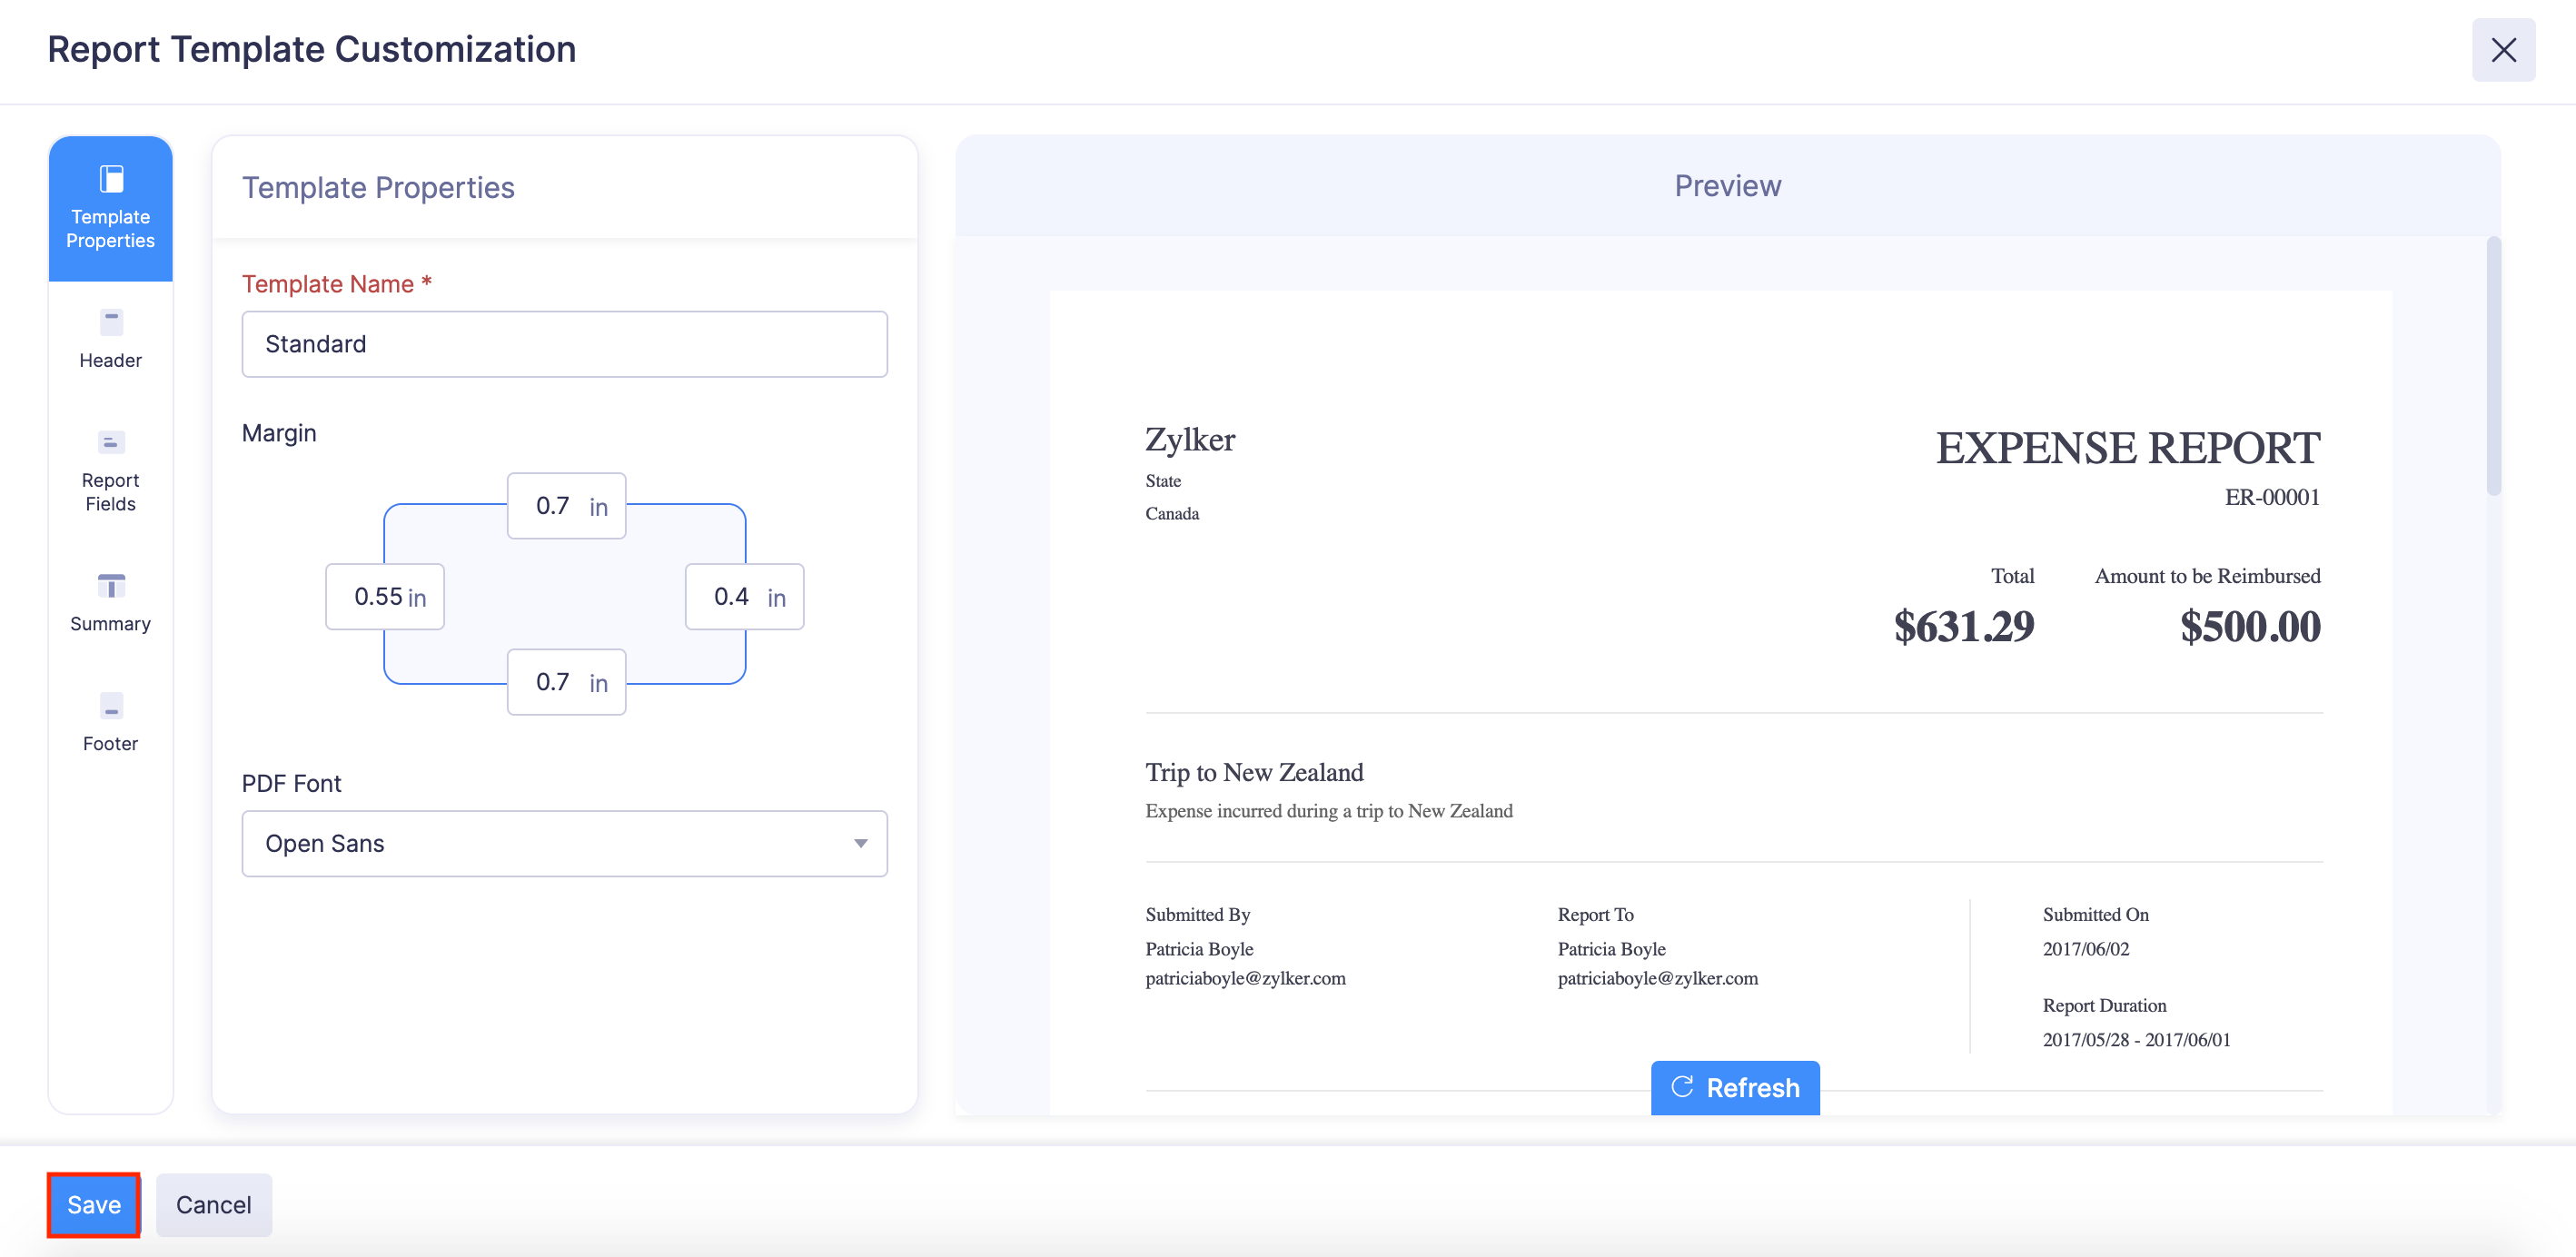
Under Template Properties, you can set up the following template properties:
- Template Name: Enter a name for your template.
- Margins (in inches): The margins of the template determine how much distance there is between the template’s content and the edges of the medium on which it’s printed.
- PDF Font: This is the font that will be used to display content on this template. A note will appear under the selected font detailing the languages it’s best suited for.
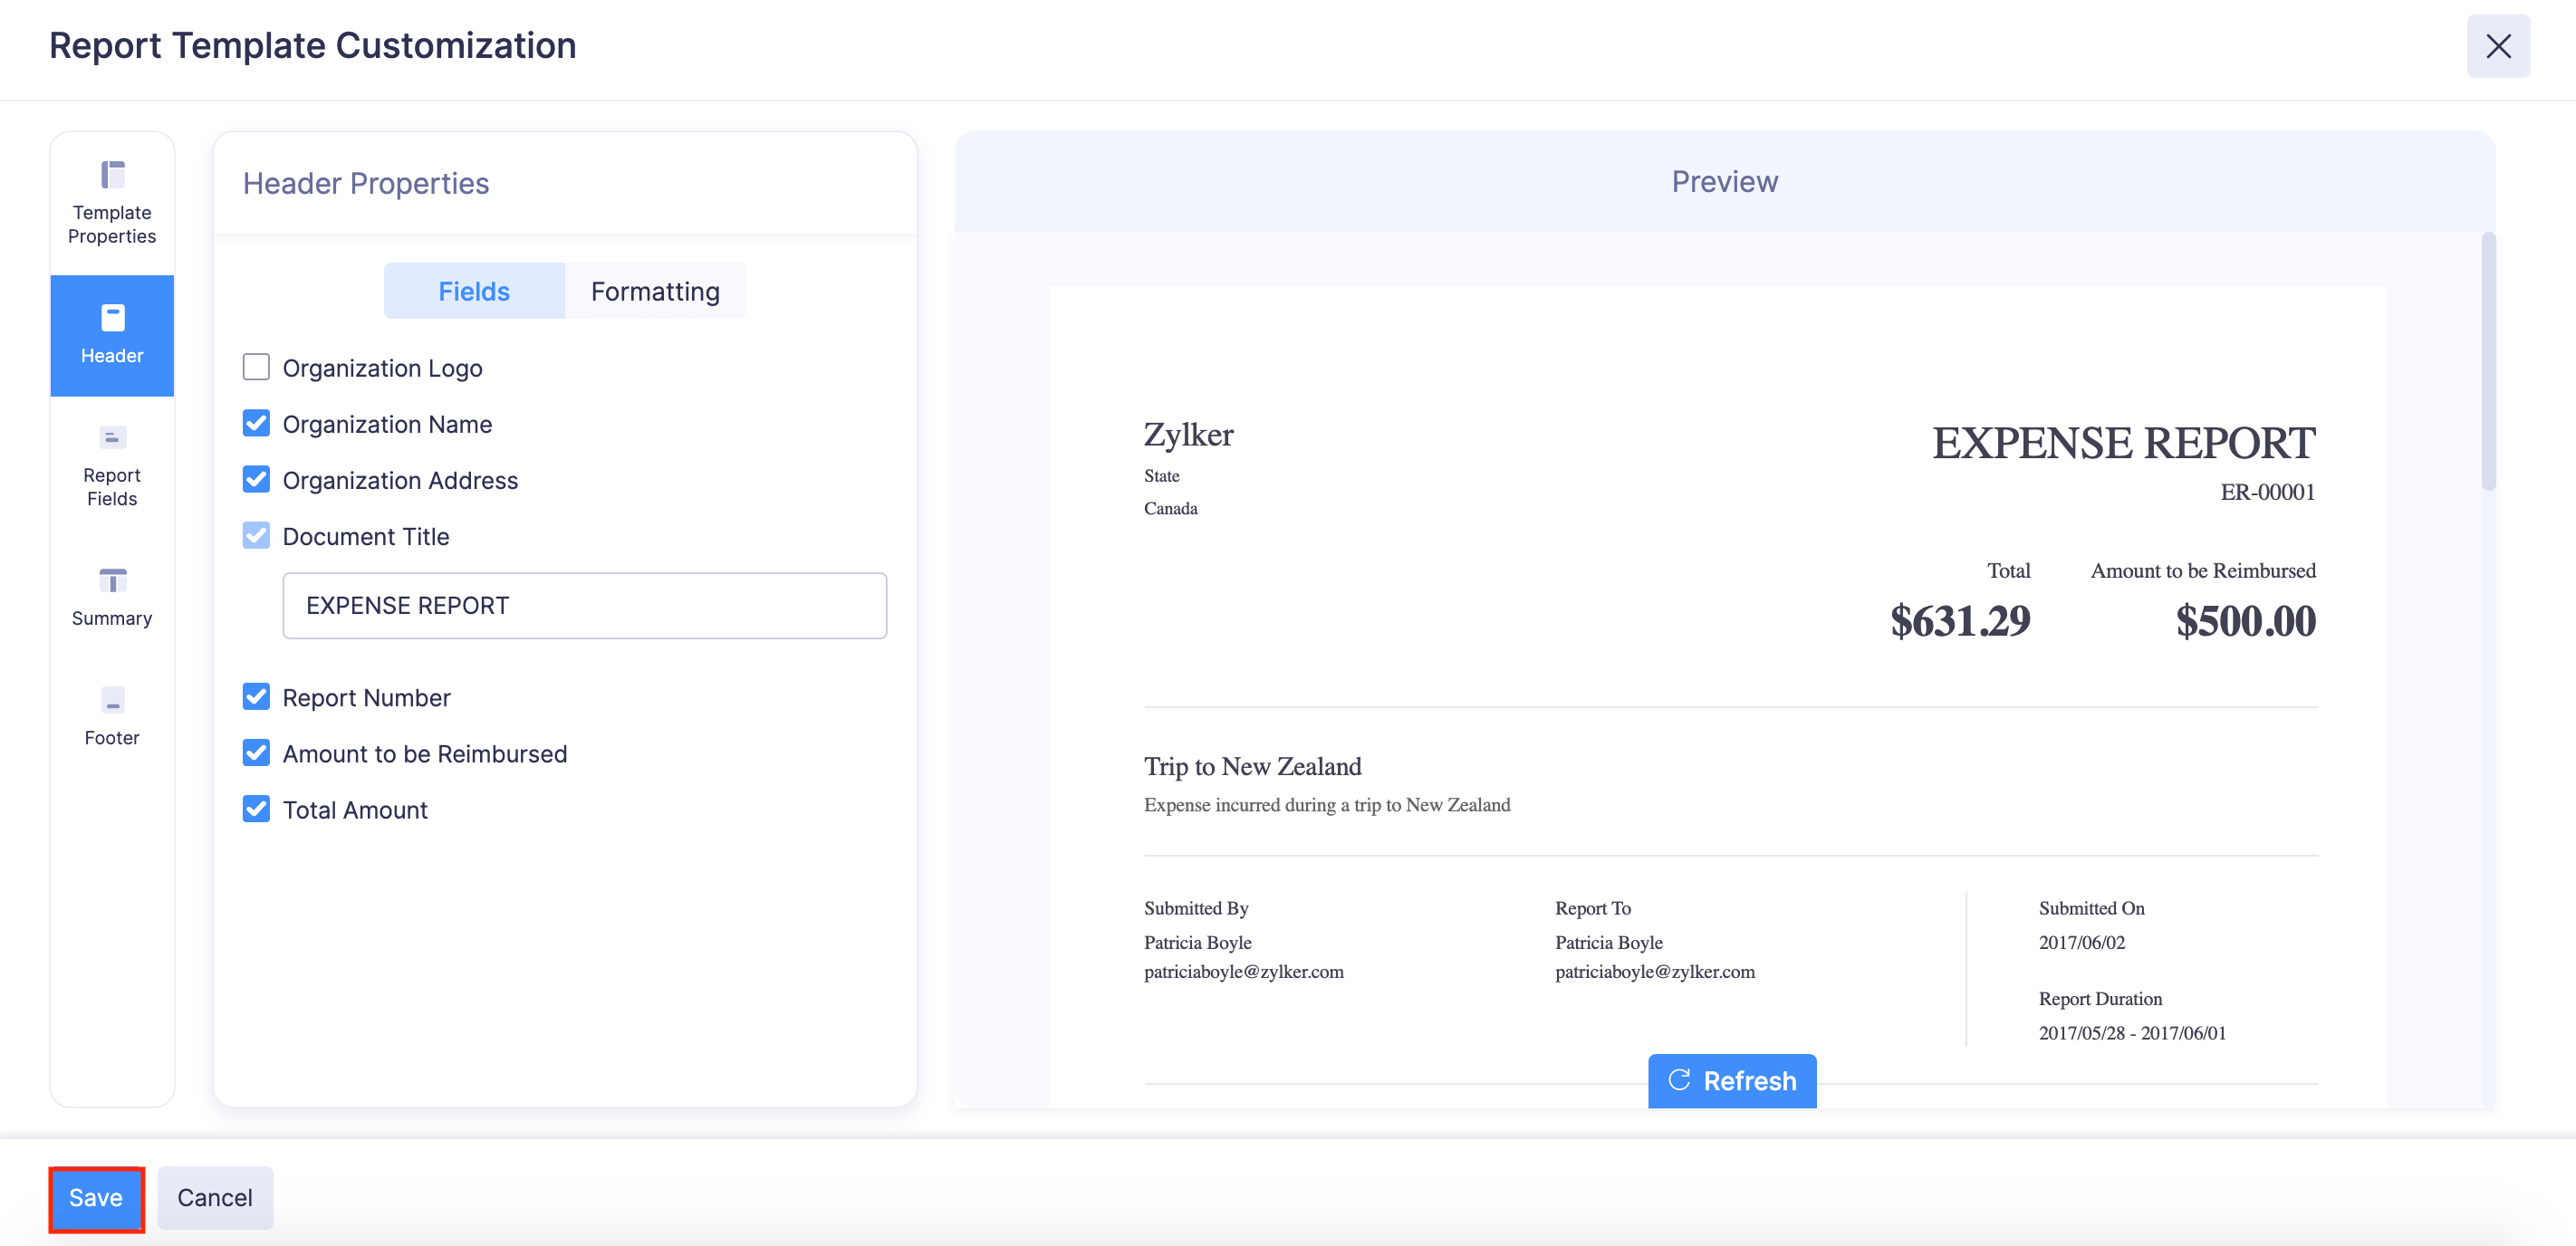
Under Header Properties, you can set up the header of the PDF template.
In the Fields tab, enable the fields that have to be displayed in the header of the PDF:
- Organisation Logo: Enable this option to display your organisation’s logo.
- Organisation Name: Enable this option to display your organisation’s name in the header.
- Organisation Address: Choose whether you want to display your organisation’s address on the header.
- Document Title: Enter a title for your PDF template.
- Report Number: Mark this checkbox if you want the report number to be displayed.
- Amount to be Reimbursed: Enable this option to display the amount to be reimbursed.
- Total Amount: Enable this option to display the total amount in the header.
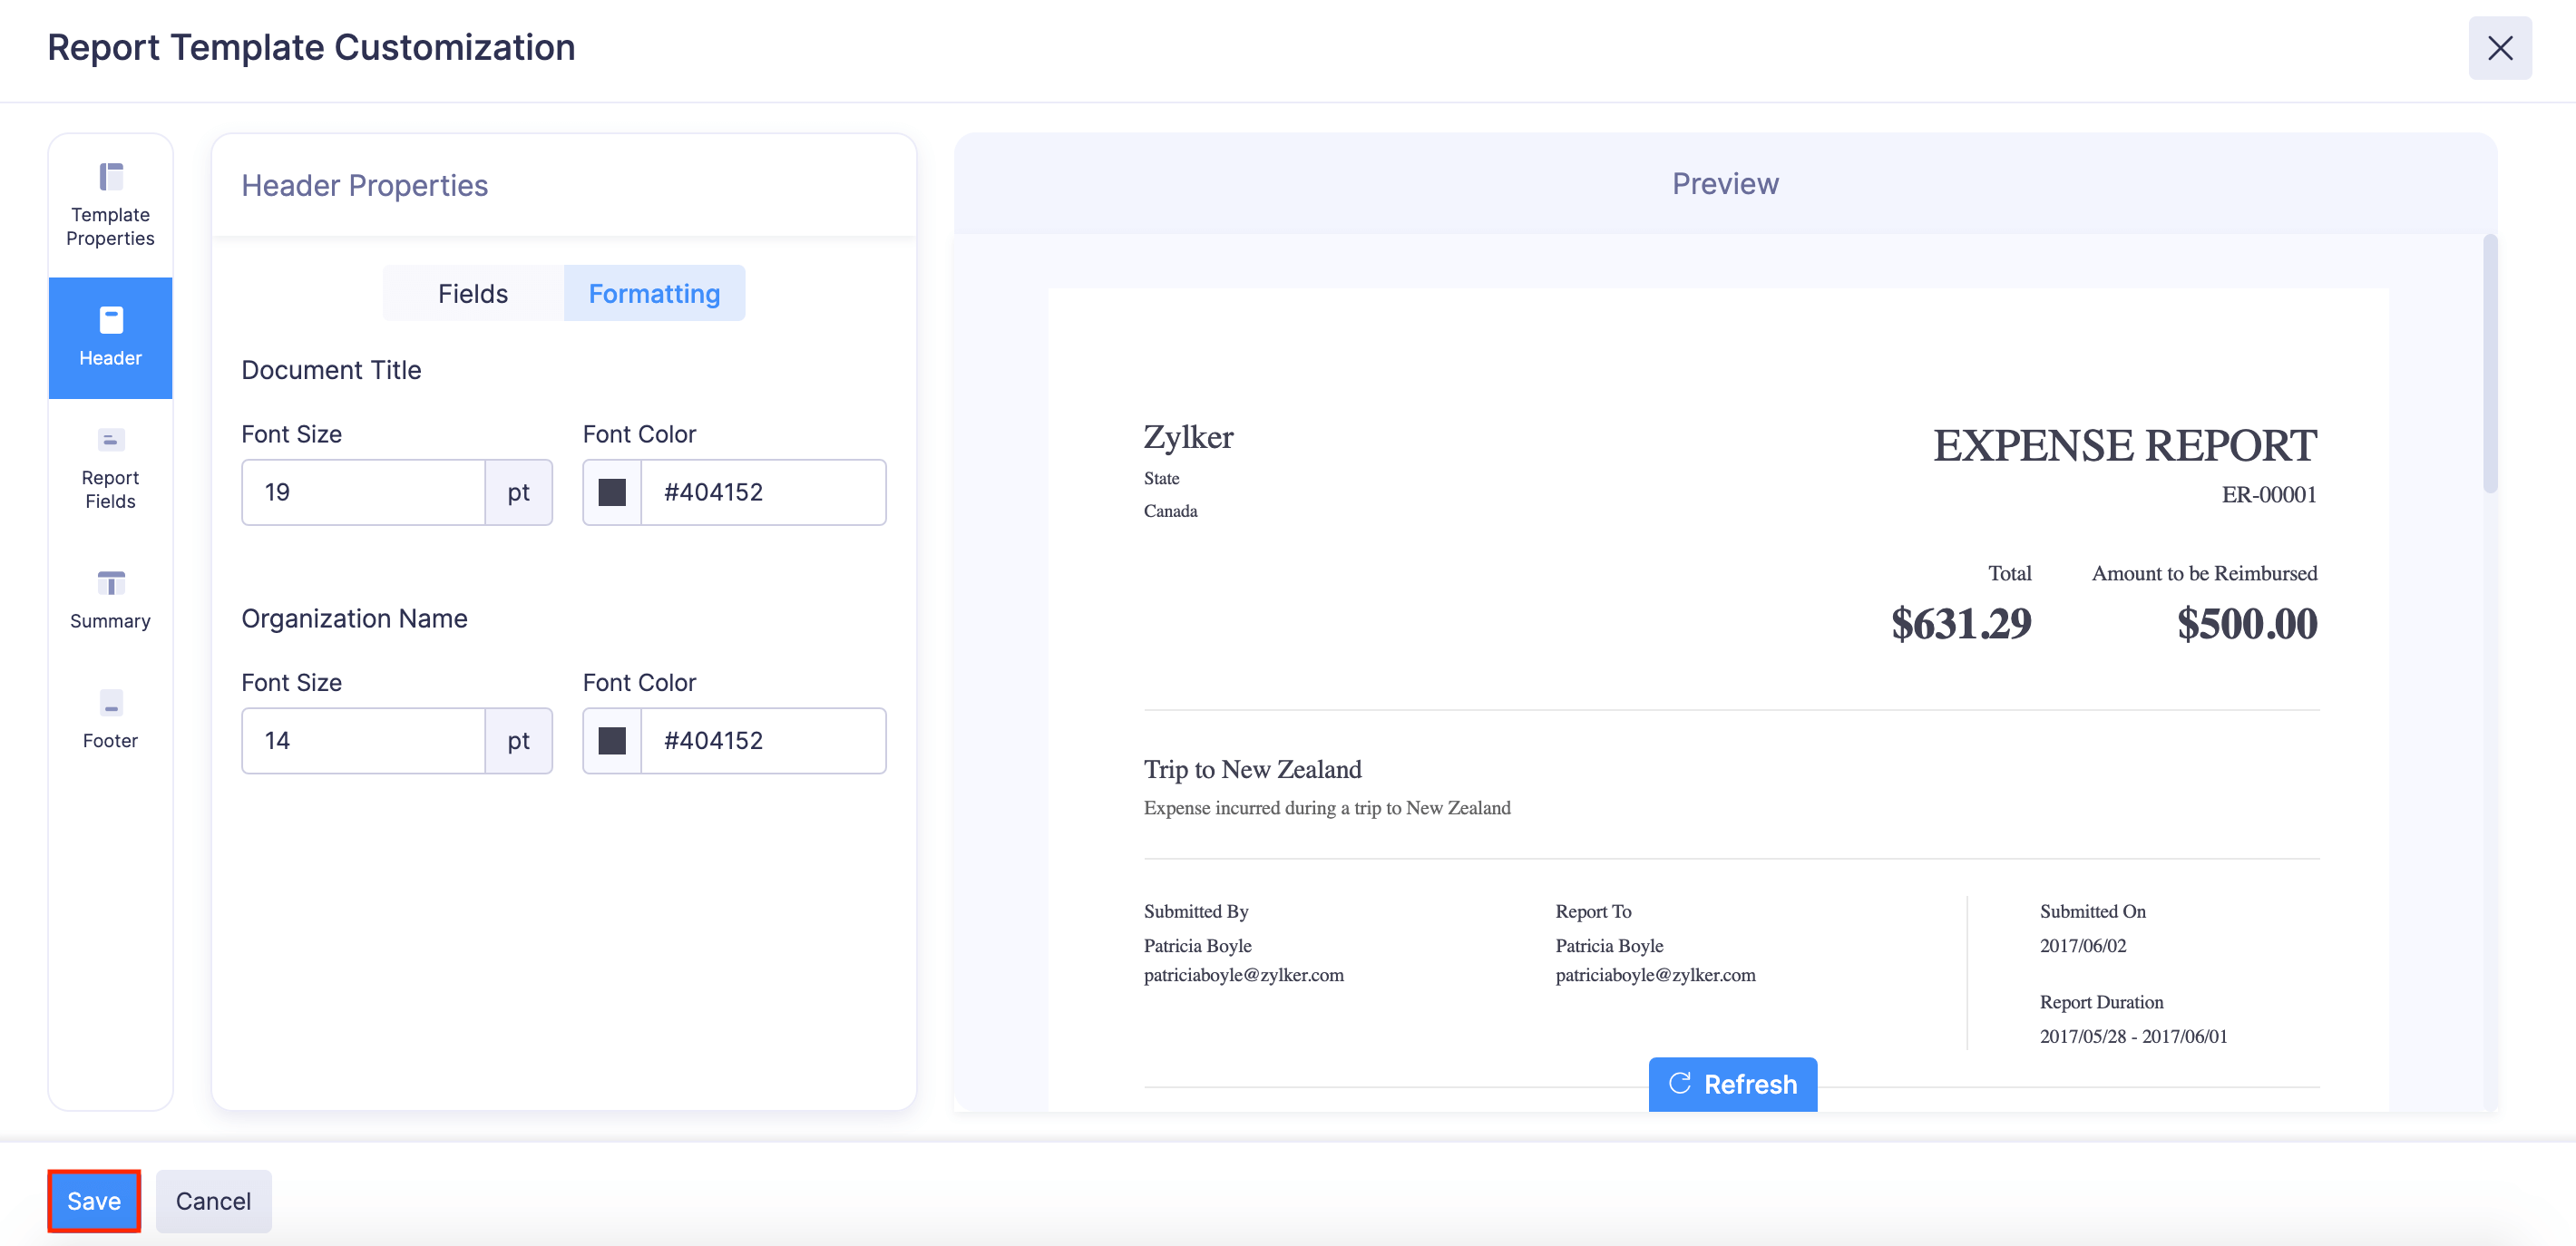
Navigate to the Formatting tab to format the fields you’ve enabled.
- Document Title: Configure the font size and the color of your document title.
- Organisation Name: If you’ve chosen to display the organisation name, you can set up its font size and color.
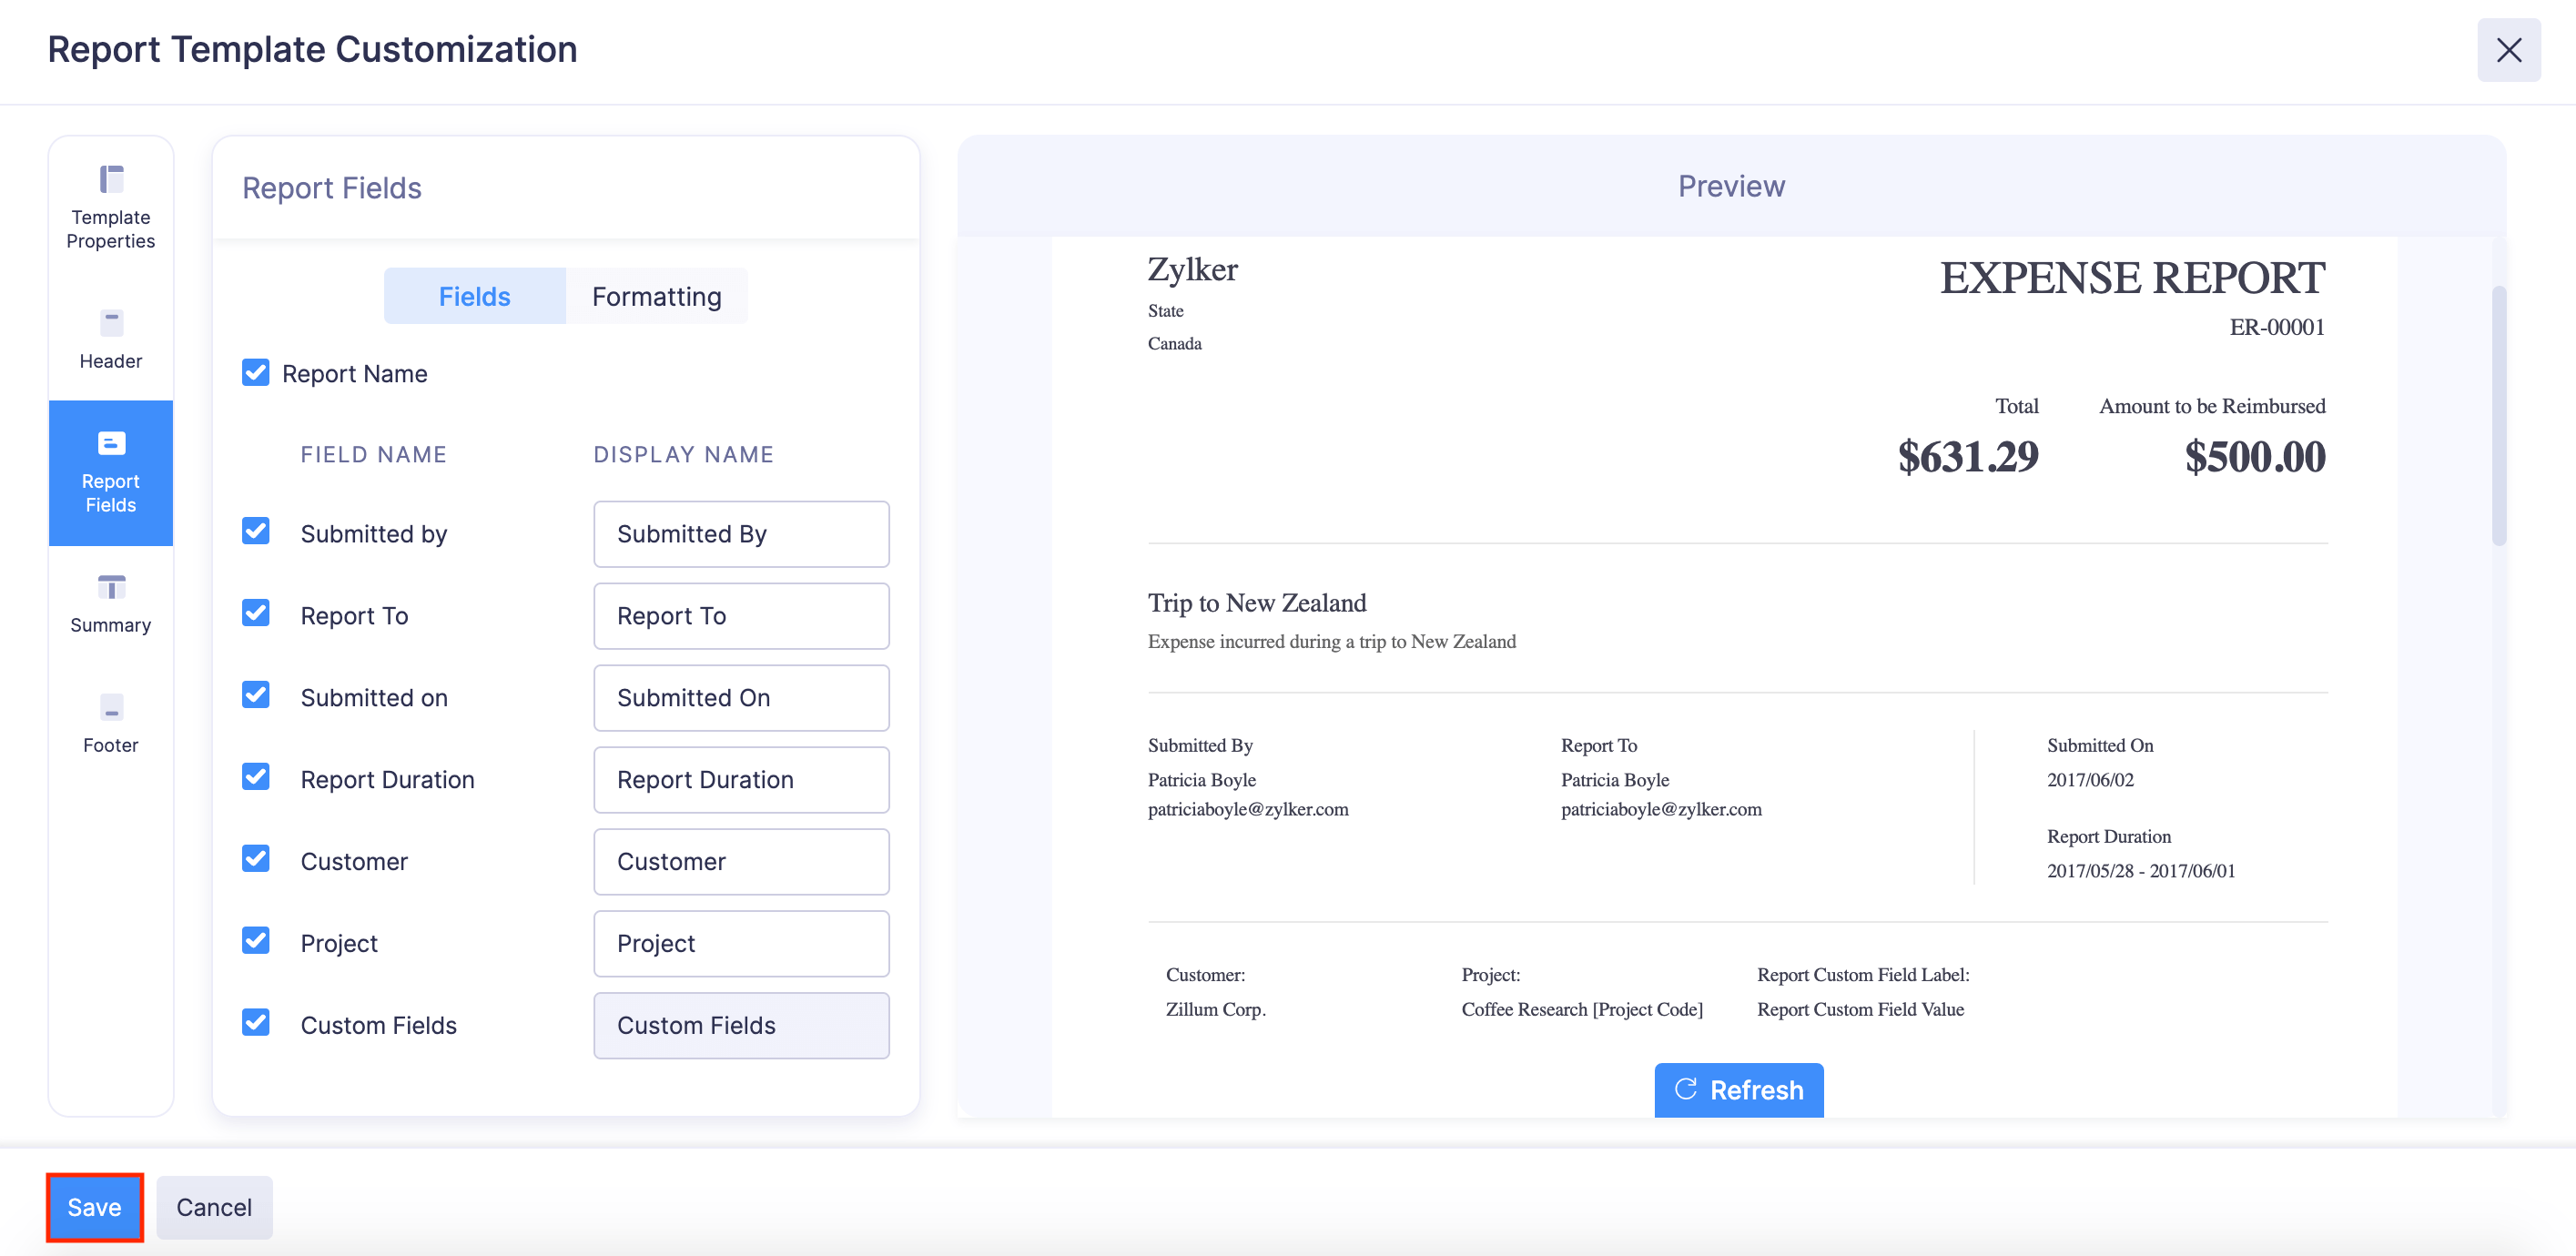
In the Report Fields section, you can choose the report details that have to be displayed in the PDF.
In the Fields tab, enable the report fields that have to be displayed and enter the names with which each field has to be displayed in the PDF:
- Report Name: Enable this option to display the report’s name.
- Submitter: Enable this option to display the name of the user who has submitted the report.
- Approver: Choose whether you want to display the user to whom the report was submitted. Change the display name if required.
- Submitted On: Check this option to display when the report was submitted for approval.
- Report Duration: Mark this checkbox if you want the report duration to be displayed. Enter another name for the field under Display Name if you want to display the field with a different name.
- Customer: Enable this option to display the customer for whom the expense was incurred. Change the display name of the field, if required.
- Project: Enable this option to display the project for which the expense was incurred. Change the display name of the field, if required.
- Custom Fields: Mark this checkbox if you want to display the custom fields you have created.
- Tags: Mark this checkbox if you want to display tags in the expense report PDFs.
- Policy Name: To include the policy associated with the user, mark this option.
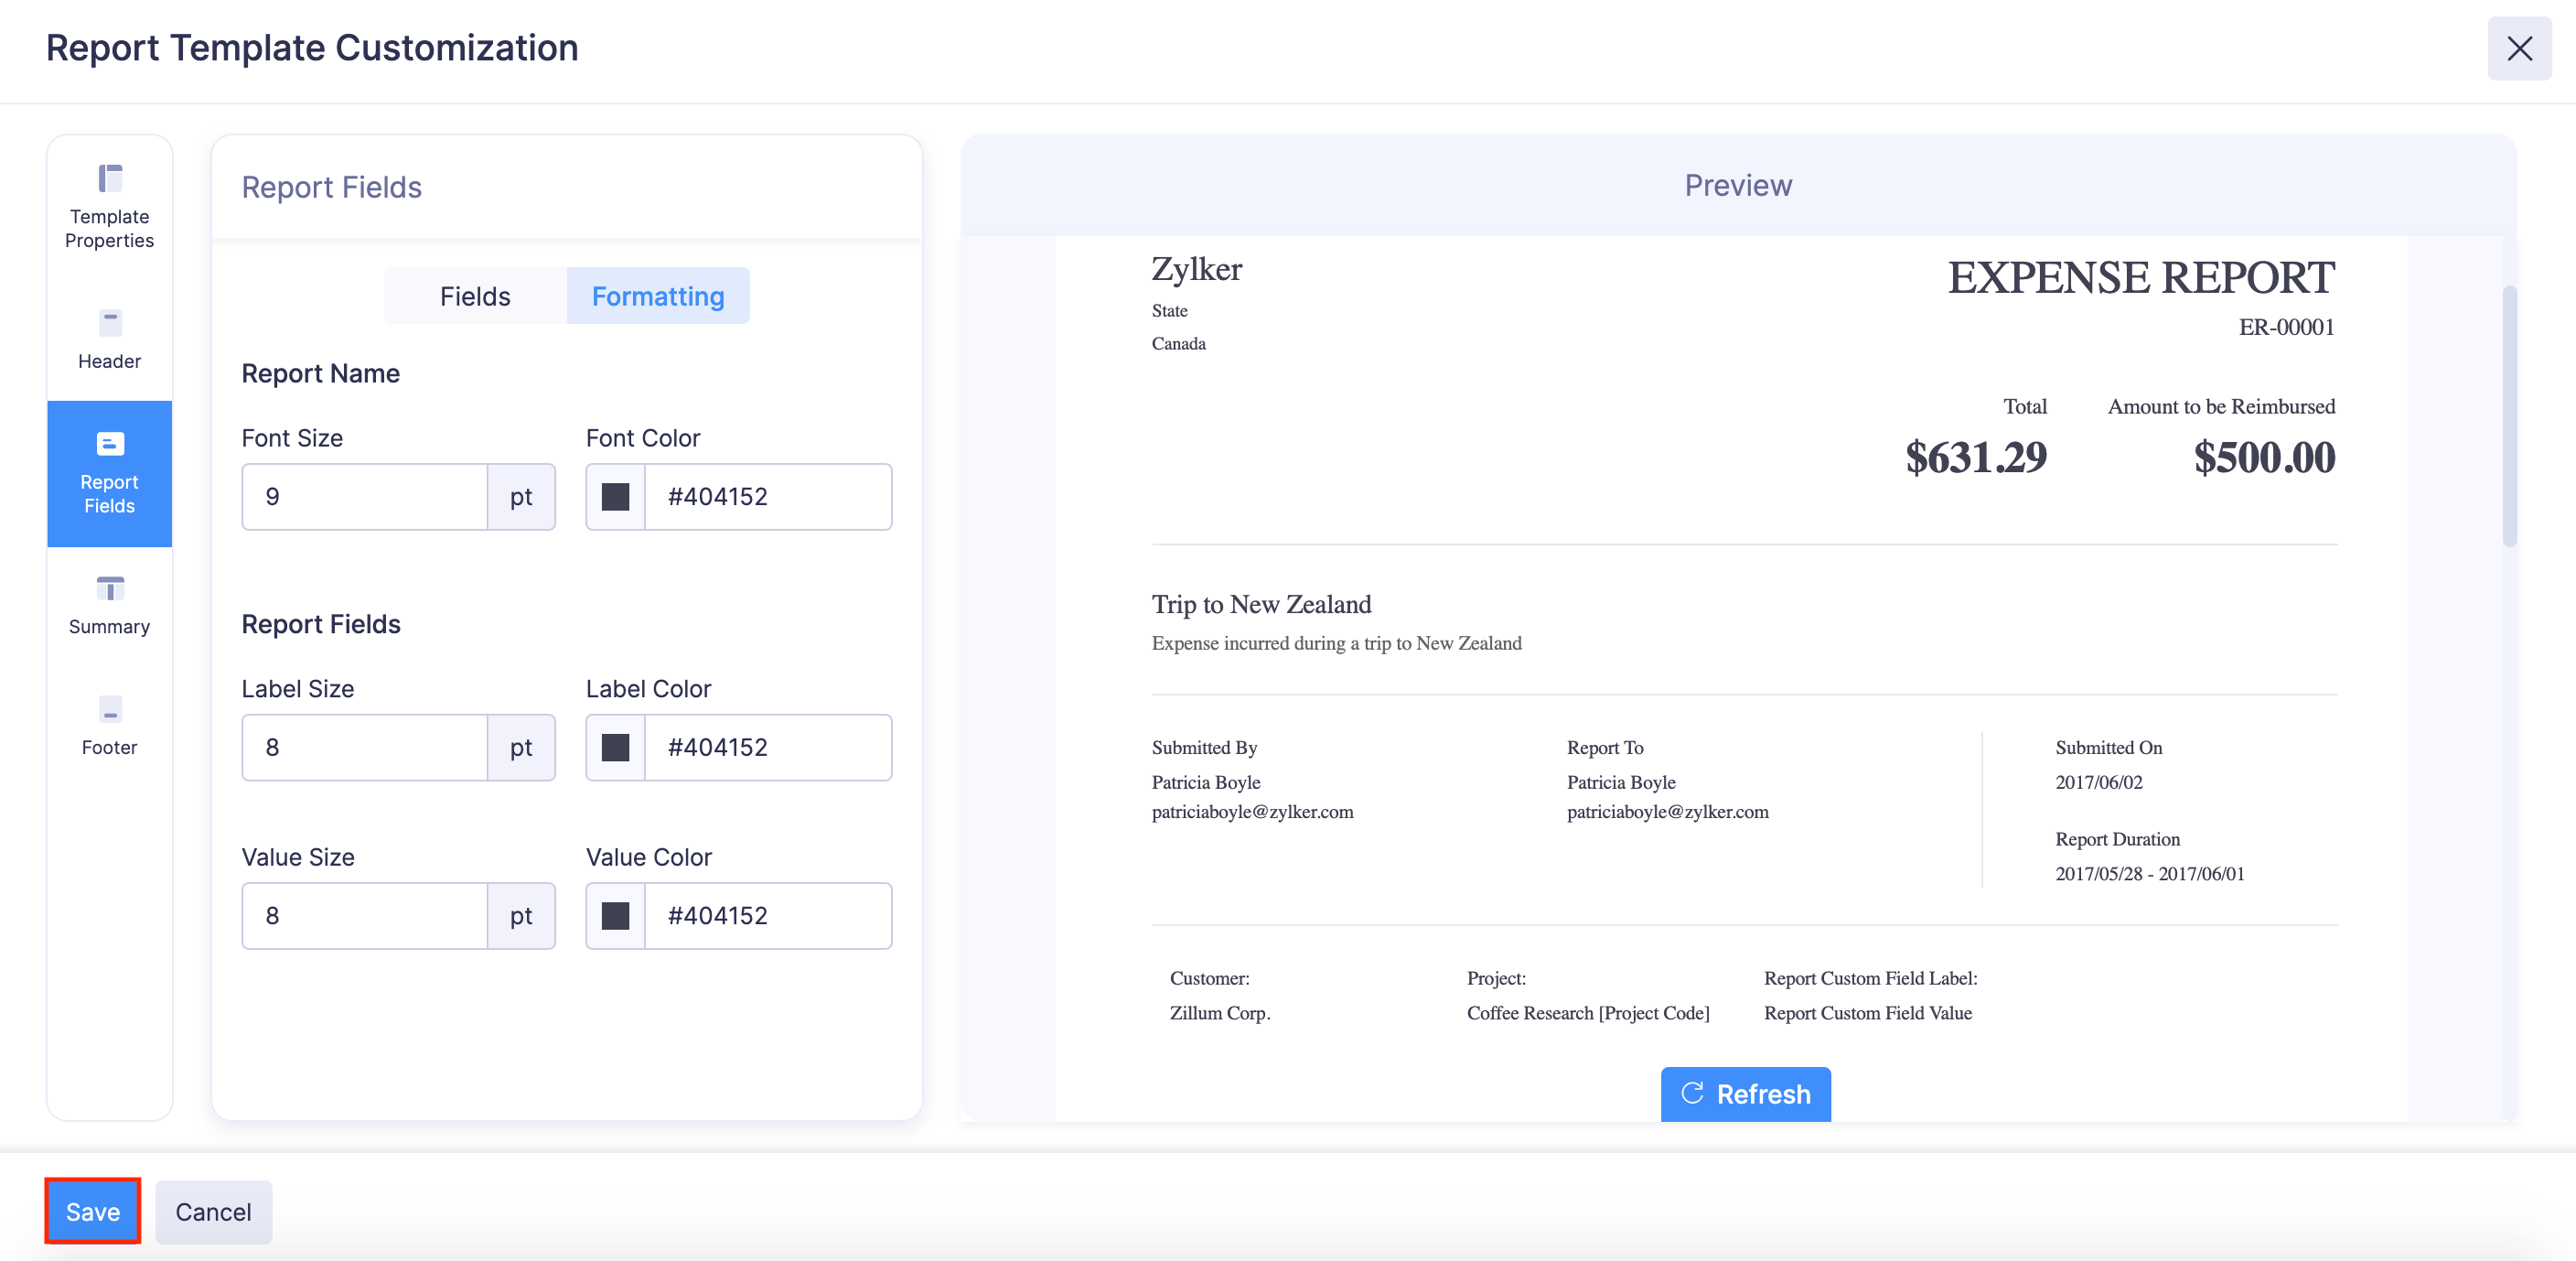
Navigate to the Formatting tab to format the fields you’ve enabled.
- Report Name: Configure the font size and color of the report name on the PDF.
- Report Fields: You can set up the size and color for all the labels and values of the report fields you’ve enabled.
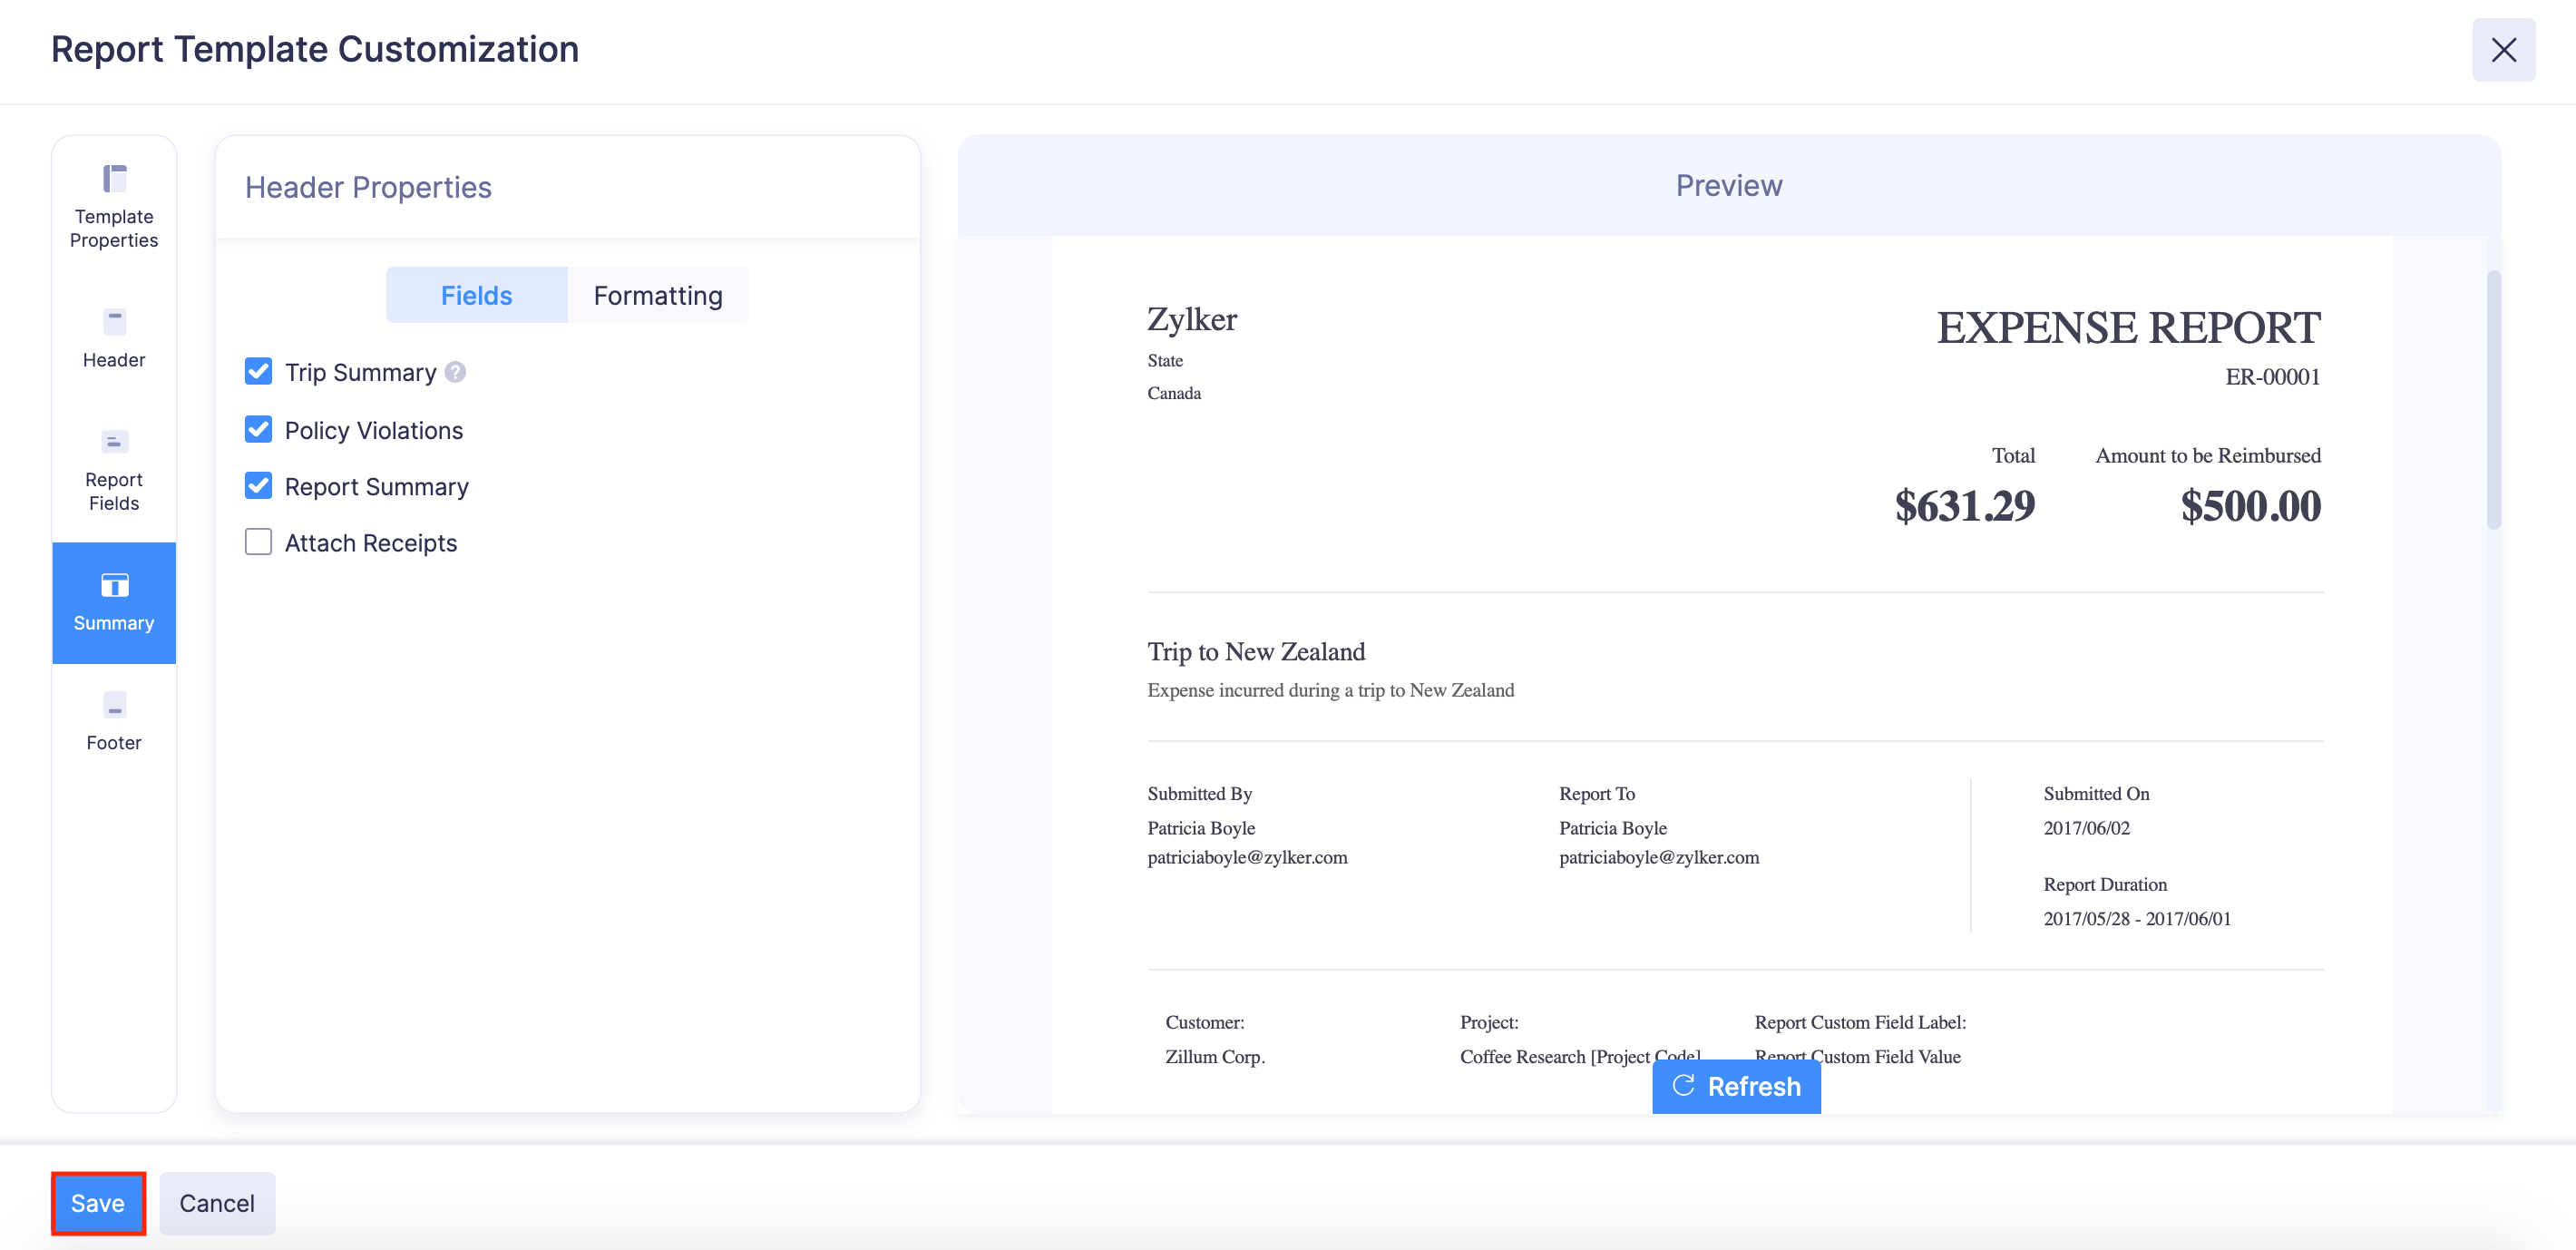
In the Fields tab of the Summary section, you can choose to display details such as trip summary, policy violations, and more.
- Trip Summary: Enable this option to display the associated trip’s details such as the trip number, destination, and description.
- Policy Violations: Mark this checkbox if you want to display the policy violations in the report.
- Report Summary: Enable this option to display the expense summary of the report.
- Attach Receipts: If you want to display the receipts attached to the expenses in the report, enable this option. Mark Display expense details along with the receipts to display expense details such as date, category, amount, merchant, and reimbursable status along with the receipt image in the PDF. You can choose to attach one, four, or nine receipts per page.
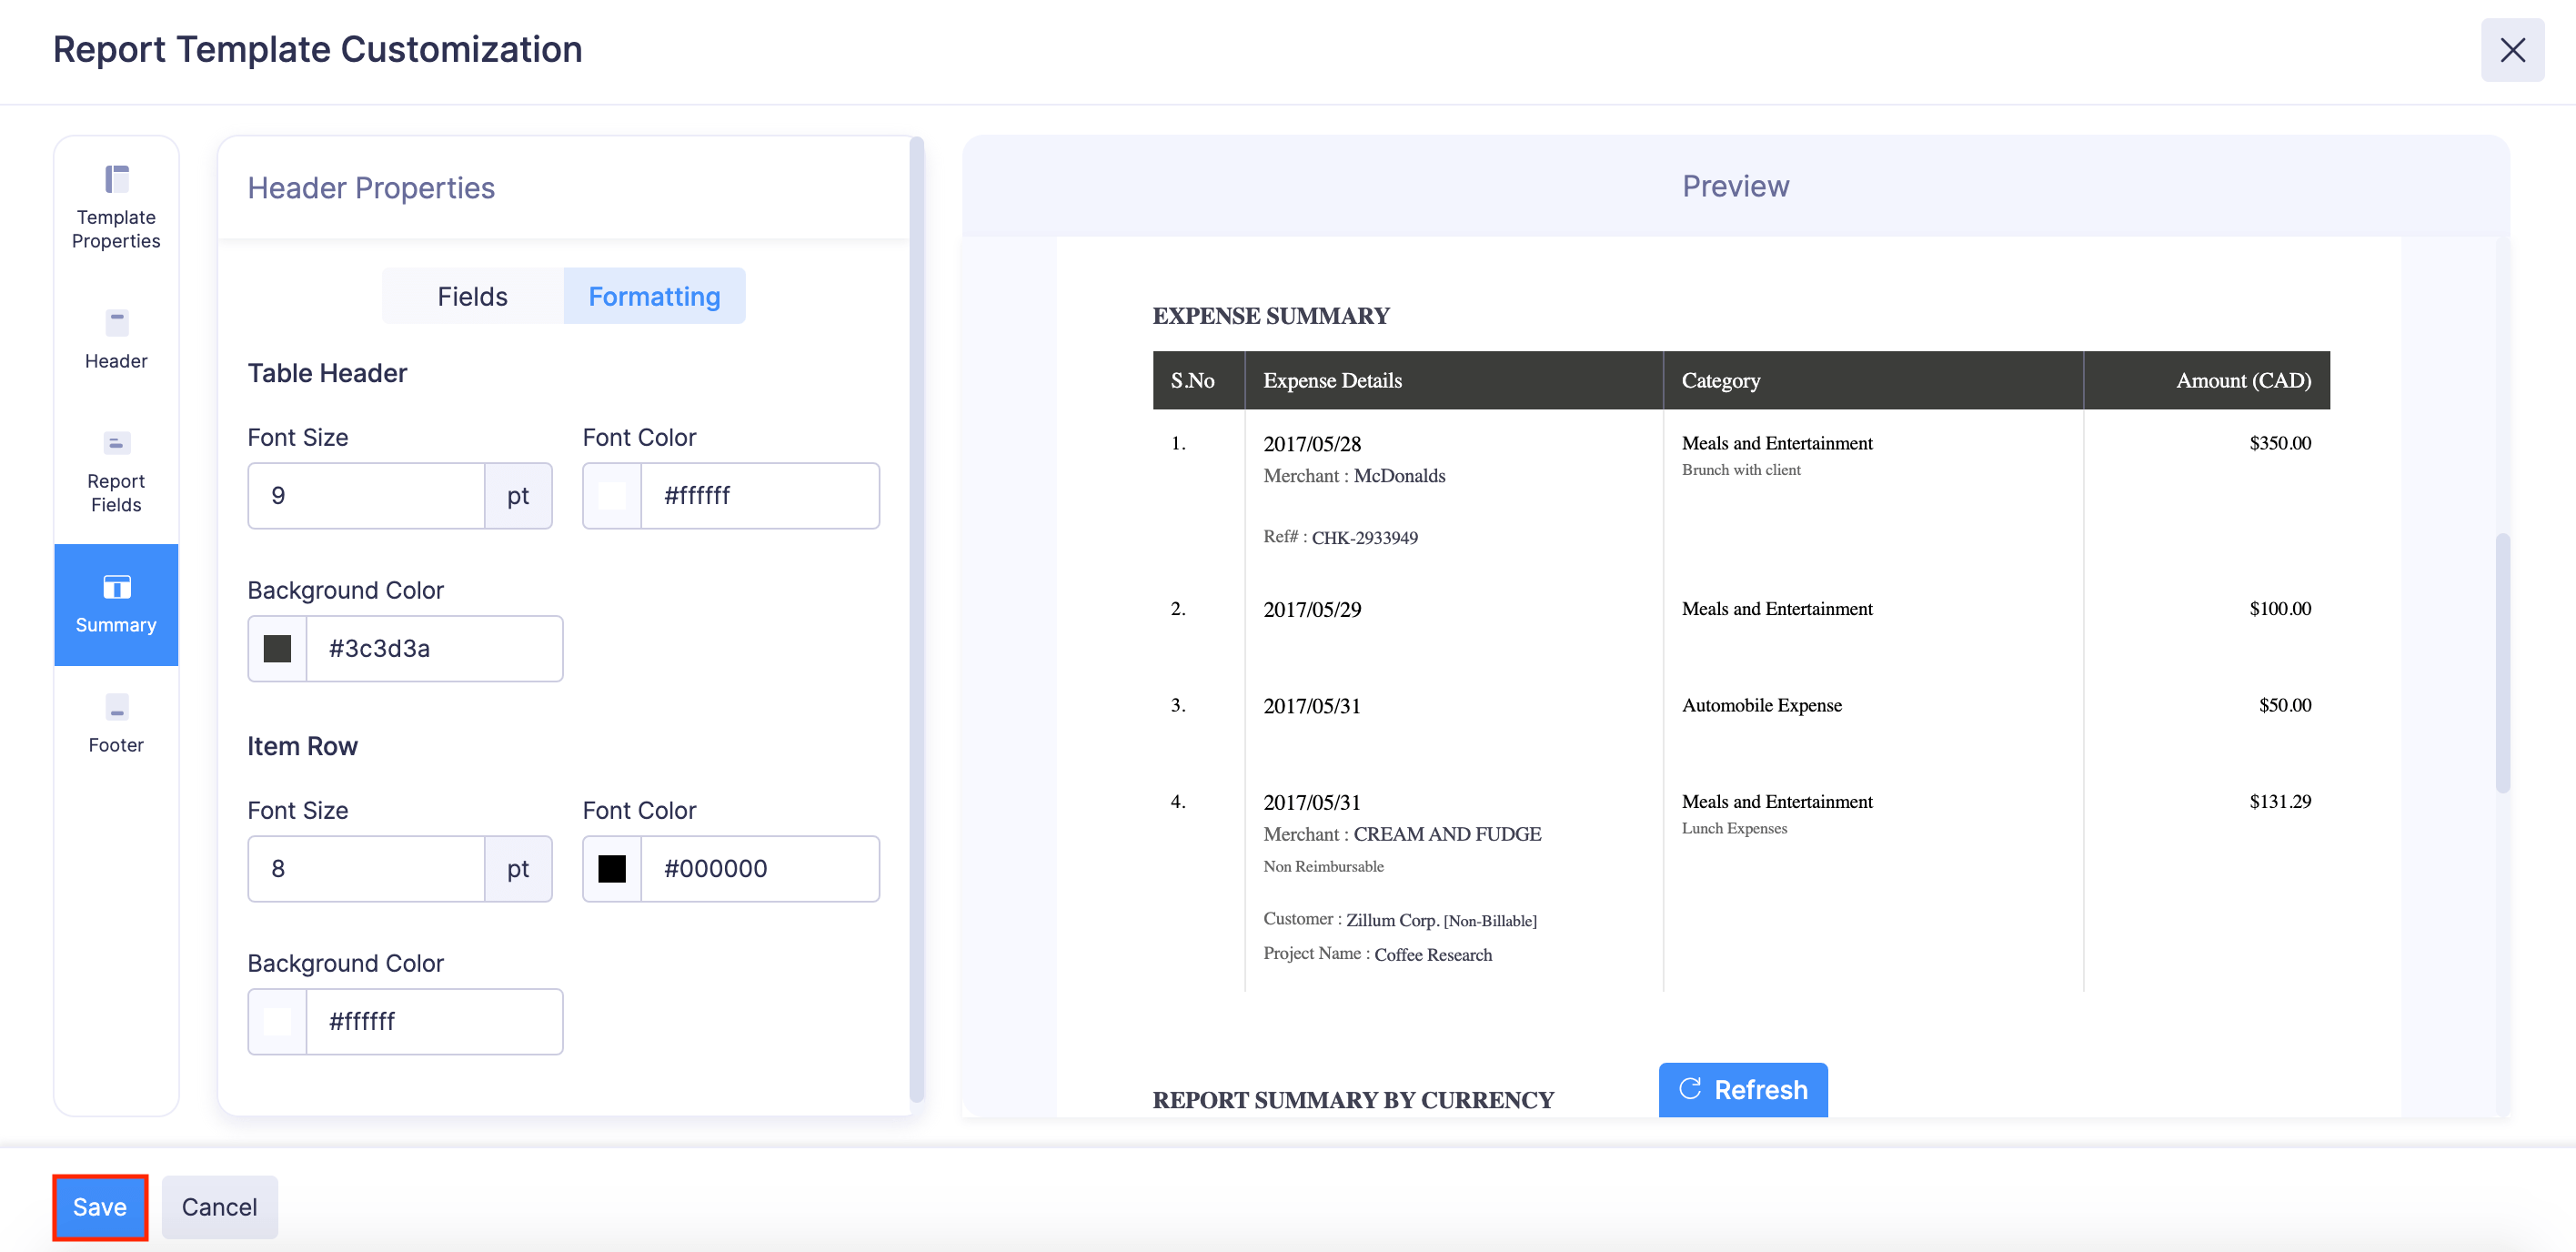
Navigate to the Formatting tab to format the header and item rows of the expense summary in the template.
- Table Header: You can set up the font size and color of your table header. You can also choose to change the background color of the header.
- Item Row: You can configure the font size, font color, and background color of the item rows in the table.
Under Footer, you can set up the footer of the PDF template.
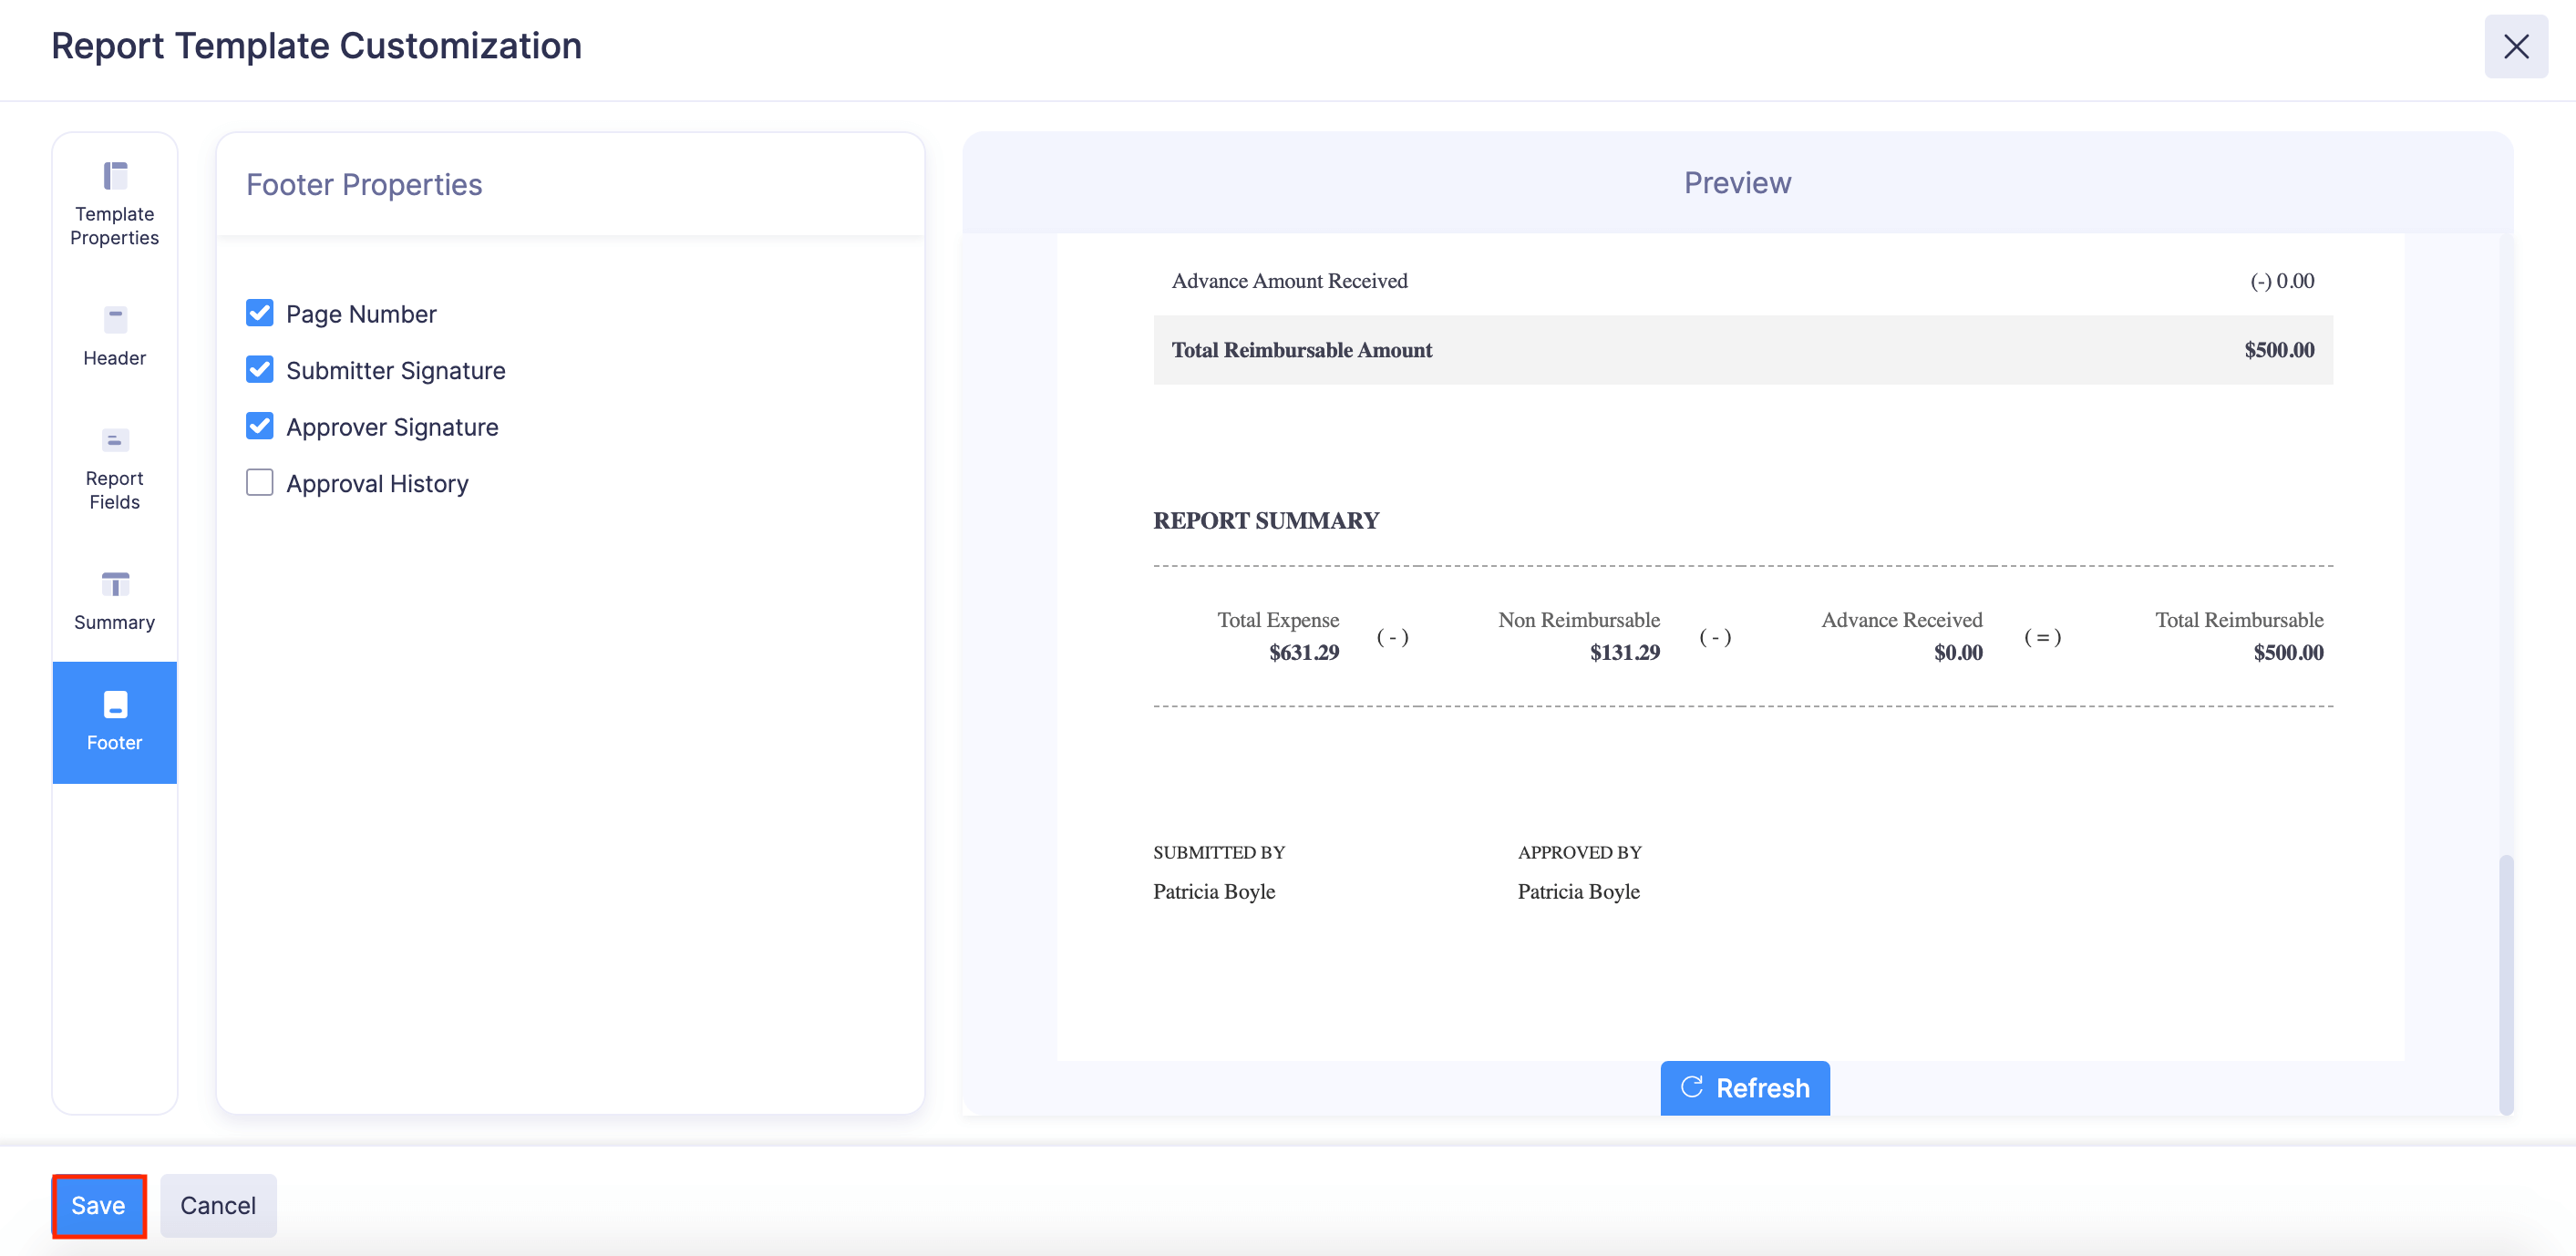
- Page Number: Enable this option to display the page number of the PDF at the footer.
- Submitter Signature: Mark this checkbox if you want the name of the submitter to be displayed.
- Approver Signature: Choose whether you want to display the name of the user who has approved the report. If there are multiple approvers, you can choose to include the names of all the approvers by marking the checkbox All approvers’ signatures.
- Approval History: You can choose to display the details of the approvers and the dates on which the report was approved.
Once you’ve configured the report template, click Save.