Client Approval For Time Entries
Client Approval allows you to get your time entries verified and approved by the clients you’re working for. This would let the clients know the total number of hours you’ve worked for them. The approved time entries alone can later be invoiced to the client.
In this page…
Understand Client Approvals
Let us try to understand Client Approval with the help of a scenario.
Scenario: Andy and his team of employees work on a project, for which they are paid based on the number of hours they work. He records the work done by each employee and sends the time entries to his customer for approval. The customer gets to know the exact number of hours spent on each task and the total time spent on finishing the project. Once the time entries are approved by the customer, Andy can invoice the client for the same, thus making the whole process smooth and easy for both the Andy and his client.
Enable Client Approvals
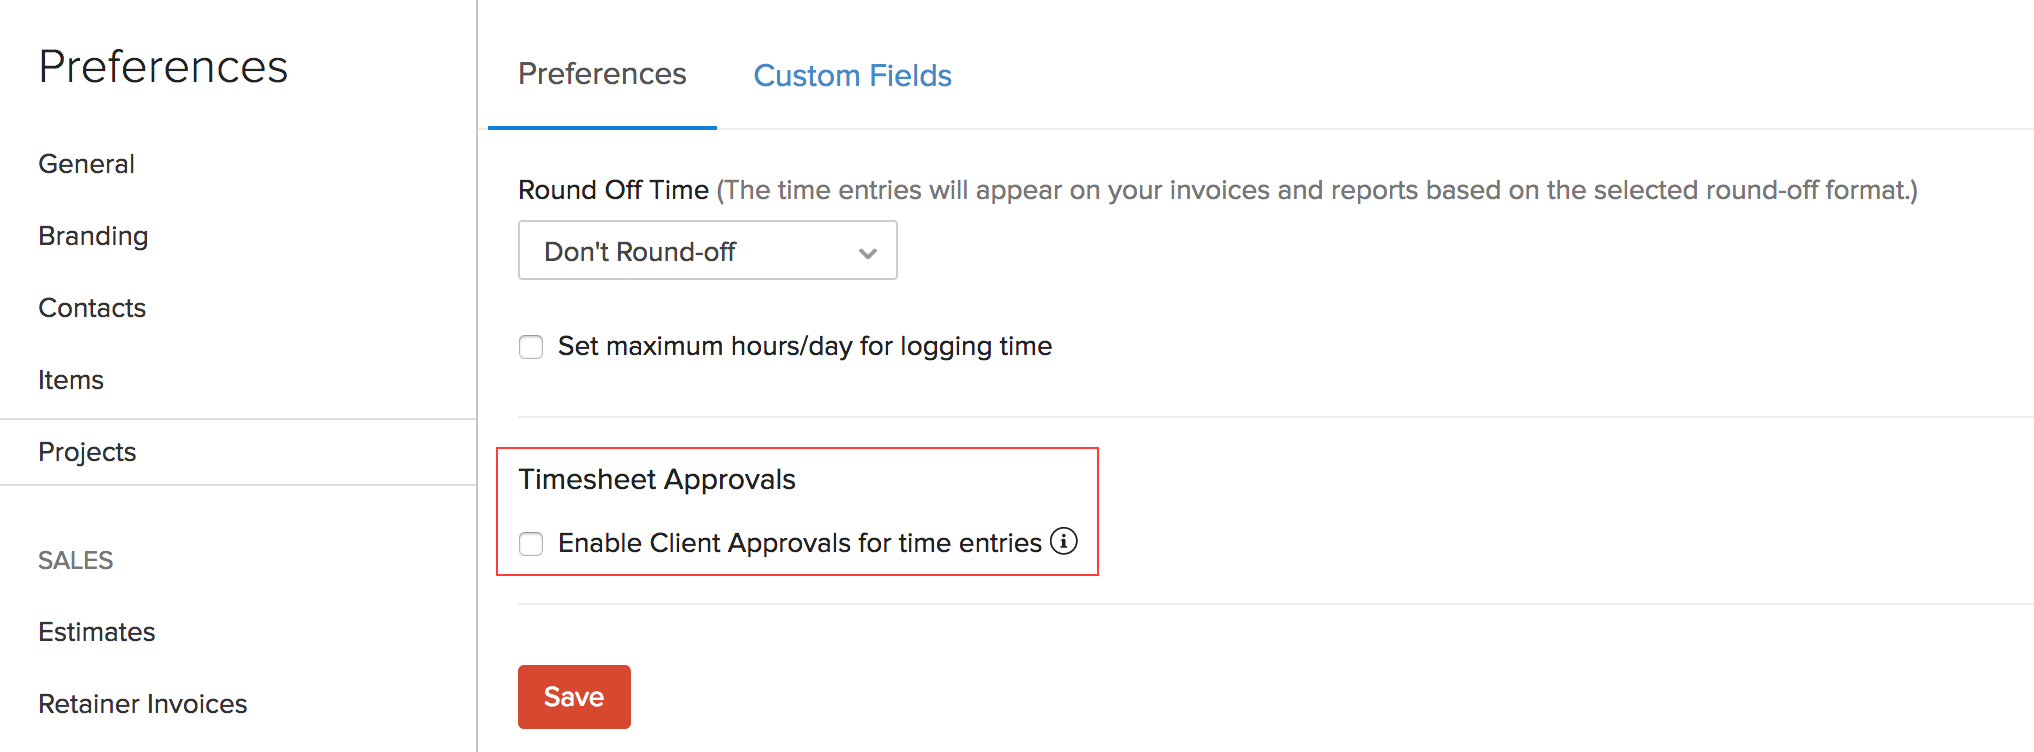
- Log in to your Zoho Books organization.
- Go to Settings and select Preferences.
- Go to the Projects tab in the left menu.
- Mark the Enable Client Approvals for time entries box.
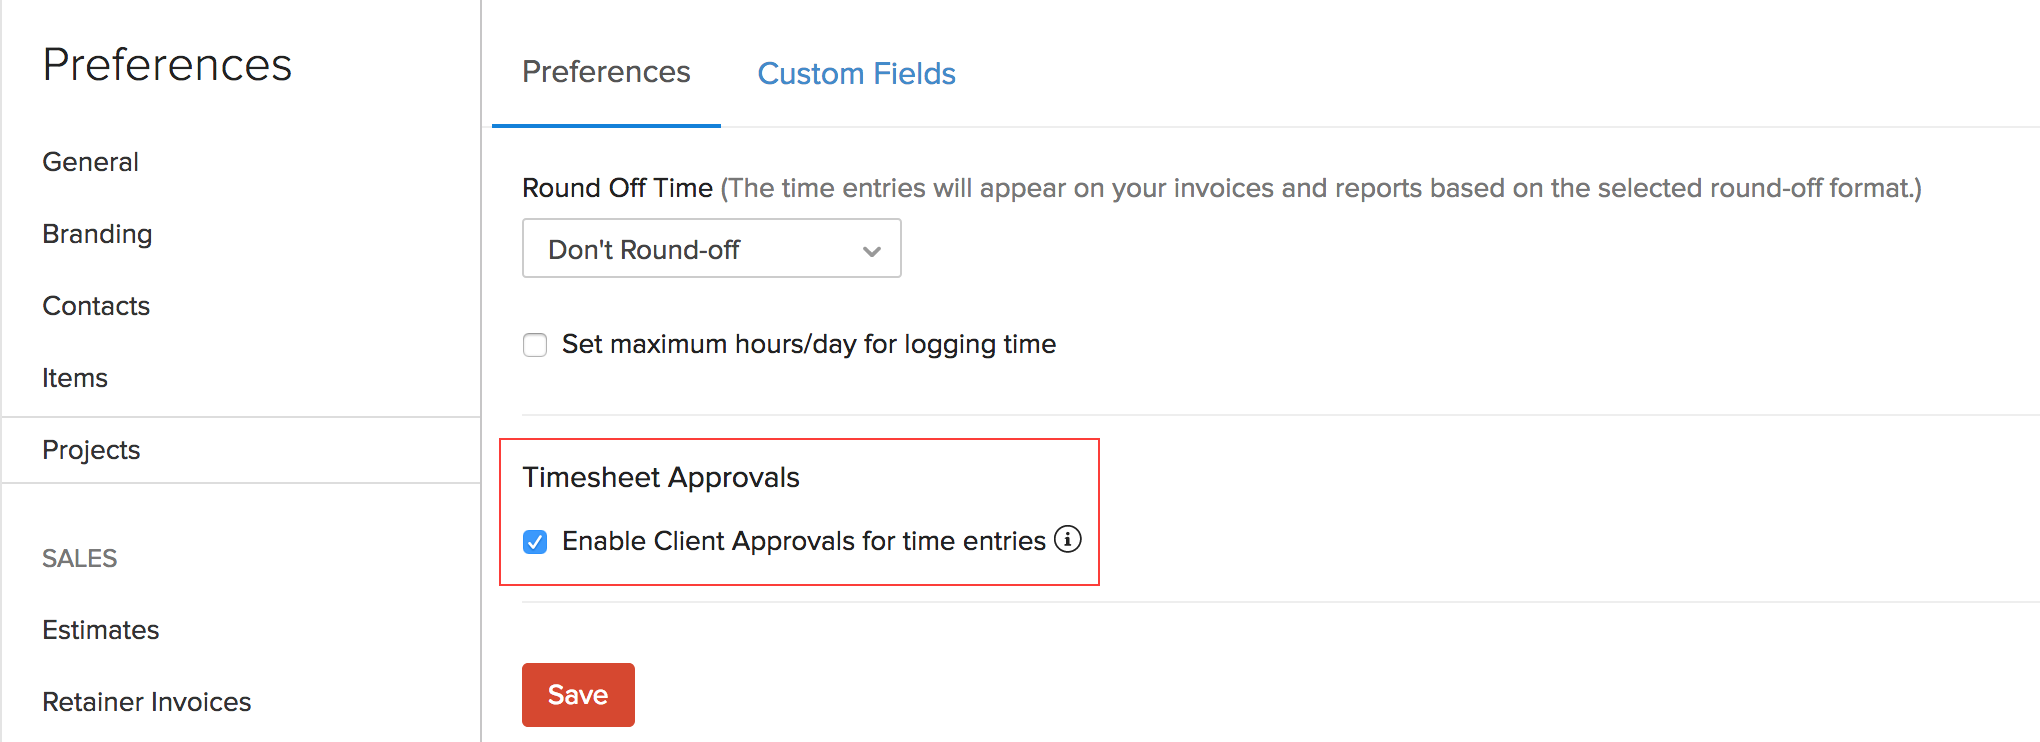
If you haven’t enabled projects and timesheets in the customer portal, a pop-up will appear asking you to enable it.
- Mark the box Enable Projects and Timesheet in Customer Portal, and click Save and Enable to let your customers view your client approvals from the Customer Portal.

Insight: Client Approvals are only available for customers for whom you’ve enabled the customer portal.
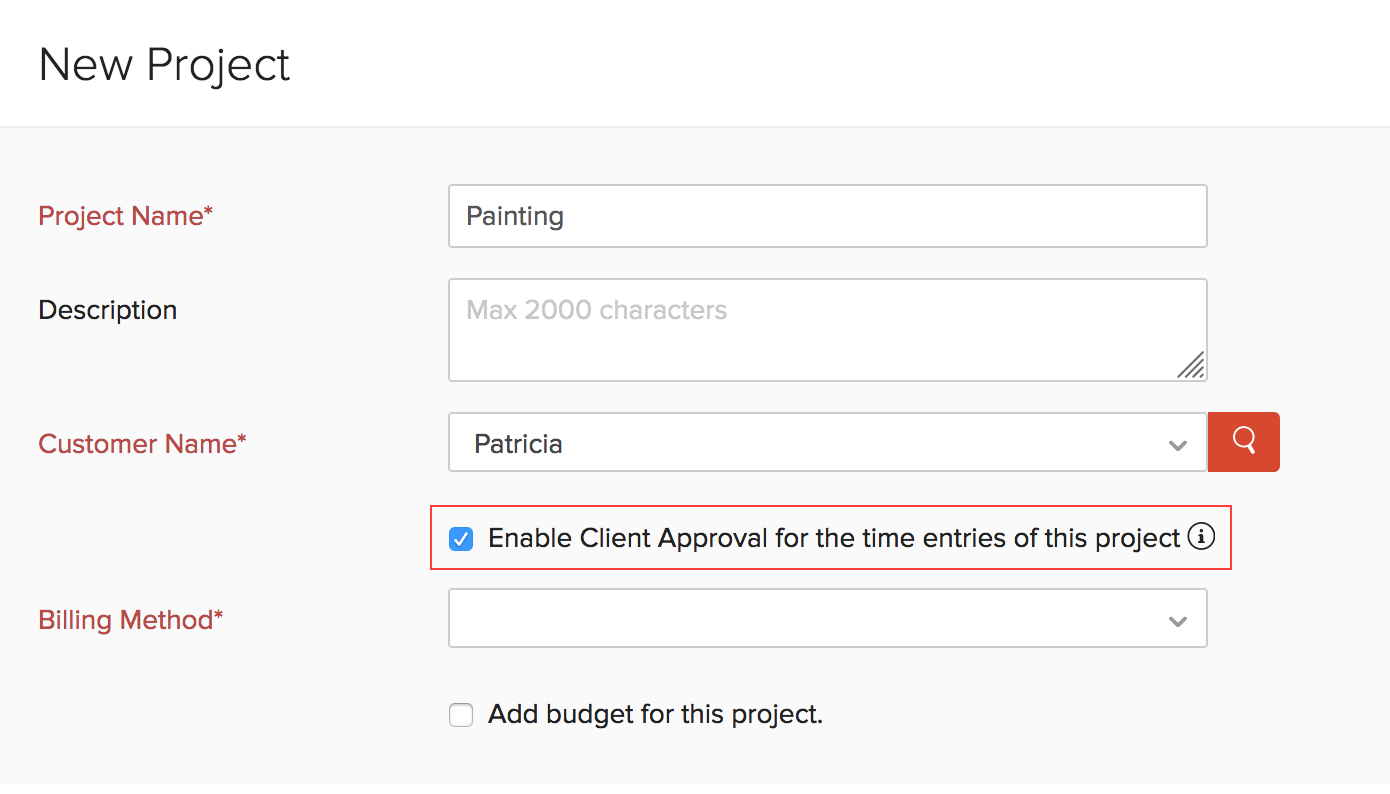
Create Client Approvals
Once you have enabled Client Approval, you can view it by going to Time Tracking and selecting Client Approvals.
Client Approvals are available only for projects for which you’ve enabled them.
To enable Client Approval for a project:
- Mark the box Enable Client Approval for the time entries of this project when creating a new project or editing an existing project.
There are two ways through which you can create client approvals:
1. From the Client Approvals Module
- Go to the Time Tracking module in the left sidebar.
- Select Client Approvals.
- Click + New Create Approval in the top right corner of the page.

2. From the Timesheet Module
- Go to the Time Tracking module in the left sidebar.
- Select Timesheet.
- Select the time entries that need to be sent for approval.
- Click the Submit for Client Approval button on the top.

Once you choose any of the above methods, you’ll need to fill in the following details:
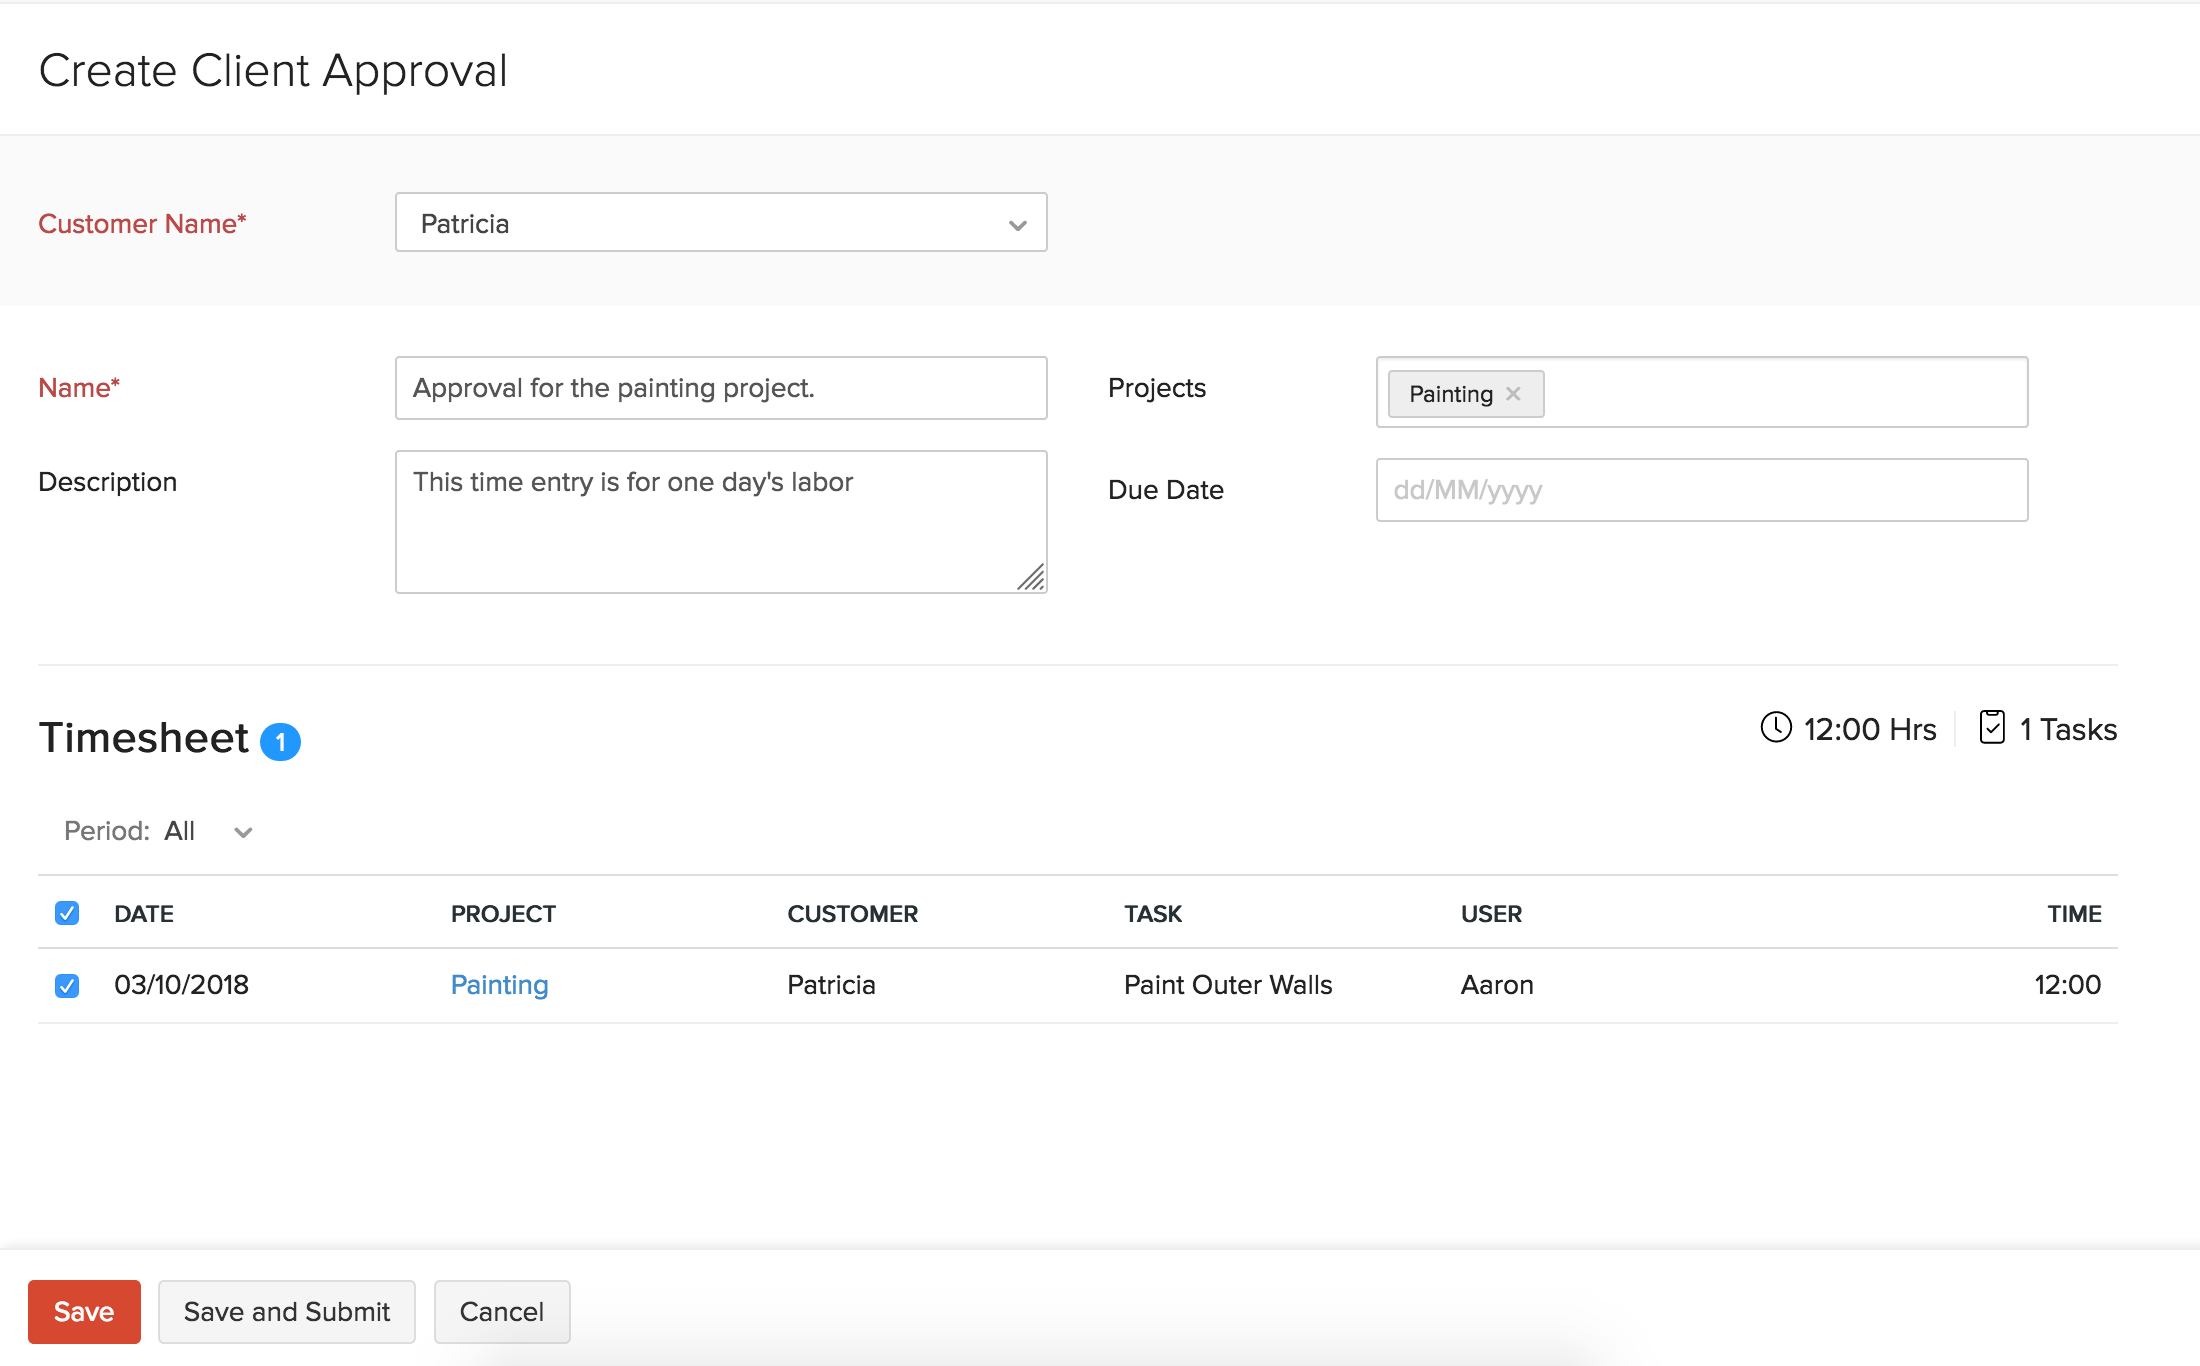
- Choose a customer from the Customer Name dropdown.
- Provide a name for the approval in the Name field.
- Select the projects for which you’d like to include time entries from the Projects dropdown.
- Add a description (if any) for the client approval in the Description field.
- Choose a due date in the Due Date field if you want your client to approve the time entries before a specific date.
- Select the time entries you wish to send your customer under Timesheet.
- Click Save and Submit to save and submit the approval immediately. Next, click Submit for Approval in the following pop-up.
- Click Save to save and submit it later.
Note: You cannot include the time entries that have already been invoiced in a client approval.
Client Approval Actions
The Client Approvals tab lists all your client approvals which can then be submitted, approved or rejected.
In this page…
Approving Client Approvals
There are three ways by which a Client Approval can be approved.
1. From the Customer Portal
Your clients can view your client approvals from the Timesheet tab in the Customer Portal.
From here, they can then approve a time entry by clicking the Approve button on the top right corner.
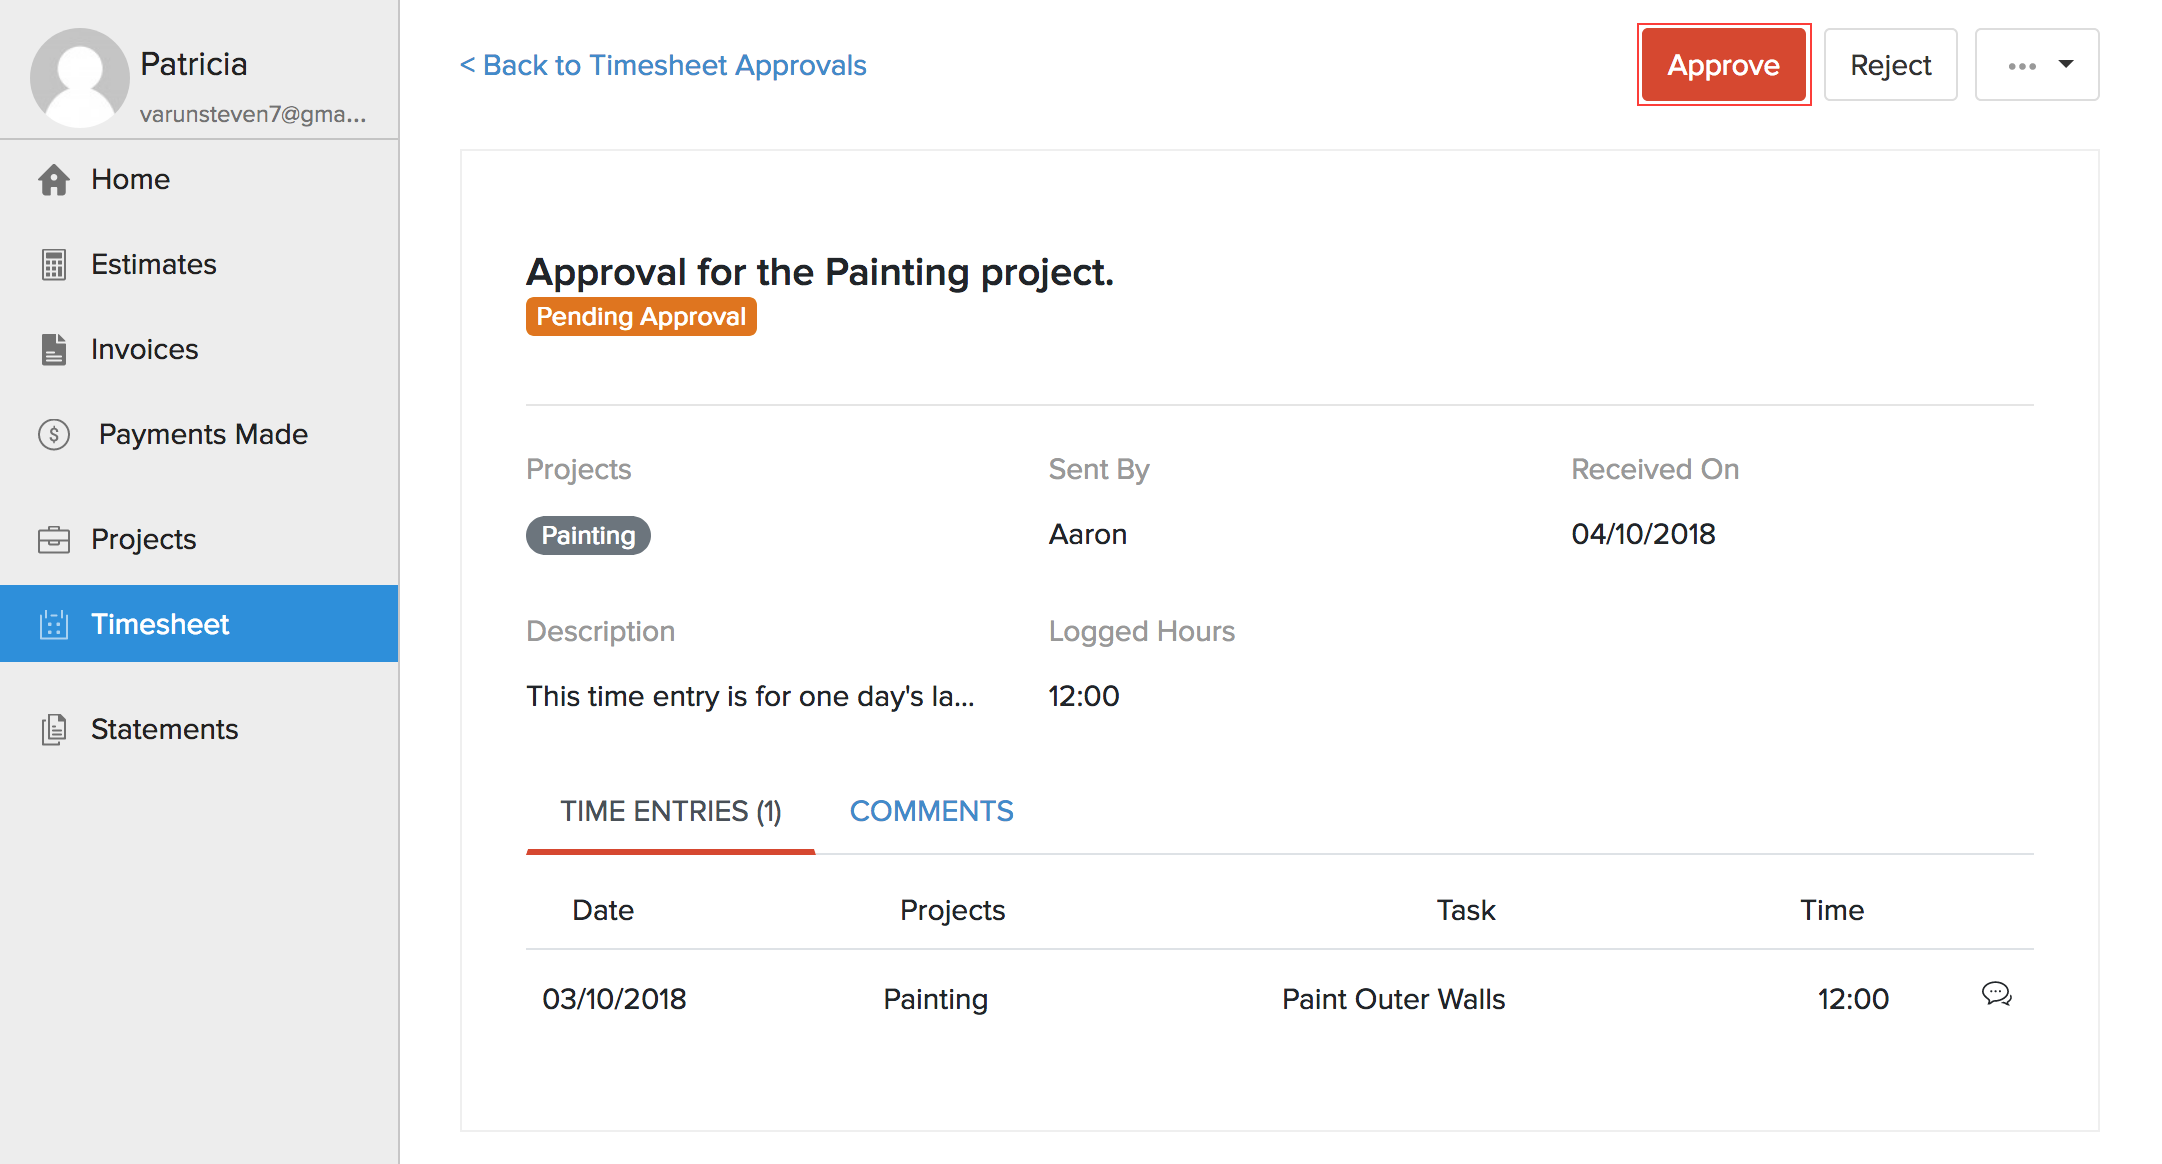
As soon as a time entry is approved, you will get notified within Zoho Books.
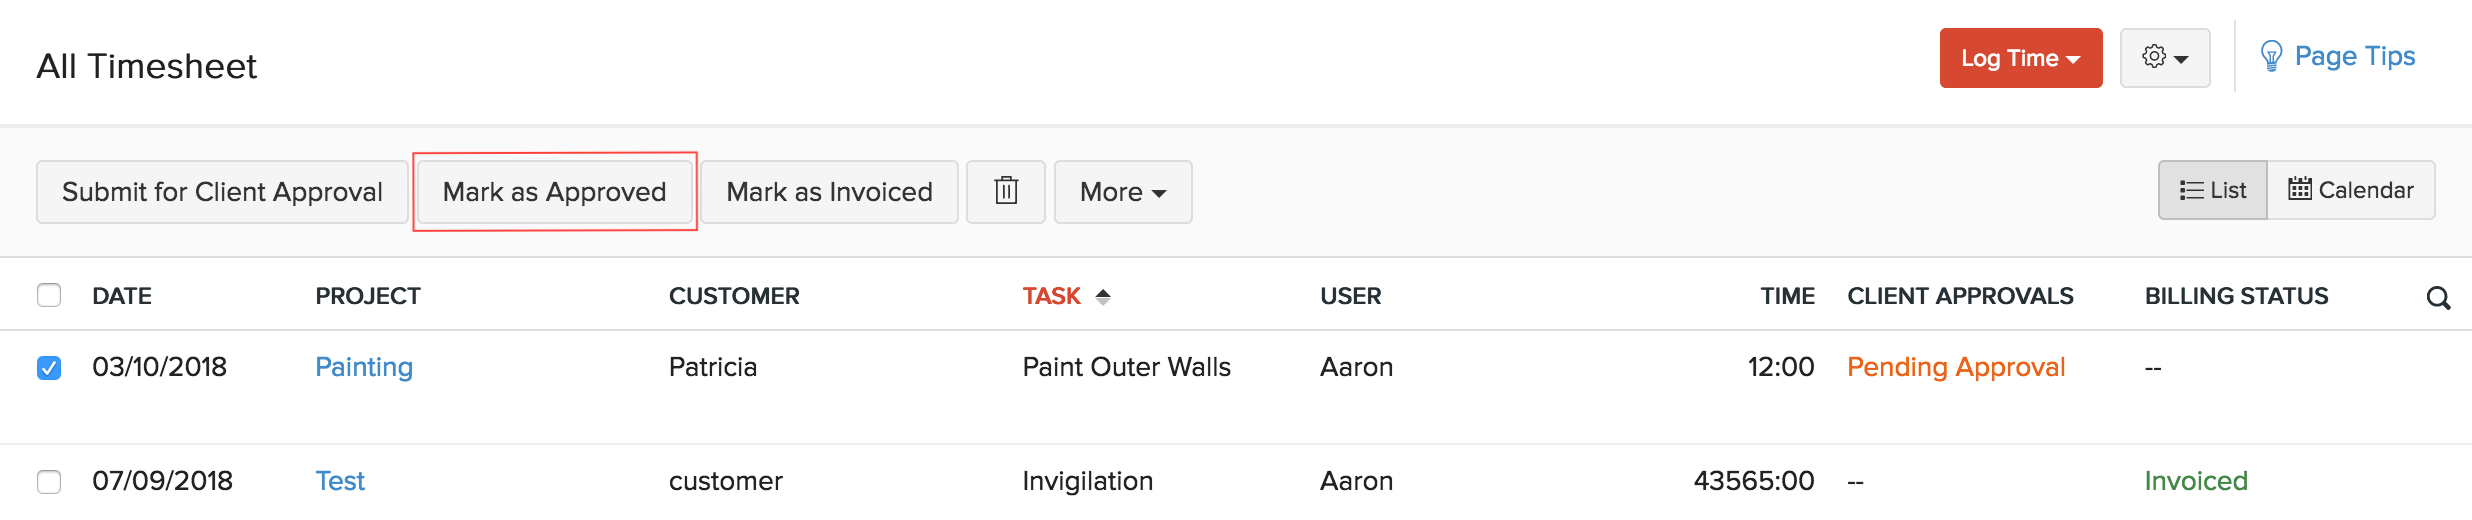
2. From the Timesheet Module
- Go to the Timesheet module under the Time Tracking tab from the left sidebar.
- Select the time entries that need to be approved.
- Click Mark as Approved button on the top to approve them.
3. From the Client Approvals Module
- Go to the Client Approvals module under the Time Tracking tab from the left sidebar.
- Select a time entry that you’d like to approve and click the More drop down.
- Select Mark as Approved.
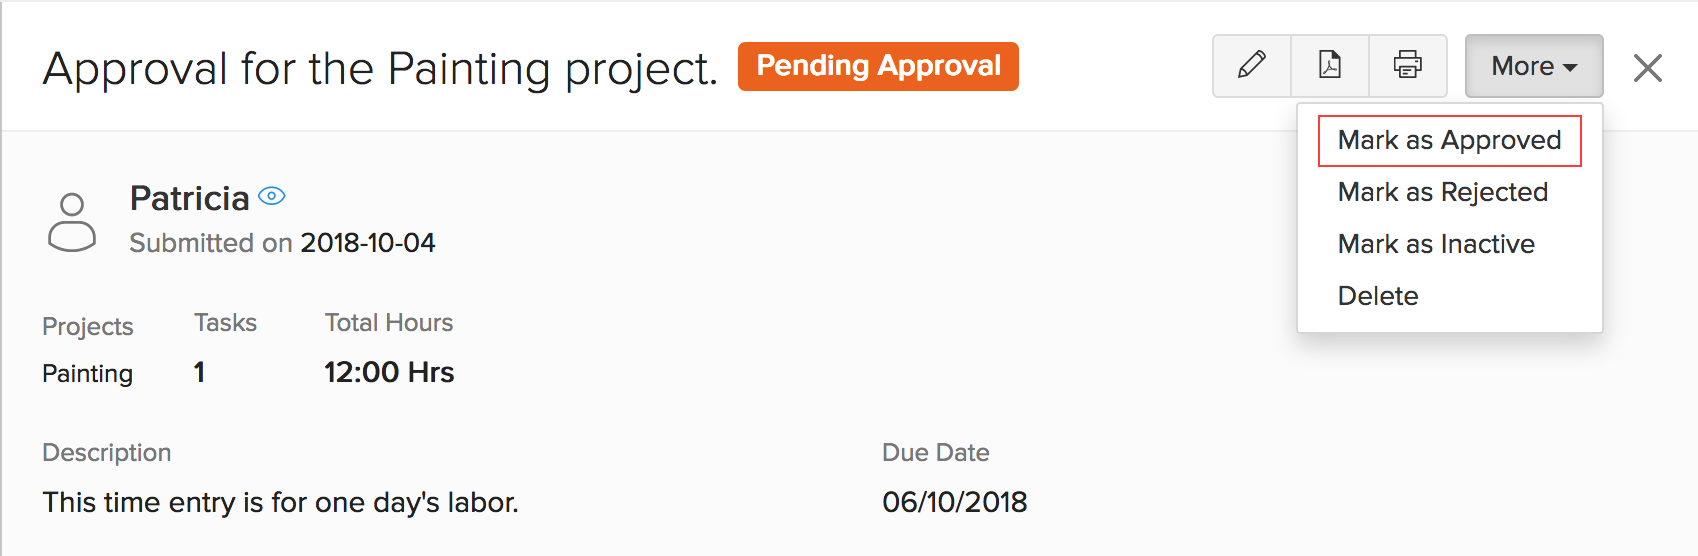
- Click Yes in the following pop-up to approve the time entry.
Rejecting Client Approvals
Client Approvals can be rejected in three ways as well.
1. From the Customer Portal
Your clients can view your client approvals from the Timesheet tab in the Customer Portal.
From here, they can then reject a time entry by clicking the Reject button on the top right corner.

- Your client will then be asked to enter a reason for rejecting the approval.
You will be notified if any of your time entries are rejected along with their reason within Zoho Books.
- You can view a reason for the rejection under the Comments & History section from the client approval page. You can also add or delete your comments from there.
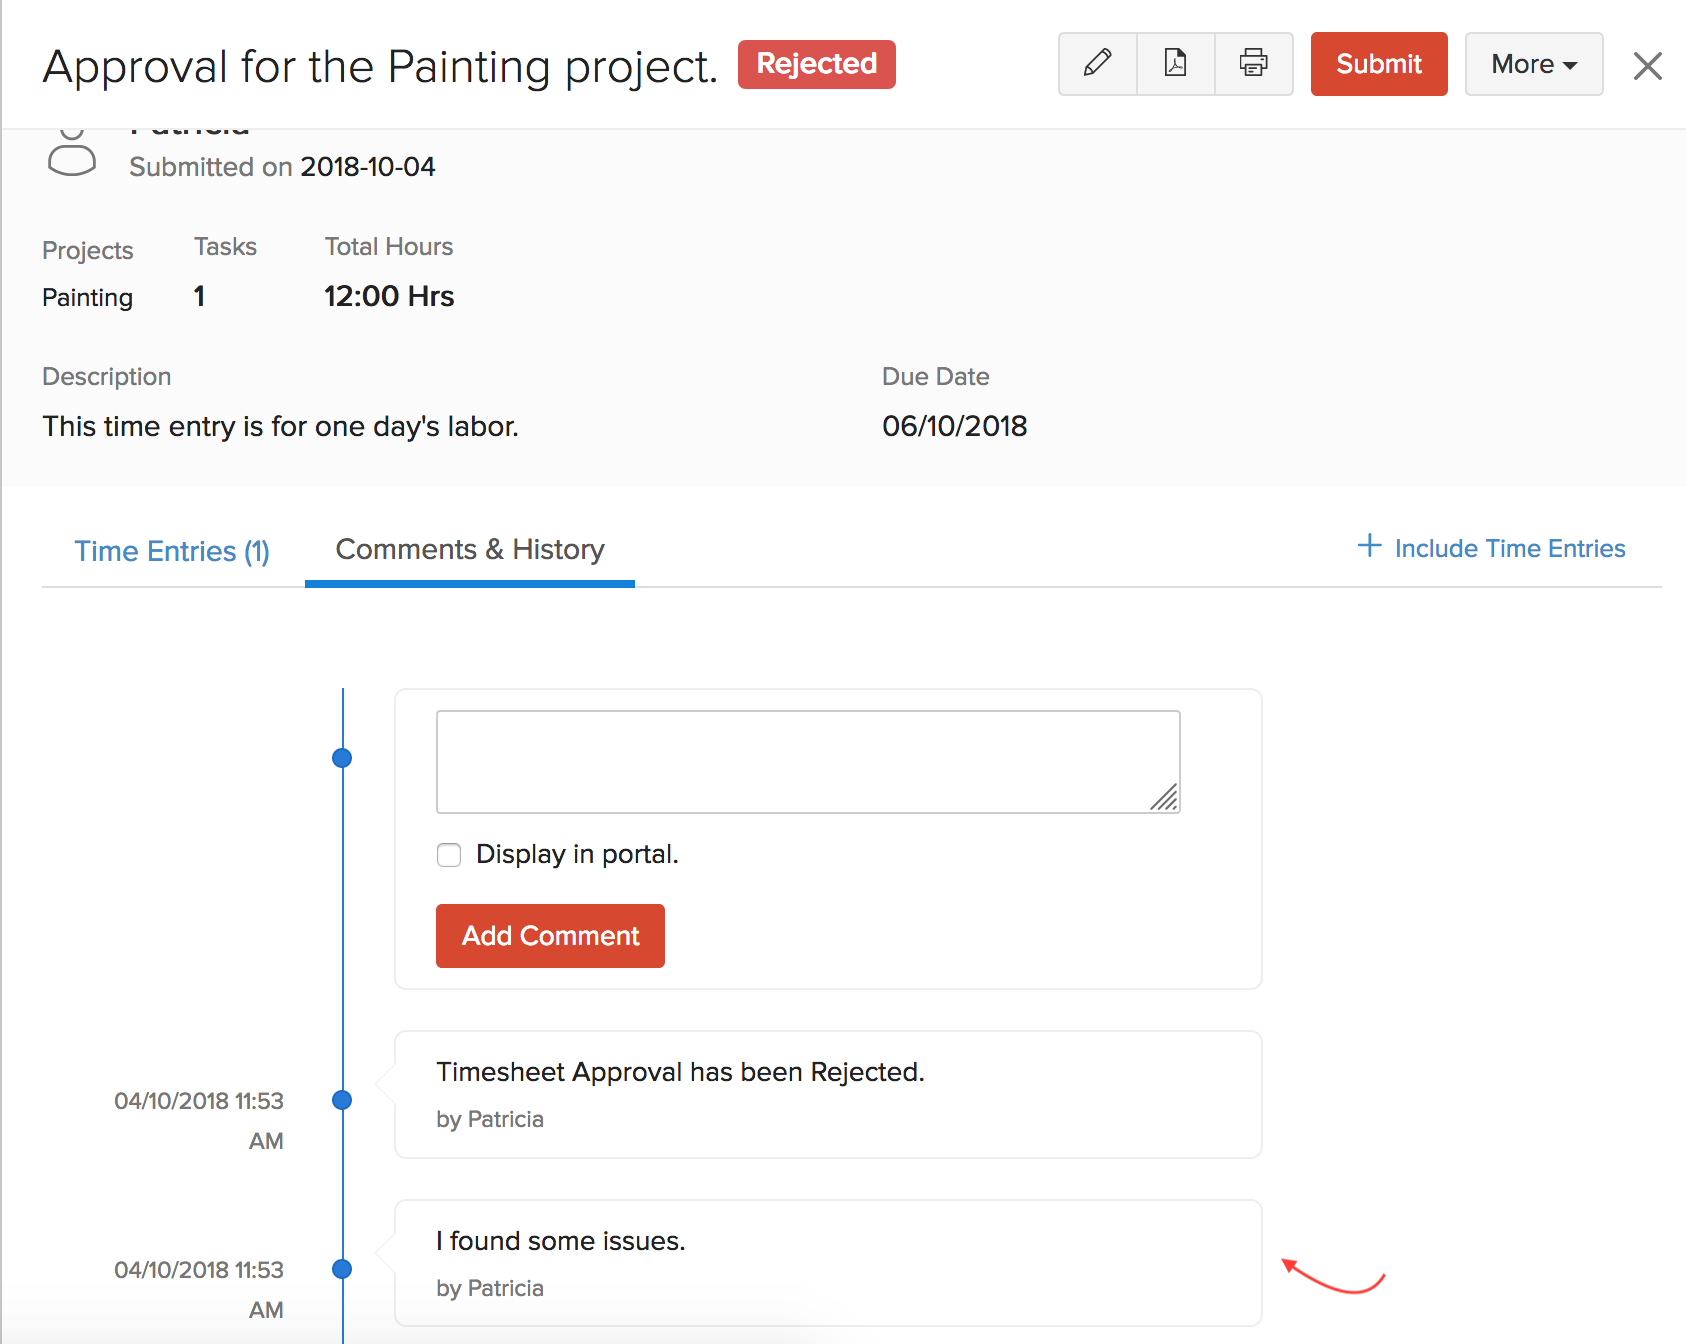
Note: You can use this comment section to exchange messages and discuss about time entries with your clients.
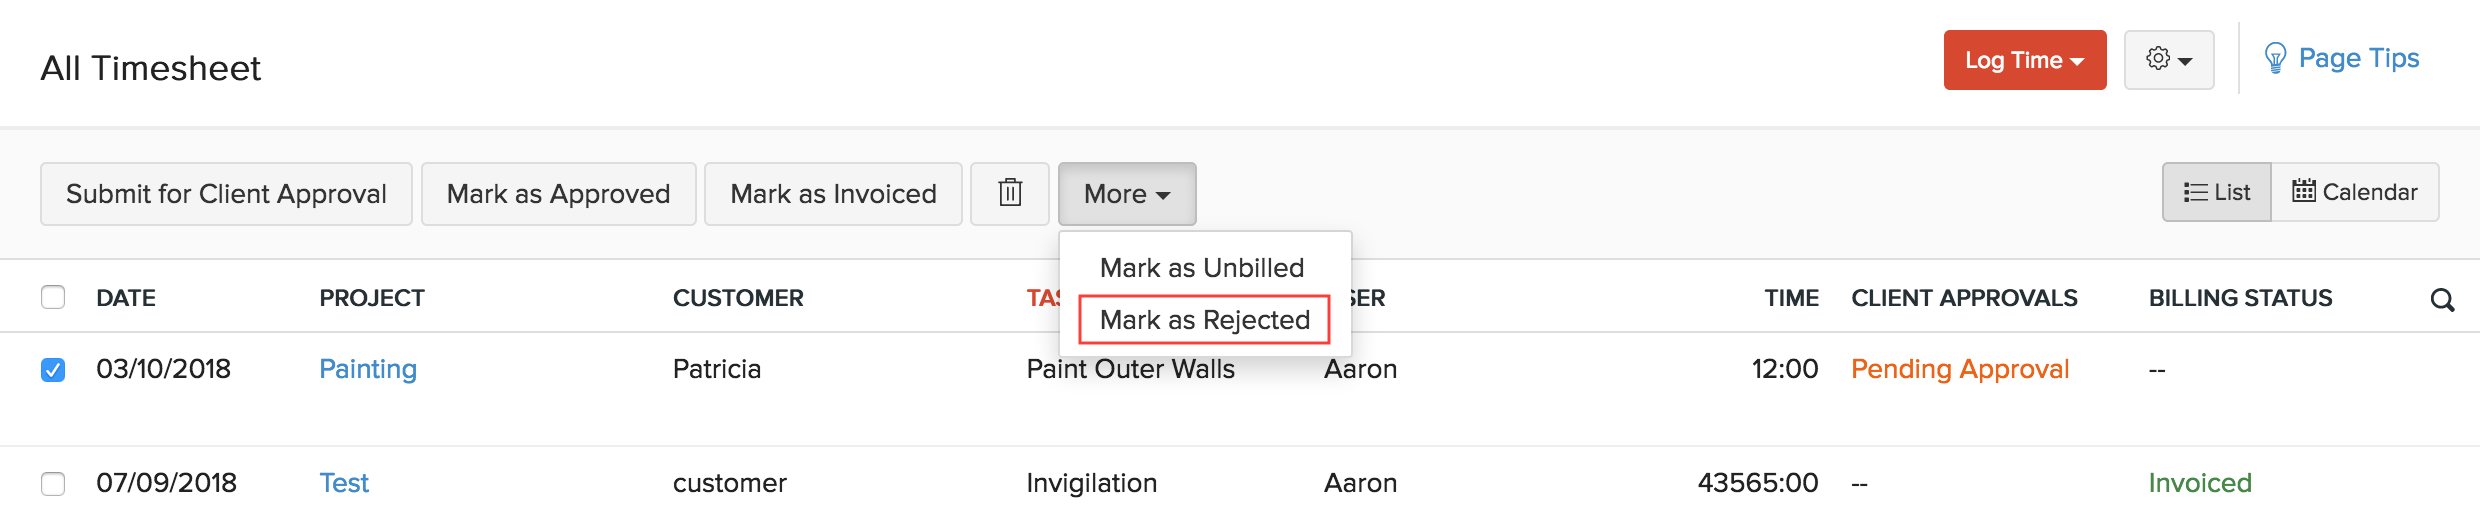
2. From the Timesheet Module
Sometimes, your clients may directly tell you that they don’t approve of an invoice instead of rejecting it from the customer portal. In such cases, you can manually mark invoices as rejected. To do so:
- Go to the Timesheet module under the Time Tracking tab from the left sidebar.
- Select the time entries that need to be marked as rejected.
- Click the More dropdown and select Mark as Rejected.
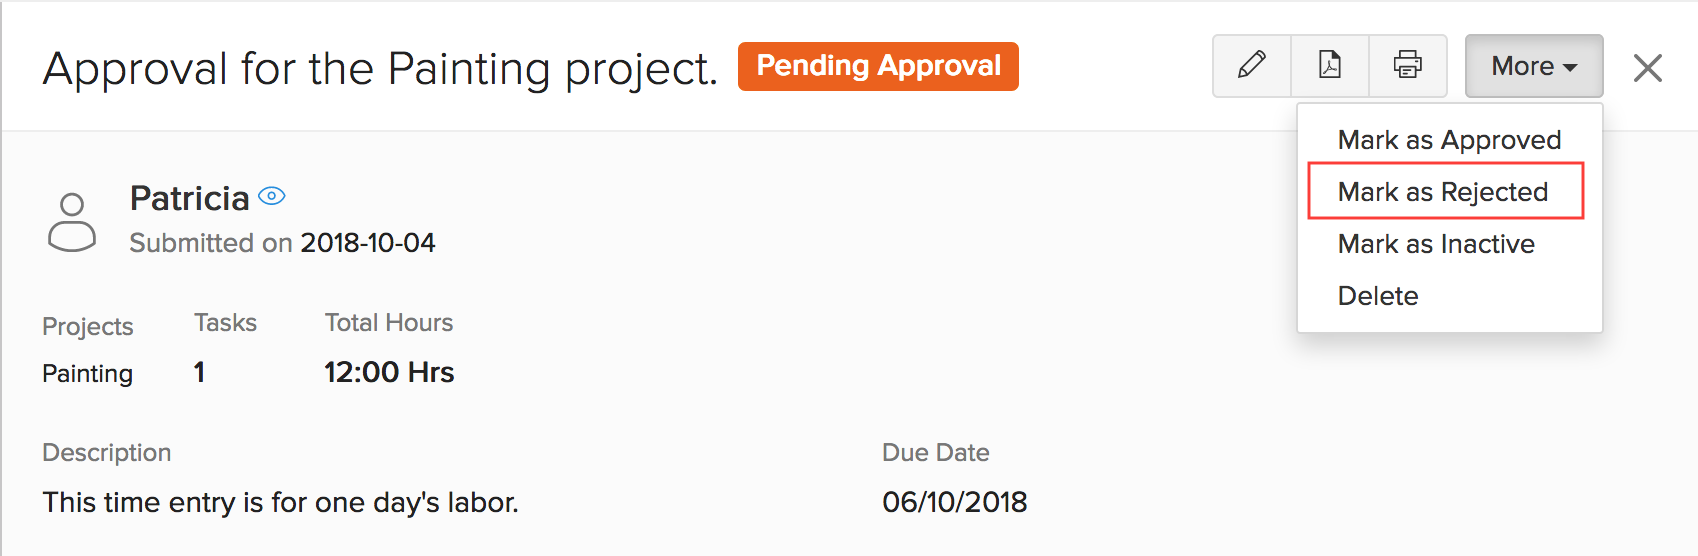
3. From the Client Approvals Module
- Go to the Client Approvals module under the Time Tracking tab from the left sidebar.
- Select the time entry that needs to be marked as rejected.
- Click the More dropdown and select Mark as Rejected.
Note: Only submitted client approvals can be marked as rejected.
Other Actions for Client Approval
Let us take a look at some of the actions that can be performed in Client Approvals.
In this page…
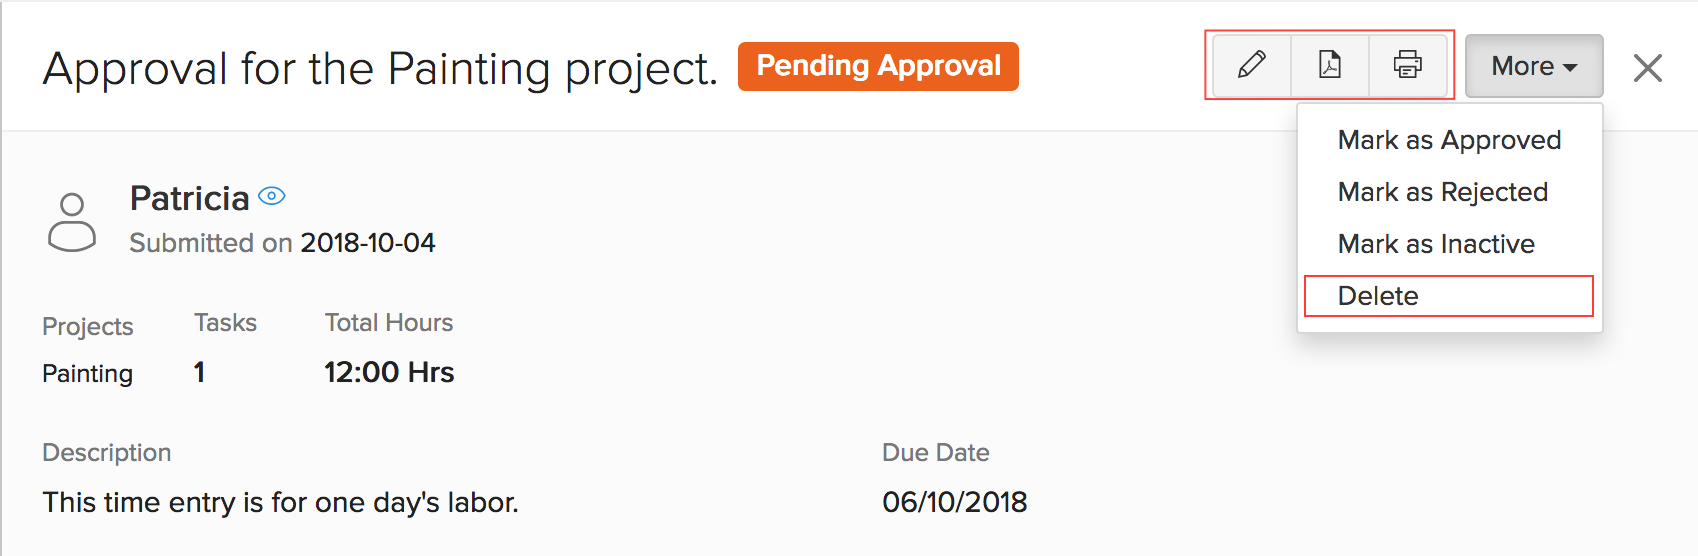
Edit, Print, Download and Delete Client Approvals
Here are the list of actions that can be performed upon a client approval:
- Print - Click the Print icon to print your client approvals.
- PDF - To download your client approvals as PDFs, click the PDF icon.
- Edit - To edit your client approvals, click the Edit icon on the top right corner.
- Delete - To completely delete your client approval, click the More dropdown and select Delete.
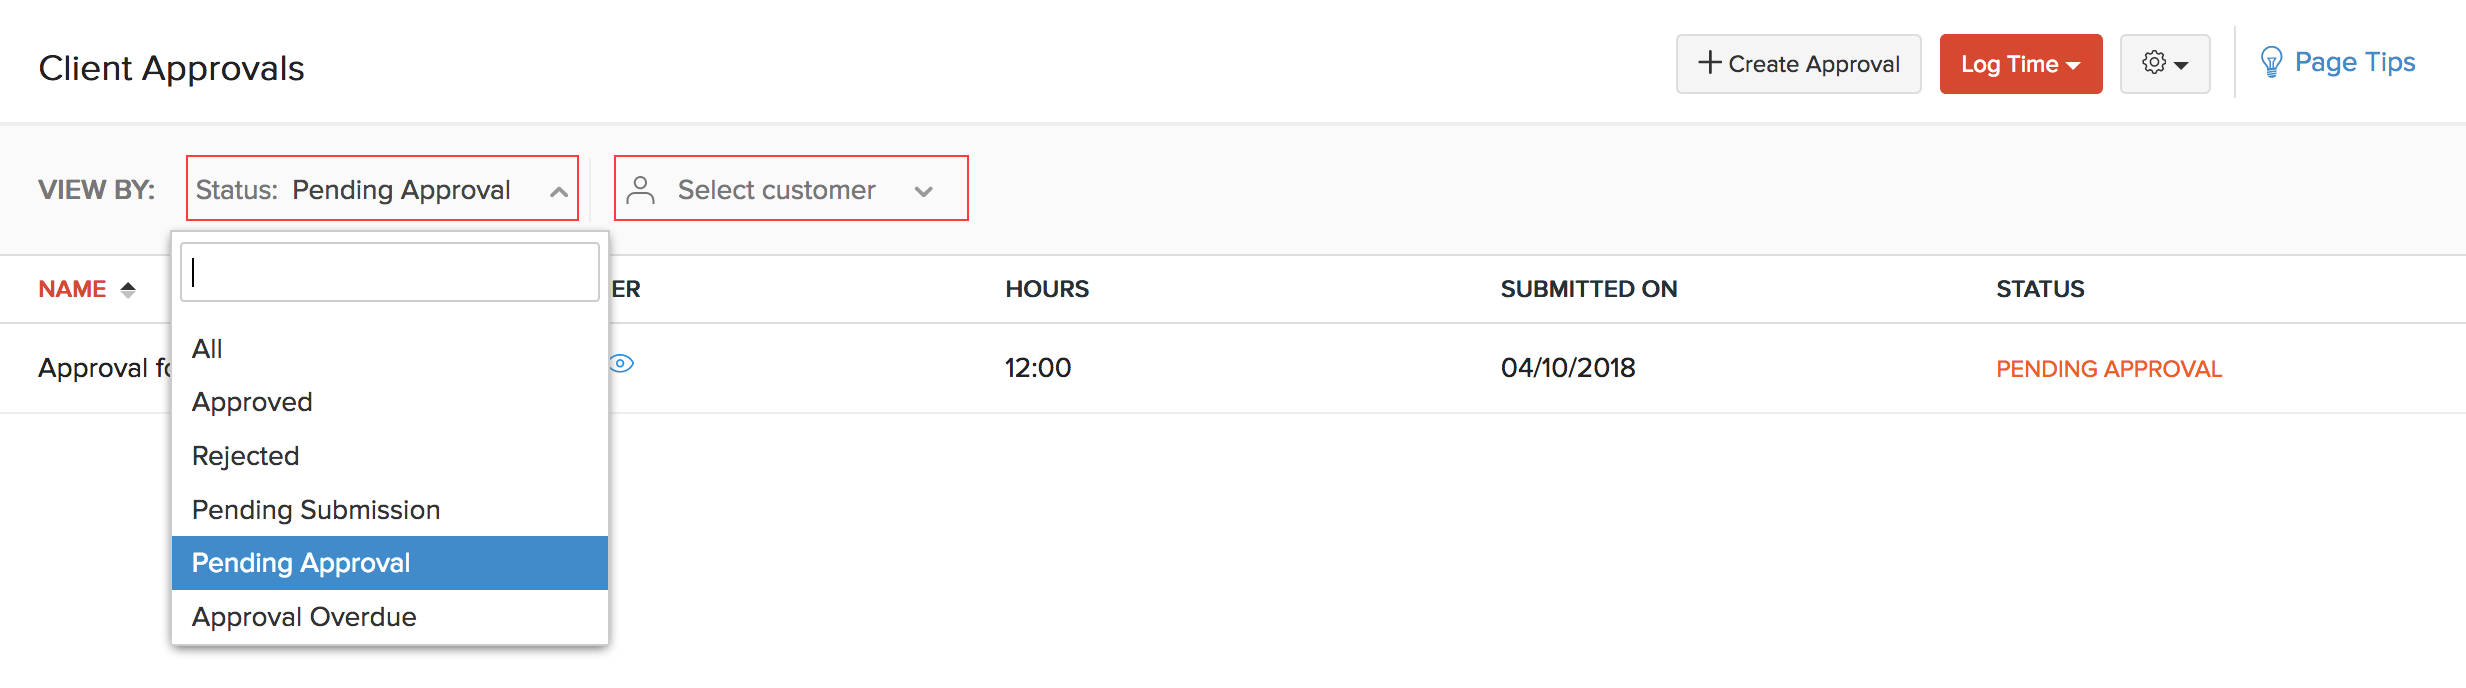
Client Approval Filters
We have a set of filters based on which you can filter your client approvals and list them.
Client Approvals can be listed based on their status and the customer names. The status can be chosen from the Status dropdown and the customer name can be chosen from Select Customer dropdown. The following are the status filters that are available in Zoho Books for Client Approvals:
- All
- Approved
- Rejected
- Pending Submission
- Pending Approval
- Approval Overdue
These filters can also be used by your clients from the Customer Portal.
Disable Client Approval
Prerequisite: To disable the Client Approvals feature for your organization, you will have to disable Client Approvals for every individual project for which you have enabled client approvals. To do so:
- Unmark the Enable Client Approval for the time entries of this project box by editing an existing project.
Next, to disable Client Approvals for your organization:
- Click the Settings and select Preferences.
- Go to Projects in the left menu.
- Unmark the box Enable Client Approvals for time entries.
- Click Save.
 Yes
No
Yes
No
 Thank you for your feedback!