Adding Users
Once you have set your Organizational details, it is important to have users added to your account. Adding users can be done in more than one ways and it is an easy process. There are three methods of adding users. This is explained in the image below.
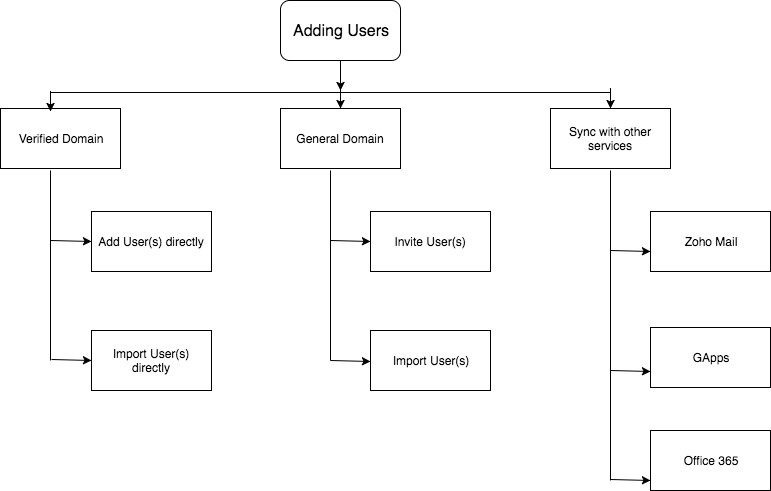
Verified Domain
General Domain
Sync with other services
Using Mobile Number Verification
Converting types of employees
- Converting Users into Employee profiles
- Converting Employee profiles into Users
- Enabling or Disabling User Login
- Editing email addresses of Users and Employee Profiles
- Viewing users in the organization tree
If you run into errors when trying to add users in Zoho People, use the following link to read about troubleshooting:
Verified Domain
Users can be added into the Zoho People account directly if a verified domain is used.
Click here to know more on Domain addition and verification.
Add User Directly
Adding users directly is a method to add users directly to your organization. You can give the users' user name and password, and add them to the org domain. They can change their password later. Given below are the steps to add users directly.
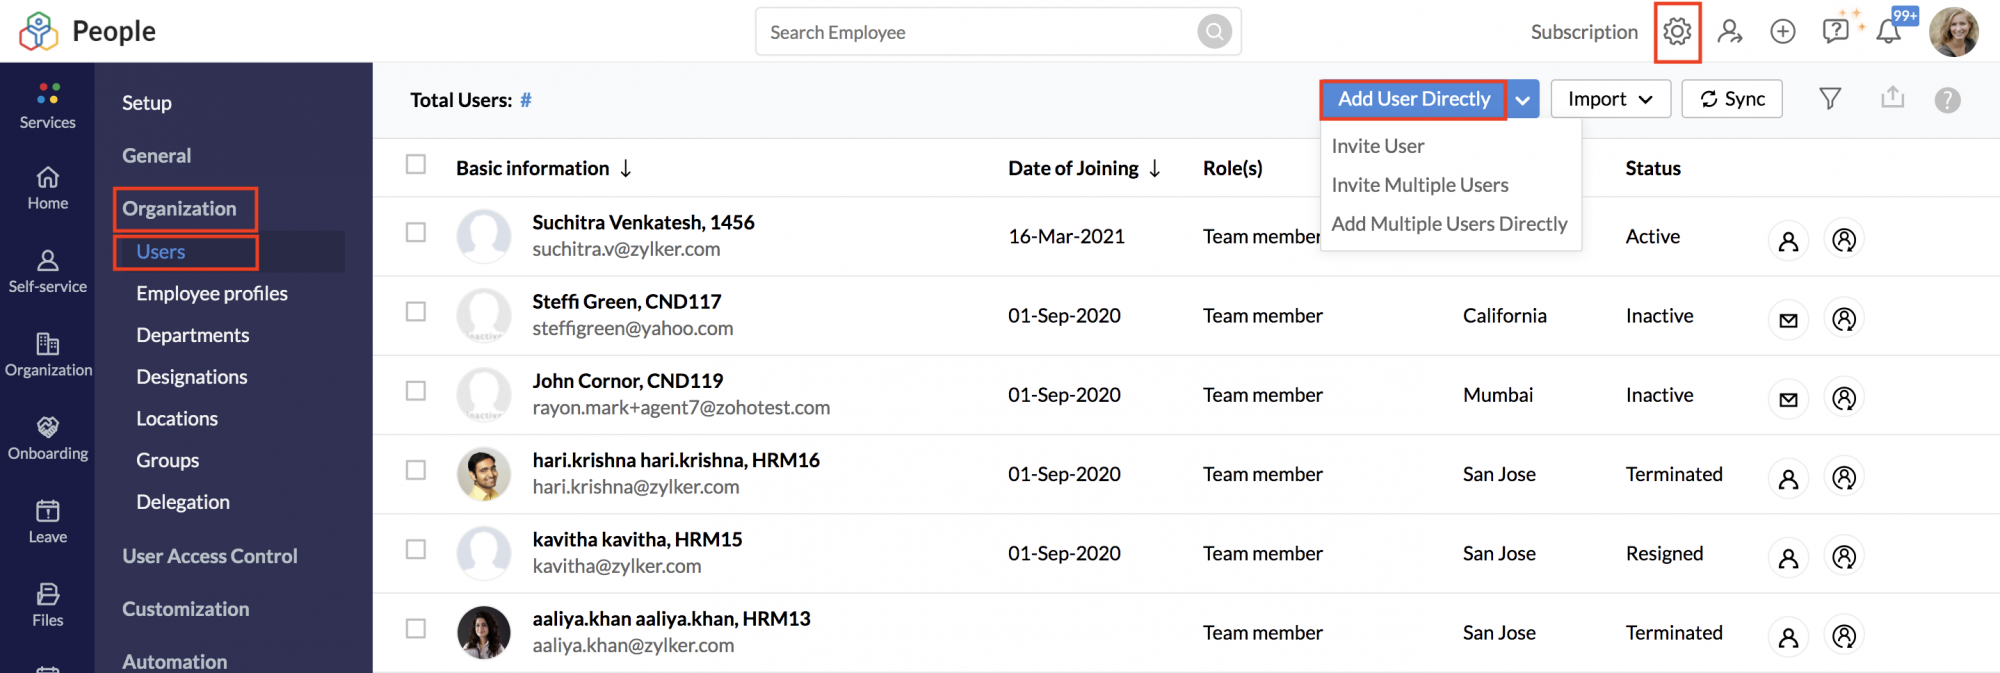
- From your home page, go to Settings > Organizations > Users
- Click on Add User Directly if you would like to add a single user or Add Multiple Users Directly if you want to add many users.
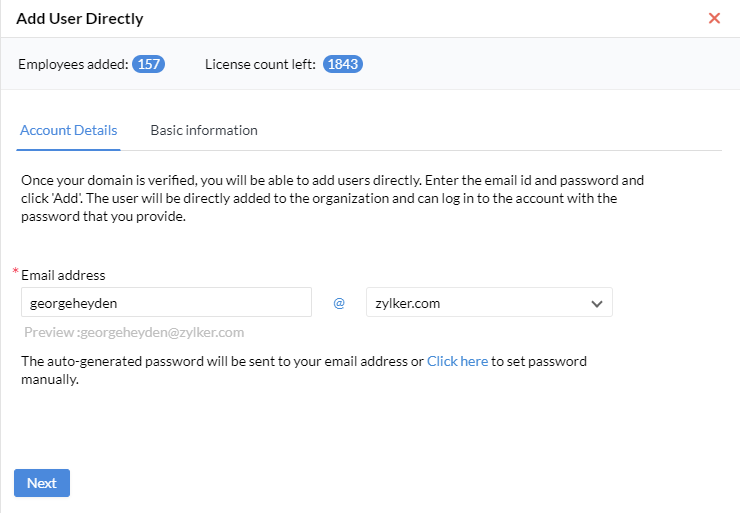
- Enter the email address, and select a verified domain from the drop-down provided.
- Note that by default auto-generated passwords will be used, if you wish to manually enter the password, use the Click here to set password manually option.
- Click Next.
An account will be set up for the user you added, and an email will then be sent to you (Administrator) the email includes the email id and the password for that particular user
Add Multiple Users Directly
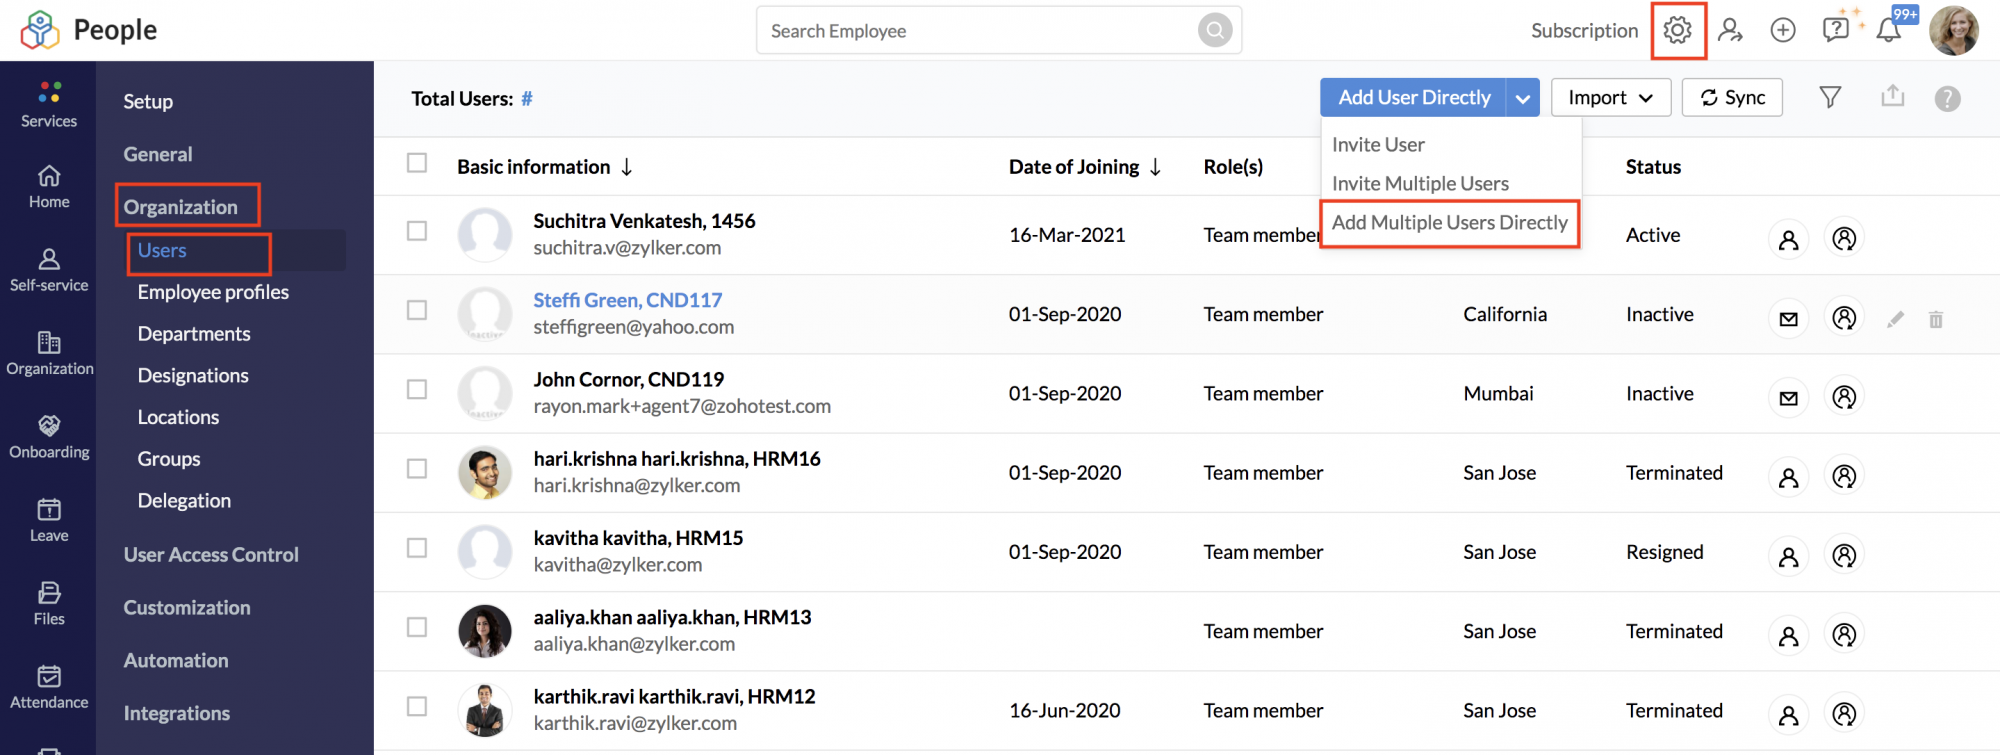
The process is similar when adding multiple users directly. Go to Settings > Organization > Users, click on the down-facing arrow next to Add User Directly button, and select Add Multiple User Directly option.
Use the + icon to add multiple email id's to invite multiple users. Note that the email you (Administrator) receive will contain a table consisting of the various email id's and their respective passwords.
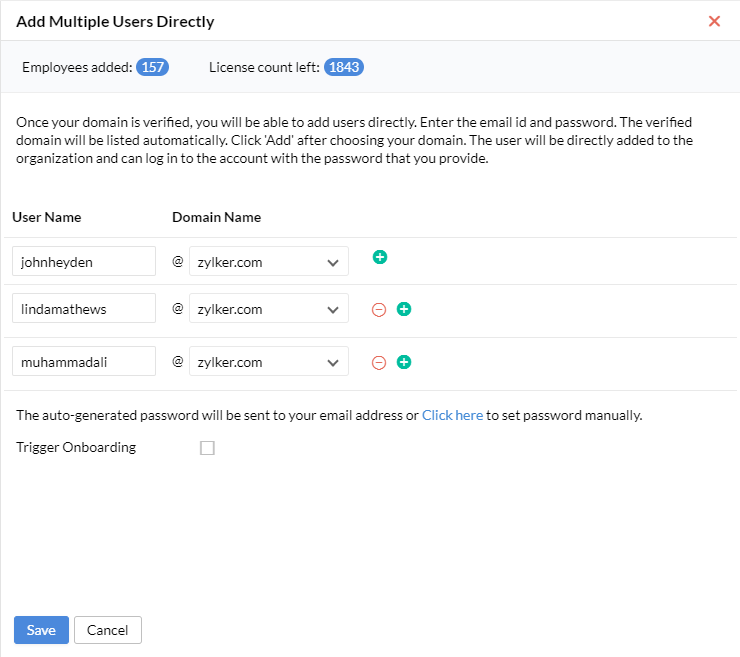
If the users you are adding are candidates who would be joining your organization, use the Trigger Onborading checkbox, This option will send an invitation link to the candidates, the candidates can use the email id and password they receive via email to login into their newly created Zoho People accounts. The included auto-generated passwords can be changed by the candidates when they login.
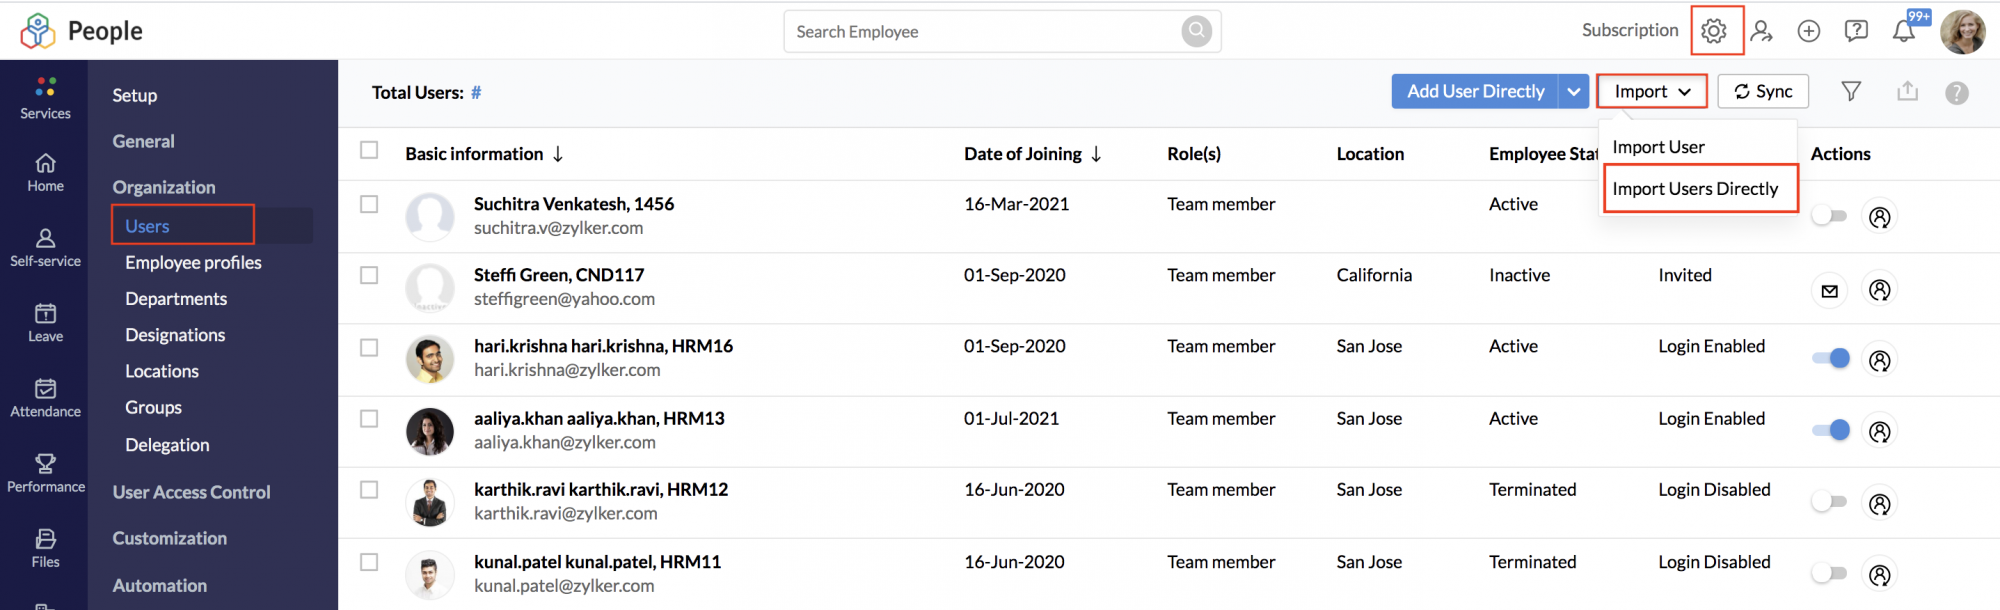
Import Users Directly
If you have a verified domain, you can Add users directly. However, if there are too many users to be added, you can opt for the import users directly option.You can import multiple users directly only if you have a verified domain. Follow the steps given below:
- From your home page, go to Settings > Organization > Users > Import Users Directly.
- Under Applicable domain, select the domain as per your need.
- Click Upload file which has details like User name, Password, First Name, Last Name etc.
- Click Next.
Once the file is uploaded, all the users will be part of the organization. In this method, there is no need to send invitations. As an administrator, you will be creating user name and temporary password for your users. This can be communicated to the users when they login for the first time in their account. The temporary password can be changed by the user in consecutive logins.
General Domain
Adding users without a verified domain requires an invitation to be sent to the users who will then have access to their Zoho People account once they have accepted their invitation.
Invite User
To invite users,
- From your home page, go to Settings (Gear icon) > Organization > Users > Invite user.
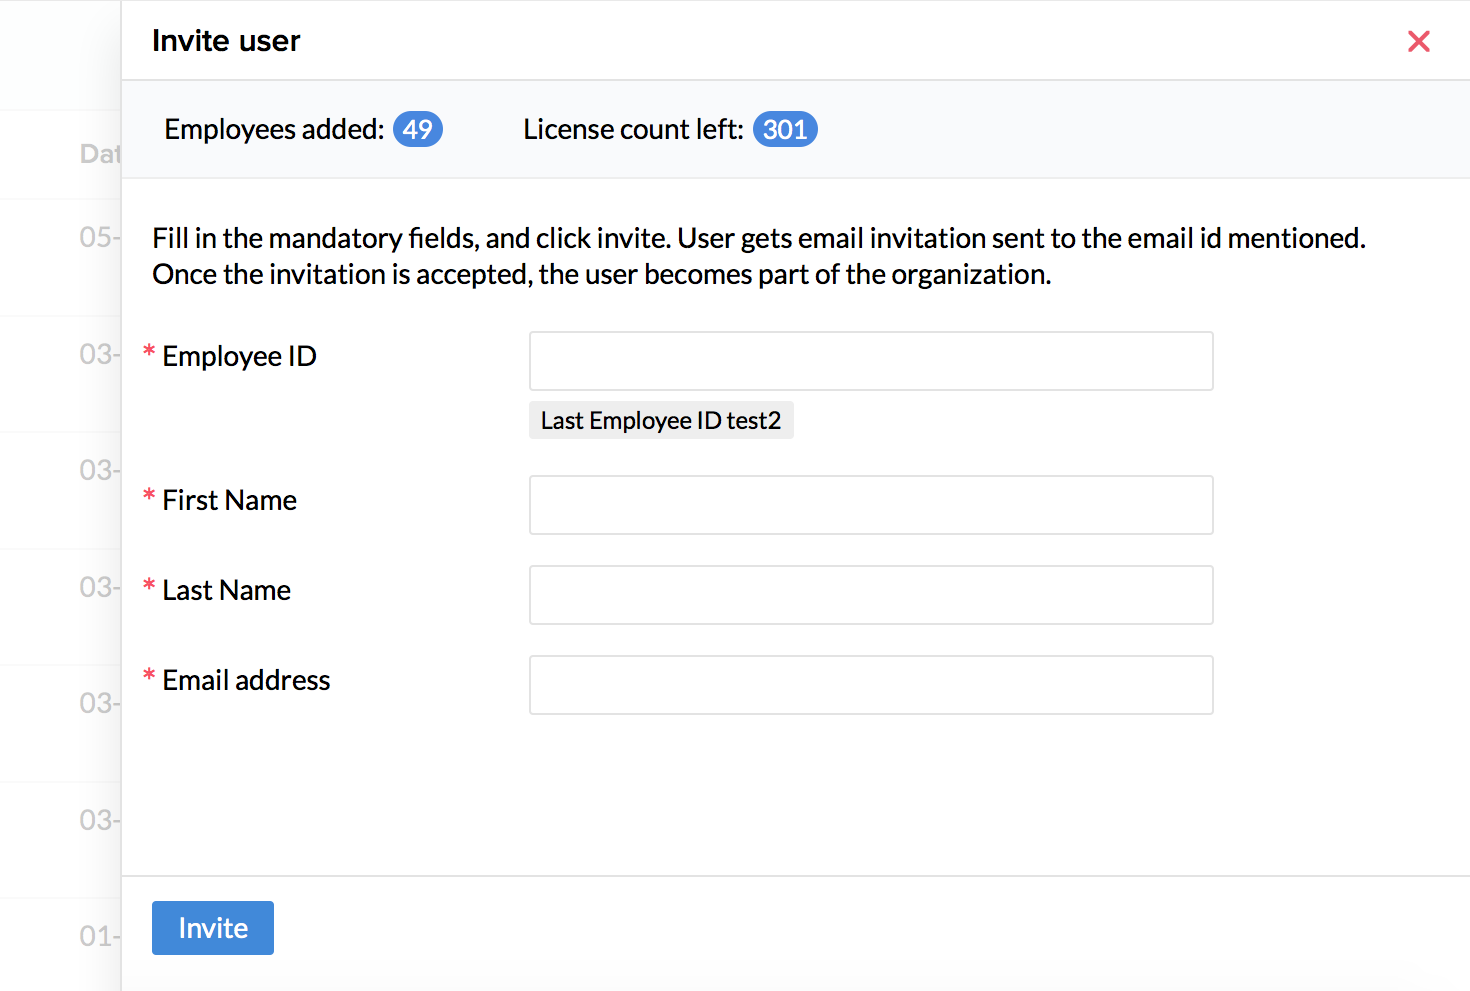
- Fill in the mandatory fields, and click invite.
The user gets email invitation sent to the email id mentioned. This email will expire in 7 days and if the user does not accept the invitation within this time, then a re-invite is sent to the user.
To resend the invitation, click the envelope icon beside the invited user.
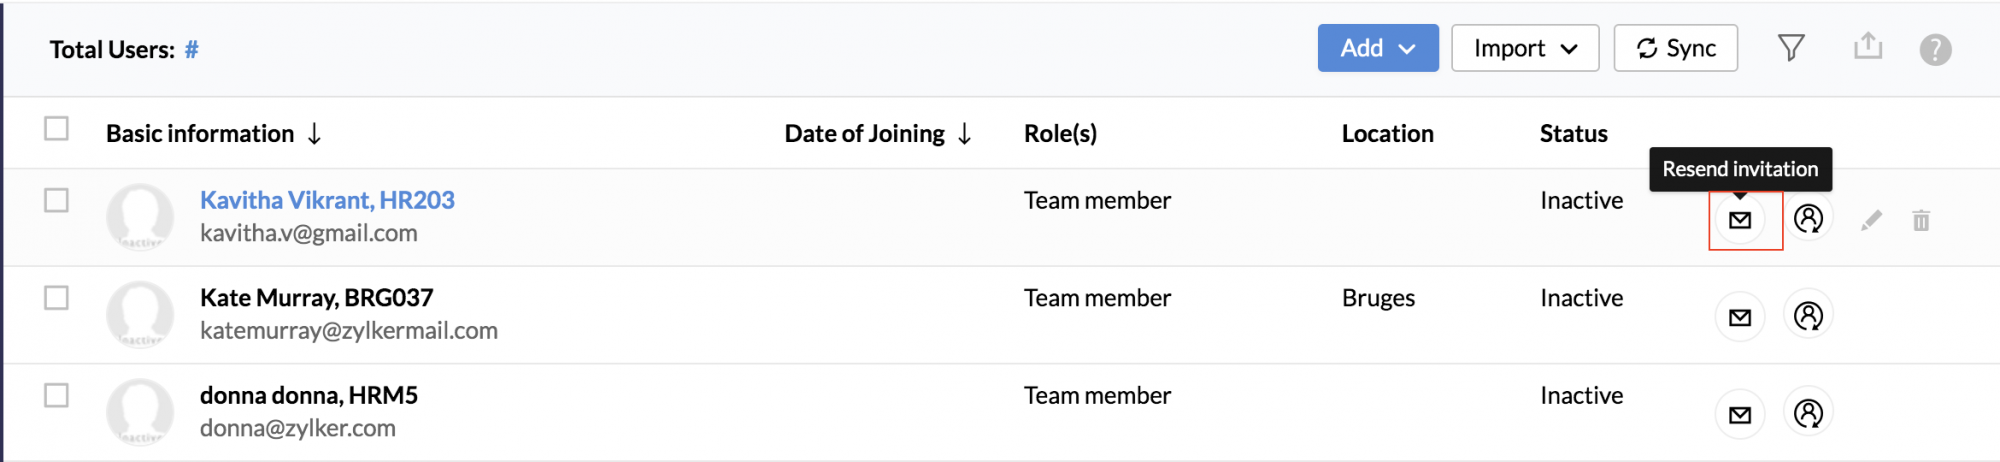
Once the invitation is accepted, the user becomes part of the organization.
Invite Multiple Users
- From your home page, go to Settings (Gear Icon) > Organization > Users > Invite Multiple Users
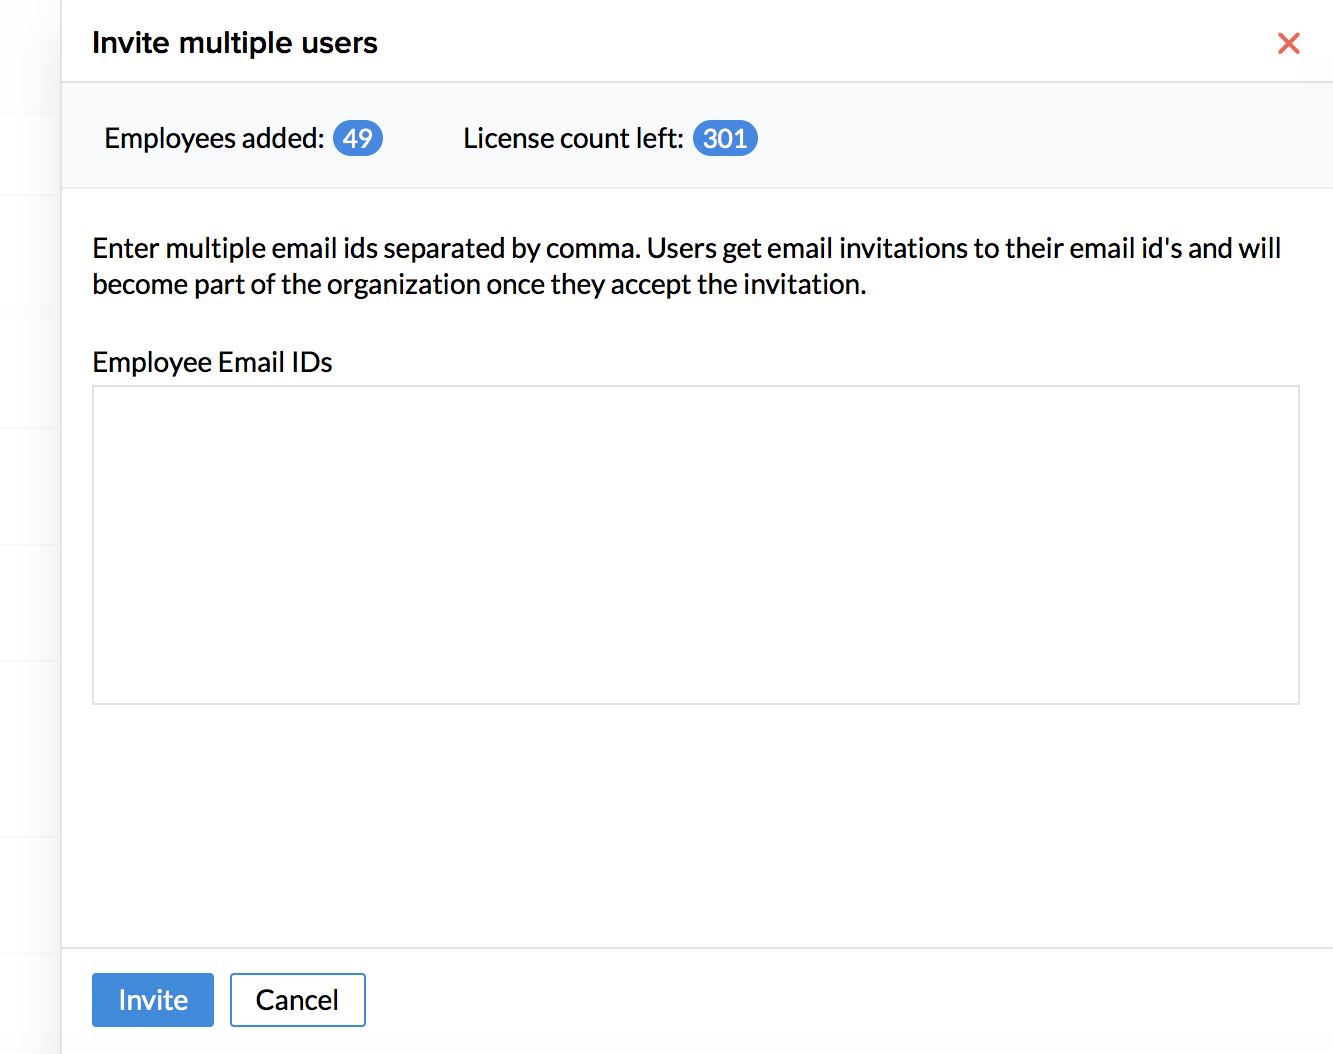
- Fill in the mandatory fields, and click invite.
Users get email invitation sent to the email id mentioned. Once the invitation is accepted, the users become part of the organization.
Import User
The Import user option lets you import users from your existing files without the need to add users manually.
- From your home page, go to Settings (Gear icon) > Organization > Users > Import User.
- Click upload file with First name, Last Name, email id, etc and click Next.
- Map the fields, confirm the mapping, and handle the duplicates if any.
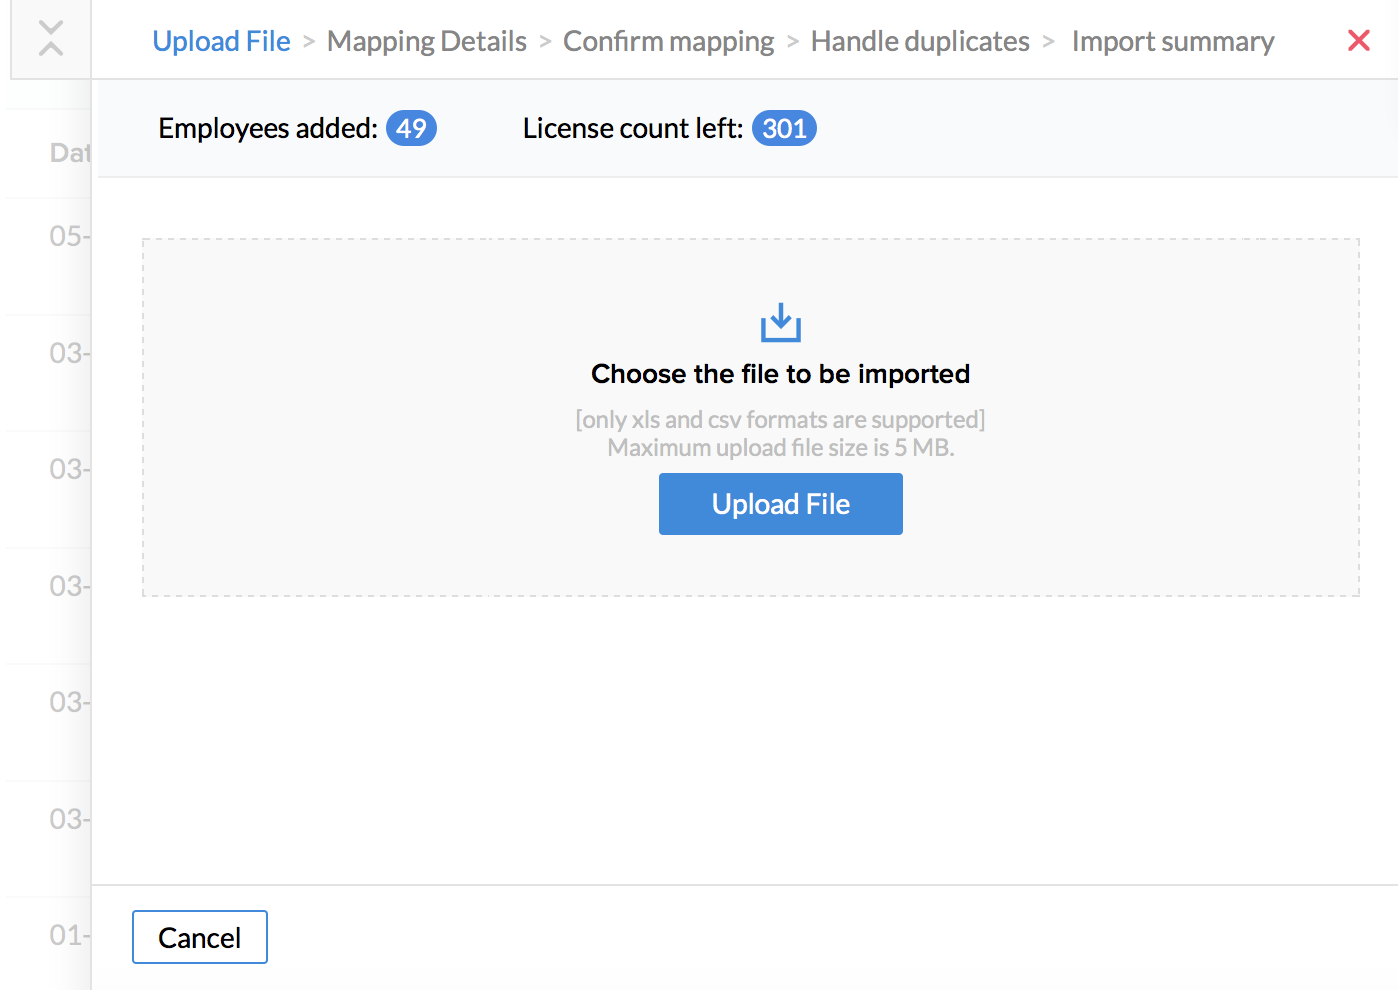
- Click Next.
The users will receive an invite to their email id (which you have given in the file during upload). Once they accept the invitation, they will be part of the organization. They can change the password in consecutive logins.
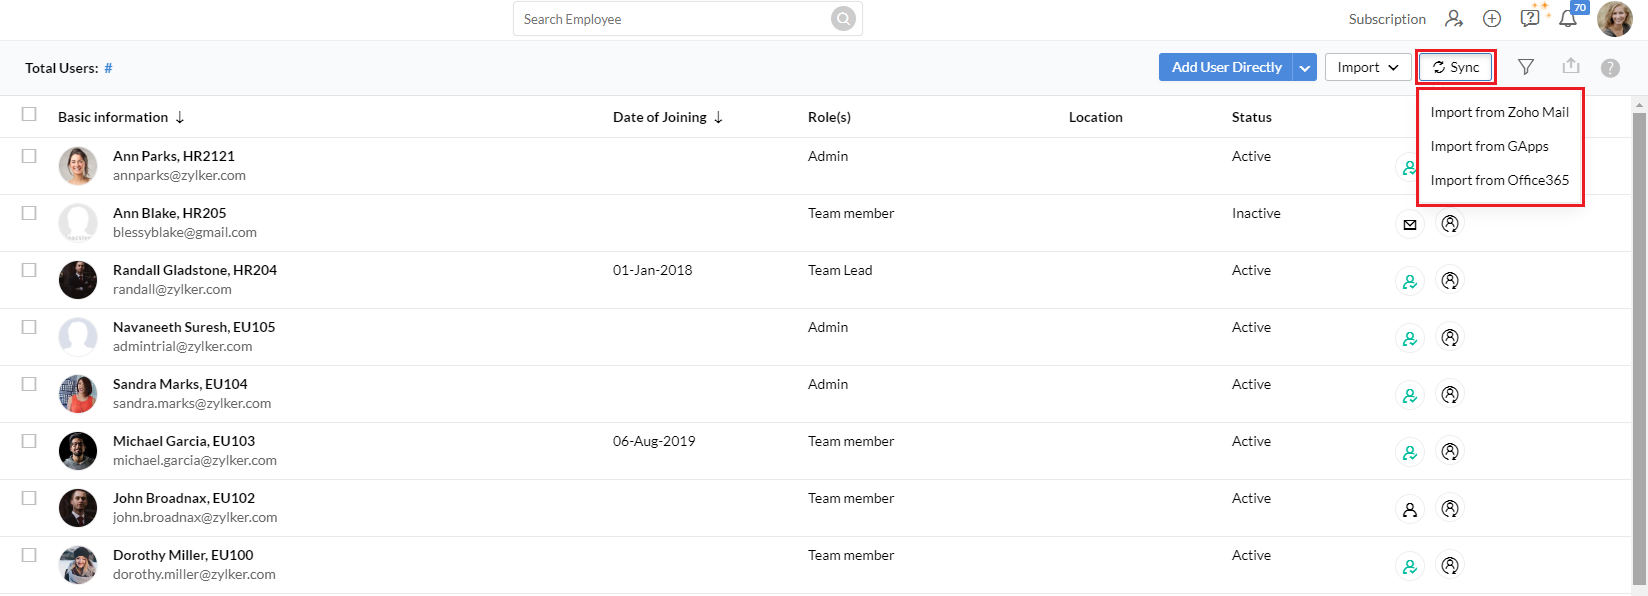
Syncing users from other services
If you have an existing database or employee repository, you can sync users from the following services with your Zoho People account.
To Sync Users, simply navigate to Settings > Organization > Users > Sync
Select from the following options - Zoho Mail, GApps, Office365.
Zoho Mail
You can add bulk users from Zoho Mail into Zoho People in a single click.
- From home, go to Settings (Gear icon) > Organization > Users > Sync
- To sync users from Zoho mail, click Import from Zoho Mail
- Search user using the Search box
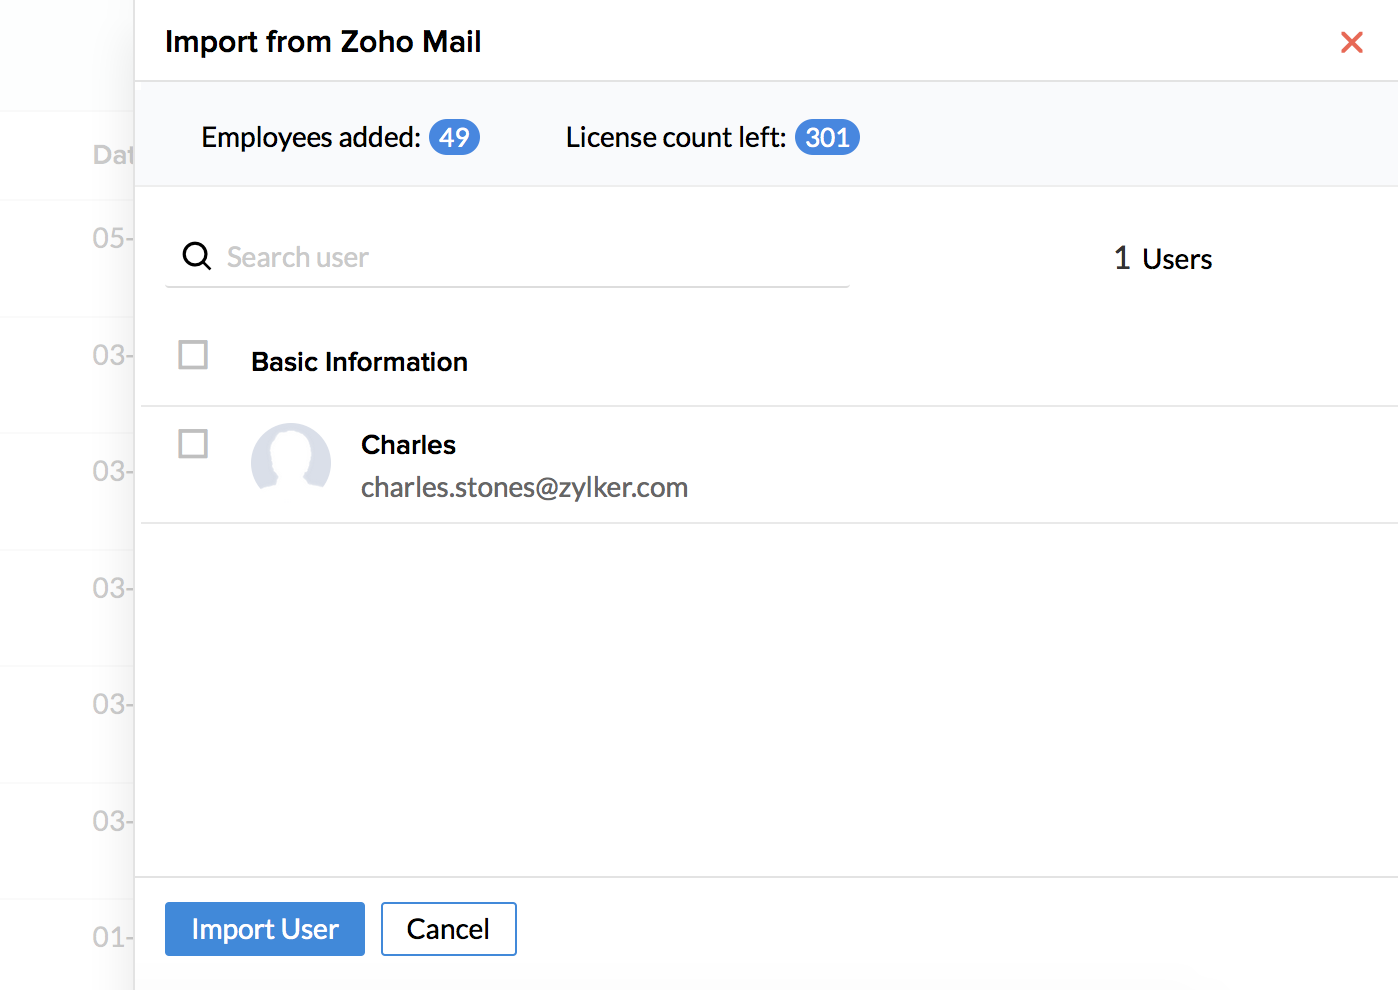
- Select the users that you would like to sync and click Submit
The same steps can be followed if you would like to sync users from Google Apps or from Office365.
Using Mobile Number Verification
Adding Users through mobile number verification
In addition to adding users by email id verification, Users can also be added by verifying mobile number.
Note: This feature is not open to all by default, but can be activated on demand. Please contact support@zohopeople.com to enable this feature.
Once this feature is enabled the following prerequisites must be met to add users using mobile number verification:
- A verified domain for your Zoho People account.
- User must have Admin privileges.
Adding a single user
1. Navigate to Settings > Users > Add
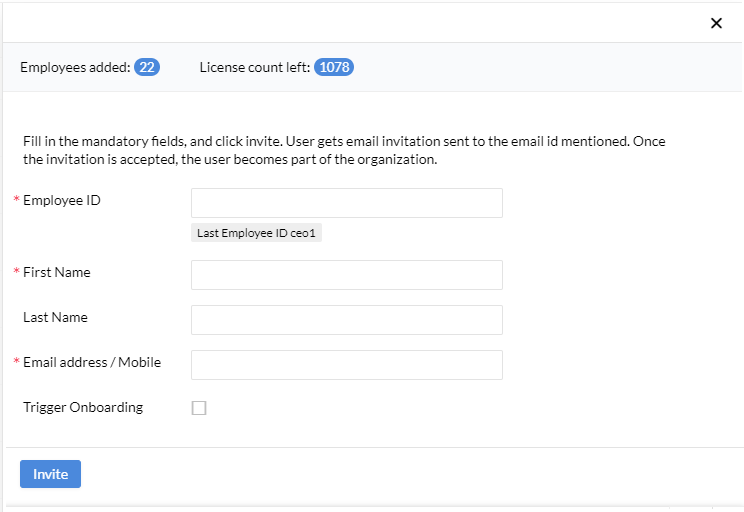
2. Fill in the details, fields with a red asterisk are mandatory
3. Enter the mobile number of the user you are trying to add
Dial code is required. Example 91-900320XXXX
(91 is the dial code for India)
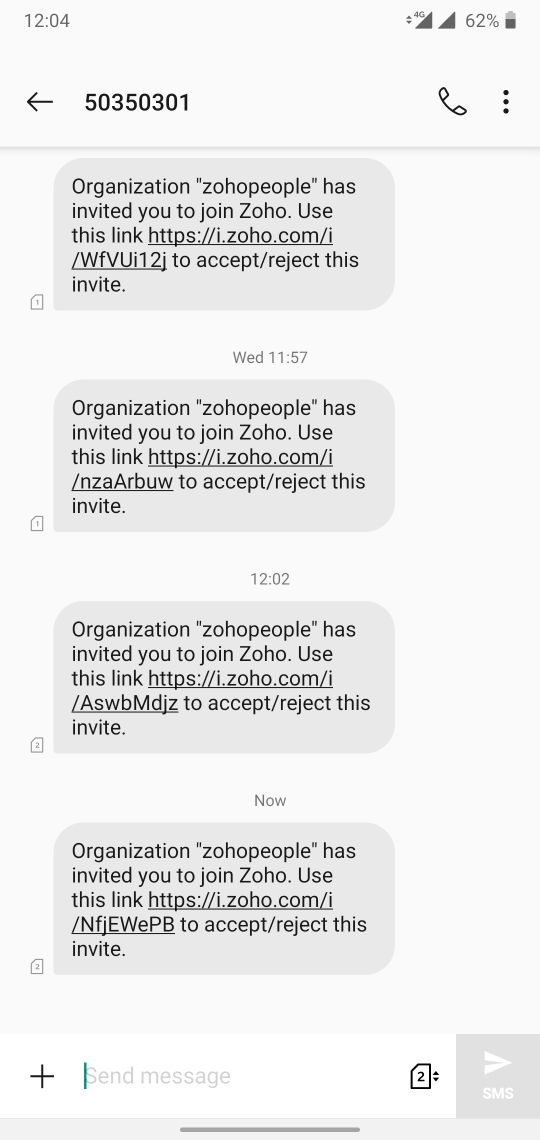
4. Click Invite
The user will receive a link in their mobile phone via text message, Account verification will be done once the user opens the link and sets up his/her password.
Note : If the user already has an existing Zoho account, then they will be prompted to login directly using existing credentials.
Adding multiple users using the import feature
1. Navigate to Settings > Users > Import > Import Users
2. Now in the file you are importing (xls, xlsx and csv formats supported), Leave Email ID column data blank. However, mobile Number column must be filled. The format is dialcode-mobilenumber.
Example: 91-900320XXXX
Note : Add user directly, Add Multiple User Directly, Invite Multiple Users options cannot be used while adding users via mobile number verification.
Here are some points to note when mobile-only users are added:
- Users added through mobile number verification only cannot be defined as Admins.
- Once the invitation is accepted and the user is added, The Mobile number of the active user cannot be changed.
- They are not authorized to import or export users.
- Password-protected mail functionality cannot be used as an email-id is required.
Note : Email ID can be updated for users added through mobile number verification. However, an Email ID with a verified domain is required. Once Email ID is added, complete functionality is restored without any restrictions.
Employee Conversion
Users can be converted to Employee Profiles and Employee Profiles to Users based on the needs of the organization. Follow the given steps below. Learn more about Employee Profiles.
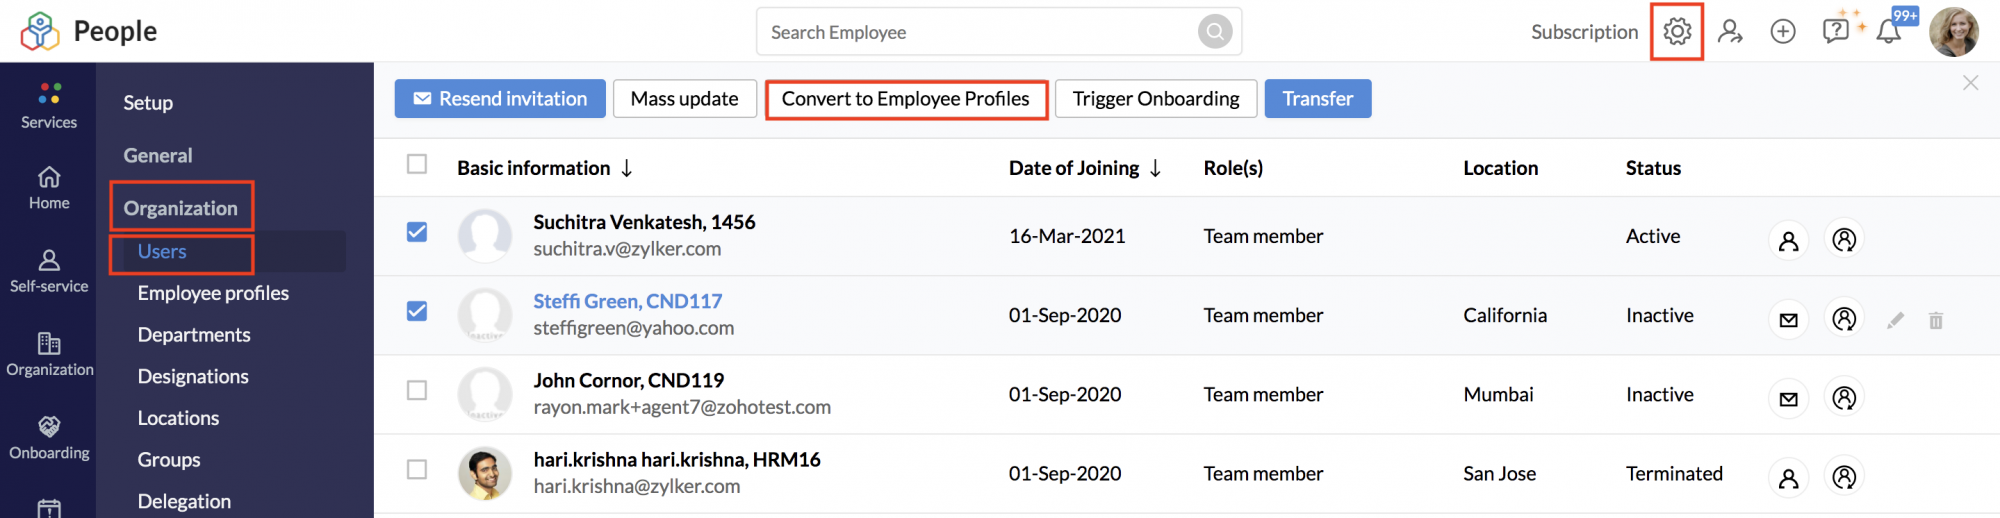
Convert User into Employee Profiles
- Go to Settings.
- Under Organization, select Users.
- Select the user profiles you want to convert.
- Click on Convert to Employee Profiles button at the top.
Convert Employee Profiles into Users
- Go to Settings.
- Under Organization, select Employee profiles.
- Select the employee profiles you want to convert. (bulk conversion is possible too)
- Click on Convert to Users drop-down at the top.
- Select Invite Users or Convert Directly.
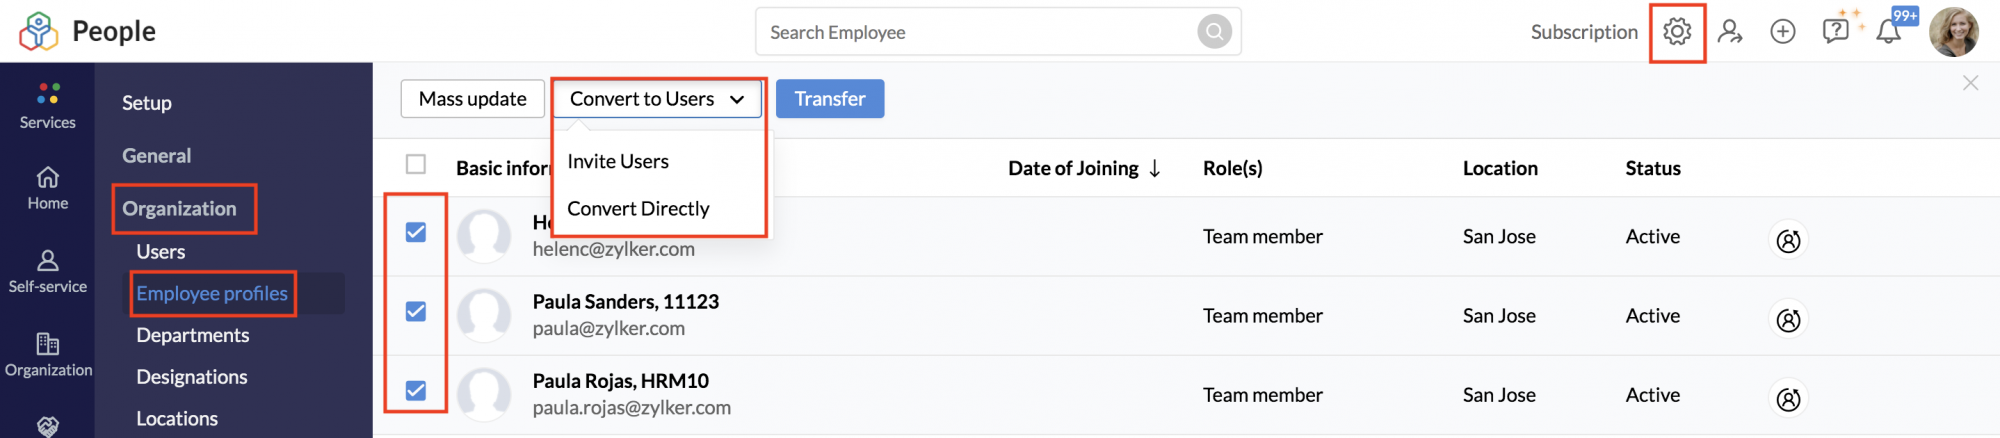
Note: Employee profiles can be directly converted into user profiles only if they have an email address within a verified domain. If not, they will be updated to user profiles once they accept the invitation.
Enabling or Disabling User Login
Restrict login access for specific users temporarily. From the user's screen, it is possible to disable and enable user login with a click of a button. Admins can also observe the current account status of all the users from this space.
To enable or disable a user login. Go to Settings (gear icon) > Users under Organization. Toggle the switch to enable or disable user login.

To enable or disable login for multiple users at once, use the left checkboxes to select a number of users, then click on Change Login Status dropdown and select Enable Login or Disable Login as required.

Note 1: Login cannot be disabled for Administrator accounts
Note 2: Login access cannot be toggled for invited users
Note 3: Change Login Status option will only be visible when multiple users are selected
Editing email addresses of Users and Employee Profiles
- Employee Profile email address can only be edited when the profile is yet to be associated with a Zoho Account. For example, if the profile was just added to Zoho People then the email address can be edited. If the Employee Profile was invited to be a User, then the email address can be edited until the invitation is accepted (before they become a User).
- If a User is converted into an Employee Profile then the email ID can no longer be edited.
- If an invited User had previously been a User in the organization, their email address cannot be edited when they are converted into an Employee Profile. This is because the email address is already associated with their Zoho account and cannot be changed. (such as a previous employee in the organization who had resigned)
- User email IDs cannot be edited. (Both active & in-active employee status).
Viewing Users in the Organization tree
Organization trees include a hierarchical tree representation of Employees and the various Departments. This allows a quick look into the company's structure and to see who you're teammates are and who each person reports to.
Depending on the Department name and the Reporting To given in the Employee form, the Organization Tree and the Department Tree gets created. Any changes made in these fields will automatically be updated in the Organization Tree and the Department Tree.
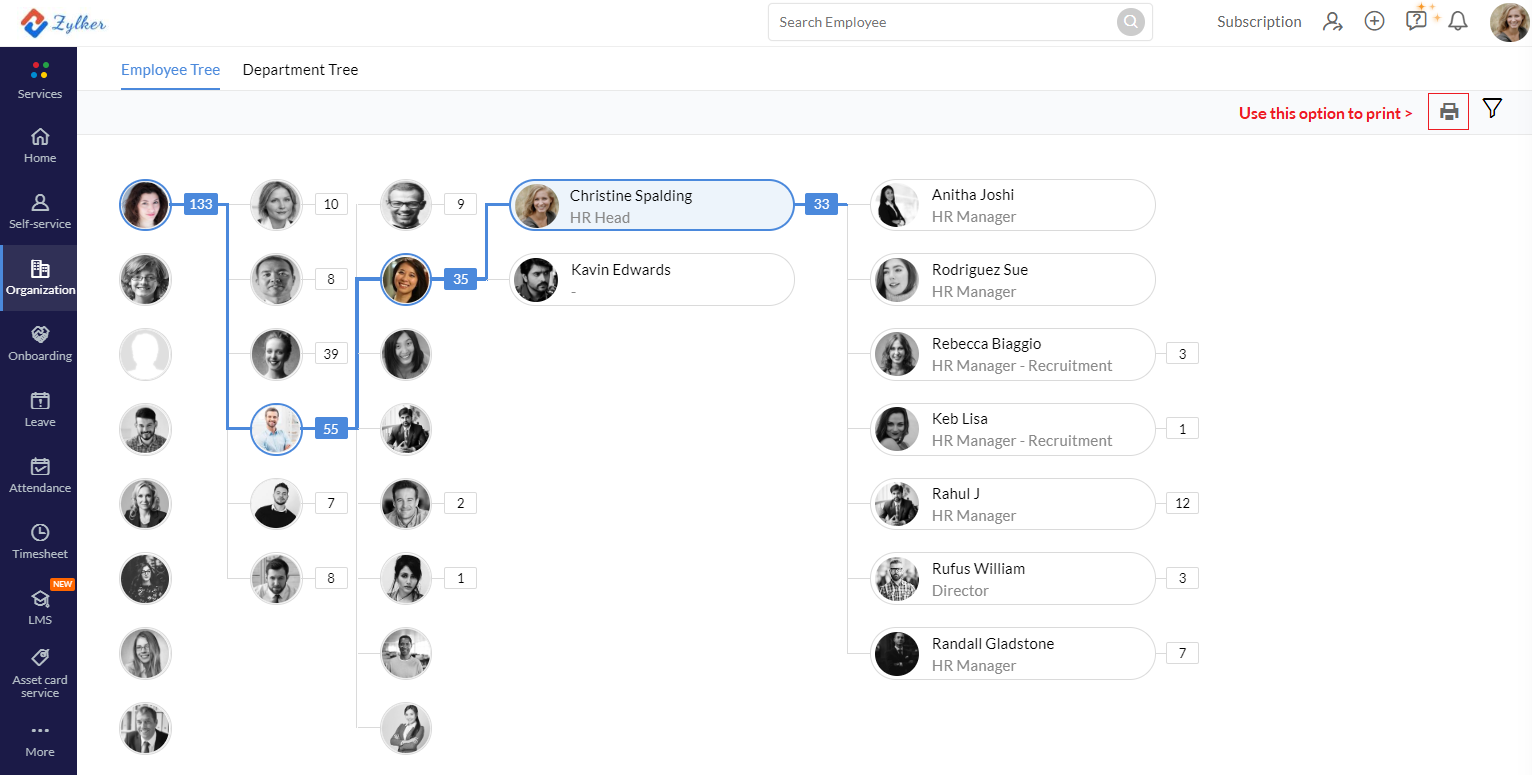
Note: You can print the Organization tree using the print icon, however when using A4 format note that only up to 4 levels will be printed, use a larger page size or use a digital pdf format for printing larger representations with more levels.
Troubleshooting
The 5 most common issues when trying to add users in Zoho People and what you can do to avoid:
- Adding user failed because a user with the same email address already exists in the organization.
This issue occurs when the email id of the user you are trying to add is an exact match to an existing active user's email address. No two email addresses of active users can be the same and therefore ensure that unique email addresses are used.
- Adding user failed because an Invited user with the same email address already exists in the organization.
This issue occurs when one of the invited users has a matching email address of the user you are trying to add. All active user email addresses must be unique.
- Adding user failed because a user with the same email address is in one of our data centers.
This error is reported when a user with the same email address exists in any of our data centers. All active user email address is required to be unique across all data centers.
- Adding user failed because a user is yet to complete account verification from their end.
This error is reported when verification is pending from the user's side. When a user is invited from Zoho People, the user is expected to respond and login to verify their account (the invitation link would be valid for 7 days)
- All other errors
For all other technical errors when adding users, contact support@zohopeople.com
Avoid adding users with "+" symbol in email address. Example john.newman+temp1@mail.com. The added users will not be able to accept the invitation to join the organization.