Blueprint
A Blueprint is a systematic flow chart of your HR processes, created digitally in Zoho People.
It captures every stage of any HR process that you follow offline. As an HR professional, you will inevitably end up working with a lot of complex processes.
From onboarding to offboarding, each HR process will have multiple stages. A clearly defined Blueprint streamlines the whole process, so you and your employees do not miss any important steps in the process.
The advantages of implementing a Blueprint:
- Lets you clearly define every stage of a process for your employees to follow.
- Cuts the monotony of setting up processes every single time you need to run them.
- Guides your employees on what to do next, and what actions should be completed, to move from one stage to the next.
- Increases accuracy in form data. For instance, an employee cannot just fill in any value in a form, when Blueprint is in action. It ensures that your employees fill form fields with the right information.
- Automates all of your processes with less manual interaction and fewer errors.
Terms explained
A blueprint in Zoho People consists of:
- States: States are the values that you define in the pick list fields of a form. Picklist fields in forms include drop down and radio fields.
- State Nodes: The connecting points of a state. Dragging the nodes lets you connect between states to create a flow.
- Start: Marks the start of the blueprint. This means the field in the form is empty.
- Transitions: A transition refers to the process of change that happens between states. It refers to the conditions that must be met in order to move from one state to another. A transition can have Before, During and After conditions. Relationship between two states: The primary state from where the transition begins is called the source state and the state to which the transition (arrow) connects to the desired state, is called the target state. In cases where the source state is not the Start, a source state can be created (by drag and drop of an available state) and must be connected to a target state. The transition from one state to the next is unidirectional in nature.
- A Before condition checks for criteria before making the transition available.
- A During condition checks for specific actions or field updates to be completed before a transition can occur. A message or a field specification can be added.
- An After condition executes certain automated actions when a transition is completed. Automated actions like mail alerts, field updates, checklists, webhooks and custom functions can be set.
- Transitions appear in black except for global transitions, which appear in blue.
- Global Transition - A global transition by default can be executed from any state in a process. However, you can deselect options for which you do not want the transition. Hover to view all global transitions in green lines.
- Transition Owner - Only those users assigned as Transition Owners will be able to view the transition.
- If no transition owner is selected, all users with edit permissions to the blueprint field will be able to see the transition. For a During field, however, all fields will be editable irrespective of any field permissions set.
Steps involved in creating a Blueprint:
1.Configuring a blueprint
- From your homepage, navigate to Settings (gear icon) > Automation > Blueprint.
- Click Create Blueprint.
- Enter the Blueprint Name.
- Choose the form and its field, to apply the Blueprint to.
- Enter a description.
- Set criteria based to trigger the blueprint based on.
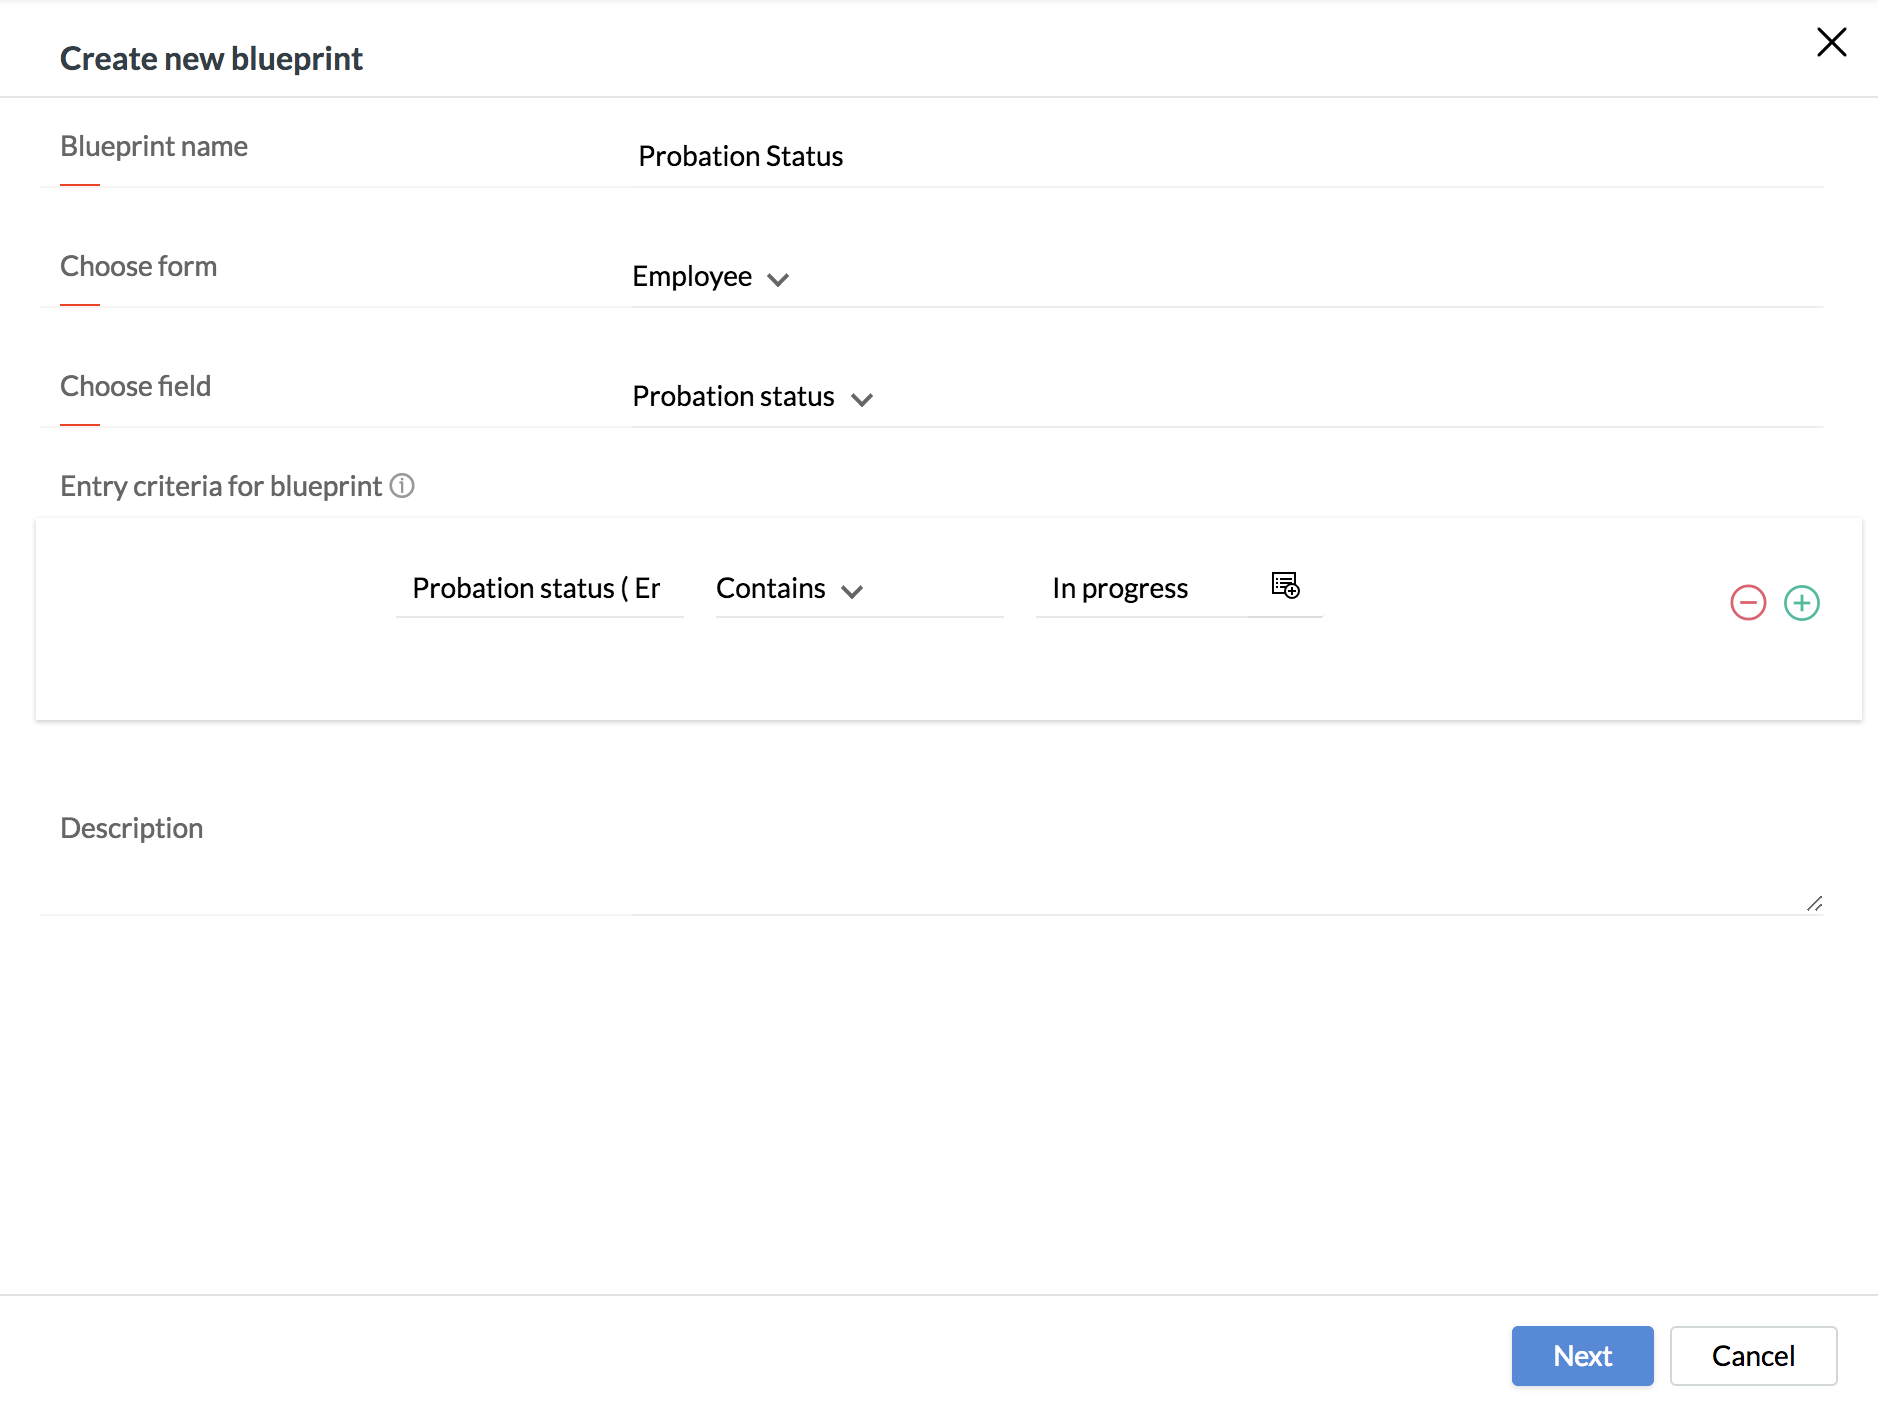
- Click Next.
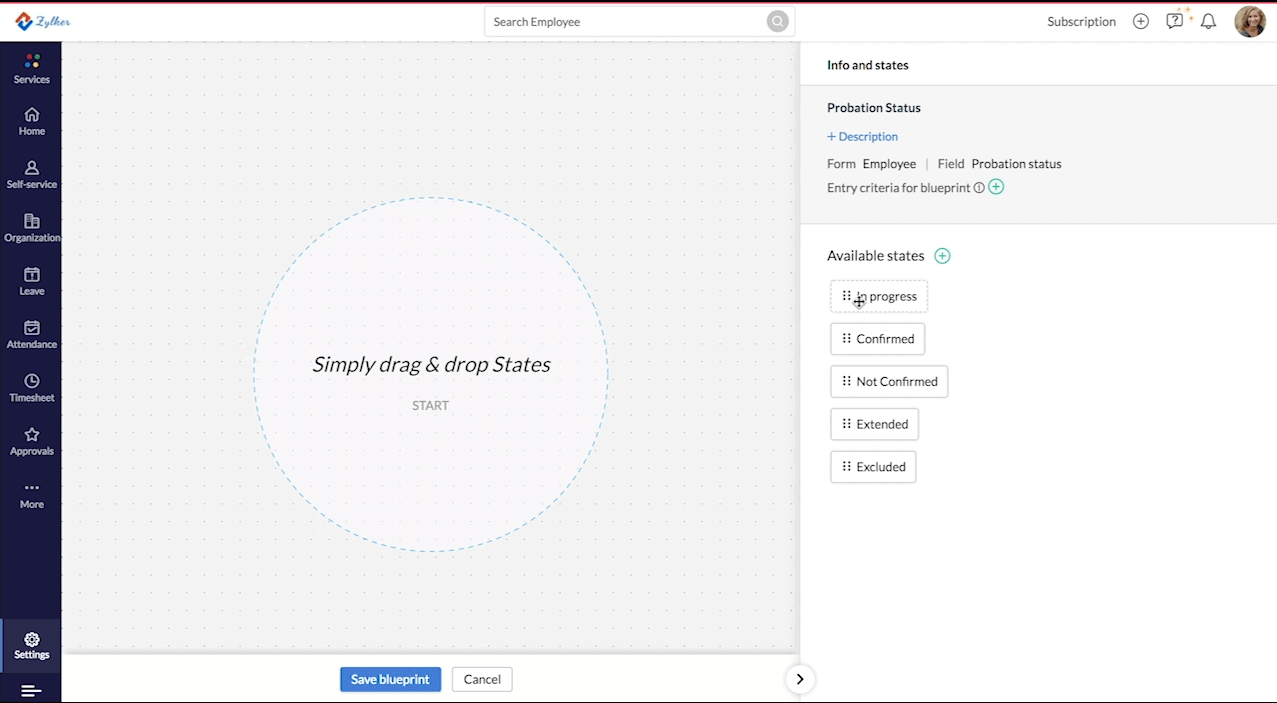
You can now frame your blueprint for the selected form and the field.
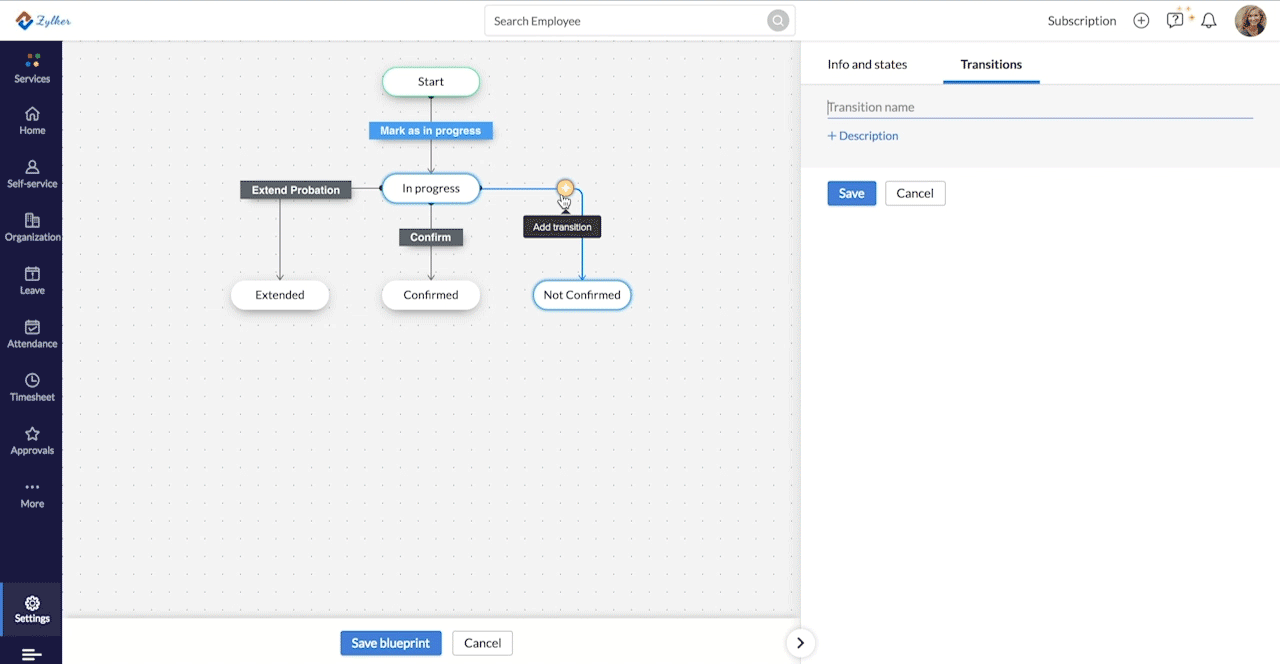
2. Creating the Blueprint Flow
All your states will be listed under Available States. The States are the values for your picklist fields. To add a new state, click the + icon near available states, enter the state name and click Submit.
Click here to learn more about forms and fields.
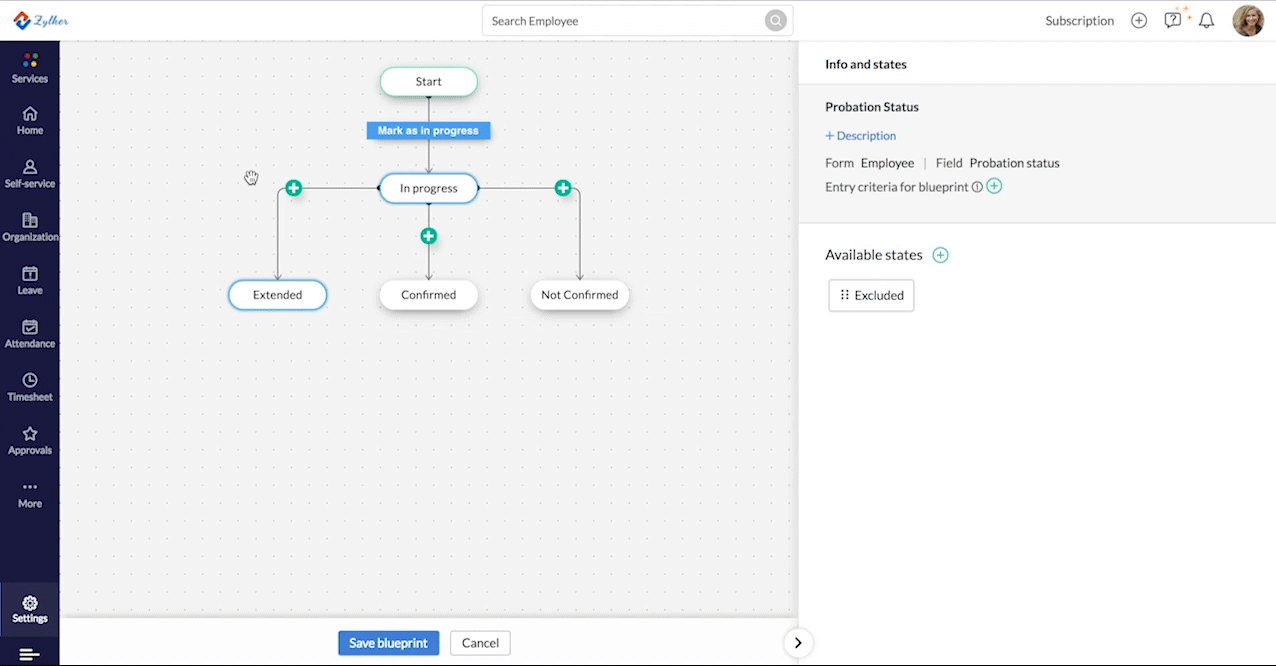
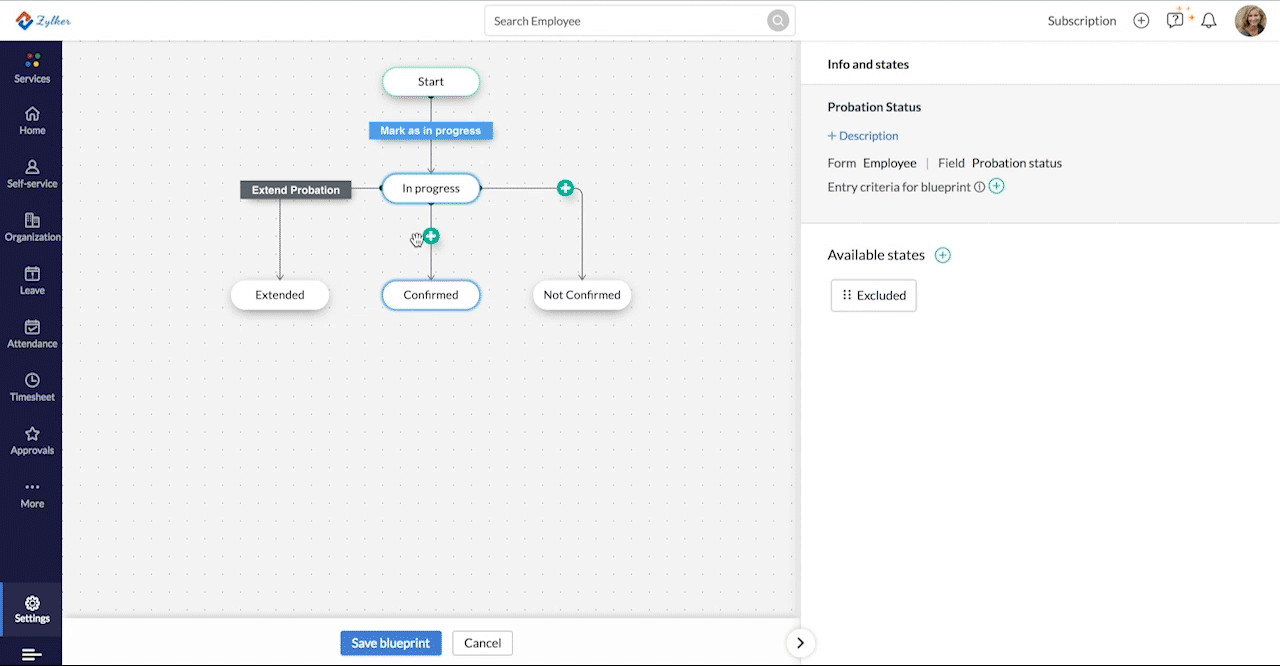
- Drag and drop the required states to create a flow. The Start will be auto-populated which means the field will not be empty.
- To connect states with each other, click on a node and drag it to the state you want to connect it to. This creates a connection between the states. To delete an added state, right click on the state and click Delete.

3. Creating Transitions
- Click the + icon to add a transition. Enter the transition name and description.
- Click Save.
- Check the Global Transition box if you want this transition to be possible from any state in the blueprint.
- Add Before, During or After conditions. Set a Before condition to set criteria which must be met for the field or transition to appear for the user.Set the criteria and click Save. The before condition has now been updated.
- To add a condition for during the transition, click on During and enter a message or field.
- To add a field, choose one from the Select field drop down. Click on +Validation to add a condition. Choose conditions to set that the selected field is,is not,is empty and is not empty. Enter a validation message and click Save. Now the transition can proceed further only of the selected field fulfills the condition or /validation you set.
- To add a message during the transition, click Add Message, enter the required message and click Save.
- To add actions to be performed once the transition is completed, click on After. Select the automated action which you would like to occur after the transition. You can choose from mail alerts, field updates, checklists, webhooks and custom functions. Add a new template or choose from the existing templates. Click here to learn more about automated actions.
- Click Save.
You can also create any number of states with transitions in a blueprint.
Once a Blueprint has been created, the transitions will be visible to the user when they fill the form in the record view.
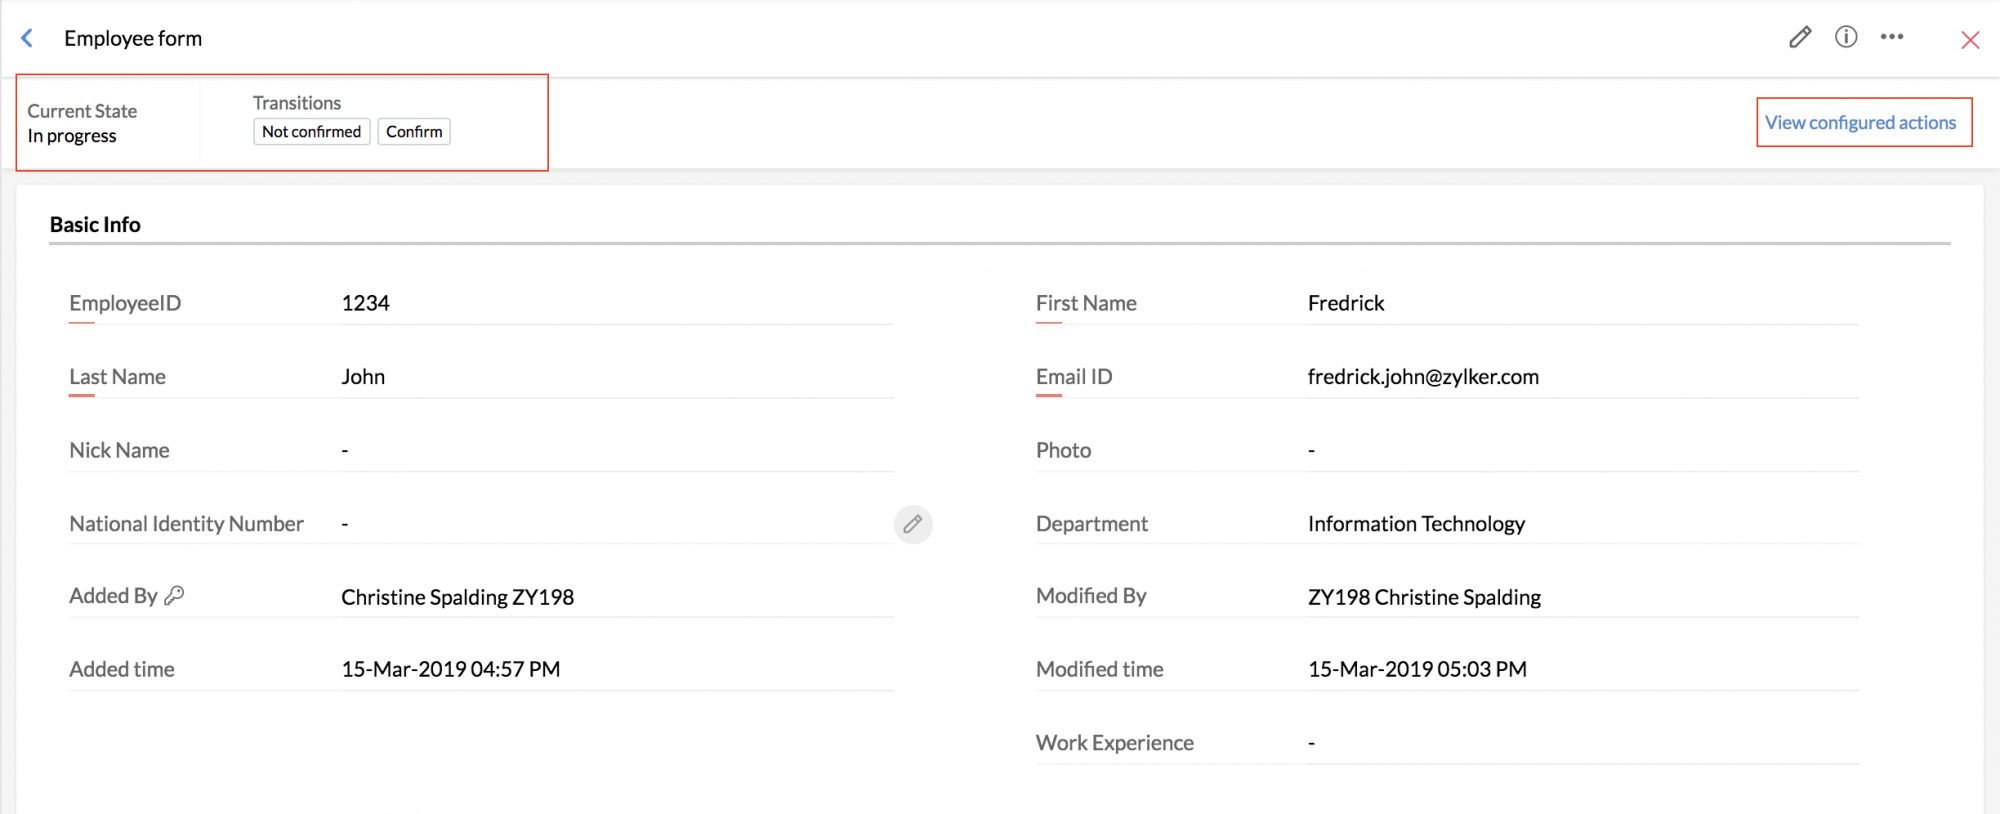
Click View configured actions to see how the record will move from one state to another.
![]()
Note:
- All changes made to the form through the blueprint will be reflected under audit history.
- If an approval has been configured for the form, the blueprint will be triggered either before it has been sent for approval or after the approval process has been completed. It will not be triggered in the approval pending state.
- The transition owner can perform the action irrespective of any field permissions set.