Configuring Zoho Mail as an IMAP Account on Android device
Configure Zoho Mail as an IMAP Account on Android
You can configure your Zoho Mail account on your Android device as IMAP. First, you need to ensure that you have enabled IMAP access for your account by logging into Zoho.
- To begin with, you need to enable IMAP Access in your Zoho Mail account.
- Log in to Zoho Mail and Enable IMAP in the Zoho Mail Settings page.
- Open the Mail application on your Android device.
- Certain versions of Android, require you to navigate to Apps >> Mail. Consult the help of your specific Android version, to locate the Mail App.
- Select Add Account from the Mail app on your device.
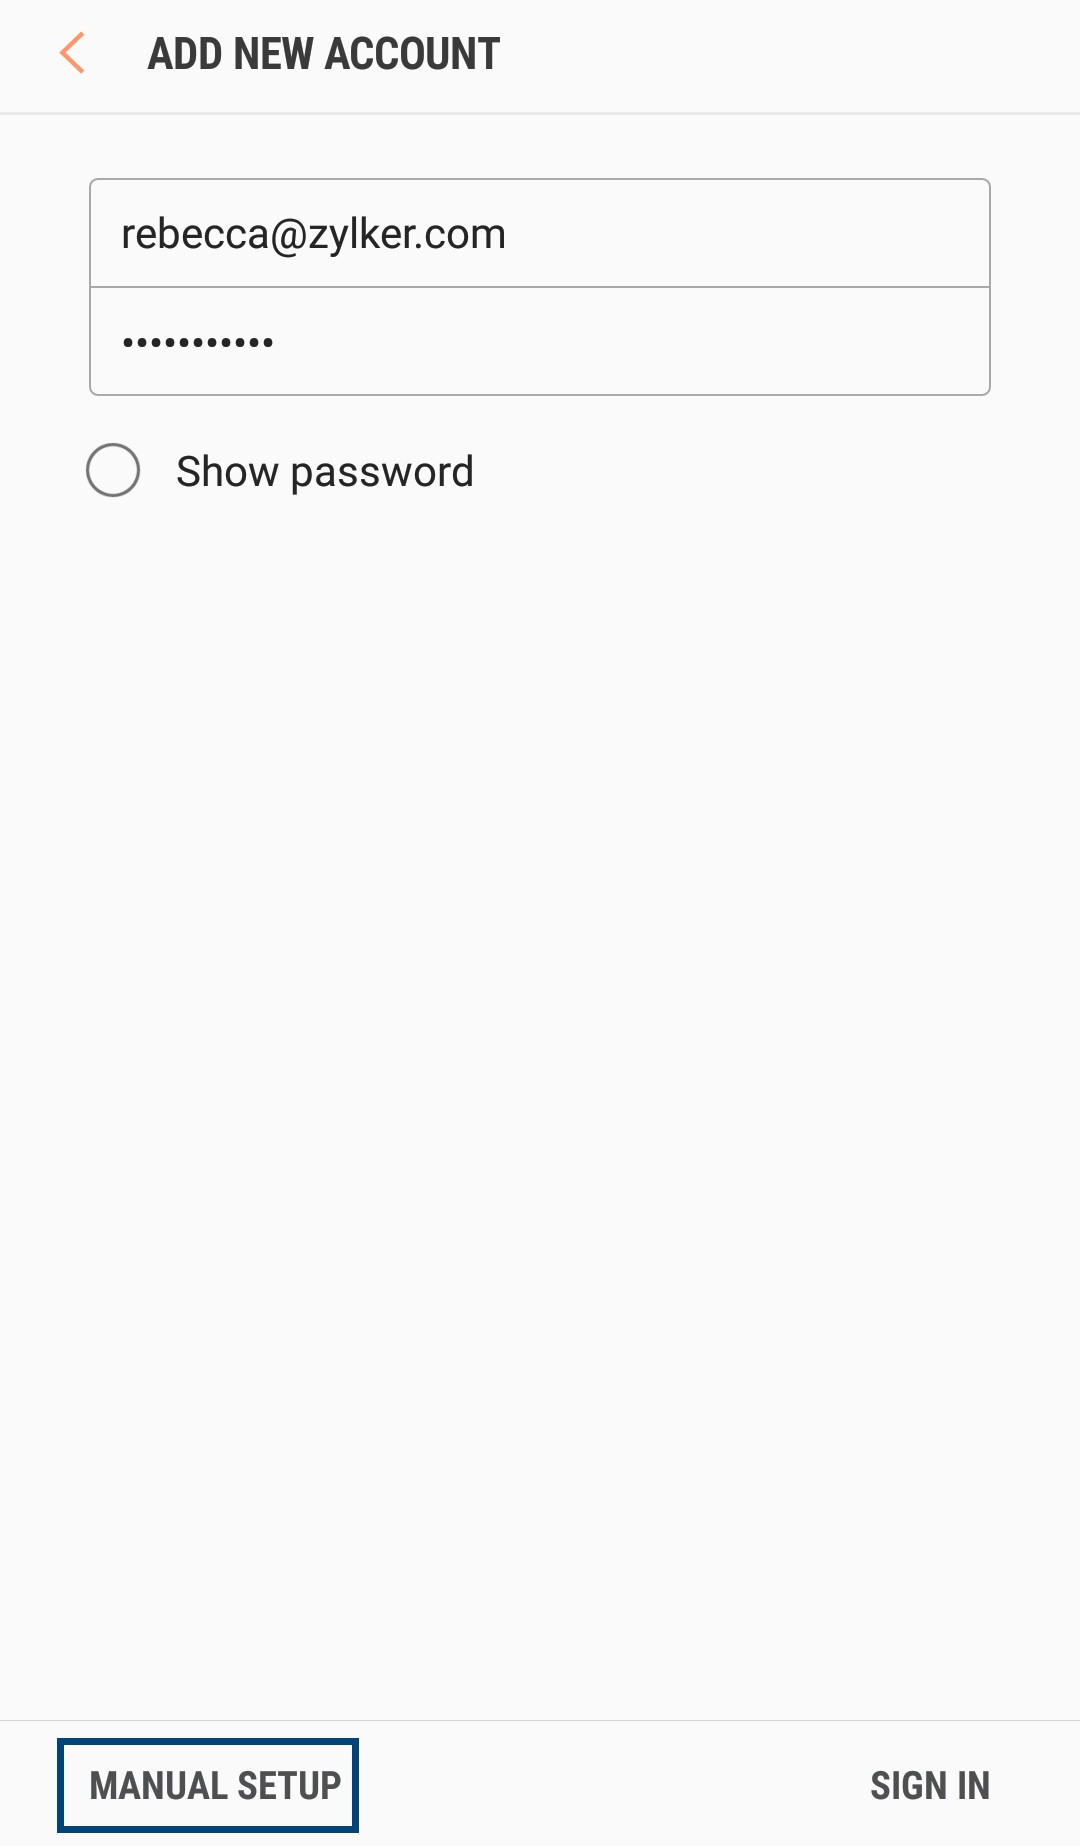
- Enter your full email address and password of your Zoho Mail account, and select the Manual Configuration option.
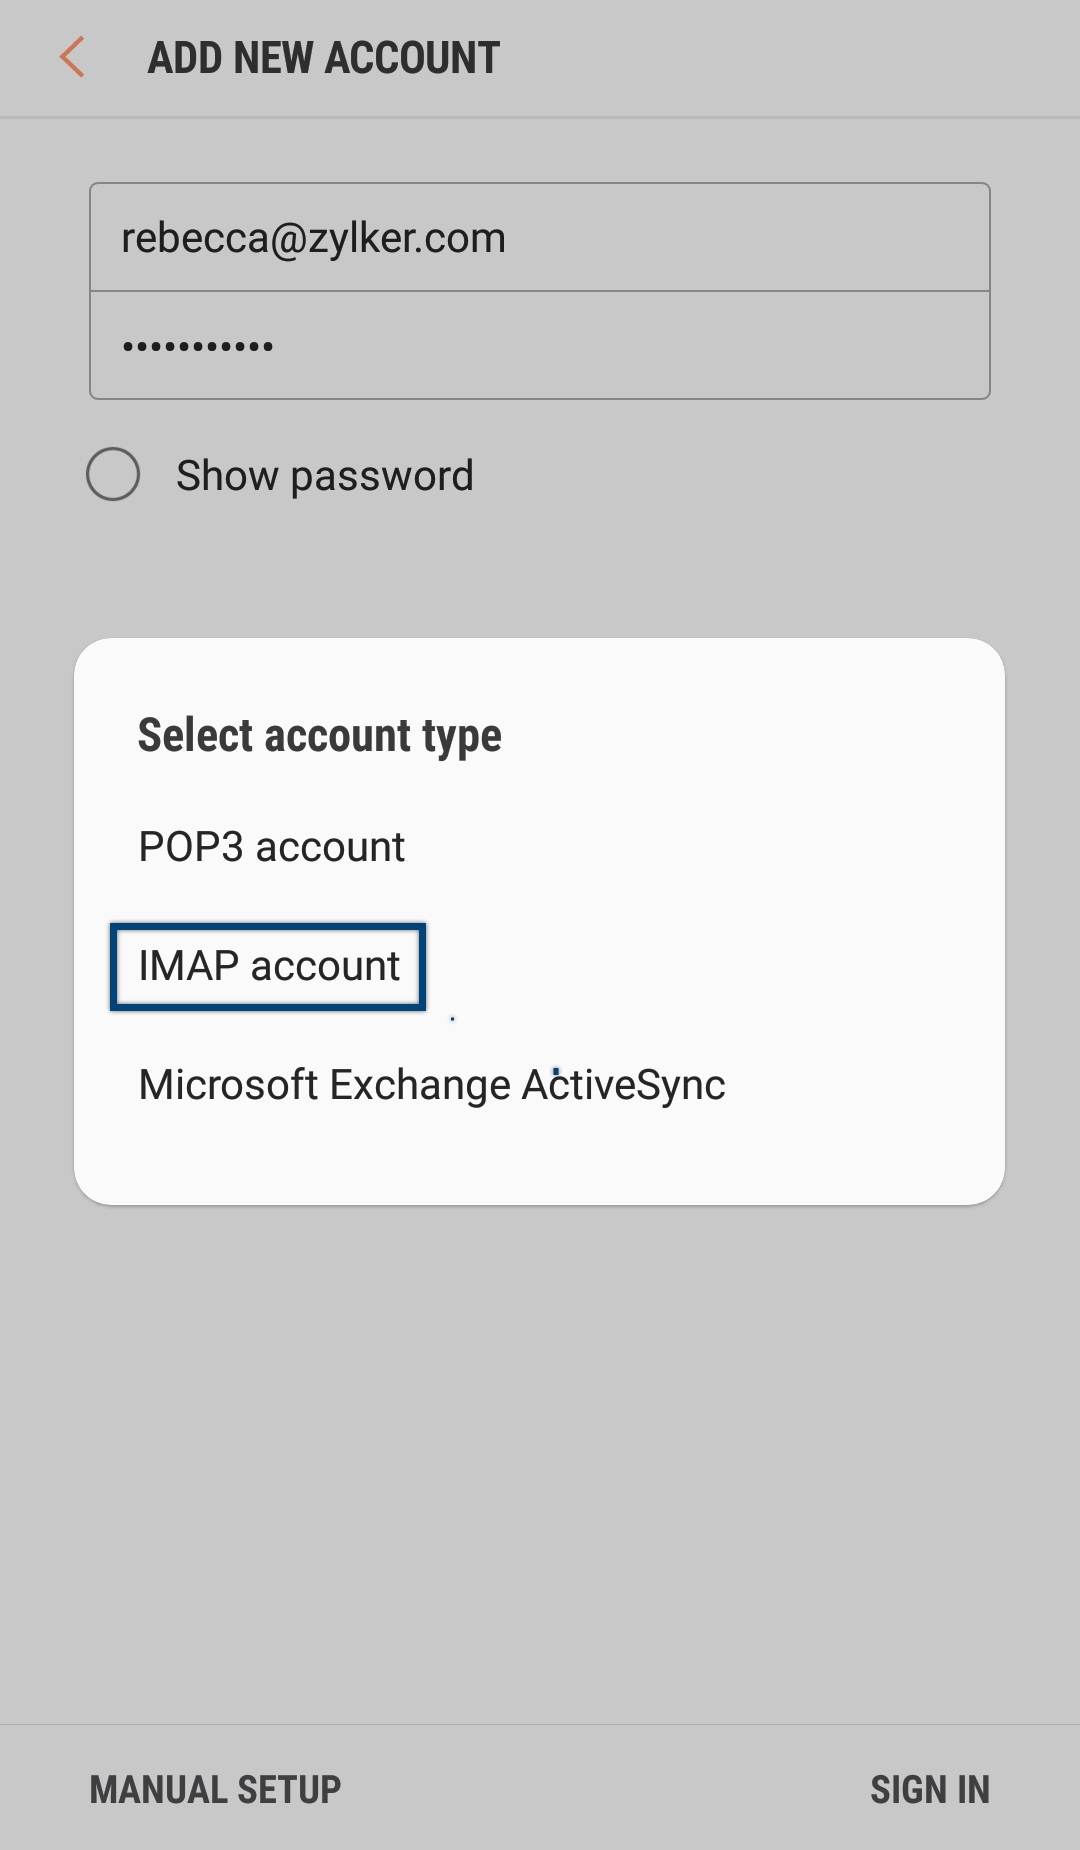
- Select IMAP Account from the options on the screen.
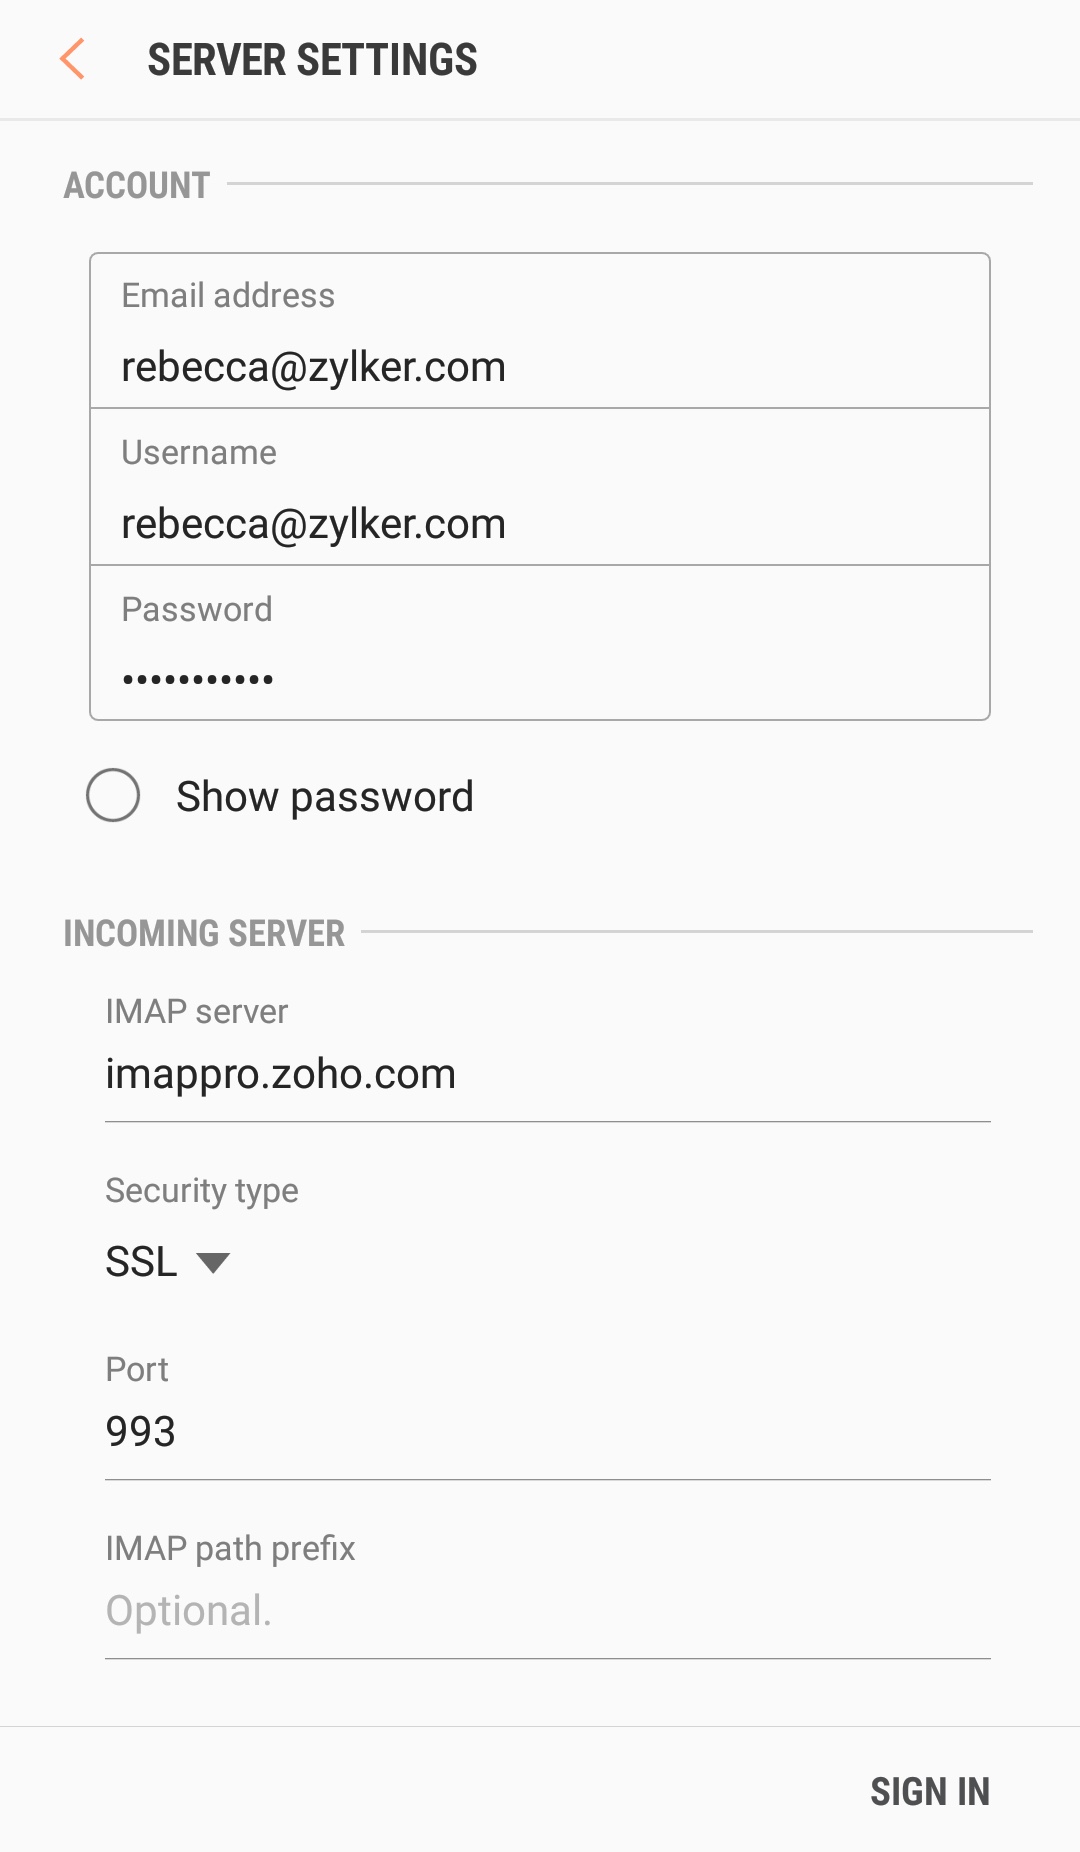
- Enter the following Incoming Server details:
- Enter your full Zoho Mail address (username@yourdomain.com for users whose domains are hosted with Zoho and username@zoho.com for @zoho.com users) in the Email Address and Username field.
- Provide your password in the Password field.
- In the IMAP Server field, enter imappro.zoho.com
- Select the Security Type as SSL.
- Enter the Port Number as 993.
- Enter the following details in the Outgoing Server configuration:
- In the SMTP Server field, enter smtp.zoho.com if you are a personal user and smtppro.zoho.com if you are an organization user.
- Select the Security Type as SSL.
- Enter the Port Number as 465.
- Enter your full Zoho Mail address (username@yourdomain.com for users whose domains are hosted with Zoho and username@zoho.com for @zoho.com users) in the Username field.
- Provide your password in the Password field.
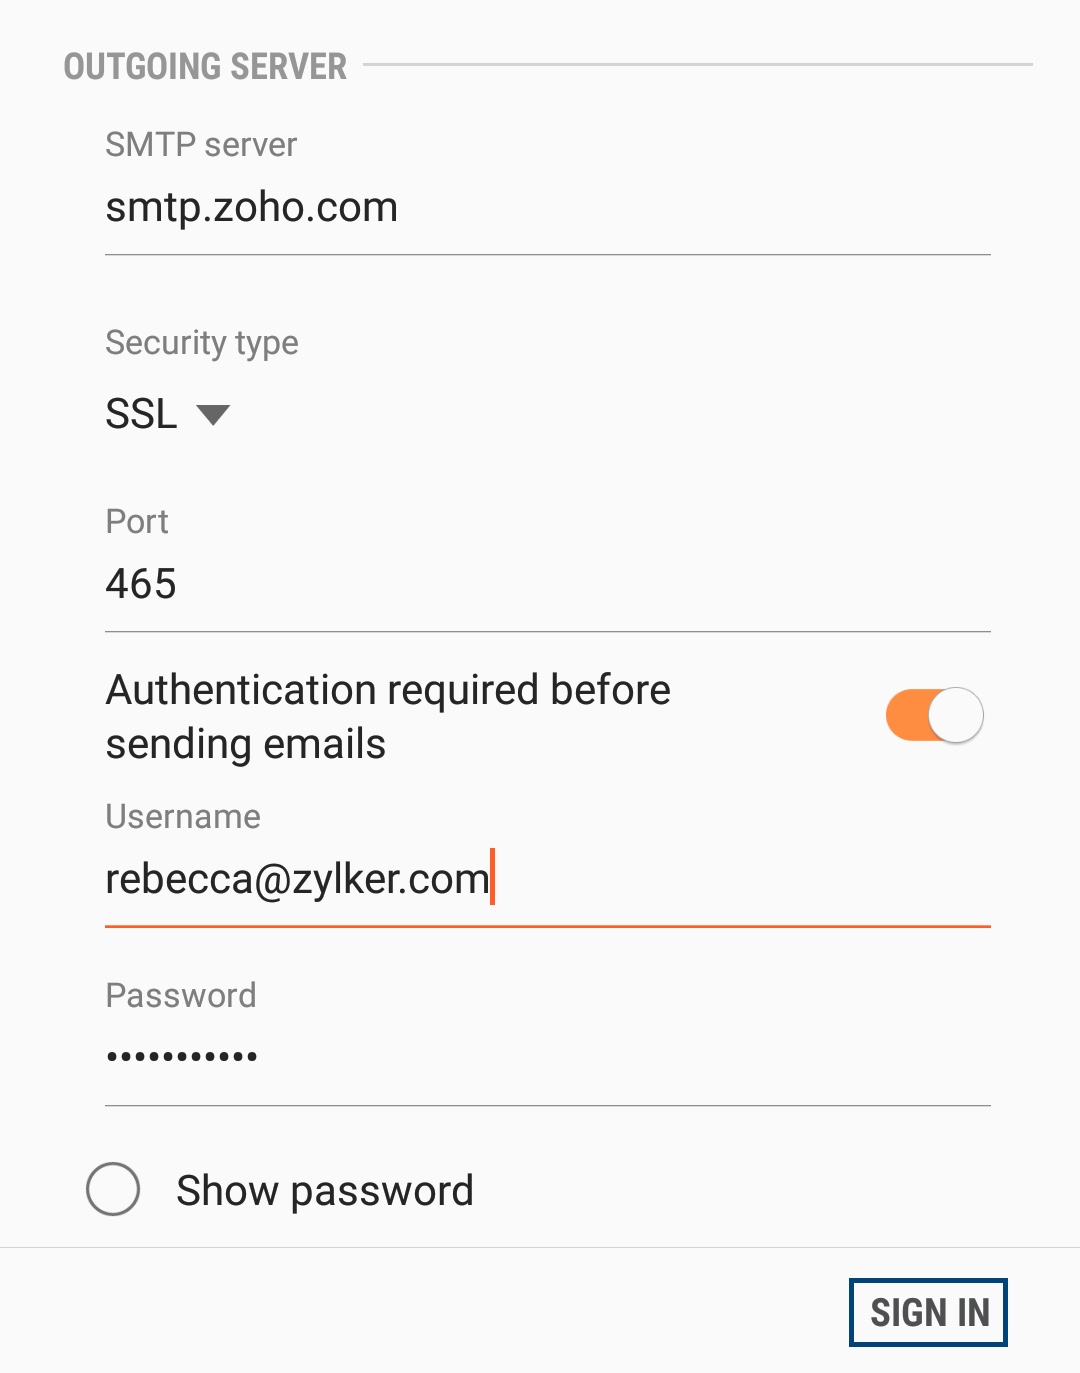
- Now, click Sign In.
- Upon successful completion, you will be navigated to Mails screen.
- You have now successfully configured Zoho mail in your Android.


Note:
The screens may vary based on your Android device and the Mail App you use in Android. But with the exact port and server settings, the account will sync without any errors.