

Import and Export Data
In Zoho Invoice, you have the option to import data from your device or the Cloud to speed up the data collation process inside every module. You can also export data from Zoho Invoice for your reference or other purposes.
Importing Data
- Navigate to the module, say Items, for which you would like to import data.
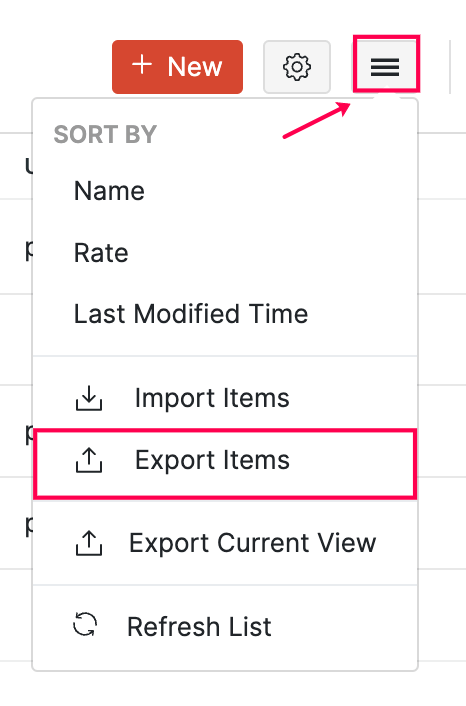
- Click the hamburger icon in the top right corner of the page.
- Select Import from the dropdown.

You will be directed to another page where the data you wish to be imported needs to be uploaded.
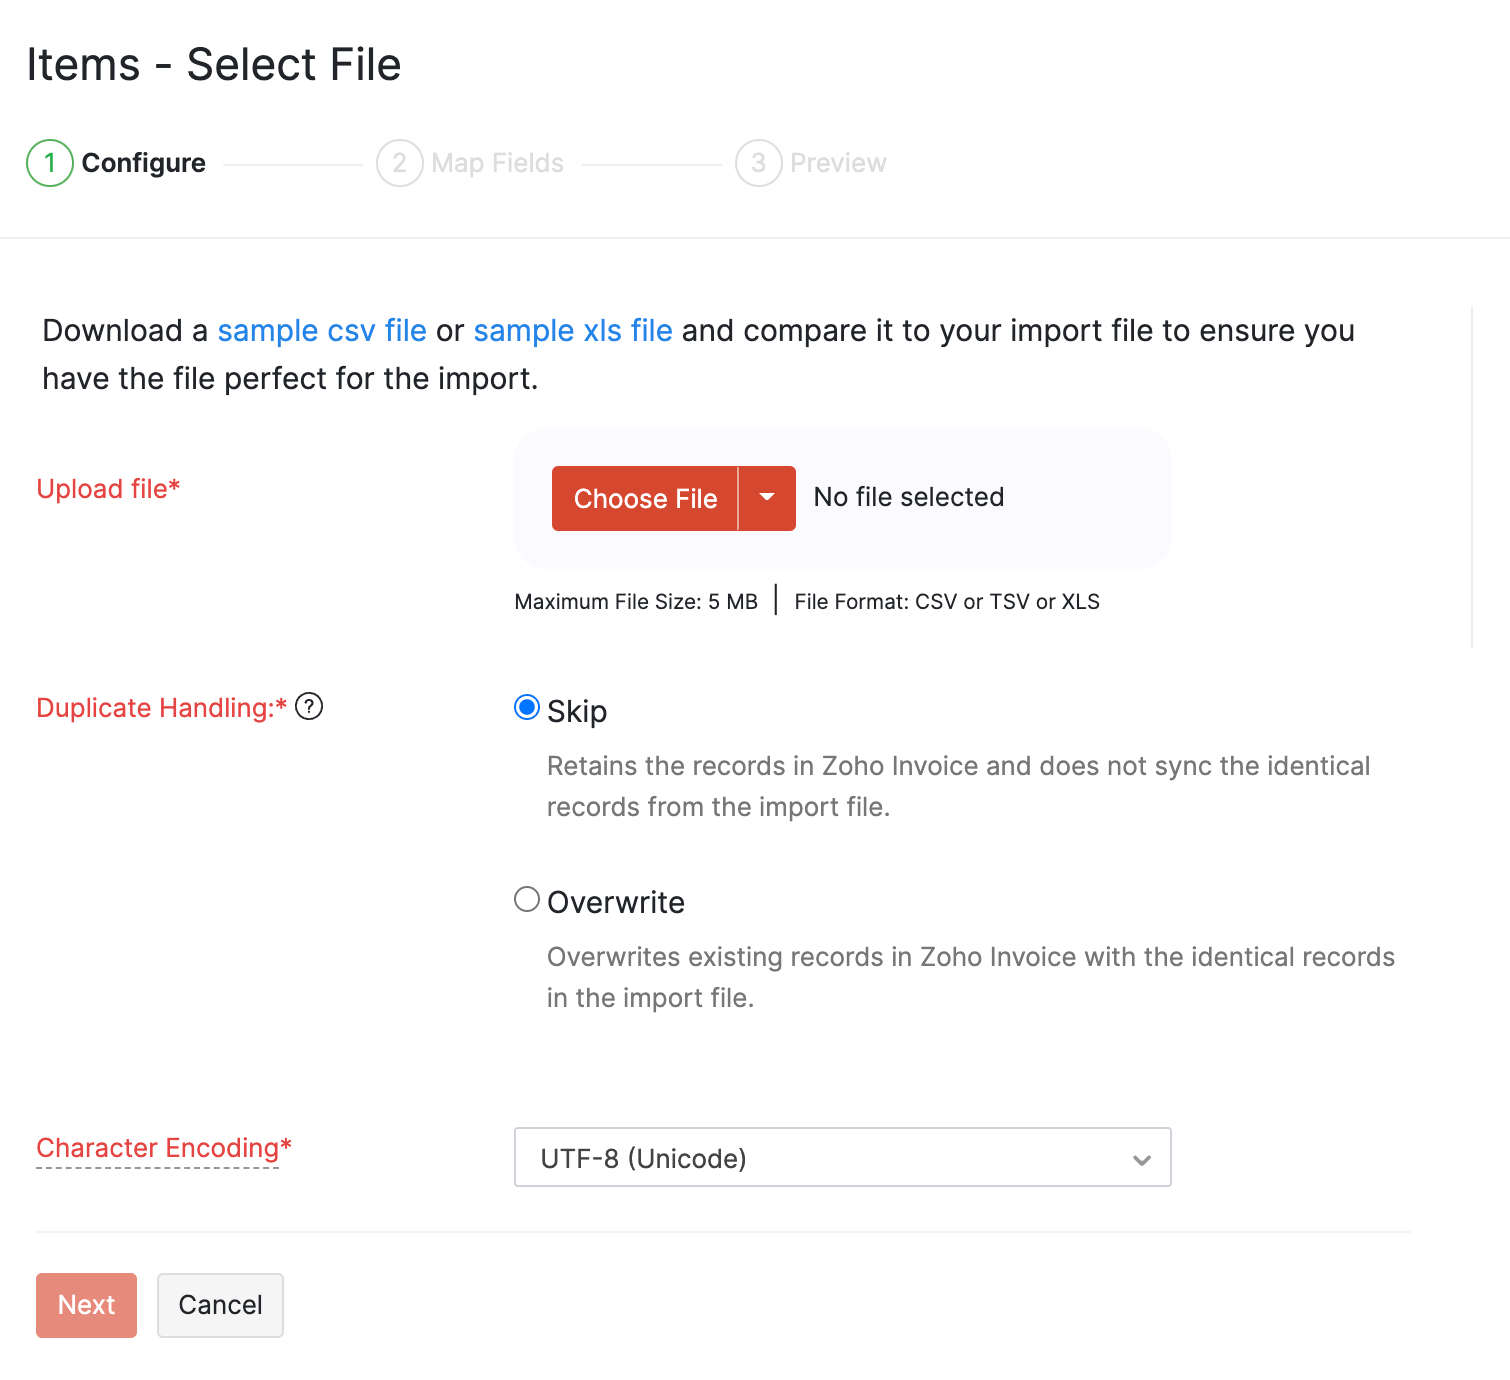
- Click the Choose File button and upload the file with your data. You can download the sample file to check the format of the import, i.e. the columns and data to be included in the import file.
Insight: Data can be uploaded as a CSV, TSV, or XLS file from your device or the Cloud.
- Select the character encoding based on your import file.
Insight: Character Encoding is used to pair numbers with characters. By default, the Unicode Transformation Format (UTF-8) encoding is used which supports a wide range of characters that go beyond 8 bits.
- Click Next.
- Map the fields mentioned in your import file with the fields of Zoho Invoice.
- Check the Save these selections for use during future imports option if you want to use the similar import format next time.
- Click Next.

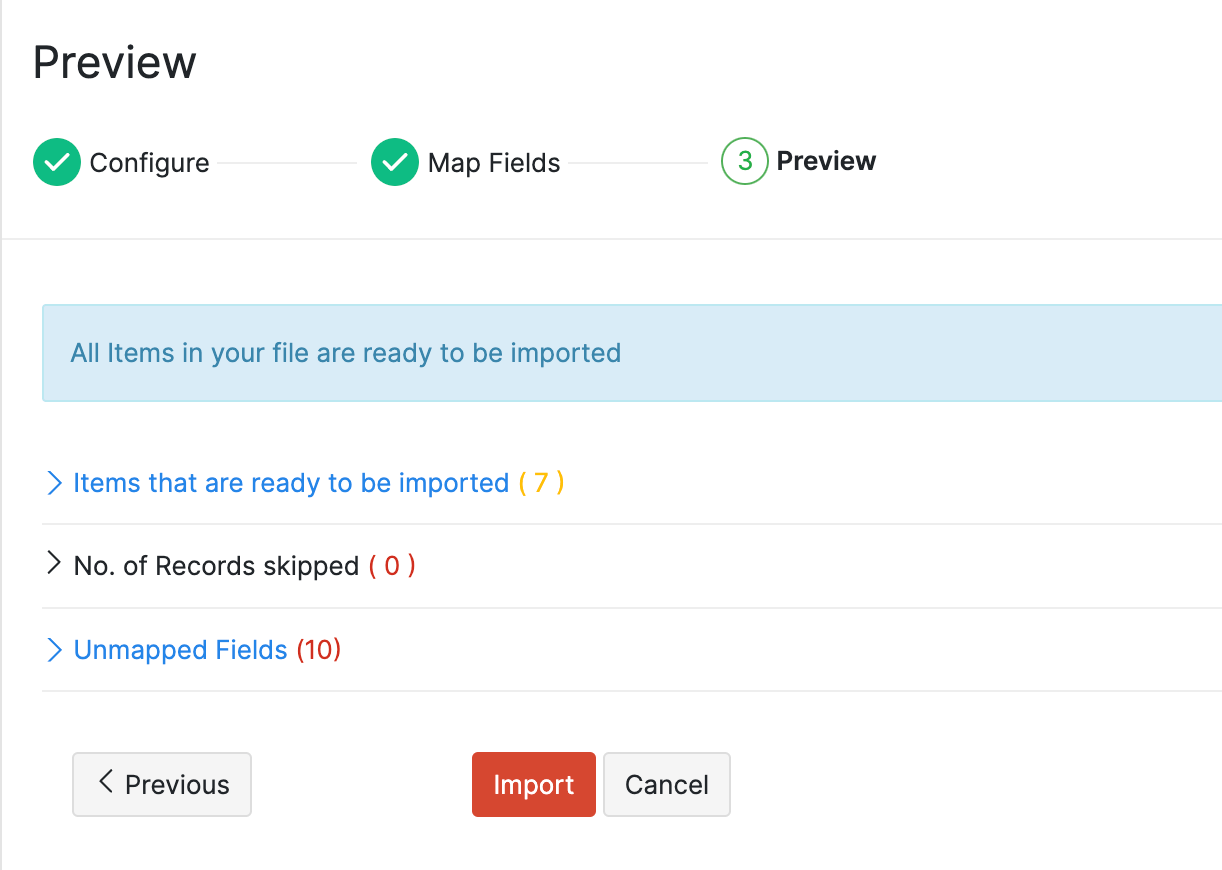
- The Preview window will display a synopsis of information such as the number of items that are ready to be imported, number of records skipped, and unmapped fields.
- Click Import to finish importing the file.
The ready to import records will now be listed in your module.
Exporting Data
- Navigate to the module, say Items, for which you would like to export data.
- Click the hamburger icon in the top right corner of the page.
- Select Export from the dropdown.
- Select the module for which you would like to export data.
- Filter the transactions you wish to export by selecting one of the following options:
- All Items: Choose this if you want to export all records in the module.
- Specific Period: Set a custom date range for which you would like to export the data. Note that the date range refers to the date of creation.
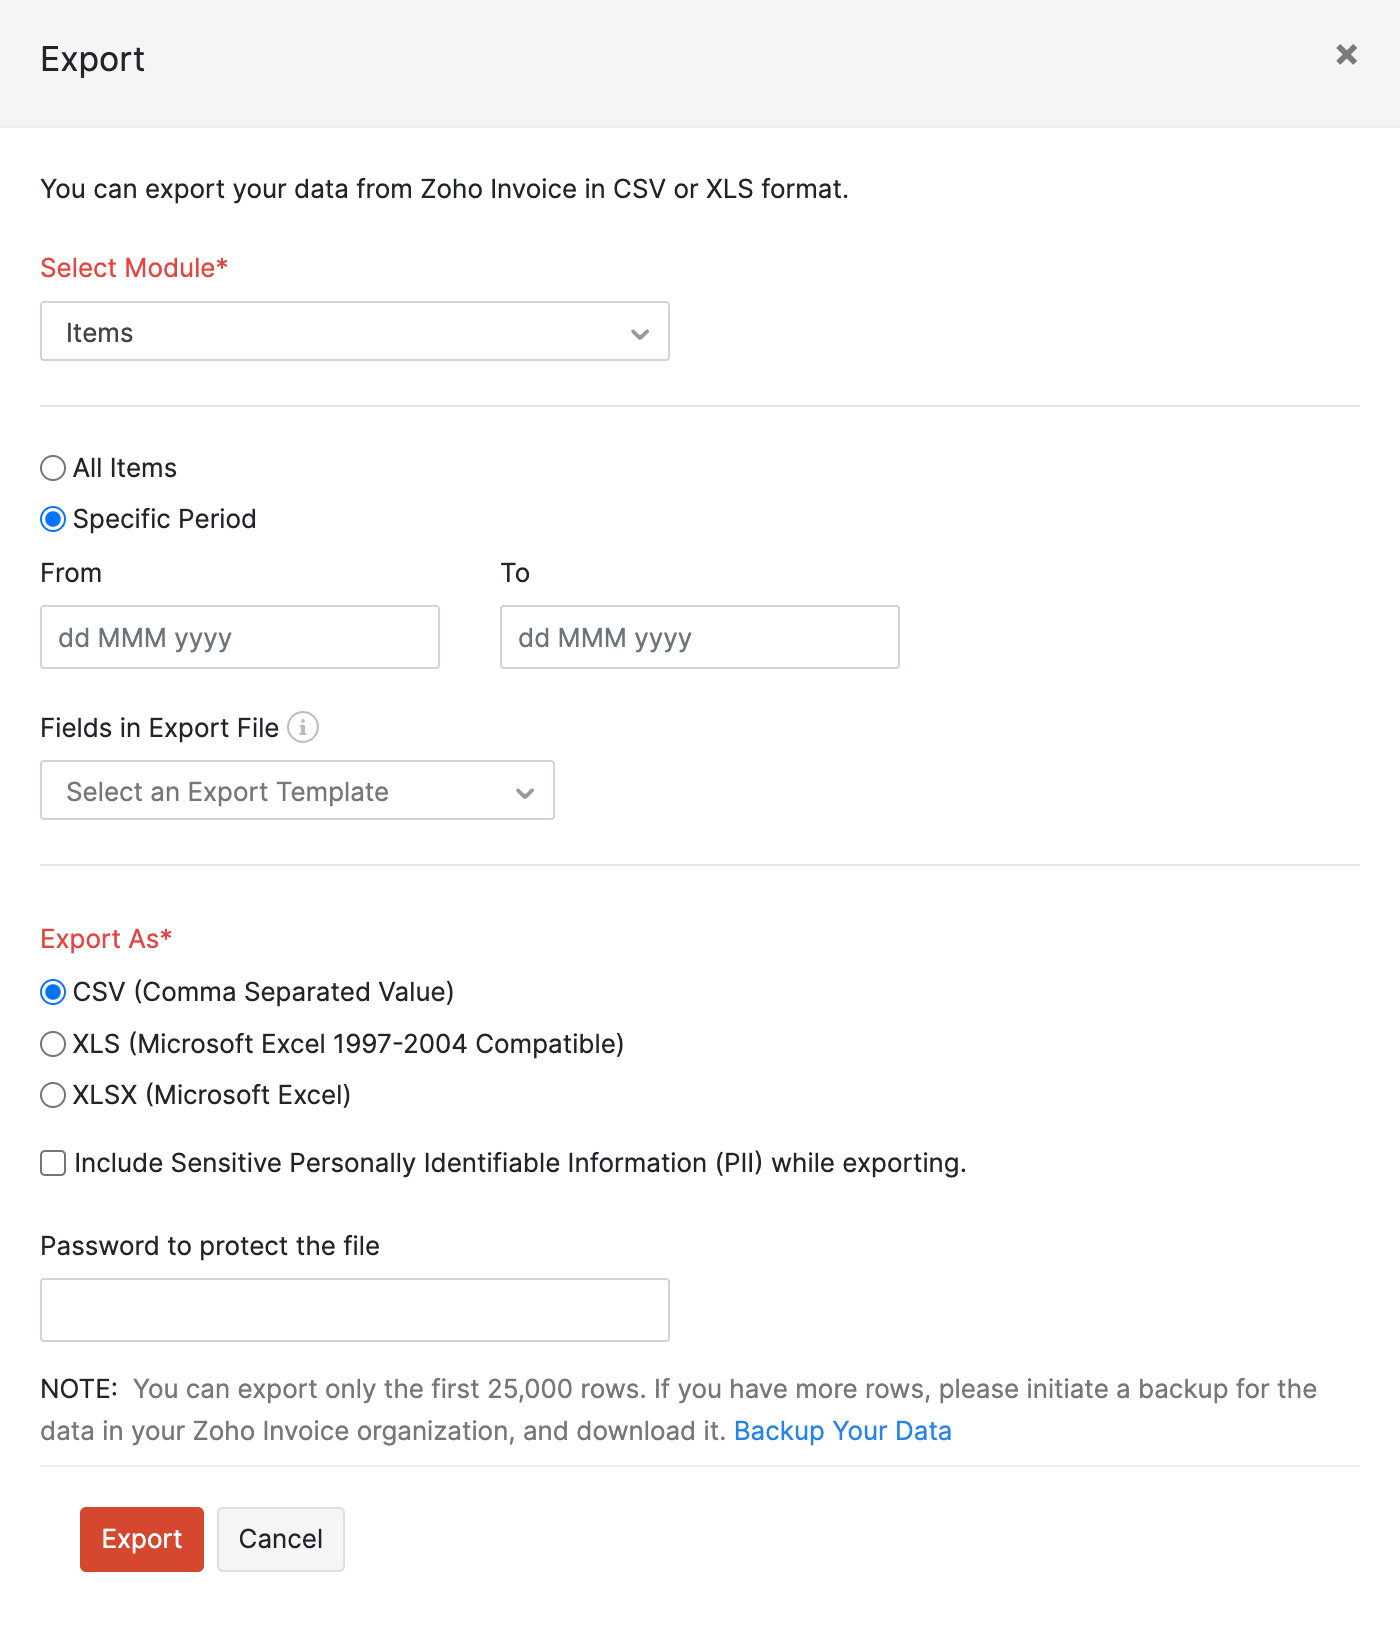
- Click the dropdown under Fields in Export File to select a template (If you don’t select an export template, all data fields will be exported for the specified period).
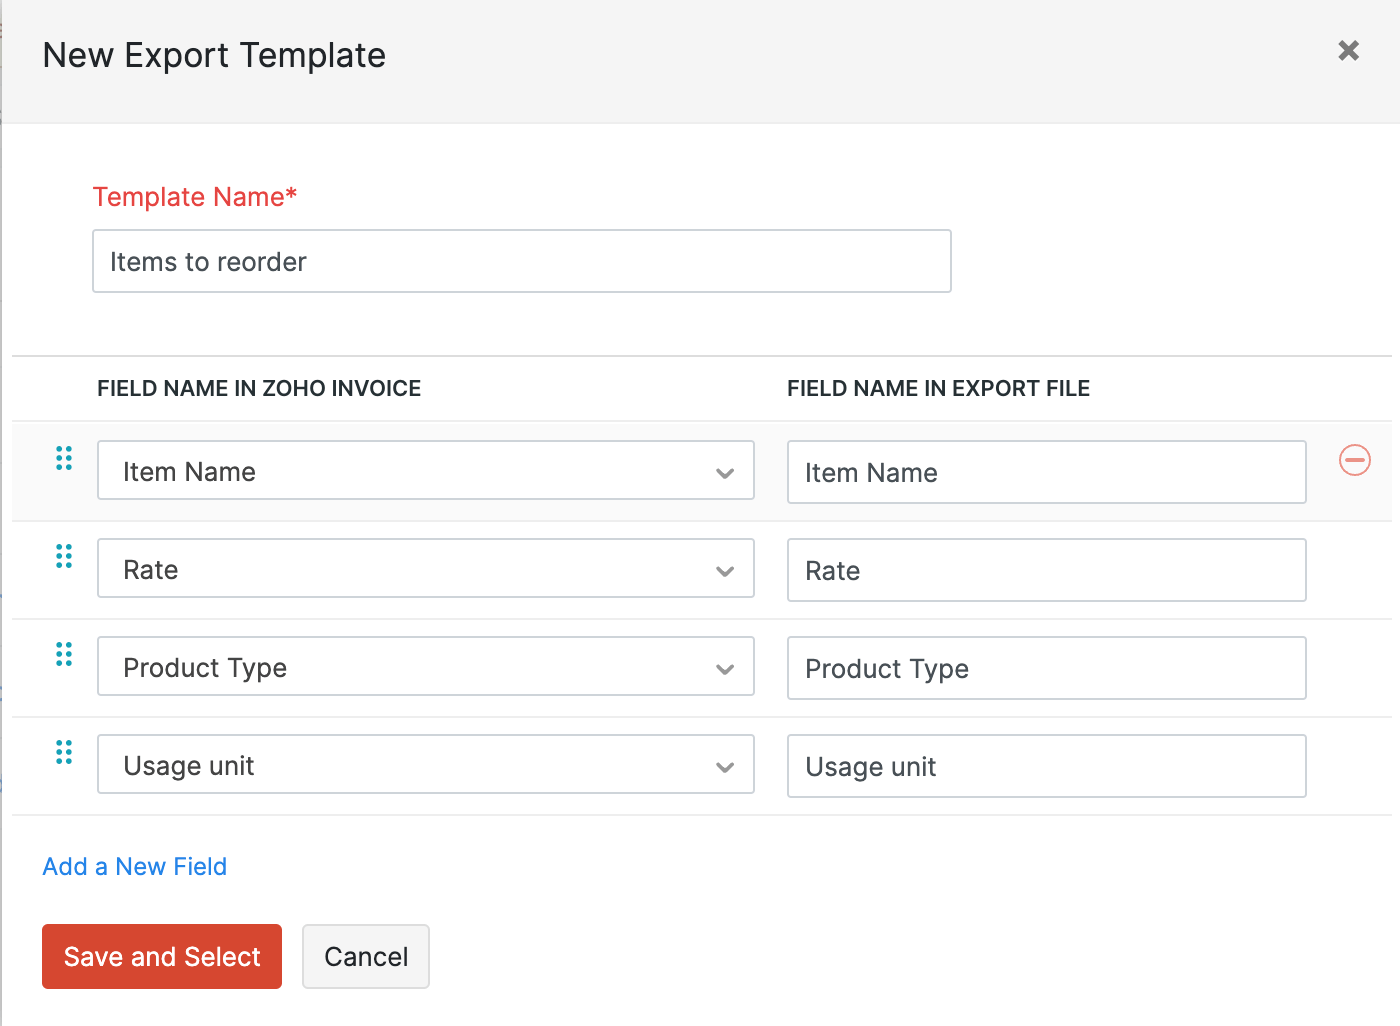
- Select a template from the list of export templates you’ve created or create a new template by clicking the + Add New option.
- Enter a name for the new template you’re creating.
- Click Add a New Field and select the required fields from the dropdown.
- Click the Remove icon on the right side of the field to remove any unnecessary fields.
- Drag the Reorder button in the left side of the field to rearrange the fields.
- Click Save and Select to continue.
- Select the format (CSV, XLS, or XLSX) in which you want to export the data.
- Enter a password to secure your file in the Password to protect the file field.
Note: While XLSX files support inbuilt password protection, CSV and XLS files will be zipped with the password, which you provided. This password must be entered when unzipping the file.
- Click Export.
You can then choose the location in your device in which this data should be downloaded.