Setting up Functions
How Can I...
Note
- Integration tasks for Functions using the Version 2.0 of APIs.
- Deluge Script - Reference Guide.
- Connections - Connect your Zoho CRM with any third-party application by invoking their APIs in a function.
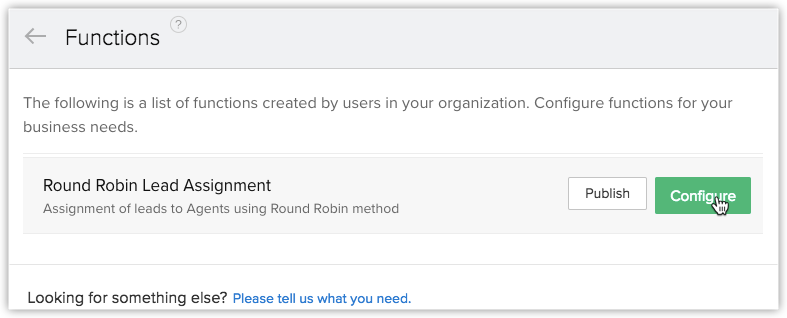
All functions programmed by your developers are listed on the Functions page. By this way, programmers can focus on developing Deluge Scripts whereas CRM Administrators can deploy the thoroughly tested functions as per their requirement.
Set Up Functions
You can set up functions in 6 places:
- Create a standalone function.
- Associate function to a workflow rule.
- Use functions later by including them in Schedules.
- Set the function to get executed upon the click of a Custom Button.
- Associate a function to a Related List.
- Associate a function to Validation rules.
To create a function
- Go to Setup > Developer Space > Functions.
- In the Functions page, click + Create New Function.
- Choose the place where the function is meant to be added.
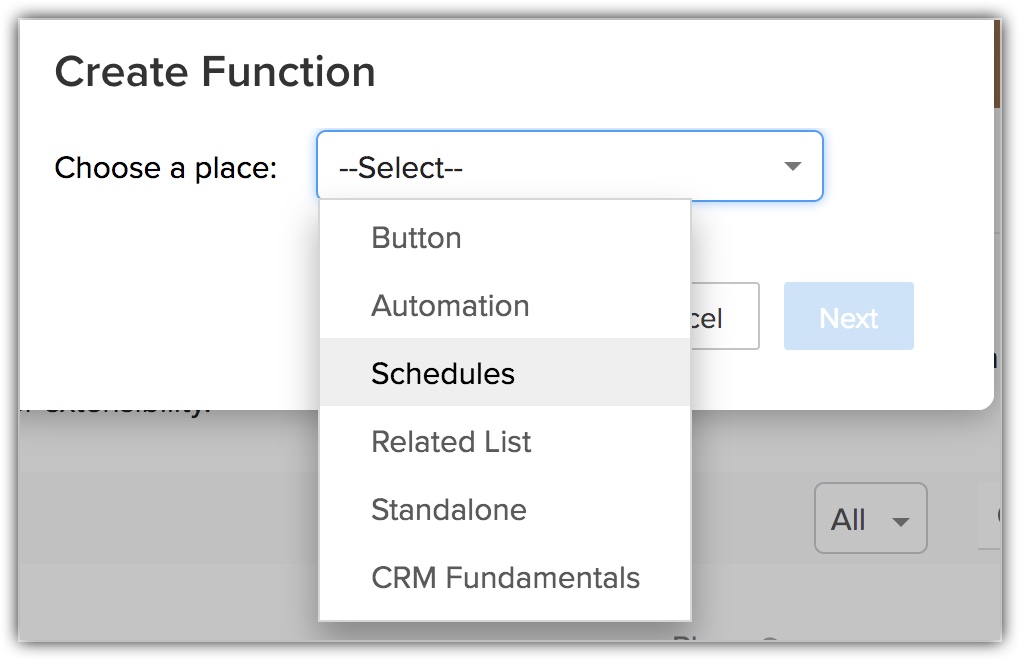
- Click Next.
- In the Create Function page, do the following:
- Give a Name and description(optional) for the function.
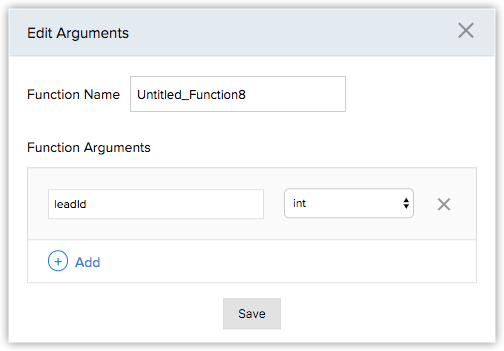
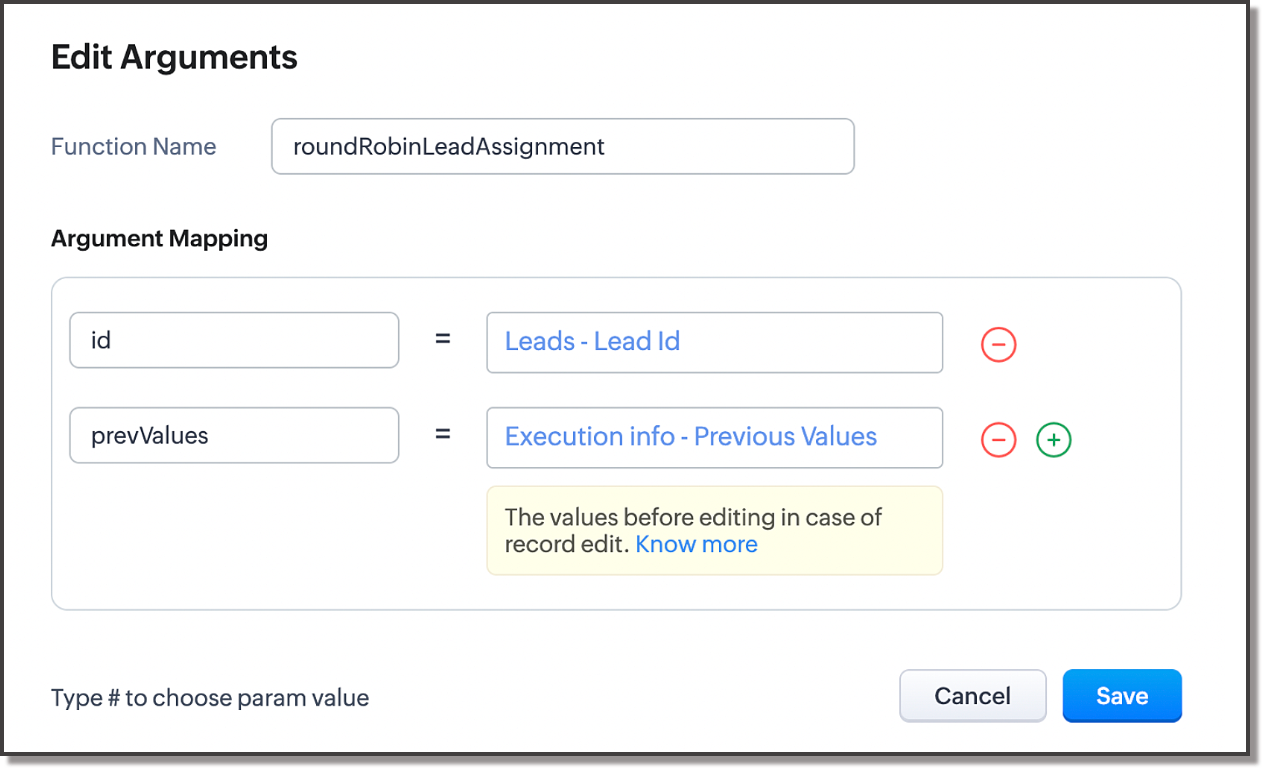
- Click Edit Arguments.
- Set the arguments to be used in the script, with field name or custom value in CRM module.
Write your required function in the Deluge Script Editor.
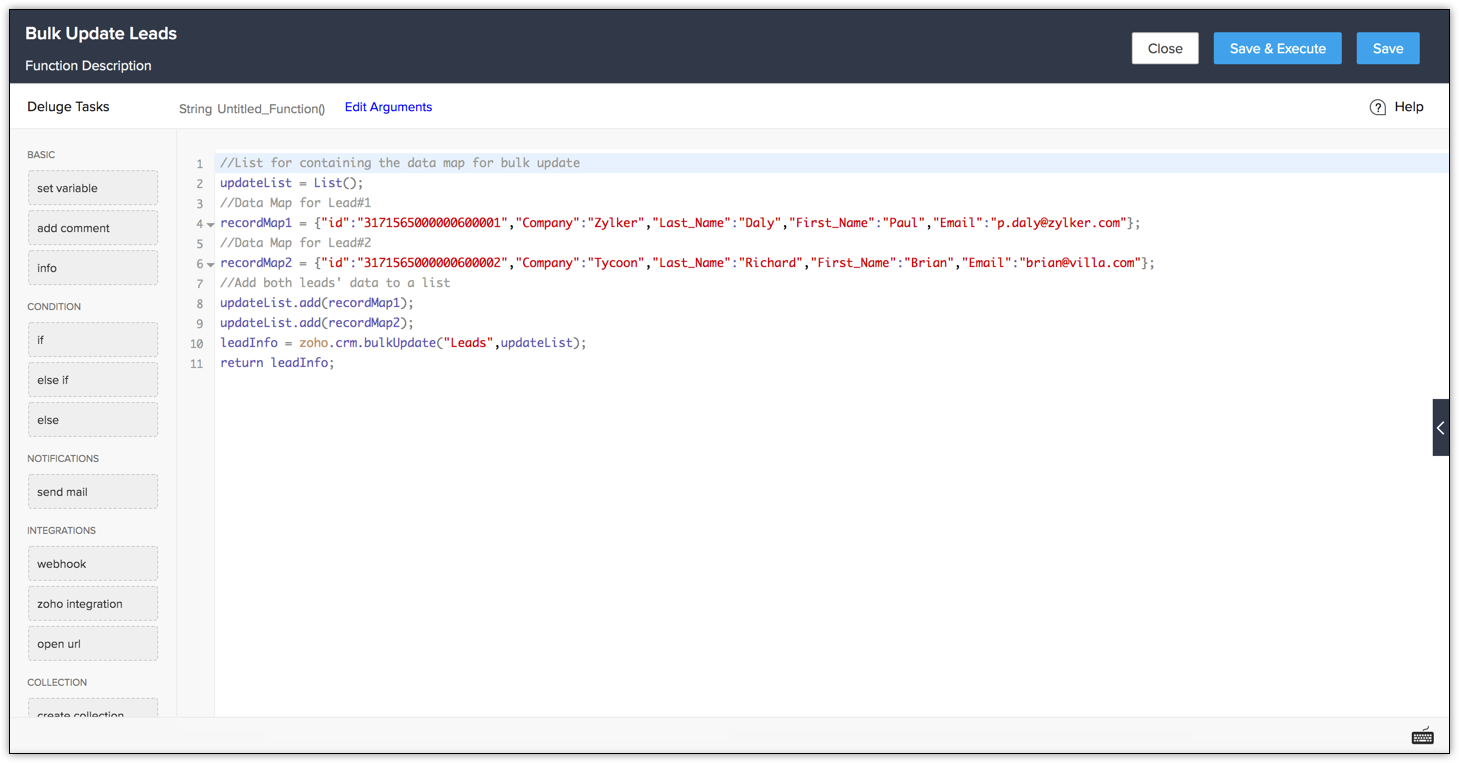
- Click Save & Execute Script to validate your code.
- Click Save.
- Click Save.
The function will be listed in the List View of the Functions page.
Please note that the functions specified to be used at a particular location cannot be used elsewhere. For example: a function configured for Workflow Rules cannot be used in Schedules.


Calling Functions using REST APIs
A function lets you have additional functionalities and features in your CRM apart from the conventional features. Functions needs a trigger to call it. The trigger could be in the form of a workflow, blueprint, related list or through the click of a button.
If the function needs to be triggered without employing these methods or from external sources, you can create standalone functions and make them available as API calls. Triggering functions through REST APIs which gives the flexibility to trigger it from anywhere inside Zoho CRM or from any third party application.
Sample function as an API call:
A form which automatically generates a lead in your CRM with the information given as input in the form.
Step 1:
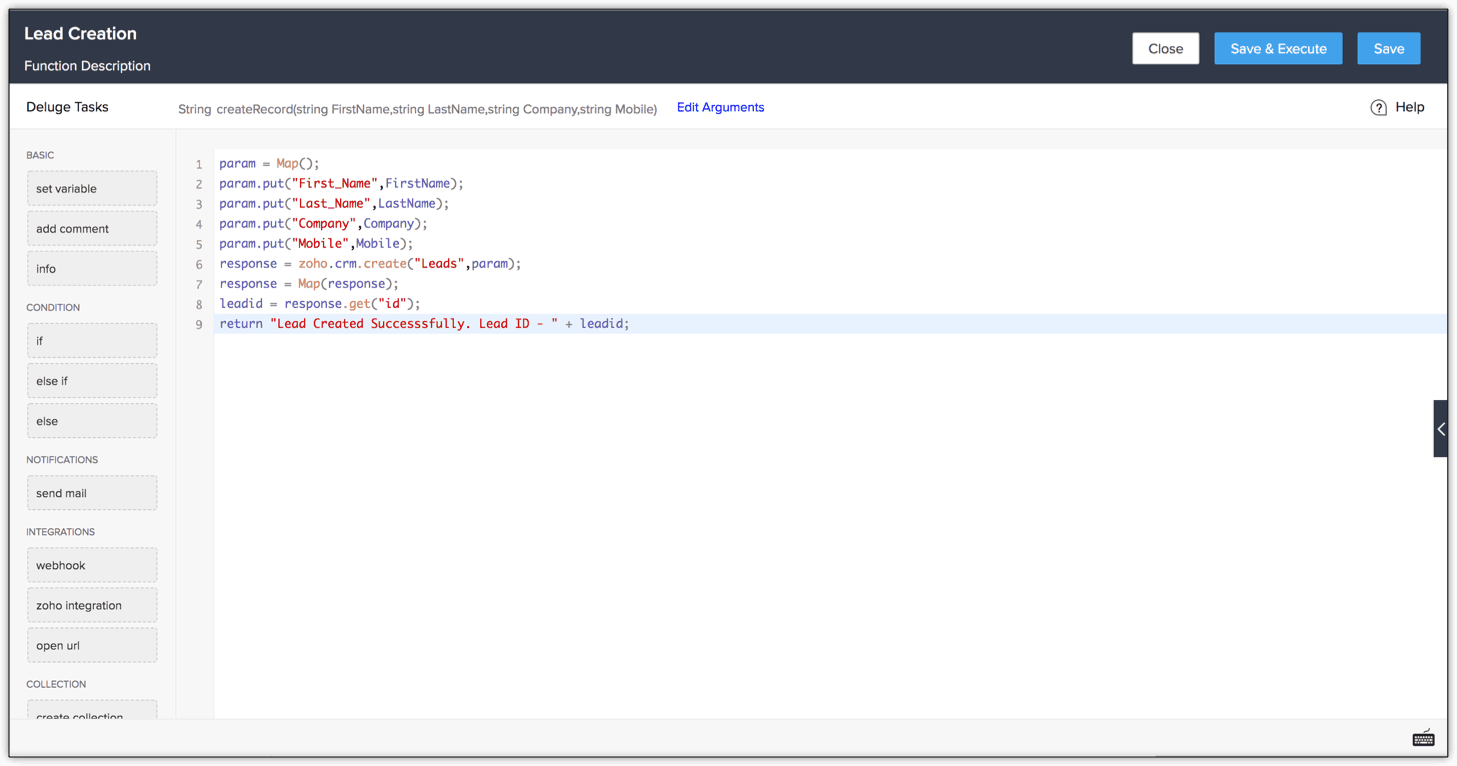
Create a standalone function with the following code.
Note:
- The arguments to be passed for the above function are "FirstName", "LastName", "Company" and "Mobile". Datatype for the arguments is STRING.
Step 2:
To make function available as an API
- Go to Setup > Developer Space > Functions.
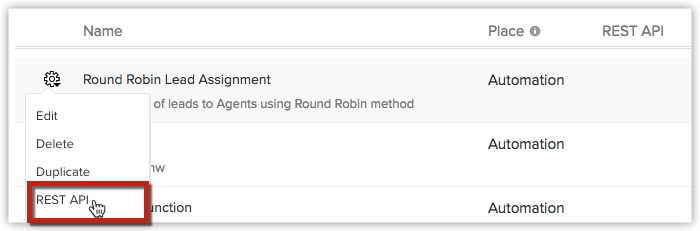
- Click the Settings icon for the corresponding function which needs to be made an API.
- Click REST API.
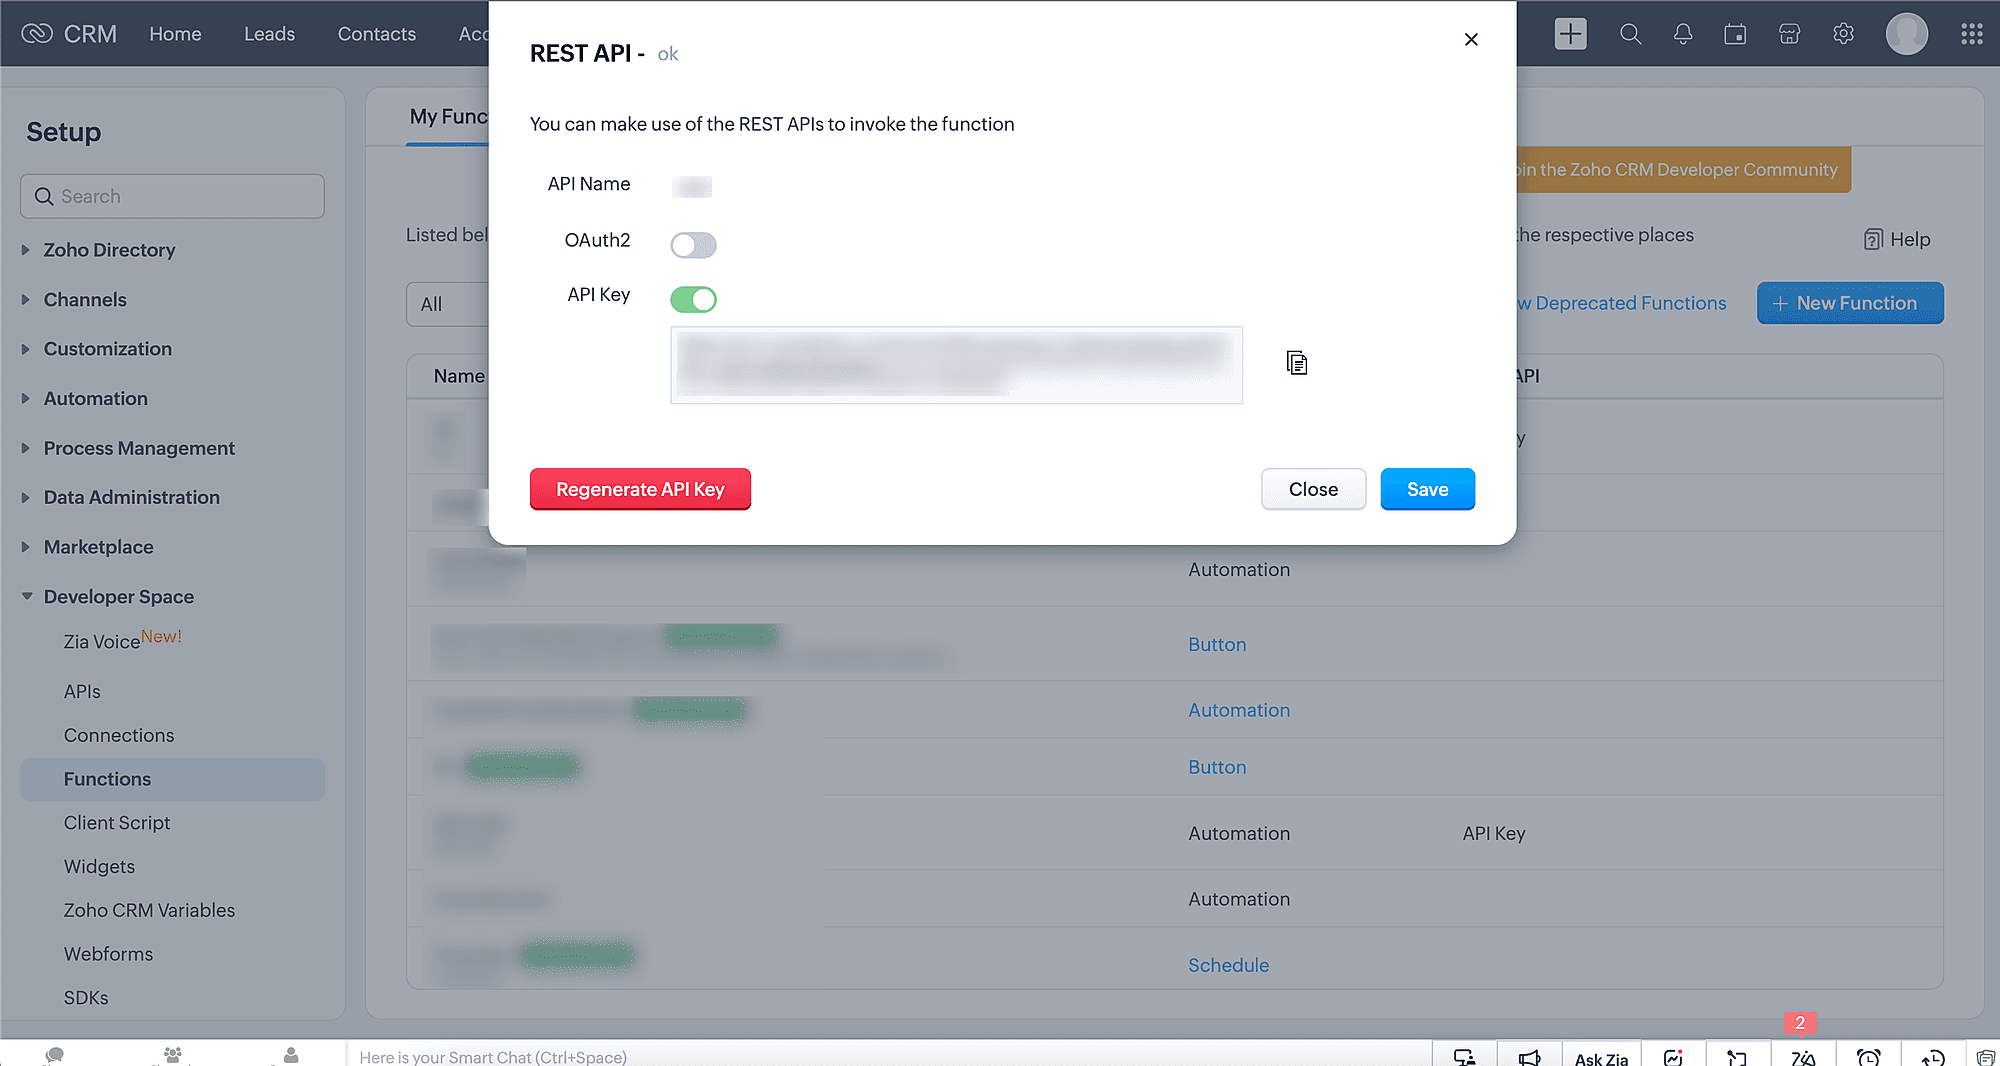
- The API Name field displays the API name of the function which you must use to invoke it. This API name is system-generated; you cannot modify it.
- Enable OAuth2.0 and the API key sliders.
- Click Save.
Note:
- Select OAuth2.0 for sharing the function as an API within your organization.
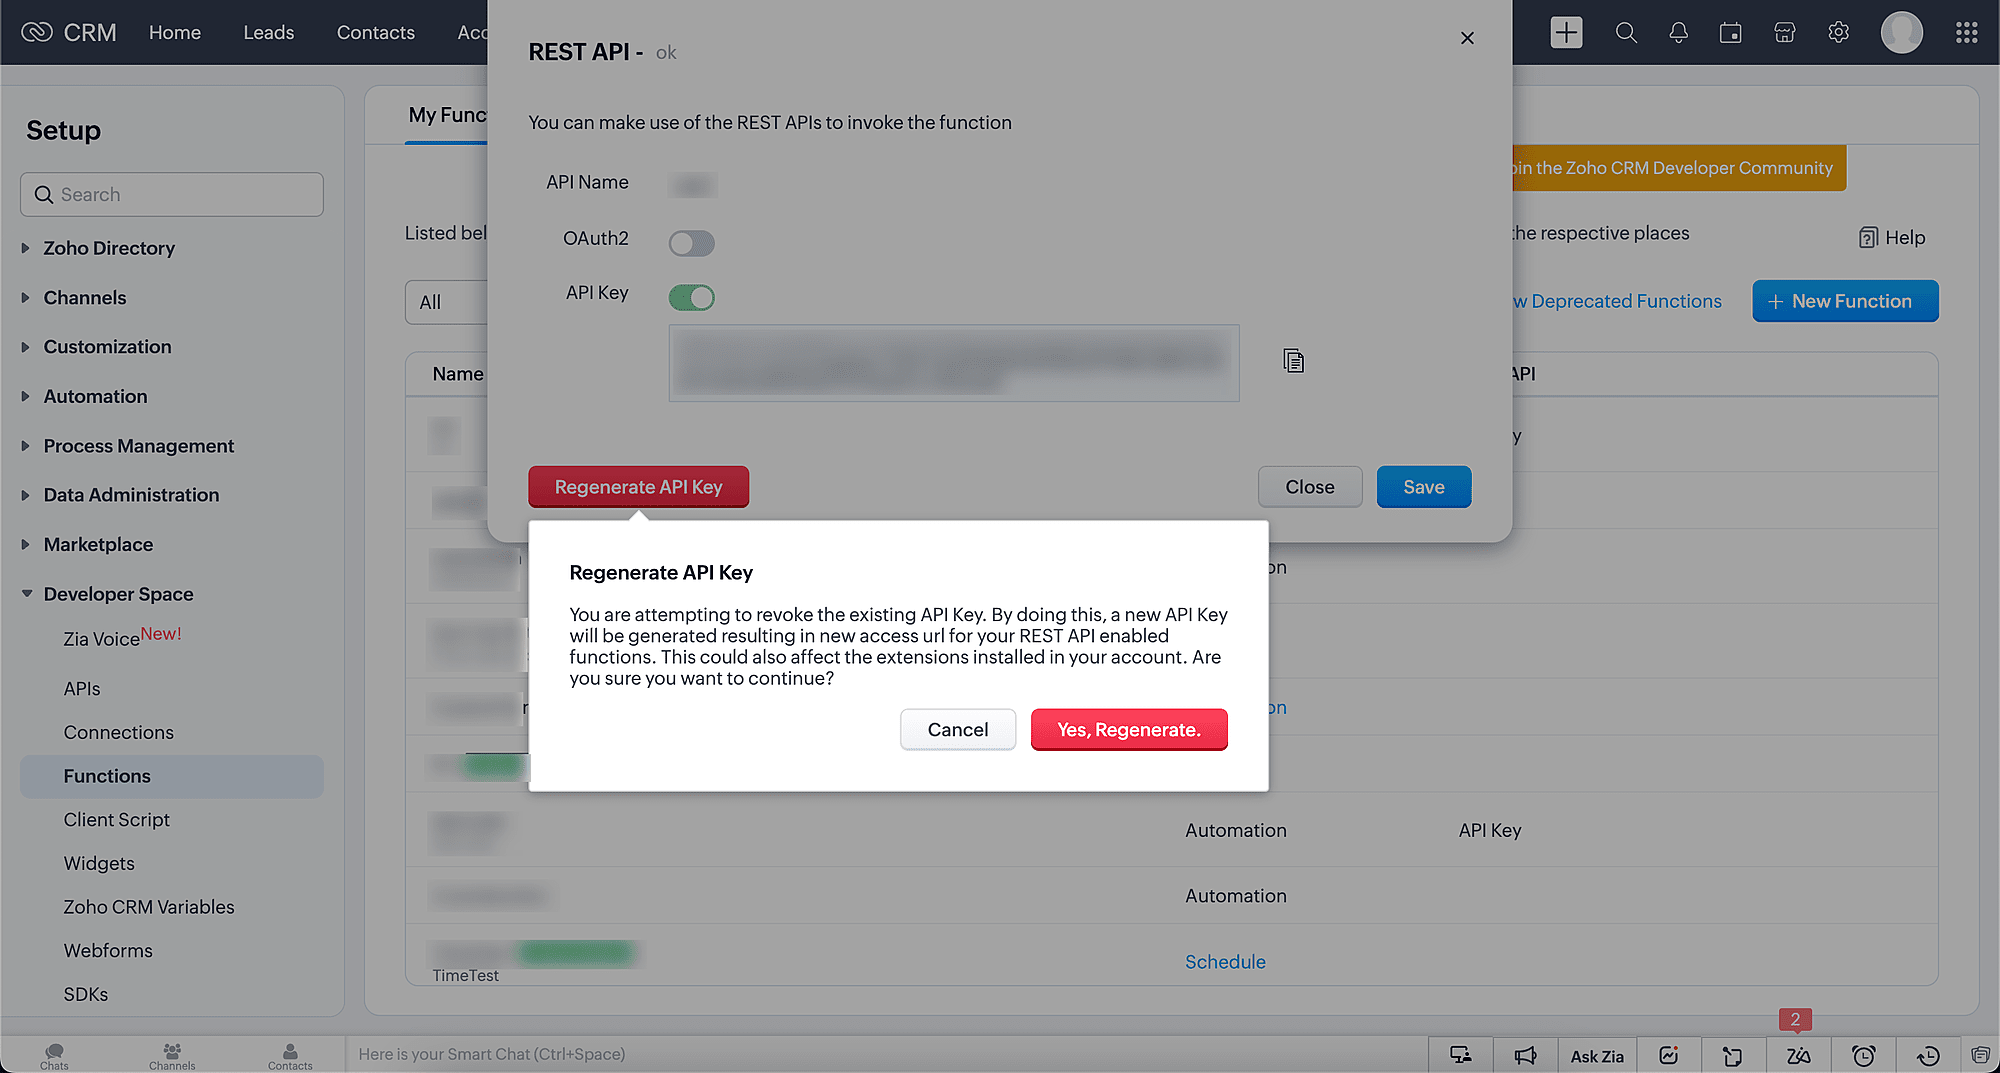
- Select API Key for sharing the function with any third party and enable it to be used by anyone. This API key is static, and does not expire unless revoked. You can regenerate the API key any time by clicking the Regenerate API key button. When you regenerate your API key, the old key becomes invalid and any requests made using the old key will be rejected. This can be beneficial in case your API key is compromised or you need to revoke access for any reason. Please be aware that the API key is common for all the functions, and that regenerating the key will reflect in all the functions. After regenerating the key, make sure to update any applications that use the old key with the new key to ensure that they continue to function properly.
- Note that only admin users have access to the Regenerate API Key option.
Step 3:
The sample here is shown as a form created using Zoho Creator. Create the form such that it has the fields "FirstName", "LastName", "Company" and "Mobile". You can program the function to get executed upon the click of Submit button.
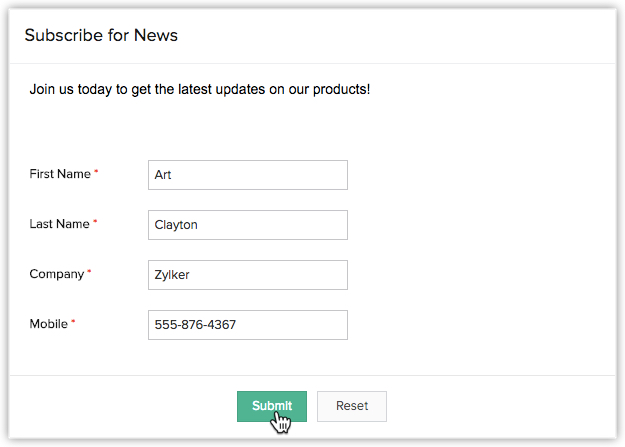
Result:
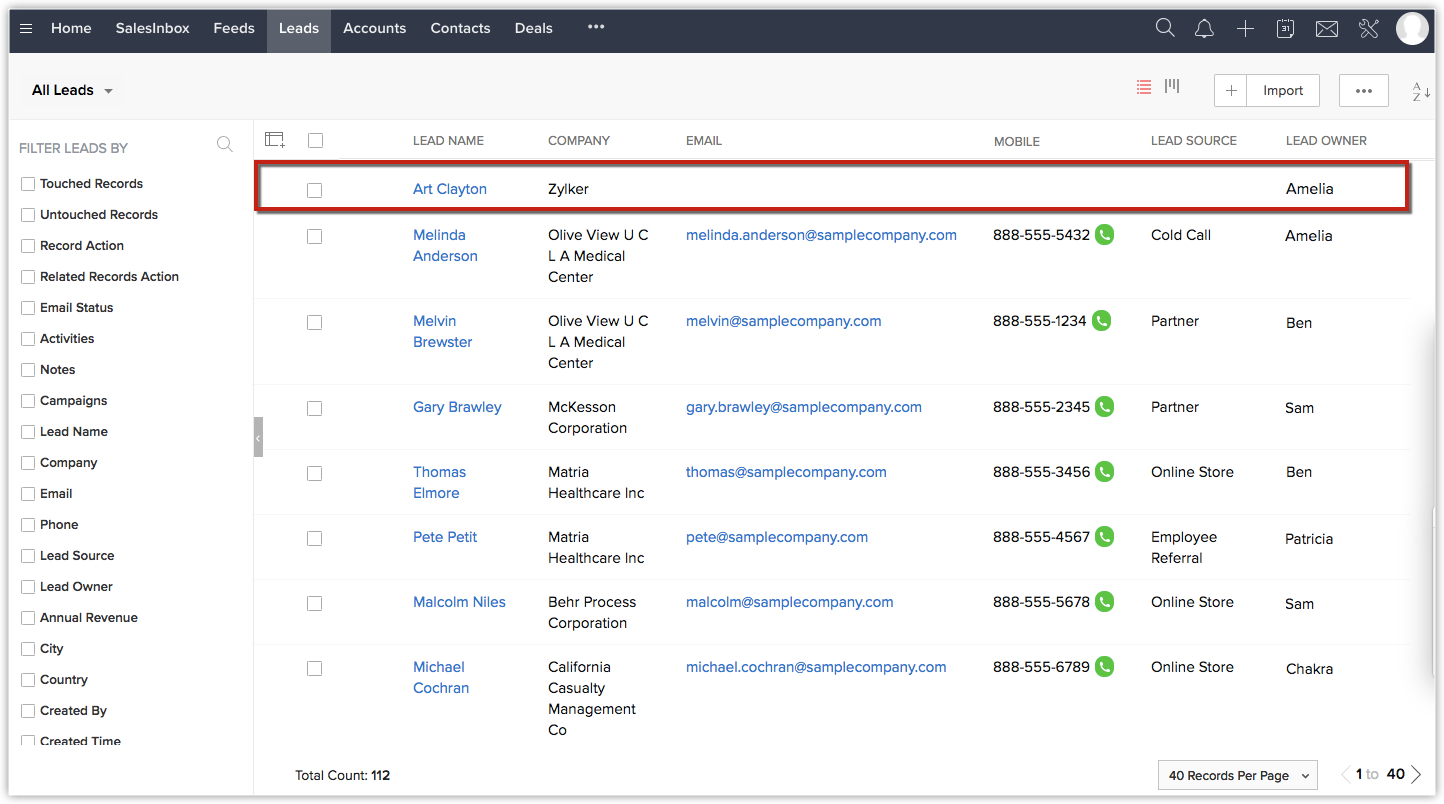
Once the Submit button is clicked, the function gets executed and the Lead is created in your CRM. The lead has the details which was given within the form.
Functions in Postman:
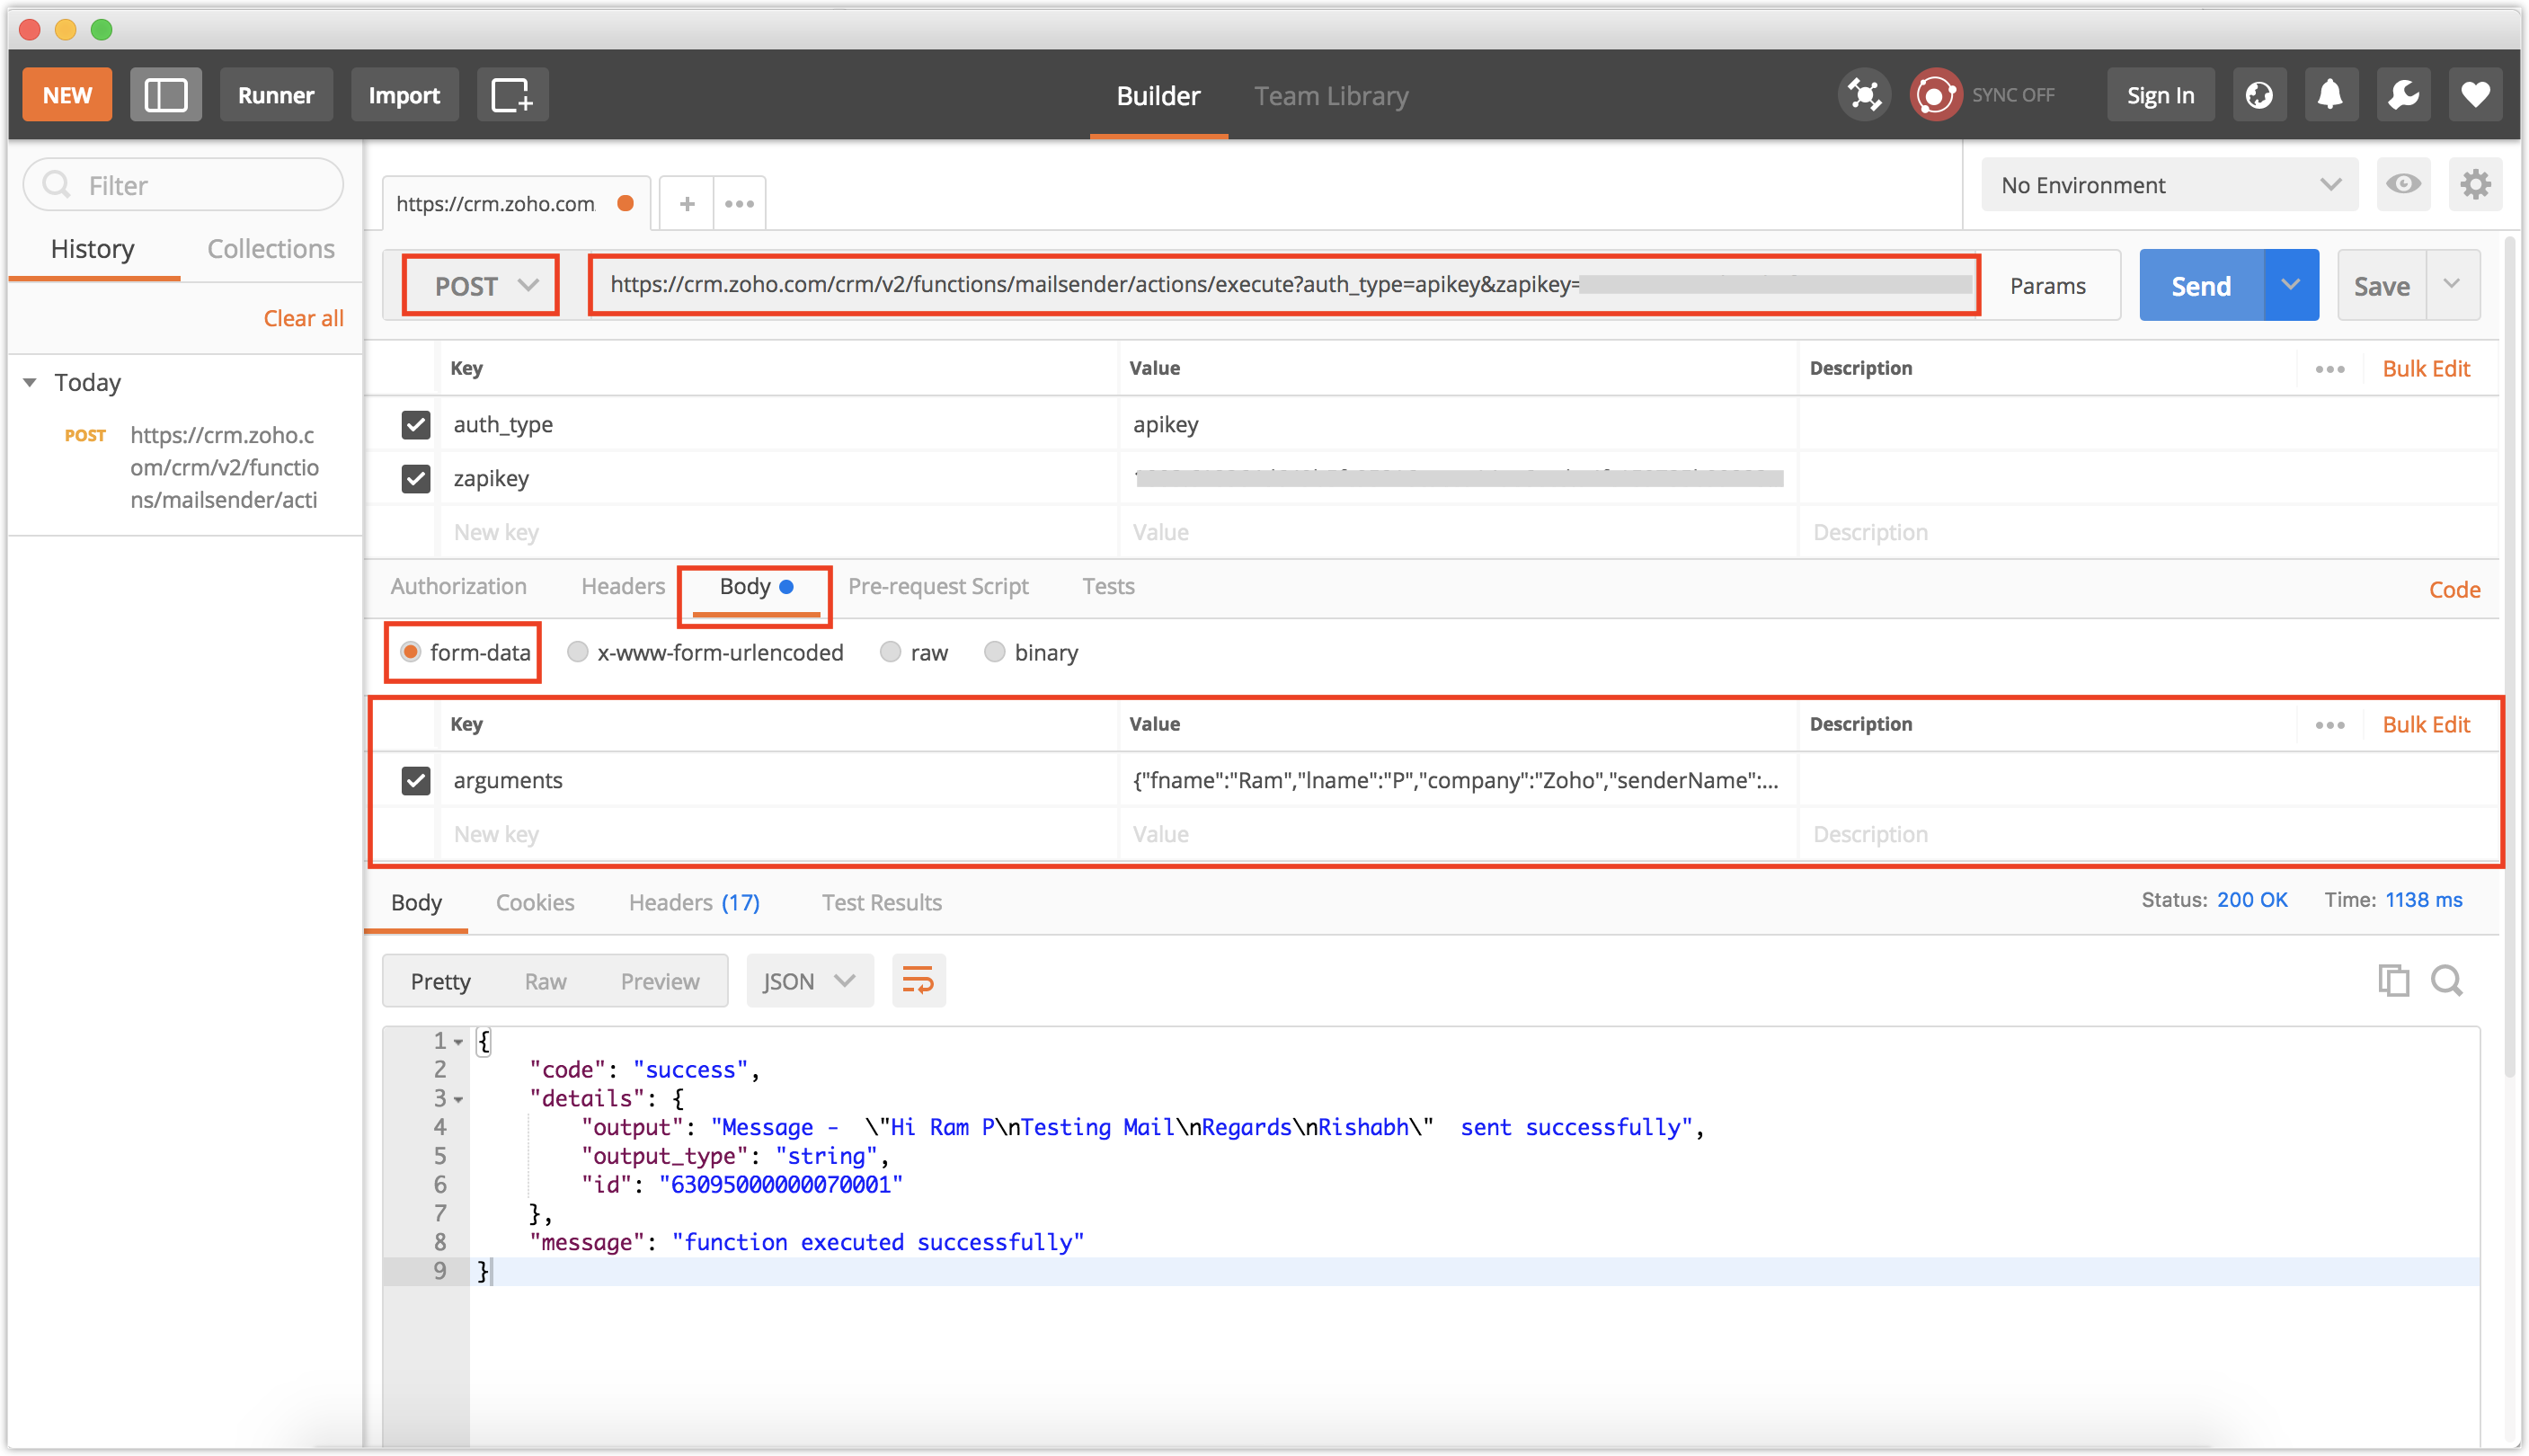
Functions which are given as API calls can be tested using POSTMAN application. However, there are a few things that you need to keep in mind when executing a function in that app.
- The current supported methods for using a function as an API are GET and POST.
- In a POST request, under the "Body" section, select "form-data".
- Create a Key named "arguments" and the Value as the Input JSON object.
- The arguments can also be given in the URL as arguments={encoded_arguments}
- POST request - Arguments Limit
- In request URL - 5000 characters
- In body - 95000 characters (as JSON object)
Sample arguments in "Body":
{
"First_Name":"Art",
"Last_Name":"Clayton",
"Company":"Zylker",
"Mobile":"555-876-4367"
}
Deploying Functions in Workflow Rules
To associate function to a workflow rule
- Go to Setup > Automation > Workflow Rules.
- On the Workflow Rules page, click + Create Rule.
- In the Create New Rule tab, specify workflow rule parameters.
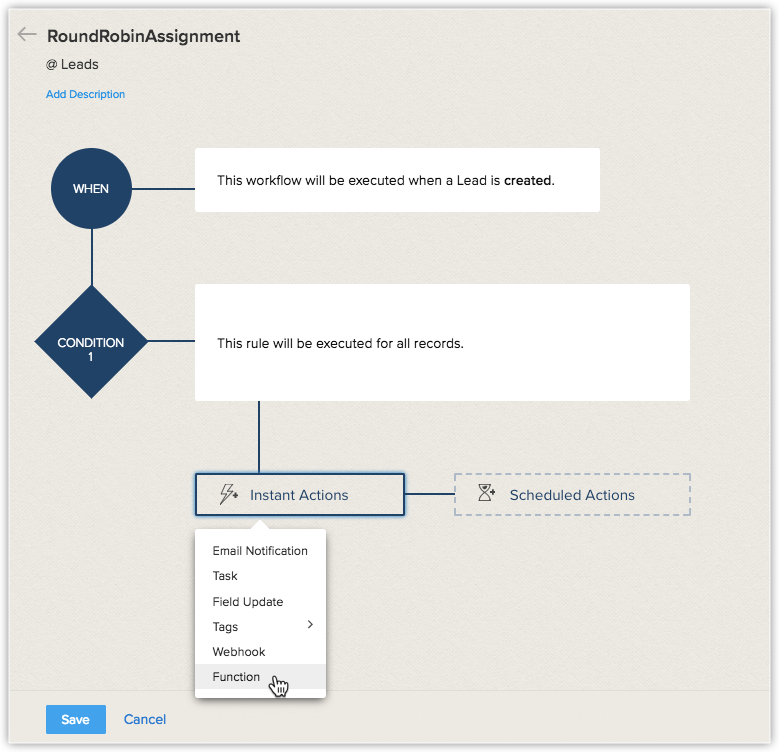
- Under Instant Actions, select Function.
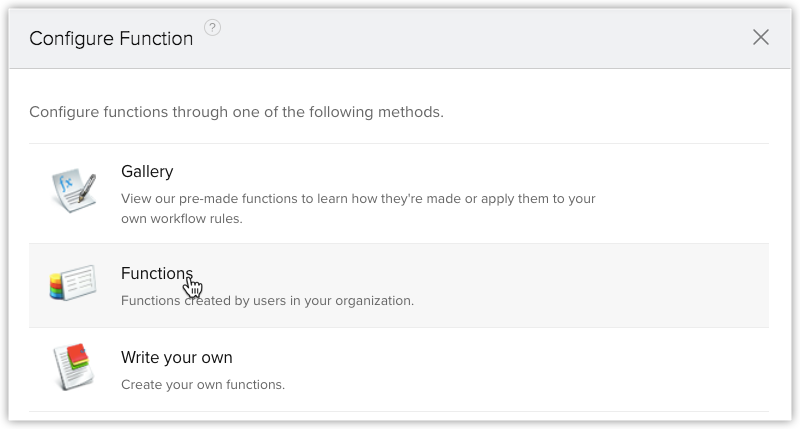
- In the Configure Function page, select a function from the Gallery, Functions (Created by users in your organization) or Write your Own using Deluge script.
- Click Functions (Created by users in your organization).
- Select the function to be triggered and click Configure.
- In the Configure Custom Function page, complete the following steps:
- Select the module to be associated.
- Previous Value: You can configure the old value (data) of a field and pass it as a parameter in a function. When you edit a record, the system will trigger a workflow and pass the value of the field (the value stored before the field's edit) as a parameter.
Under the Argument Mapping, specify a dynamic name in the Key section, and in the Add Merge Field, select the Execution-Info option. Then, choose the Previous Value option, to get a previous value.
Here is an example of how to configure the old values of the fields:
oldEmail= preValues.get("Email"); //The name 'preValues' is a dynamic name used in the above mentioned examples. You can use any name that suits your needs.
Source:
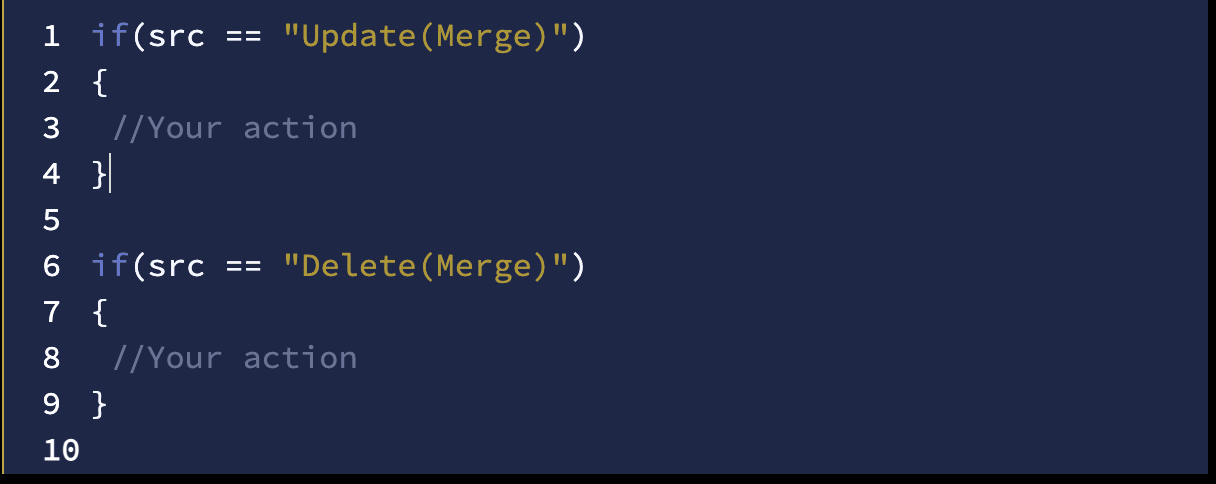
To ensure whether your workflow was triggered due to a merge (using Find and Merge Duplicates) or a regular delete in a function, pass the "Source" value as an argument in your function. When two records are merged, the system updates the main record and deletes the child record.Example: Consider two records: a main record and a child record. The main record has an email value, while the child record has no email value. When these records are merged, the email value of the child will be merged with the parent record, updating it, while the child record will be deleted.
By using "Execution-info -> Source," you will receive the value "Update(merge)" for the main record and "Delete(merge)" for the child record.
This will help you understand exactly what caused the workflow to run and handle the records accordingly.Notes:
For Previous Value:
- The workflow will be triggered only when the record is edited.
- You cannot configure data for multi-line and lookup fields.
- You cannot retrieve the previous values of subforms and multi-select lookup fields.
For Source Value:
- The "Execution-info > Source" is supported only for merging records using Find and Merge Duplicates.
The two options mentioned above are now available in Early Access. To get access to these options, please send an email to support@zohocrm.com.
- Click Save.
- Click Saveon the Workflow rule page.
Now, your function is associated with the workflow rule. When the workflow rule is triggered, the function will be automatically executed.


See Also - Integrate a function to a Schedule, Custom Button, Validation Rule, and Related List.
To test the function integration
- Add test data in Zoho CRM according to your workflow rule criteria.
- Check for the data received from Zoho CRM via function, in your application.
- Modify your function code in Zoho CRM, if data is not received or if there is a data mismatch.
- Continue this test until you obtain the required data from Zoho CRM to your Application.
Important Notes
- You can associate up to 6 (1 Instant Action and 5 Time-Based Actions) functions per workflow rule.
- Zoho CRM will the send the data in following standard format for Date and Date Time fields to third-party applications:
- Date: yyyy-MM-dd
- Date Time: yyyy-MM-dd hh:mm
Refer Error Codes
When the execution of function fails, one of the following error messages will be displayed in Zoho CRM:
HTTP Status Codes
- 400 Bad Request - Often missing a required parameter.
- 401 Unauthorized - No valid API key provided.
- 402 Request Failed - Parameters were valid but request failed.
- 404 Not Found - The requested item doesn't exist.
- 500, 502, 503, 504 Server errors - Error in the third-party application.
- Error Code 1 - Temporarily not able to connect to the API server. Check API server logs, firewalls settings for requests sent from CRM.
Custom Errors
- Internal process failure - When the function is not executed due to errors in processing of the script.
- Day limit reached - When the company has reached the maximum limit for the day.
- Deluge Script - When the execution of workflow triggers fail due to errors in Deluge Script.