Overview
Deluge, or Data Enriched Language for the Universal Grid Environment, is an online scripting language integrated with Zoho services. It enables users to add logic to their applications incrementally, making it more powerful and robust.
UI-based actions like point-and-click are limited in their scope. After a certain point, if we want something to be very complex, we need custom scripts to perform custom actions. Deluge can make that possible. For example, if you only need to collect data in an app like Zoho Creator, which is straightforward, you can do it using drag-and-drop. However, if you want to do more than that, say send an email on form submission, fetch data or update data, or any other similar action, then you would need Deluge.
Deluge is Zoho's proprietary language, and is built by Zoho.
Is Deluge a programming language or a scripting language?
Deluge is a scripting language.
A programming language, in a nutshell, is a sequence of instructions to enable the computer to do something. It's like writing down the steps it takes to do something. These instructions are written in a programming language, and the stuff that these instructions manipulate is different types of data, like numbers or words.
A scripting language, on the other hand, is a form of programming language that is used to create scripts or bits of code. Most commonly, scripting languages are written to facilitate enhanced features of websites. For example, when you search something on Google, the results are dynamic. This is because of scripts. The Google search itself is processed on the server (or, in other words, done using a programming language) but it's enhanced with features like dynamic auto-suggest using scripts that run on the user's browser.
When compared to programming languages, scripting languages are easy to learn and use, and do not require much programming knowledge or experience. Complex tasks can be performed in relatively few steps using scripts, unlike programming languages, which are generally lengthy. Apart from these basic differences, there are a few technical differences as well, but what makes a programming language or a scripting language has nothing to do with technicalities. A scripting language is available to the user at runtime, and allows the user to direct the behavior of the main program. And that is precisely what Deluge is, to Zoho Services.
In a programming language, you write a large number other things apart from the custom action you are trying to achieve. Basically, there are a lot of dependencies you need to work out to trigger your custom action. In a scripting language like Deluge, you simply write the script for the action that you want to achieve. This is because we have already taken care of the dependencies.
Deluge is our own scripting language, which you can use to write logic and automate actions across multiple Zoho applications.
Where can you use Deluge?
Over thirty Zoho Products currently support Deluge, which are listed in the image below. Products marked with stars are in private release stages, or we're close to getting it up and running for those products. When an action happens in one of these Zoho applications, it can trigger a Deluge script that does some workflow action for us.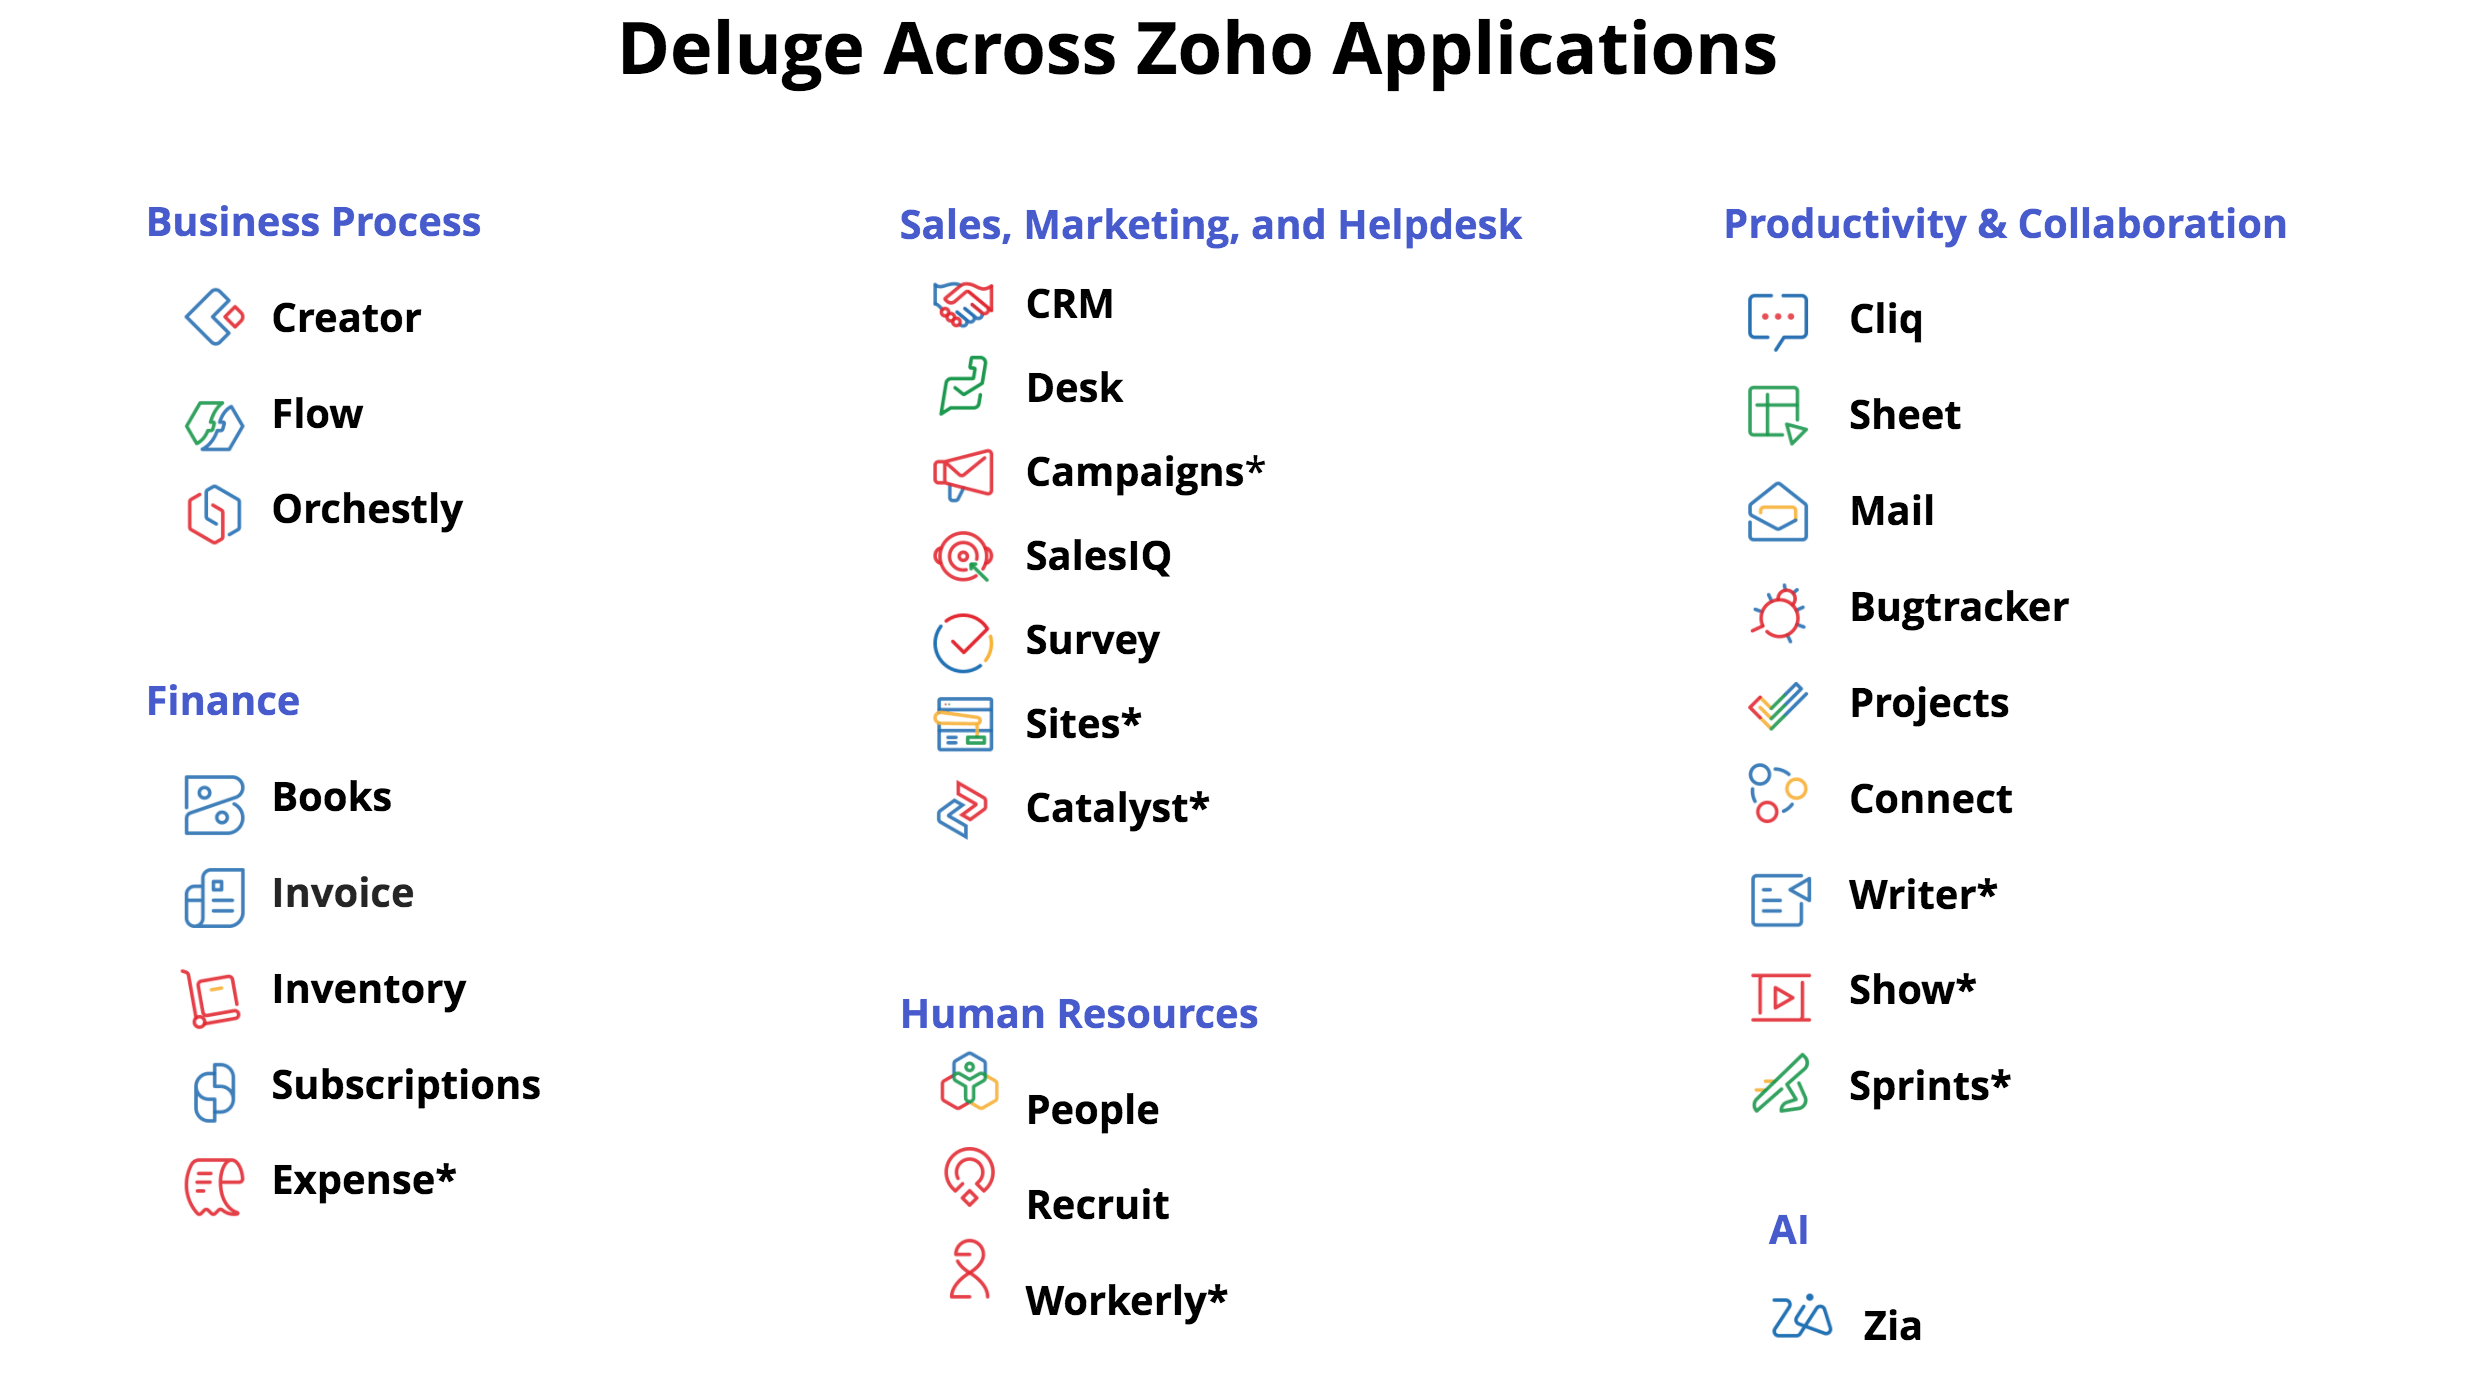
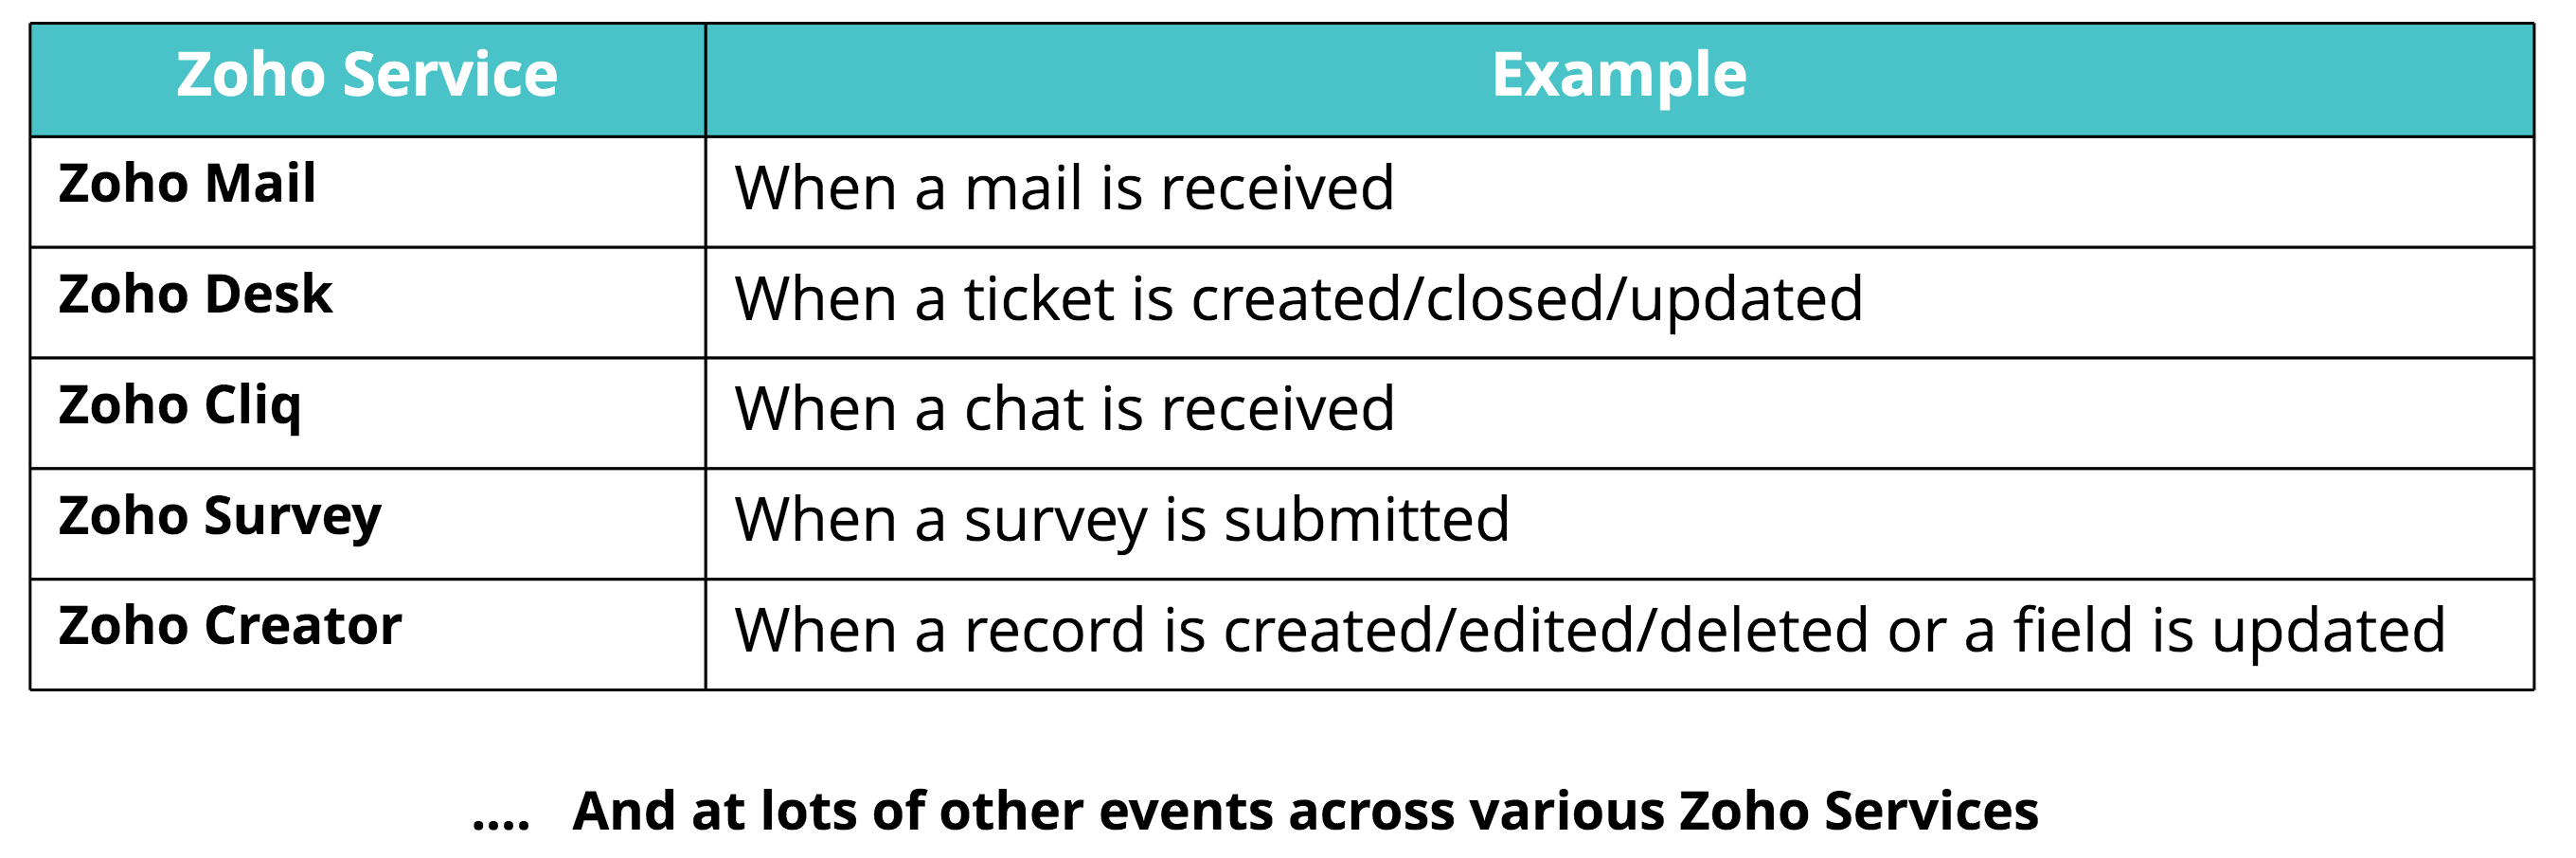
Generally, you'll be using Deluge to manipulate data in some way, such as creating or updating a record, or deleting a record that exists in other Zoho or external applications. You can also choose when that action happens. We have already defined all the events across Zoho applications in which you can trigger Deluge scripts. The following image displays a few sample events in which Deluge functions can be triggered.
Unique features of Deluge Scripting
- Automation: Perform automated tasks, like sending automated text messages to employees when visitors arrive to meet them, or an automated email notification when your stock is running low. You can also perform calculations. For example, If the total cart value exceeds a particular amount, you can automatically apply a discount and calculate the total cost. This is one of the most common use cases.
- Integration: Perform seamless integration between Zoho services, or between your Zoho service and any other third party service. For example, when a new candidate is short-listed in Zoho Recruit, data can be automatically pushed to the Zoho Calendar account of the HR representative who is going to interview the candidate. Alternatively, take the example of Zoho Bug tracker, which is a product used to track issues and bugs. All the bugs found can be pushed to Zoho Desk, which is another Zoho product to track customer tickets. This integration is not only limited to Zoho Products. Using Deluge, you can make API calls to any other applicable external service.
- User-friendly Syntax: The Deluge Script syntax is easy to read and understand. The process of creating powerful application is fun, easy, and quick.
- Code is Data: Deluge Script has no concrete syntax. The syntax you see is just a "skin". The actual code is stored as abstract syntax (i.e. a whole bunch of tables) in the database. In future, users will be able to generate the same code in their own favorable syntax. For example, Sam can edit the code in the standard Deluge syntax, while Lucy can edit the same code in her preferred Perl syntax.
- Query Integrated Language: Deluge Script bridges the gap between the program logic written in a high-level programming language and the data that it operates upon. It brings the expressiveness of SQL closer to the core application logic. This means the query is integrated at the language levels.
Built-in functions: Execute pre-built functions to perform common actions with different functions available exclusively for different data-types.
Use cases of Deluge in various Zoho Services
The following table lists a few popular use cases across various Zoho services. Additionally, there are endless Deluge tasks and functions you can perform depending on your requirement.
| Zoho Service | Use Cases |
|---|---|
Zoho People: An online Human Resource Management System to manage all your employee data from one place. |
|
Zoho Cliq: A team communication app which enables workplace conversations and workflows in one single place. |
|
Zoho CRM: A unified platform that helps you juggle multiple business activities efficiently. It's designed to help you sell, market, analyze, manage better and collaborate with customers and employees. |
|
Zoho Billing: Zoho Billing is a subscription billing platform that manages complex billing cycles, oversee customer subscriptions, automate invoicing and payment collection, manage failed payment retries and analyzes your business growth |
|
Zoho SalesIQ: An advanced tool for tracking website visitors and providing live chat support to customers. |
|
Zoho Orchestly: Orchestly is business process workflow management software that helps automate, orchestrate, and manage your business processes. |
|
| Zoho Survey: Zoho Survey provides a user-friendly interface for creating customized surveys to help you start gathering customer feedback right away. |
|
| Zoho Projects: Zoho Projects is a cloud-based project management solution designed for small and midsize companies. |
|
| Zoho Invoice: Invoicing software built for small businesses and freelancers, made to help you send invoices, track the status of each invoice, automatically send payment reminders to customers, and receive payments online.e. |
|
| Zoho Desk: Help desk software that gives you the ability to manage your customer support activities efficiently. |
|
| Zoho Bug Tracker: An online bug tracker and issue tracking software that helps you track and fix bugs efficiently. |
|
| Zoho Mail: A collaborative business communication platform that is a blend of the classic email and modern collaborative tools such as comments, likes, and sharing. |
|
| Zoho Books: A cloud-based smart accounting software which takes care of all your accounting needs. |
|
| Zoho Inventory: An online cloud-based application to meet all your order management needs. |
|
| Zoho Sheet: An application that can be used to create, edit, and share spreadsheets online. |
|
| Zoho Recruit: An Applicant Tracking System (ATS) and recruitment software built to manage recruiting processes across staffing agencies and corporate companies in an efficient manner. |
|
| Zoho Connect: Zoho Connect is a team collaboration application that allows you to keep your workplace communication organized. |
|
| Zoho Flow: Zoho Flow is an integration platform that connects cloud applications. It helps you set up workflows to automate information exchange among the apps you use. |
|